Homemade Jelly Candy turns a few simple ingredients into soft, chewy, brightly colored sweets with a pleasantly fruity flavor. Although store-bought jelly treats look complicated, you can make a satisfying version at home without specialized candy-making experience. The process mainly requires fruit juice, gelatin, sugar, and a little patience while the candy sets.
This Homemade Jelly Candy recipe works especially well when you want a playful dessert for parties, gift boxes, snack trays, or family gatherings. Moreover, you can change the juice and coloring to create countless variations. Strawberry, raspberry, orange, grape, peach, and tropical fruit juices all work beautifully.
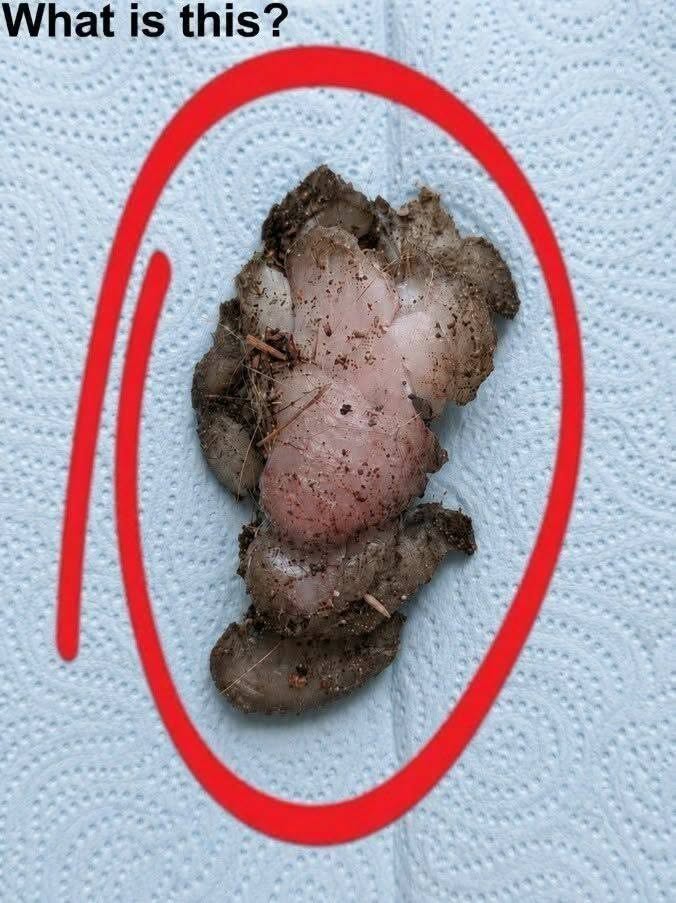
One memorable afternoon, I found an old jelly-like toy tucked beneath a piece of furniture while cleaning. Dust had completely changed its appearance, so at first I couldn’t tell what it was. After a few minutes of guessing, the mystery turned into a surprisingly funny conversation about the jelly candies we used to enjoy as kids. That memory sparked the idea for making an edible version from scratch. Instead of buying a bag from the store, I experimented with fruit juice, gelatin, and sugar. The first batch disappeared quickly, and the recipe became an easy favorite whenever a colorful homemade treat sounded good.
What Makes Homemade Jelly Candy So Easy
Simple Ingredients Create the Right Texture
Homemade Jelly Candy relies on ingredients that work together in a very predictable way. First, gelatin gives the candy its flexible structure. Meanwhile, sugar adds sweetness and helps create a smooth, candy-like bite. Fruit juice provides flavor and color, while lemon juice adds just enough acidity to keep the finished candy from tasting overly sweet.
For this recipe, you will need 1 cup fruit juice, 4 tablespoons unflavored powdered gelatin, 1/2 cup granulated sugar, 1 tablespoon lemon juice, and 1 teaspoon vanilla extract. You can also use a small amount of food coloring if you want a brighter appearance.
Choose a smooth fruit juice without pulp because pulp can affect the candy’s finish. Apple, grape, cranberry, berry, orange, and tropical blends work particularly well. However, avoid fresh pineapple, kiwi, papaya, and certain other fresh tropical fruits unless you cook them first. Natural enzymes in some fresh fruits can interfere with gelatin’s ability to set properly.
Bottled or pasteurized juice usually avoids that problem. Therefore, beginners may find it easier to start with a familiar bottled fruit juice.
Sugar does more than sweeten Homemade Jelly Candy. It also rounds out sharp fruit flavors and gives the candy a softer, more pleasant texture. Still, you should measure carefully because major changes to the sugar or gelatin can alter how firmly the candy sets.
Equipment That Helps the Process Go Smoothly
You do not need professional candy equipment for Homemade Jelly Candy. In fact, a small saucepan, whisk, measuring cups, measuring spoons, silicone molds, and a refrigerator handle almost everything.
Silicone molds make the process especially convenient because the finished candies release easily. Small hearts, bears, stars, fruit shapes, or simple squares all work well. However, you can also pour the mixture into a lightly greased or parchment-lined container and cut it into pieces after it sets.
A liquid measuring cup with a pouring spout also helps. After heating the candy mixture, you need to transfer it into small molds fairly quickly. Therefore, pouring from a spouted measuring cup gives you better control and reduces spills.
Keep the heat low during cooking. Although sugar needs warmth to dissolve, gelatin does not benefit from aggressive boiling. High heat can weaken gelatin and change its setting power. Instead, gently heat the mixture while whisking until everything looks smooth.
Before you start, arrange the molds on a baking sheet or tray. This simple step makes them easier to move into the refrigerator. Because flexible silicone molds can bend when full, the tray also prevents accidental spills.
Once you prepare your equipment, Homemade Jelly Candy becomes a straightforward mix, heat, pour, and chill recipe.
How to Make Homemade Jelly Candy
Mixing and Heating the Candy Base
Begin Homemade Jelly Candy by pouring 1 cup of fruit juice into a small saucepan. Sprinkle the unflavored gelatin evenly over the surface instead of dumping it into one spot. Then leave the mixture undisturbed for about five minutes.
This step allows the gelatin to bloom. As a result, the gelatin absorbs liquid before heating and dissolves more evenly later.
After five minutes, add the granulated sugar and lemon juice. Place the saucepan over low heat. Then whisk gently as the mixture warms.
Do not let the mixture boil. Instead, heat it just until the gelatin and sugar dissolve completely. This process usually takes about three to five minutes. The liquid should look smooth without visible gelatin granules.
Next, remove the saucepan from the heat. Stir in the vanilla extract. If you want stronger color, add one or two drops of food coloring at this point. However, many fruit juices already provide enough natural color.
Allow the mixture to rest for about one minute. Any foam will begin to settle during this time. For an especially smooth finish, skim away excess foam with a spoon.
Next, carefully pour the warm mixture into your prepared molds. Fill each cavity close to the top without overflowing it.
If you use a rectangular dish instead of individual molds, pour the entire mixture into the prepared container. Spread it evenly if necessary.
Because Homemade Jelly Candy starts setting as it cools, work steadily once you remove the saucepan from the heat.
Chilling, Unmolding, and Finishing
Place the filled molds in the refrigerator and chill the Homemade Jelly Candy for at least two hours. However, three to four hours creates an even firmer texture.
Once the candies feel completely set, remove one piece gently from the mold. Pull the silicone away from the candy rather than tugging hard on the candy itself. Then push upward from the bottom of the mold.
If the jelly still feels very soft, return the tray to the refrigerator for another 30 minutes.
For candies made in a rectangular dish, lift the set jelly from the container and place it on a cutting board. Then cut it into small squares with a lightly greased knife.
You can serve Homemade Jelly Candy immediately at this stage. However, you can also roll each piece in a light coating of granulated sugar for a classic candy-shop appearance.
If you choose the sugar coating, let the candies air-dry for approximately one hour first. Otherwise, excessive surface moisture may dissolve the sugar coating.
Another option involves mixing granulated sugar with a small amount of citric acid. This combination produces a sweet-and-sour coating similar to many commercial fruit candies. Start with a very small amount of citric acid because its flavor becomes intense quickly.
Keep finished Homemade Jelly Candy refrigerated in an airtight container. Layer parchment or wax paper between the candies if you stack them.
Because this recipe contains a relatively high amount of moisture, refrigeration keeps the texture more consistent and helps preserve freshness.
Flavor Variations and Helpful Candy Tips
Easy Ways to Change the Flavor
One of the best features of Homemade Jelly Candy involves its flexibility. You can change the flavor simply by changing the juice.
For strawberry-style candy, use strawberry juice, strawberry nectar, or a smooth berry blend. Meanwhile, grape juice produces a deep purple candy with a bold fruit flavor. Cranberry juice creates a tart version, so you may want to increase the sugar slightly if the juice tastes particularly sharp.
Orange juice produces a bright citrus candy. However, strain any pulp before using it. Peach nectar also creates a soft, mellow flavor, while mango nectar produces a richer tropical result.
You can also combine juices. For example, apple and raspberry create a balanced sweet-tart flavor. Likewise, orange and cranberry produce a refreshing combination.
For stronger fruit flavor, replace part of the fruit juice with concentrated fruit syrup. However, keep the total liquid amount at approximately one cup so the gelatin ratio remains dependable.
Extracts offer another simple way to customize Homemade Jelly Candy. Add a few drops of strawberry, raspberry, orange, lemon, cherry, or coconut extract after removing the mixture from the heat.
Because extracts can taste strong, add them gradually. Vanilla works particularly well as a background flavor because it softens sharp fruit notes without overpowering them.
You can also divide one batch into two smaller portions and tint each portion differently. Then pour alternating colors into the molds for a layered or marbled appearance.
As a result, one basic Homemade Jelly Candy recipe can produce many different treats without requiring a completely new method.
Preventing Common Jelly Candy Problems
A few small details can make a major difference when preparing Homemade Jelly Candy.
First, always bloom the gelatin. Skipping this step can create stubborn lumps that remain even after heating. Therefore, sprinkle the gelatin evenly over cool juice and give it several minutes to absorb the liquid.
Second, avoid boiling the mixture. Excessive heat can weaken gelatin. Consequently, your candies may remain softer than expected.
Third, measure the liquid accurately. Extra juice may seem harmless, but even a modest increase can make the candies considerably softer. Likewise, reducing the gelatin can change the finished texture.
If your Homemade Jelly Candy does not release easily from the mold, refrigerate it longer. Cold candy generally releases more cleanly than candy that has begun warming at room temperature.
You can also place the molds in the freezer for five to ten minutes before unmolding. However, do not freeze them solid because freezing and thawing can affect the texture.
If the finished candies feel too firm for your preference, reduce the gelatin slightly in your next batch. Conversely, add an extra teaspoon or two if you prefer a firmer chew.
Avoid leaving Homemade Jelly Candy uncovered in the refrigerator for extended periods. Gelatin candies can lose moisture and become tough around the edges.
Finally, experiment in small batches. Once you find your preferred gelatin-to-liquid ratio, you can confidently create different flavors using the same basic method.
Serving and Storing Homemade Jelly Candy
Fun Ways to Serve the Finished Candy
Homemade Jelly Candy fits many occasions because you can change its shape, color, and flavor without changing the basic recipe.
For birthday parties, prepare several colors and arrange them in small bowls. Additionally, you can use silicone molds that match the party theme. Stars, flowers, animals, and geometric shapes instantly make simple candies look more festive.
For holidays, choose seasonal colors and shapes. Red and pink candies work well for Valentine’s Day, while orange shapes suit fall gatherings. Red and green candies can brighten winter dessert trays.
Homemade Jelly Candy also works nicely as a small homemade gift. Place completely chilled candies in a food-safe container lined with parchment paper. Then keep the container refrigerated until you plan to give it away.
You can also serve these candies alongside cookies, brownies, chocolate pieces, or fresh fruit as part of a dessert board. Because jelly candies offer a different texture from baked desserts, they add variety to the selection.
For children, smaller shapes make convenient portions. However, adults often enjoy these candies too, especially when you use stronger flavors such as cranberry, citrus, or raspberry.
If you want a more sophisticated variation, add a small amount of finely grated citrus zest. Lemon zest complements berry juice, while orange zest pairs beautifully with cranberry or grape.
No matter how you serve Homemade Jelly Candy, keep the pieces cool until shortly before serving. Warm environments can gradually soften gelatin-based sweets.
The Best Way to Store Jelly Candy
Proper storage keeps Homemade Jelly Candy soft, flavorful, and pleasant to eat.
Place the candies in an airtight container and refrigerate them. For the best texture, enjoy them within about one week. Although they may remain usable longer under proper refrigeration, their texture and surface quality taste best when fresh.
Separate multiple layers with parchment paper. This step prevents the candies from pressing against one another and sticking together.
If you coated the candies with sugar, remember that refrigeration can create condensation. Therefore, the coating may eventually become damp. For the neatest presentation, apply the sugar shortly before serving instead of coating every piece several days in advance.
Avoid storing Homemade Jelly Candy beside foods with strong odors. Gelatin-based sweets can sometimes absorb surrounding aromas, especially if the container does not seal tightly.
Freezing usually does not provide the best results. Ice crystals may disrupt the gel structure, so the candy can release water after thawing. Refrigeration provides a much more reliable texture.
Before serving refrigerated candy, you can leave it at room temperature for about five minutes. This short rest softens the texture slightly without making the pieces unstable.
If the candies develop an unusual odor, visible mold, or significant changes in appearance, discard them.
With careful storage, Homemade Jelly Candy remains an easy make-ahead dessert that you can prepare several days before a party or gathering.
Frequently Asked Questions
Why didn’t my Homemade Jelly Candy set?
The most common causes include too much liquid, too little gelatin, boiling the mixture, or using certain fresh fruits that contain enzymes that break down gelatin. Measure carefully and use pasteurized fruit juice for the most consistent result.
Can I make Homemade Jelly Candy without molds?
Yes. Pour the mixture into a parchment-lined or lightly greased shallow dish. After chilling it completely, remove the jelly and cut it into squares, rectangles, diamonds, or other simple shapes.
Can I reduce the sugar?
You can reduce it slightly, especially if your fruit juice already tastes sweet. However, major changes may affect both flavor and texture. Start by reducing the sugar by one or two tablespoons rather than removing a large amount.
How long does Homemade Jelly Candy last?
For the best quality, store it in an airtight container in the refrigerator and enjoy it within about one week. Keep parchment paper between stacked layers to prevent sticking.
Can I make sour jelly candy?
Yes. Add a little citric acid to the sugar coating after the candies set. Begin with a small quantity because citric acid creates a powerful sour flavor. Lemon juice in the candy mixture also adds gentle tartness.
Conclusion
Homemade Jelly Candy proves that a colorful, chewy sweet does not require complicated equipment or advanced candy-making skills. With fruit juice, gelatin, sugar, lemon juice, and a few simple steps, you can create a batch of soft candies that taste fresh and fruity.
Moreover, this recipe gives you plenty of room to experiment. Change the juice, add extracts, use different molds, or create a sweet-and-sour coating. Because the basic technique stays the same, you can customize Homemade Jelly Candy for birthdays, holidays, dessert tables, homemade gifts, or an everyday treat.
The most important steps remain simple: bloom the gelatin, heat the mixture gently, measure accurately, and allow enough chilling time. Once you master those basics, Homemade Jelly Candy becomes an easy recipe to repeat whenever you want a playful homemade sweet.
{
  "title": "Homemade Jelly Candy",
  "summary": "Soft, chewy homemade jelly candy made with fruit juice, gelatin, sugar, and lemon juice. An easy colorful treat that can be customized with different flavors and shapes.",
  "notes": "Use pasteurized fruit juice for reliable setting. Avoid boiling the gelatin mixture. Store finished candies in an airtight container in the refrigerator for up to 1 week.",
  "ingredients_flat": [
    {
      "amount": "1",
      "unit": "cup",
      "name": "fruit juice"
    },
    {
      "amount": "4",
      "unit": "tablespoons",
      "name": "unflavored powdered gelatin"
    },
    {
      "amount": "1/2",
      "unit": "cup",
      "name": "granulated sugar"
    },
    {
      "amount": "1",
      "unit": "tablespoon",
      "name": "lemon juice"
    },
    {
      "amount": "1",
      "unit": "teaspoon",
      "name": "vanilla extract"
    },
    {
      "amount": "1-2",
      "unit": "drops",
      "name": "food coloring, optional"
    },
    {
      "amount": "1/4",
      "unit": "cup",
      "name": "granulated sugar for coating, optional"
    }
  ],
  "instructions_flat": [
    {
      "name": "Step 1",
      "text": "Pour the fruit juice into a small saucepan and sprinkle the gelatin evenly over the surface. Let it stand for 5 minutes so the gelatin can bloom.",
      "summary": "",
      "image_url": ""
    },
    {
      "name": "Step 2",
      "text": "Add the sugar and lemon juice. Place the saucepan over low heat and whisk gently until the gelatin and sugar dissolve completely, about 3 to 5 minutes. Do not boil.",
      "summary": "",
      "image_url": ""
    },
    {
      "name": "Step 3",
      "text": "Remove the saucepan from the heat. Stir in the vanilla extract and optional food coloring.",
      "summary": "",
      "image_url": ""
    },
    {
      "name": "Step 4",
      "text": "Let the mixture rest for about 1 minute. Skim away excess foam from the surface if desired.",
      "summary": "",
      "image_url": ""
    },
    {
      "name": "Step 5",
      "text": "Carefully pour the mixture into silicone candy molds or a prepared shallow dish.",
      "summary": "",
      "image_url": ""
    },
    {
      "name": "Step 6",
      "text": "Refrigerate for at least 2 hours, or preferably 3 to 4 hours, until completely firm.",
      "summary": "",
      "image_url": ""
    },
    {
      "name": "Step 7",
      "text": "Remove the candies gently from the molds. If using a dish, lift out the jelly and cut it into small pieces.",
      "summary": "",
      "image_url": ""
    },
    {
      "name": "Step 8",
      "text": "Serve plain or let the candies air-dry for about 1 hour before lightly coating them with granulated sugar.",
      "summary": "",
      "image_url": ""
    }
  ],
  "equipment": [
    {
      "name": "Small saucepan",
      "notes": ""
    },
    {
      "name": "Whisk",
      "notes": ""
    },
    {
      "name": "Measuring cups",
      "notes": ""
    },
    {
      "name": "Measuring spoons",
      "notes": ""
    },
    {
      "name": "Silicone candy molds",
      "notes": ""
    },
    {
      "name": "Baking sheet or tray",
      "notes": ""
    },
    {
      "name": "Liquid measuring cup with pouring spout",
      "notes": ""
    }
  ],
  "nutrition": {
    "calories": "58 kcal",
    "carbohydrates": "12 g",
    "protein": "2 g",
    "fat": "0 g",
    "saturated_fat": "0 g",
    "polyunsaturated_fat": "0 g",
    "monounsaturated_fat": "0 g",
    "trans_fat": "0 g",
    "cholesterol": "0 mg",
    "sodium": "7 mg",
    "potassium": "34 mg",
    "fiber": "0 g",
    "sugar": "11 g",
    "vitamin_a": "5 IU",
    "vitamin_c": "2 mg",
    "calcium": "4 mg",
    "iron": "0.1 mg"
  },
  "tags": {
    "course": [
      "Dessert"
    ],
    "cuisine": [
      "American"
    ],
    "keyword": [
      "Homemade Jelly Candy",
      "jelly candy recipe",
      "fruit jelly candy",
      "homemade candy"
    ]
  }
}
SEO Output
Focus Keyword: Homemade Jelly Candy
SEO Title: Homemade Jelly Candy – Easy Fruity Chewy Candy Recipe
Meta Description: Homemade Jelly Candy is an easy fruity treat made with juice, gelatin, and sugar for soft, chewy candies you can customize at home.
Expert SEO Title: Homemade Jelly Candy: 7 Brilliant Tips for Perfect Treats
Midjourney Prompt: Realistic homemade jelly candy in colorful translucent fruit-flavored shapes arranged neatly on a light clean surface, glossy soft gummy texture, small sugar-coated pieces, natural window lighting, appetizing close-up food photography, bright but realistic colors, elegant minimal styling, shallow depth of field, vertical Pinterest composition, clean uncluttered background, generous negative space at the top for text overlay, highly detailed professional food photography –v 6 –ar 2:3
More Blog
- Drinking Water on an Empty Stomach — What Science Actually Supports (No Hype, Just Facts)
- Waking Up Between 3 and 5 AM? It Might Be Your Soul Trying to Talk to You
- What a “Bleach” Patch on Your Underwear Really Means — And Why It’s Actually a Good Sign
- This Drink May Weaken Your Bones From The Inside — But Everyone Drinks It Anyway