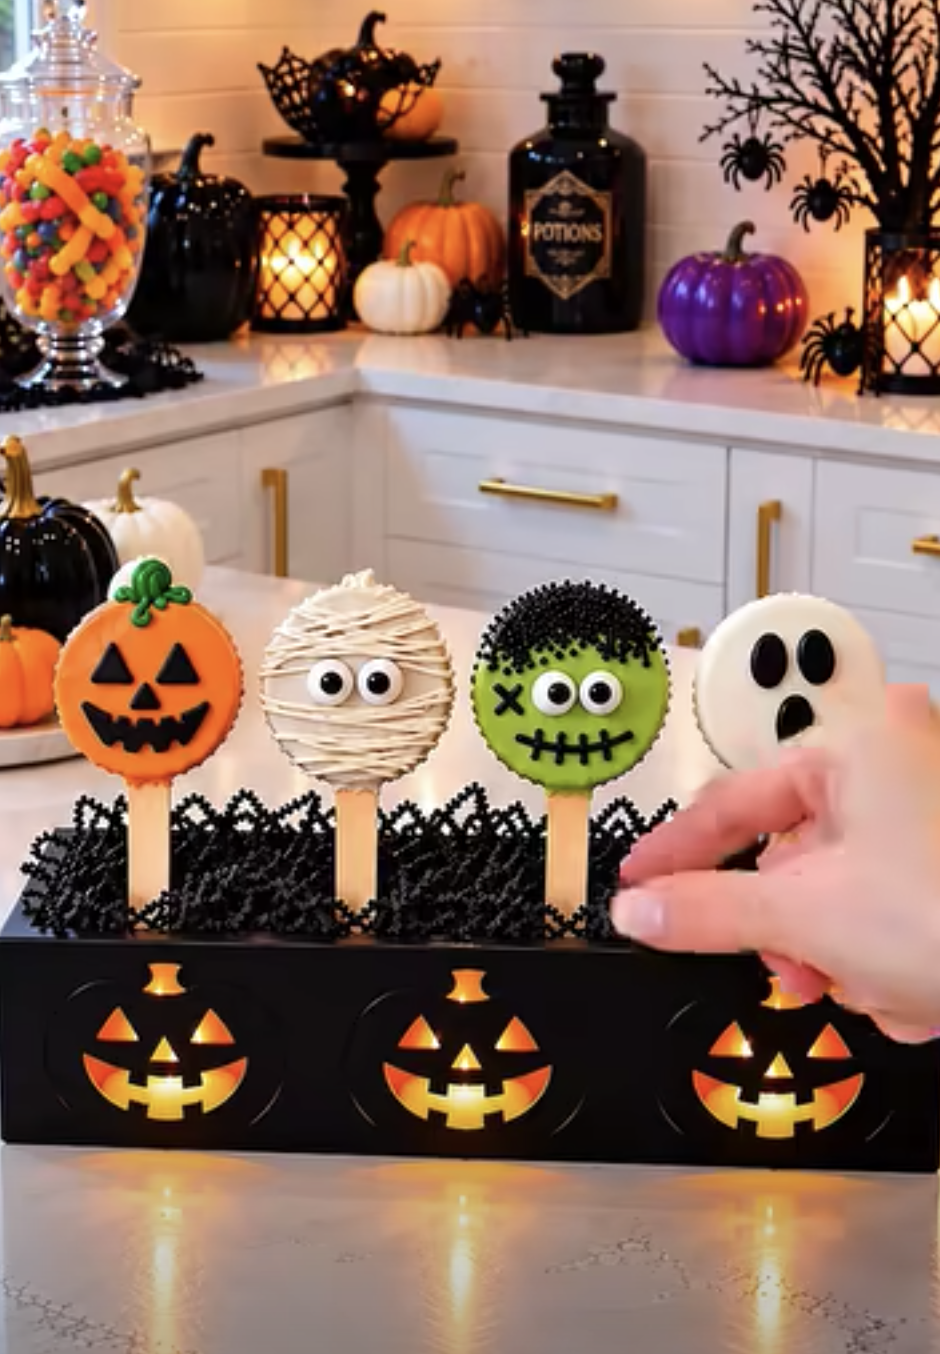
Halloween Oreo Pops are one of the easiest and cutest treats you can make for spooky season. These festive chocolate-covered Oreo cookies combine crunchy chocolate wafers, sweet cream filling, colorful candy coatings, and playful Halloween decorations. Best of all, you don’t need an oven or complicated baking skills to create them.
With just a few ingredients, you can transform ordinary Oreo cookies into adorable ghosts, pumpkins, monsters, and mummies. Each cookie sits on a lollipop stick, making these treats easy to serve at Halloween parties, school celebrations, family gatherings, and festive dessert tables.
Halloween Oreo Pops: Easy No-Bake Spooky Treats for Parties
Ingredients
Equipment
Method
- Carefully separate each Oreo cookie into two halves, keeping the cream filling attached to one side whenever possible.
- Melt a small amount of chocolate. Dip the tip of each lollipop stick into the melted chocolate and gently press it into the cream filling. Add a little more melted chocolate and replace the top cookie half.
- Arrange the assembled Oreo pops on a parchment-lined baking sheet. Refrigerate for 10-15 minutes until the chocolate securing the sticks becomes firm.
- Melt the white chocolate wafers, orange candy melts, and milk or dark chocolate melts separately according to package directions. Add small amounts of coconut oil if needed to thin the coatings.
- Hold each Oreo pop by its stick and carefully dip it into the desired melted coating. Turn gently to cover the cookie, then lift and allow excess chocolate to drip back into the bowl.
- For Ghost Oreo Pops, coat three cookies with white chocolate. Add candy eyes while the coating remains slightly soft. After the coating sets, draw small spooky mouths with black decorating icing.
- For Pumpkin Oreo Pops, coat three cookies with orange candy melts. Draw curved pumpkin lines with orange or black decorating icing and add small green icing stems.
- For Monster Oreo Pops, coat three cookies with milk or dark chocolate. Decorate with candy eyes and Halloween sprinkles while the coating remains wet. Add funny faces with black decorating icing.
- For Mummy Oreo Pops, coat three cookies with white chocolate and allow the coating to set. Drizzle additional melted white chocolate in thin lines to resemble mummy bandages. Attach candy eyes using a small amount of melted chocolate.
- Place the finished Oreo pops on parchment paper or stand them upright in a sturdy cake-pop holder. Allow the coatings and decorations to set completely before serving or packaging.
Notes
Whether you want a quick Halloween dessert or a creative activity to enjoy with kids, Halloween Oreo Pops deliver the perfect combination of convenience, flavor, and fun.
I started making Halloween Oreo Pops when I needed a simple dessert that looked special without requiring an entire afternoon in the kitchen. I had a package of Oreos, some leftover candy melts, and a few Halloween decorations. Instead of baking cookies, I decided to turn them into colorful little characters. The ghost pops were the easiest to decorate, but the mummy designs quickly became my favorites. Everyone enjoyed picking a different character, and the treats disappeared from the dessert table surprisingly fast. Now, I love making these pops whenever Halloween approaches because they always add a playful touch to the celebration.
No-bake
4 Halloween designs
Beginner-friendly
25 minPrep time
30 minChill and set
12 popsServings
Why You’ll Love These Halloween Oreo Pops
A Simple No-Bake Halloween Dessert
One of the biggest advantages of Halloween Oreo Pops is their simplicity. Unlike traditional Halloween cupcakes or decorated sugar cookies, these treats require no baking, dough preparation, or complicated frosting techniques.
Instead, you start with store-bought Oreo cookies, attach lollipop sticks, dip them into melted chocolate, and decorate them with candy eyes, icing, and sprinkles.
The process is straightforward enough for beginners, yet the finished treats look impressive on a Halloween dessert table.
Additionally, you can prepare the decorations ahead of time and organize everything into small bowls. This makes decorating faster and less messy.
Here are several reasons these Oreo pops make a wonderful Halloween treat:
- No oven required: Enjoy a festive dessert without baking.
- Minimal preparation: Use ready-made cookies and simple candy coatings.
- Four fun designs: Create ghosts, pumpkins, monsters, and mummies.
- Easy customization: Experiment with different colors, expressions, and decorations.
- Party-friendly portions: Each cookie comes on its own stick.
- Make-ahead convenience: Prepare the treats before your Halloween celebration.
- Kid-friendly decorating: Let children add candy eyes and sprinkles with adult supervision.
Because each pop offers a satisfying combination of crunchy cookies and smooth chocolate, these treats appeal to both children and adults.
Furthermore, the recipe makes approximately 12 Oreo pops, which works well for small gatherings.
For larger celebrations, simply double or triple the ingredients.
Four Spooky Designs for Every Halloween Celebration
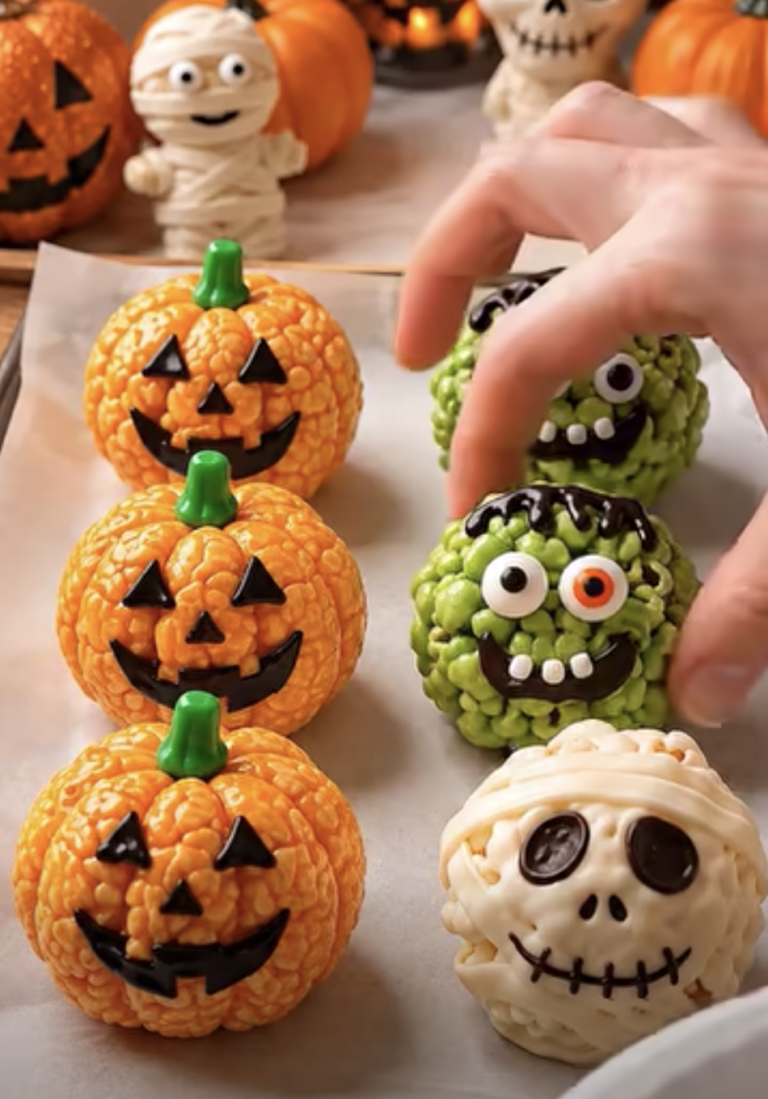
Halloween Oreo Pops become even more exciting when you decorate them as different Halloween characters.
Each design starts with the same Oreo cookie base. However, colorful candy melts and small decorations give every pop its own personality.

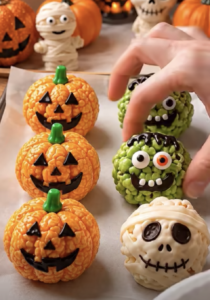
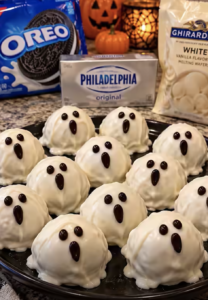
Ghost Oreo Pops
White chocolate creates the perfect ghostly appearance. Add candy eyes and a small black mouth for a cute, surprised expression.

Pumpkin Oreo Pops
Bright orange candy melts create cheerful pumpkins. Dark chocolate lines and a small green stem complete the design.

Monster Oreo Pops
Dark chocolate, candy eyes, and colorful sprinkles create silly monsters. Give each monster a different expression for extra fun.

Mummy Oreo Pops
White chocolate drizzle creates mummy bandages across the cookies. Candy eyes peeking between the lines make the design especially adorable.
Together, these four variations create a colorful assortment that looks wonderful on a festive platter or Halloween candy display.
Ingredients and Preparation Tips for Perfect Oreo Pops
Choosing the Best Cookies and Chocolate
Although Halloween Oreo Pops use simple ingredients, selecting the right products helps create smooth coatings and sturdy treats.
Oreo cookies provide the crunchy chocolate base and sweet cream filling. Regular Oreo cookies work well, but Double Stuf Oreos can make attaching the sticks easier because they contain more filling.
However, handle the cookies carefully to prevent the wafers from cracking.
Lollipop sticks transform the cookies into handheld treats. Choose food-safe paper or plastic sticks approximately 4–6 inches long.
Avoid inserting the sticks too forcefully because the cookies can separate.
White chocolate melting wafers create the ghost and mummy designs. Their smooth texture makes dipping easier and provides a bright background for candy eyes.
Orange candy melts work perfectly for pumpkin designs. They create a vibrant color without requiring additional food coloring.
Milk or dark chocolate melts add rich chocolate flavor and create a contrasting base for monster decorations.
Halloween sprinkles provide extra color and texture. Choose small sprinkles that stick easily to the melted coating.
Candy eyes make decorating simple because they instantly give each character a playful expression.
Finally, decorating icing helps create pumpkin lines, ghost mouths, and other facial details.
You can also use melted dark chocolate for black decorations and green decorating icing for pumpkin stems.
If your melted coating seems too thick, add a small amount of coconut oil. However, follow the melting wafer manufacturer’s recommendations because some coatings don’t require additional oil.
How to Keep Oreo Pops from Breaking
One of the most common challenges when making Halloween Oreo Pops involves attaching the lollipop sticks without breaking the cookies.
Fortunately, a few simple techniques can prevent this problem.
First, gently separate each Oreo cookie into two halves.
Avoid twisting too aggressively because the chocolate wafers can crack.
Next, dip the tip of a lollipop stick into a small amount of melted chocolate.
Press the coated tip gently into the cream filling.
Then, add another small dab of melted chocolate over the stick before placing the second cookie half back on top.
This extra chocolate acts like edible glue.
After assembling the cookies, place them on a parchment-lined baking sheet.
Refrigerate them for approximately 10–15 minutes to help the chocolate firm up.
Once the sticks feel secure, you can begin dipping.
Another helpful tip involves using a narrow, deep bowl for the melted coating. This allows you to dip the cookies without excessive turning.
Additionally, avoid shaking the Oreo pops aggressively after dipping.
Instead, gently tap the stick against the bowl to remove excess chocolate.
If a cookie begins to separate, place it back on parchment paper and let the chocolate adhesive firm up before continuing.
How to Decorate Halloween Oreo Pops Four Ways
Creating Smooth Chocolate-Coated Oreo Pops
A smooth chocolate coating gives Halloween Oreo Pops their polished appearance.
Start by melting the white chocolate, orange candy melts, and dark chocolate separately.
Follow the package instructions for each coating.
If using a microwave, heat the chocolate in short intervals, stirring thoroughly between each round.
For example, begin with 20–30 seconds, stir, and continue heating in 15-second intervals until smooth.
Avoid overheating because candy melts can become thick or grainy.
Once the coatings melt, check their consistency.
They should flow smoothly from a spoon without forming heavy clumps.
If necessary, add a little coconut oil to thin the mixture.
Next, remove the assembled Oreo pops from the refrigerator.
Hold one cookie by its stick and lower it carefully into the melted coating.
Turn gently until the chocolate covers the entire cookie.
Then, lift the pop and allow excess coating to drip back into the bowl.
Place the coated Oreo pop on parchment paper or stand it upright in a sturdy cake-pop holder.
For the cleanest appearance, avoid touching the coating while it sets.
You can also use a spoon to cover any small areas that the dipping process misses.
Finally, decorate each pop according to its Halloween character.
Some decorations, such as sprinkles, should go onto wet chocolate. Others, such as icing details, work better after the coating firms up.
Decorating Ghosts, Pumpkins, Monsters, and Mummies
Each Halloween Oreo Pops design requires only a few simple decorations.
1. Ghost Oreo Pops
Dip three Oreo pops into melted white chocolate.
While the coating remains slightly soft, add two candy eyes.
Once the chocolate sets, use black decorating icing to draw a small oval mouth.
For extra personality, give each ghost a different expression.
2. Pumpkin Oreo Pops
Dip three Oreo pops into melted orange candy melts.
Allow the coating to firm up slightly.
Then, use orange decorating icing or melted dark chocolate to draw curved pumpkin lines.
Add a small green icing stem at the top of each cookie.
You can also create jack-o’-lantern faces with black icing.
3. Monster Oreo Pops
Dip three Oreo pops into melted milk or dark chocolate.
While the coating remains wet, add candy eyes and colorful Halloween sprinkles.
Use one eye, two eyes, or several eyes to create different monster expressions.
For additional detail, draw small mouths with decorating icing.
4. Mummy Oreo Pops
Dip three Oreo pops into melted white chocolate.
Allow the base coating to set.
Then, drizzle thin lines of melted white chocolate across the front to resemble mummy bandages.
Leave a small opening for the candy eyes.
Finally, attach the eyes with a dab of melted chocolate.
Once you finish decorating, let all the Oreo pops set completely before handling or packaging them.
Serving, Storing, and Customizing Halloween Oreo Pops
Best Ways to Serve and Store Your Oreo Pops
Halloween Oreo Pops make wonderful party treats because they’re easy to display and serve.
For a festive dessert table, arrange the finished pops upright in a sturdy cake-pop stand or food-safe display holder.
You can also place them flat on a large serving platter lined with parchment paper.
For a more dramatic Halloween presentation, alternate the four designs so the different colors stand out.
Another fun idea involves placing the pops inside individual clear treat bags.
Once the chocolate coating sets completely, slide each pop into a food-safe bag and tie it with a colorful ribbon.
These individually packaged treats work especially well as party favors.
However, check school policies and allergy requirements before distributing homemade treats at school events.
To store Halloween Oreo Pops, place them in an airtight container.
Keep the container in a cool, dry location away from direct sunlight.
For the best quality, enjoy them within five to seven days.
If your kitchen feels warm, refrigerate the pops to prevent the chocolate coating from softening.
When refrigerating, separate layers with parchment paper to protect the decorations.
Before serving, allow the closed container to warm slightly toward room temperature. This helps reduce condensation on the chocolate.
Additionally, avoid exposing the pops to high humidity because moisture can affect the appearance of the candy coating.
Creative Variations and Common Mistakes to Avoid
You can easily customize Halloween Oreo Pops to match your party theme.
For example, use Golden Oreo cookies instead of traditional chocolate Oreos for a vanilla-flavored variation.
Alternatively, try mint-flavored Oreos for a refreshing chocolate-mint combination.
You can also experiment with purple, green, or black candy melts to create additional Halloween characters.
For a colorful monster collection, use different candy coatings and decorate each cookie with a unique number of eyes.
If you prefer a more elegant presentation, drizzle contrasting chocolate over the finished pops.
For example, orange drizzle looks striking against dark chocolate, while white drizzle creates beautiful patterns over purple candy melts.
However, a few common mistakes can affect the finished treats.
Cracked Oreo cookies: Handle the cookies gently and avoid forcing the sticks into the filling.
Cookies sliding off sticks: Use melted chocolate as adhesive and chill the assembled pops before dipping.
Thick chocolate coating: Melt the candy wafers slowly and thin them only when necessary.
Uneven coating: Use a deep, narrow dipping container and allow excess chocolate to drip away.
Decorations falling off: Add sprinkles and candy eyes while the coating remains slightly soft.
Smudged icing: Let the chocolate coating set before drawing detailed faces.
Chocolate becoming grainy: Avoid overheating and keep water away from the melted coating.
With these simple tips, you can create Halloween Oreo Pops that look festive and taste delicious.
Ingredients
Yield: 12 Oreo pops, approximately 3 of each design
Oreo Pops Base
- 12 Oreo cookies
- 12 food-safe lollipop sticks, approximately 4–6 inches long
- 1 cup (approximately 6 oz) white chocolate melting wafers
- 1 cup (approximately 6 oz) orange candy melts
- 1 cup (approximately 6 oz) milk or dark chocolate melting wafers
- Up to 2 tablespoons coconut oil, optional, for thinning the coatings
Halloween Decorations
- ½ cup Halloween sprinkles
- 24 small candy eyes
- 2 tablespoons black decorating icing
- 1 tablespoon orange decorating icing
- 1 tablespoon green decorating icing
- 2 tablespoons additional white chocolate melts, for mummy bandages
Instructions
1. Prepare the Oreo cookies. Carefully separate each Oreo cookie into two halves. Keep the cream filling attached to one half whenever possible.
2. Attach the lollipop sticks. Melt a small amount of chocolate. Dip the tip of each lollipop stick into the melted chocolate and gently press it into the cream filling. Add a little extra melted chocolate, then replace the top cookie half.
3. Chill the assembled pops. Place the Oreo pops on a parchment-lined baking sheet and refrigerate for 10–15 minutes until the chocolate adhesive firms up.
4. Melt the candy coatings. Melt the white chocolate, orange candy melts, and milk or dark chocolate separately according to their package directions. Add small amounts of coconut oil if needed for a smoother consistency.
5. Dip the Oreo pops. Carefully dip each cookie into its chosen coating. Gently turn to cover the cookie, then lift and allow excess chocolate to drip away.
6. Decorate the ghosts. Coat three Oreo pops with white chocolate. Add candy eyes while the coating remains slightly soft. Once set, draw small ghost mouths with black icing.
7. Decorate the pumpkins. Coat three Oreo pops with orange candy melts. Draw curved pumpkin lines using orange or black icing, then add small green icing stems.
8. Decorate the monsters. Coat three Oreo pops with milk or dark chocolate. Add candy eyes and Halloween sprinkles while the coating remains wet. Create silly monster faces with black icing.
9. Decorate the mummies. Coat three Oreo pops with white chocolate and allow the coating to set. Drizzle additional melted white chocolate in thin lines to resemble bandages. Attach candy eyes with a small dab of chocolate.
10. Let the pops set. Place the finished Halloween Oreo Pops on parchment paper or stand them upright in a sturdy cake-pop holder. Allow the coating and decorations to firm up completely before serving or packaging.
Frequently Asked Questions
1. Can I make Halloween Oreo Pops ahead of time?
Yes. Halloween Oreo Pops are excellent make-ahead treats. Prepare them one or two days before your Halloween celebration and store them in an airtight container in a cool, dry location. For the best quality, enjoy them within five to seven days.
2. Why do my Oreo cookies break when I insert the sticks?
Oreo cookies can crack when you push lollipop sticks into them too forcefully. Instead, carefully separate the cookies, place the stick into the cream filling with a little melted chocolate, and reassemble them. Then, chill the cookies before dipping.
3. Can I use regular chocolate chips instead of candy melts?
Yes, but chocolate chips may create a thicker coating and can require tempering for a firm, glossy finish. Candy melts generally work better for beginners because they melt smoothly and set more predictably.
4. How do I keep Halloween Oreo Pops from falling off their sticks?
Use melted chocolate to secure each stick inside the Oreo cookie. Then, refrigerate the assembled pops for 10–15 minutes before dipping. Additionally, avoid heavy shaking or twisting when coating the cookies.
5. Do Halloween Oreo Pops need refrigeration?
Not always. If you use shelf-stable cookies, candy melts, and decorations, you can usually store the pops in a cool, dry location. However, refrigerate them if your kitchen becomes warm or if your chosen decorations require refrigeration. Keep the container airtight to protect the coating from moisture.
Conclusion
Halloween Oreo Pops offer a simple, creative, and delicious way to celebrate spooky season. With crunchy Oreo cookies, smooth chocolate coatings, and colorful decorations, you can create adorable Halloween treats without turning on the oven.
The four festive designs—ghosts, pumpkins, monsters, and mummies—make this recipe especially fun for parties, family activities, and holiday dessert tables.
Additionally, you can prepare these treats ahead of time, customize their colors, and package them individually for Halloween party favors.
Whether you’re making a small batch for family movie night or preparing a larger collection for a festive celebration, Halloween Oreo Pops bring sweetness, creativity, and playful Halloween charm to every occasion.