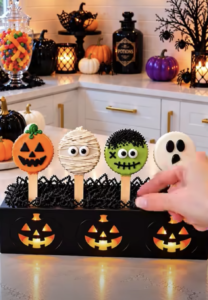
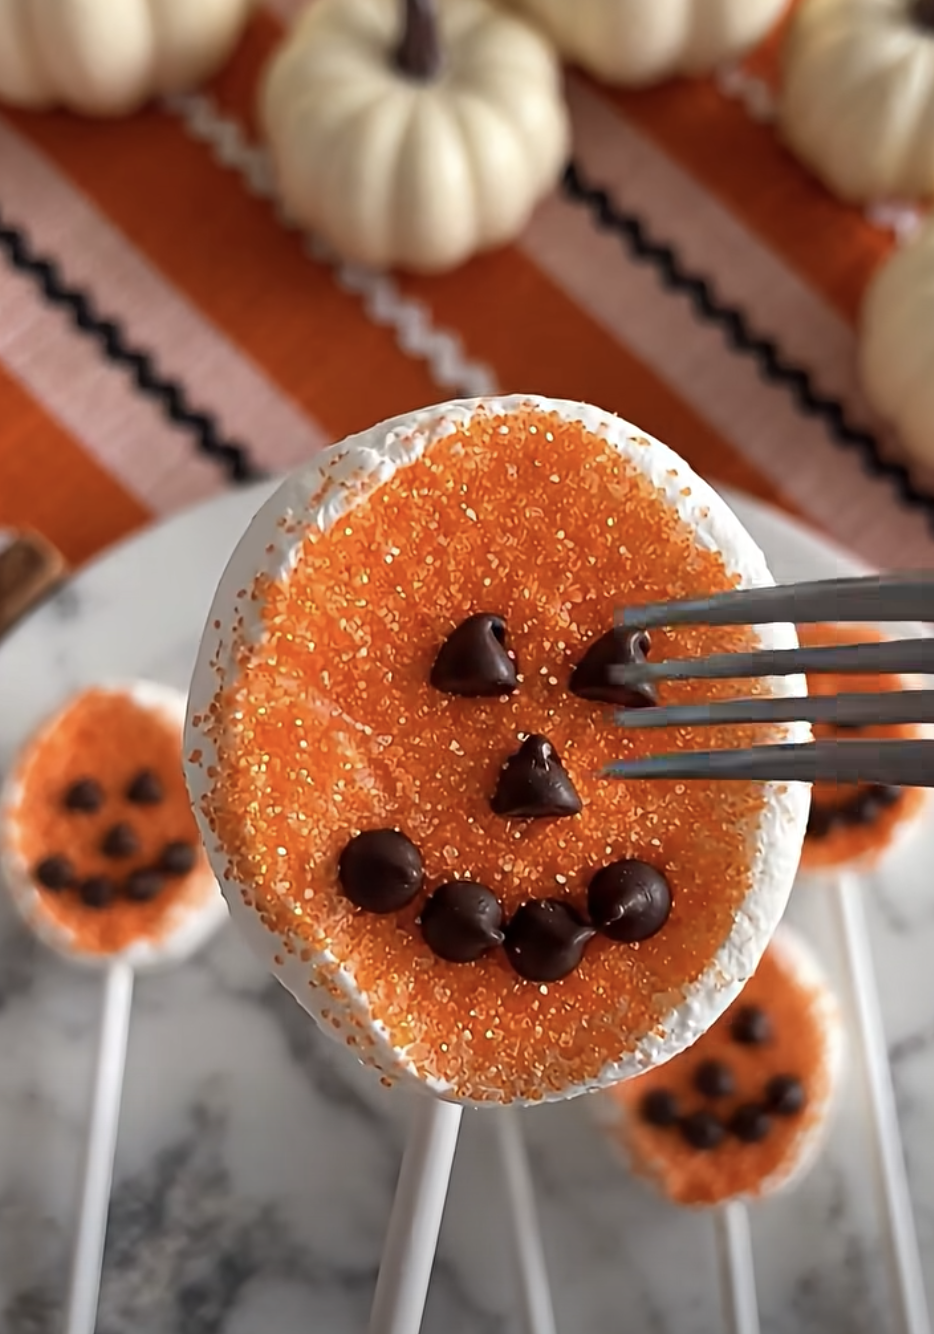
Marshmallow Pumpkin Pops are adorable, colorful, and delicious Halloween treats that combine fluffy marshmallows, bright orange sugar sprinkles, and mini chocolate chips into festive little pumpkin faces. These sweet, no-bake treats make a fun addition to Halloween parties, fall celebrations, and family dessert tables.
Best of all, you can prepare these easy Halloween marshmallow pops with just a handful of ingredients. You don’t need an oven, complicated decorating tools, or advanced baking skills. Simply prepare the marshmallows, coat them in orange sprinkles, add chocolate chip faces, and let them set.
Marshmallow Pumpkin Pops – The Cutest Easy Halloween Treats!
Ingredients
Equipment
Method
- Line a baking sheet with parchment paper and place the orange sanding sugar in a shallow bowl.
- Carefully cut each jumbo marshmallow in half to create 24 smaller marshmallow pieces.
- Gently insert one food-safe lollipop stick into the bottom of each marshmallow half, making sure it stays secure.
- If using orange candy melts, place them in a microwave-safe bowl and heat in 15–20-second intervals, stirring between intervals until smooth.
- Lightly dip or brush each marshmallow with melted orange candy coating. If skipping candy melts, use the sticky cut marshmallow surfaces to help the sugar adhere.
- Immediately roll each marshmallow in orange sanding sugar until evenly coated.
- Gently press two mini chocolate chips into each marshmallow to create pumpkin eyes. Add optional chocolate mouths or green stems if desired.
- Arrange the decorated marshmallow pops on parchment paper and allow them to set for approximately 15 minutes, or until the optional candy coating becomes firm.
- Transfer the finished Marshmallow Pumpkin Pops to a serving tray or suitable upright holder. Serve once the coating has fully set.
Notes
These homemade pumpkin treats also offer a wonderful opportunity for family creativity. Kids can help roll the marshmallows in sprinkles and arrange the chocolate chips into funny, friendly, or spooky expressions.
I first tried making these little pumpkin pops while looking for a simple Halloween dessert that didn’t involve baking. I wanted something colorful, inexpensive, and easy enough to prepare during a busy afternoon. After finding marshmallows and orange sprinkles in the pantry, I decided to turn them into miniature pumpkins. The first batch looked so cheerful that I immediately made another tray. The best part was decorating the faces. Some pumpkins had silly expressions, while others looked surprisingly spooky. Since then, these marshmallow treats have become one of my favorite ways to add a playful touch to a Halloween dessert table without spending hours in the kitchen.
Whether you’re planning a classroom celebration, a neighborhood Halloween party, or a cozy fall afternoon, these Marshmallow Pumpkin Pops deliver plenty of seasonal charm with very little effort.
Prep: 15 minutes
Set: 15 minutes
Total: 30 minutes
Yield: 24 small pops | Difficulty: Easy | Baking: None
Why You’ll Love These Marshmallow Pumpkin Pops
A Fun and Festive Halloween Dessert
One of the best things about Marshmallow Pumpkin Pops is their cheerful appearance. Their bright orange coating and tiny chocolate faces make them instantly recognizable as miniature Halloween pumpkins.
Unlike complicated Halloween desserts, these treats rely on simple shapes and familiar ingredients. You don’t need to carve pumpkins, bake cakes, or prepare frosting from scratch.
The marshmallows provide a soft, fluffy center. Meanwhile, orange sanding sugar creates a sparkling, slightly crunchy coating that looks festive and tastes sweet.
Mini chocolate chips make easy pumpkin eyes. You can arrange them into different expressions or add extra chocolate decorations for more detailed faces.
The lollipop sticks make the treats easy to display and serve. You can arrange them upright in a decorated container or lay them across a Halloween dessert platter.
Additionally, these pumpkin pops work beautifully with other seasonal sweets, such as chocolate-covered pretzels, Halloween cookies, and candy corn.
Their small size makes them especially convenient for dessert tables because guests can enjoy one without needing plates or forks.
For a creative presentation, make several different facial expressions. Some pumpkins can look happy, while others can have surprised or silly faces.
With their bright colors and playful decorations, these treats add a festive touch to almost any Halloween celebration.
Easy Ingredients and Kid-Friendly Decorating
Another reason to love Marshmallow Pumpkin Pops is their simplicity.
You only need jumbo marshmallows, orange sanding sugar, mini chocolate chips, and lollipop sticks for the basic recipe.
Orange candy melts provide an optional coating that helps the sprinkles adhere more securely.
Because the recipe requires no baking, preparation stays quick and manageable.
You can also organize the decorating process into simple tasks. One person can prepare the marshmallows, another can coat them with sprinkles, and someone else can arrange the chocolate faces.
This makes the recipe a fun family activity.
However, adults should handle cutting, melting candy, and inserting sticks. Young children also need close supervision because small candies and sticks can present choking or injury hazards.
For older children, decorating the pumpkin faces offers plenty of room for creativity.
You can even create a small decorating station with separate bowls of sprinkles and chocolate chips.
Furthermore, the recipe is easy to scale. Make one batch for a family activity or prepare several batches for a larger party.
Since the ingredients require little preparation, these pops also work well when you need a last-minute Halloween dessert.
Choosing the Best Ingredients for Marshmallow Pumpkin Pops
Marshmallows, Orange Sprinkles, and Chocolate Decorations
The right ingredients help Marshmallow Pumpkin Pops look colorful and hold their shape.
Start with fresh jumbo marshmallows. Their soft texture makes them easy to cut, and their larger size provides enough surface area for decorating.
Avoid stale marshmallows because they can become tough and difficult to work with.
For this recipe, cut each jumbo marshmallow in half across its width. This creates two smaller pieces with a flat, slightly sticky surface.
The freshly cut side helps the orange sugar adhere naturally.
Next, choose orange sanding sugar or fine orange sugar sprinkles.
Sanding sugar works particularly well because its sparkling crystals create a bright, pumpkin-like appearance.
Fine sprinkles also work, although the finished texture may look slightly different.
For the faces, use mini chocolate chips. Their small size makes them convenient for creating eyes on the marshmallow surface.
The original ingredient quantities provide two chocolate chips per pop, which works perfectly for simple pumpkin eyes.
If you want mouths or additional facial details, use extra mini chocolate chips or a small amount of melted chocolate.
Finally, choose sturdy, food-safe lollipop sticks.
Paper lollipop sticks generally work well because they provide a secure grip without sharp points.
Make sure the sticks fit comfortably inside the marshmallow pieces without splitting them.
When to Use Orange Candy Melts
Orange candy melts are optional, but they can make Marshmallow Pumpkin Pops easier to decorate.
Freshly cut marshmallows naturally have a sticky surface, so orange sanding sugar may adhere without any additional coating.
However, the rounded outer surfaces of marshmallows can be less sticky.
If you want a more complete orange coating, melted candy melts provide a useful solution.
To prepare them, place the orange candy melts in a microwave-safe bowl.
Heat in short intervals of approximately 15–20 seconds, stirring between each interval until smooth.
Avoid overheating because candy melts can become thick or grainy.
Once smooth, allow the coating to cool slightly before using it.
Dip or lightly brush each marshmallow with a thin layer of melted candy coating.
Then, immediately roll the marshmallow in orange sanding sugar.
The candy coating helps the sugar stick to the entire surface and creates a more vibrant orange appearance.
It also provides a slightly firmer outer shell after setting.
However, use only a thin coating. Too much melted candy can make the pops heavy and overly sweet.
For a simpler version, skip the candy melts and focus on coating the freshly cut marshmallow surfaces.
Both methods produce cute, festive Halloween treats.
How to Make Perfect Marshmallow Pumpkin Pops
Simple Steps for Easy Halloween Decorating
Making Marshmallow Pumpkin Pops requires only a few straightforward steps.
First, prepare your workspace. Line a baking sheet with parchment paper and place the orange sanding sugar in a shallow bowl.
Next, use a clean, sharp knife to cut the jumbo marshmallows in half.
If the knife becomes sticky, lightly dust it with powdered sugar or wipe it clean between cuts.
Carefully insert a lollipop stick into the bottom of each marshmallow half.
Push the stick far enough to hold the marshmallow securely, but avoid piercing through the top.
If you plan to use candy melts, melt them according to the package directions.
Next, lightly coat the marshmallows with the melted orange candy.
Immediately roll each marshmallow in orange sanding sugar until the surface has an even coating.
If you’re skipping candy melts, press the freshly cut marshmallow surfaces into the sugar and gently roll the remaining sides.
Once the marshmallows have their orange coating, decorate the faces.
Press two mini chocolate chips into each marshmallow to create simple eyes.
For additional expressions, add extra chocolate chips or use a small amount of melted chocolate to draw mouths.
Finally, arrange the pops on parchment paper and allow them to set for approximately 15 minutes.
If you used candy melts, wait until the coating becomes firm before serving.
Common Mistakes to Avoid
Although Marshmallow Pumpkin Pops are beginner-friendly, a few mistakes can affect their appearance.
One common mistake involves using stale marshmallows. Dry marshmallows don’t hold sprinkles as easily and may crack when you insert the sticks.
Instead, choose fresh, soft marshmallows.
Another mistake is applying too much melted candy coating. Thick layers can create uneven surfaces and make the treats overly sweet.
Use a thin coating for the best results.
Also, avoid overheating the candy melts. Excessive heat can make them difficult to spread.
Melt them slowly and stir frequently.
When adding chocolate chips, don’t press too hard. Excessive pressure can flatten the marshmallows or push them off their sticks.
If the chocolate chips won’t stay attached, use a tiny dab of melted candy coating as edible glue.
Another helpful tip is to work with a few marshmallows at a time.
Candy melts begin to firm as they cool, so coating an entire batch before adding sprinkles can make decorating difficult.
Instead, coat, sprinkle, and decorate each pop before moving to the next.
Finally, avoid storing the finished pops in a humid environment.
Moisture can make the sugar coating sticky and reduce the treats’ attractive sparkle.
With a little patience and careful handling, your pumpkin pops will look bright, neat, and festive.
Serving, Storing, and Customizing Marshmallow Pumpkin Pops
Creative Halloween Party Serving Ideas
Marshmallow Pumpkin Pops make adorable additions to Halloween dessert displays.
For a simple presentation, arrange the finished pops on a black, orange, or white serving platter.
You can also place them upright in a sturdy decorative container with a food-safe insert that holds the sticks securely.
For a pumpkin patch theme, arrange the pops at different heights and surround the display with decorative fall leaves or miniature pumpkins.
Keep nonfood decorations separate from the edible treats.
These pops also look beautiful alongside Halloween cupcakes, chocolate-dipped pretzels, and sugar cookies.
For a children’s party, create a colorful dessert table with several different pumpkin expressions.
You can even give each pumpkin a unique personality by changing the placement of the chocolate chips.
If you’re preparing treats for a school celebration, check the school’s food policies and allergy requirements before bringing homemade items.
For individual party favors, place each fully set pop in a food-safe treat bag and secure it around the stick.
Store the finished pops in a cool, dry location away from direct sunlight.
An airtight container helps protect the marshmallows from drying out.
For the best texture and appearance, enjoy them within two to three days.
If you use candy melts, make sure the coating has fully hardened before packaging.
Fun Variations and Decorating Ideas
One of the most enjoyable parts of making Marshmallow Pumpkin Pops is experimenting with different decorations.
For classic pumpkin faces, use two mini chocolate chips for the eyes and a small line of melted chocolate for the mouth.
For silly pumpkins, arrange the eyes at slightly different heights.
You can also create jack-o’-lantern expressions using tiny pieces of dark chocolate or black decorating icing.
If you want pumpkin stems, attach a small piece of green candy or a short strip of green fruit leather to the top.
For a more detailed pumpkin appearance, use green candy melts to create tiny leaves.
You can also experiment with different sprinkle textures.
Fine orange sanding sugar creates a sparkling finish, while orange nonpareils produce a more textured surface.
For a colorful Halloween assortment, make some marshmallow pops with purple or green coatings.
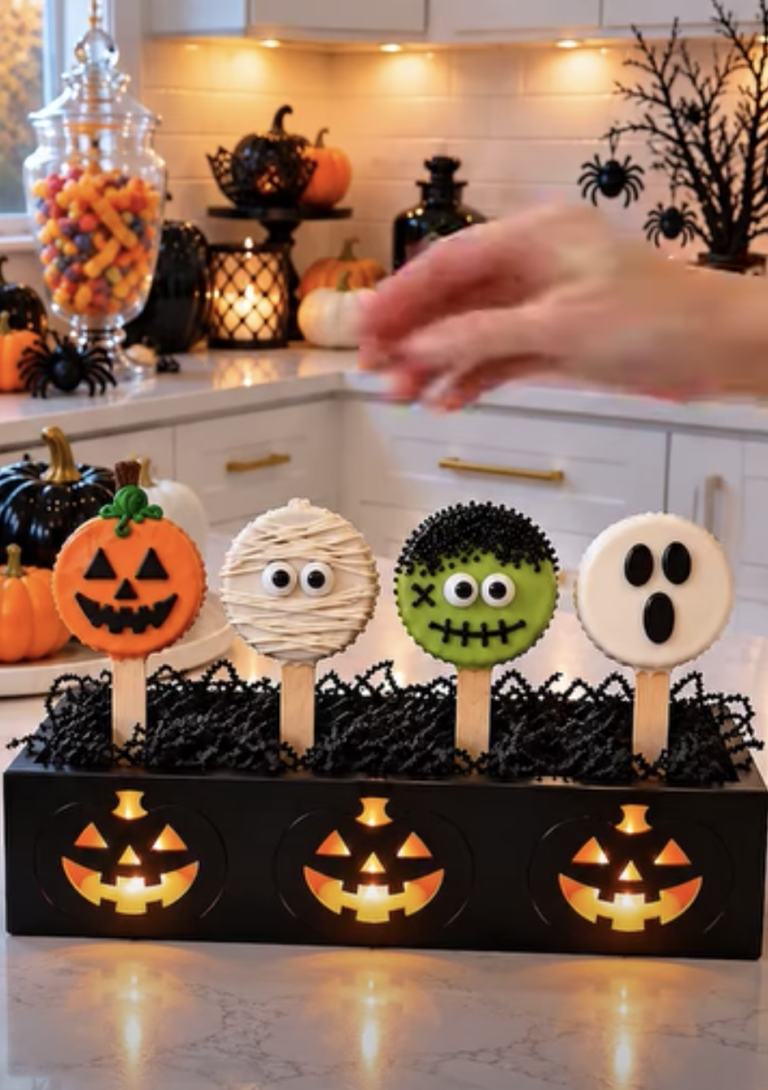
These variations can resemble playful Halloween monsters rather than pumpkins.
If you prefer chocolate flavor, dip the marshmallows in orange-colored white chocolate coating instead of candy melts.
However, use oil-based candy coloring because water-based coloring can cause melted chocolate to seize.
For an extra-festive display, combine different facial expressions, colors, and decorative details.
Whatever variation you choose, keep the decorations lightweight so the marshmallows remain secure on their sticks.
Ingredients
Yield: 24 small pops | Prep time: 15 minutes | Setting time: 15 minutes
For the marshmallow pumpkin pops:
- 12 jumbo marshmallows, cut in half
- 24 food-safe lollipop sticks or sucker sticks
- 1/2 cup orange sanding sugar or orange sugar sprinkles
- 24 mini chocolate chips, for simple pumpkin eyes
- 1/2 cup orange candy melts (optional, for better sprinkle adhesion)
Optional decorations:
- 2 tablespoons additional mini chocolate chips or melted chocolate, for pumpkin mouths
- 2 tablespoons green decorating candy or green fruit leather pieces, for pumpkin stems
Instructions
1. Prepare the workspace. Line a baking sheet with parchment paper. Place the orange sanding sugar in a shallow bowl.
2. Cut the marshmallows. Carefully slice each jumbo marshmallow in half to create 24 smaller marshmallow pieces.
3. Insert the sticks. Gently push one food-safe lollipop stick into the bottom of each marshmallow half, making sure it stays secure.
4. Melt the candy coating if using. Place the orange candy melts in a microwave-safe bowl. Heat in 15–20-second intervals, stirring until smooth.
5. Coat the marshmallows. Lightly dip or brush each marshmallow with melted orange candy coating. If skipping candy melts, use the naturally sticky cut surfaces to help the sugar adhere.
6. Add the orange sprinkles. Immediately roll each marshmallow in orange sanding sugar until evenly coated.
7. Create pumpkin faces. Gently press two mini chocolate chips into each marshmallow for eyes. If desired, add extra chocolate or green decorations to create mouths and stems.
8. Let the pops set. Place the finished pops on parchment paper and allow them to set for approximately 15 minutes, or until the optional candy coating becomes firm.
9. Serve and enjoy. Arrange the Marshmallow Pumpkin Pops on a festive serving tray or display them upright in a suitable holder. Serve once fully set.
Helpful tip: If the chocolate chips don’t stick securely, use a tiny dab of melted candy coating to attach them.
Frequently Asked Questions
1. Can I make Marshmallow Pumpkin Pops ahead of time?
Yes. You can prepare these treats one or two days before your Halloween celebration. Allow the coating to set completely, then store the pops in an airtight container in a cool, dry location. Keep them away from humidity to preserve the sugar coating.
2. Do I need orange candy melts for Marshmallow Pumpkin Pops?
No. Orange candy melts are optional. Freshly cut marshmallows have a naturally sticky surface that can hold sanding sugar. However, a thin layer of melted candy coating helps the sprinkles adhere more evenly, especially around the rounded sides.
3. How do I keep the chocolate chip faces from falling off?
Press the mini chocolate chips gently into the marshmallow while the surface remains sticky. If necessary, attach them with a tiny amount of melted candy coating. Allow the coating to harden before moving or packaging the pops.
4. Can kids help make Marshmallow Pumpkin Pops?
Yes, older children can help roll the marshmallows in sprinkles and decorate the faces with supervision. Adults should handle knives, hot melted candy, and stick insertion. Keep small candies and sticks away from very young children because they can present choking or injury hazards.
5. How long do Marshmallow Pumpkin Pops stay fresh?
For the best flavor and texture, enjoy the pops within two to three days. Store them in an airtight container at cool room temperature, away from heat and moisture. Refrigeration generally isn’t necessary and may cause condensation that makes the sugar coating sticky.
Conclusion
Marshmallow Pumpkin Pops offer a fun, easy, and colorful way to celebrate Halloween without baking.
With fluffy marshmallows, bright orange sprinkles, mini chocolate chips, and simple lollipop sticks, you can create adorable miniature pumpkin treats in about 30 minutes.
Their soft centers, sweet crunchy coatings, and playful faces make them a delightful addition to Halloween dessert tables, fall parties, and family activities.
Best of all, the recipe uses inexpensive ingredients and allows plenty of creative freedom.
You can keep the pumpkins simple with chocolate chip eyes or add extra decorations for silly, spooky, or cheerful expressions.
For the best results, use fresh marshmallows, apply the orange coating evenly, and let the finished pops set completely before serving.
Whether you’re preparing a Halloween party platter or enjoying a fun afternoon of decorating, these Marshmallow Pumpkin Pops bring sweetness, creativity, and festive charm to the season.