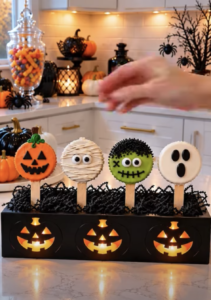
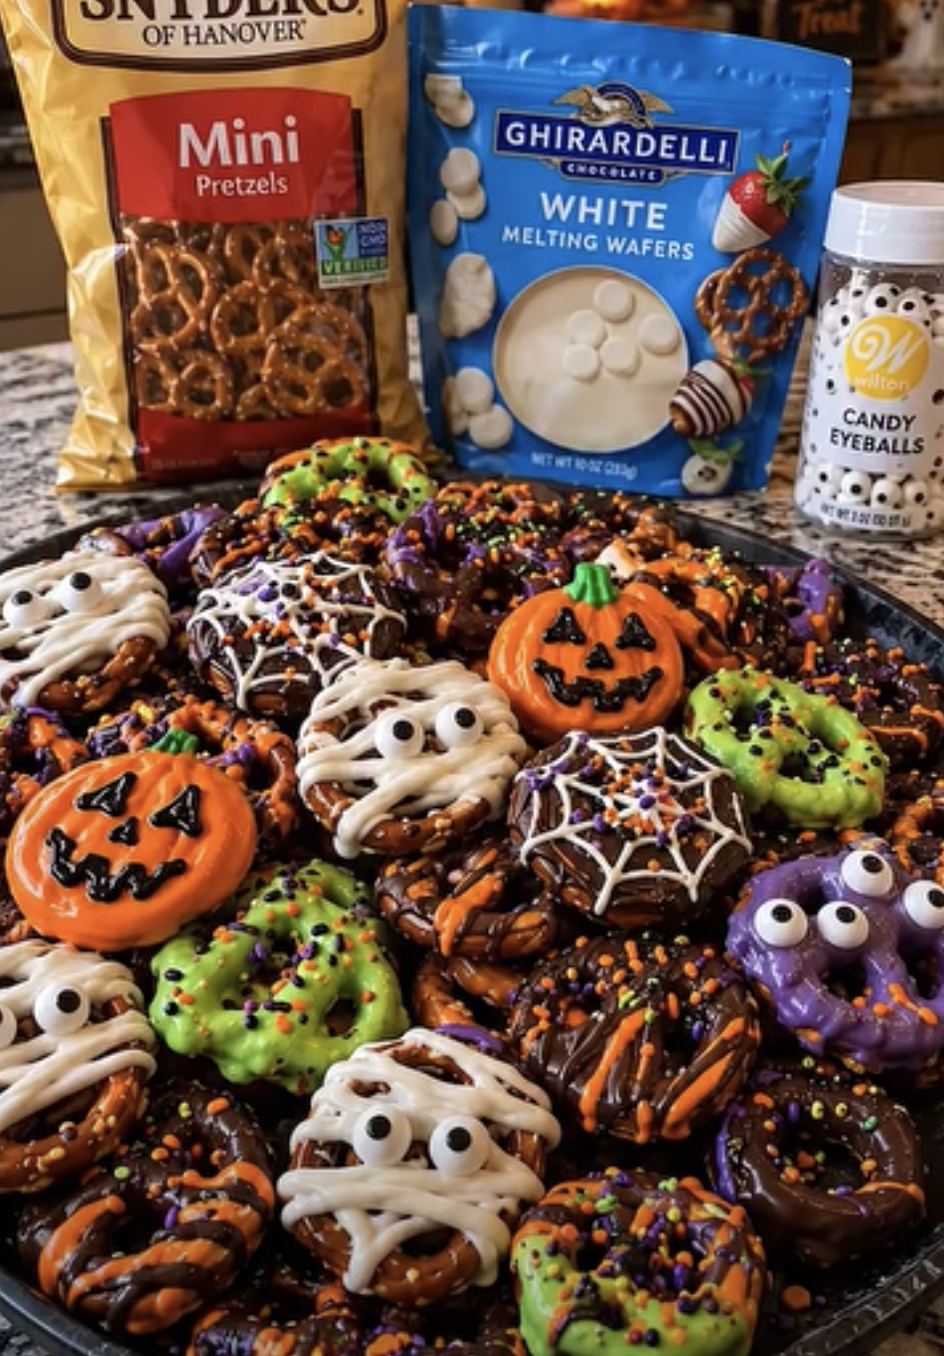
Halloween Pretzels are colorful, crunchy, and deliciously festive treats that combine salty pretzels with smooth, sweet candy coating. With orange, purple, white, and green candy melts, you can create adorable pumpkins, silly monsters, spooky mummies, and other Halloween-inspired designs in your own kitchen.
These easy Halloween Pretzels require no baking, making them perfect for Halloween parties, classroom celebrations, trick-or-treat snack tables, and fun family activities. Best of all, you only need a handful of ingredients and a little creativity to turn ordinary pretzels into eye-catching holiday treats.
The combination of crunchy pretzels and sweet candy coating creates an irresistible contrast. Meanwhile, candy eyeballs, Halloween sprinkles, and decorative icing make every piece look unique.
Halloween Pretzels – Easy Sweet and Salty Halloween Party Treats
Ingredients
Equipment
Method
- Line a large baking sheet with parchment paper and arrange pretzels and decorations nearby.
- Melt orange, purple, white, and optional green candy melts separately in microwave-safe bowls according to package directions. Stir until smooth.
- Dip pretzels halfway or completely into melted candy coating. Allow excess coating to drip off.
- Place dipped pretzels on parchment paper. Immediately add candy eyeballs and Halloween sprinkles while coating remains soft.
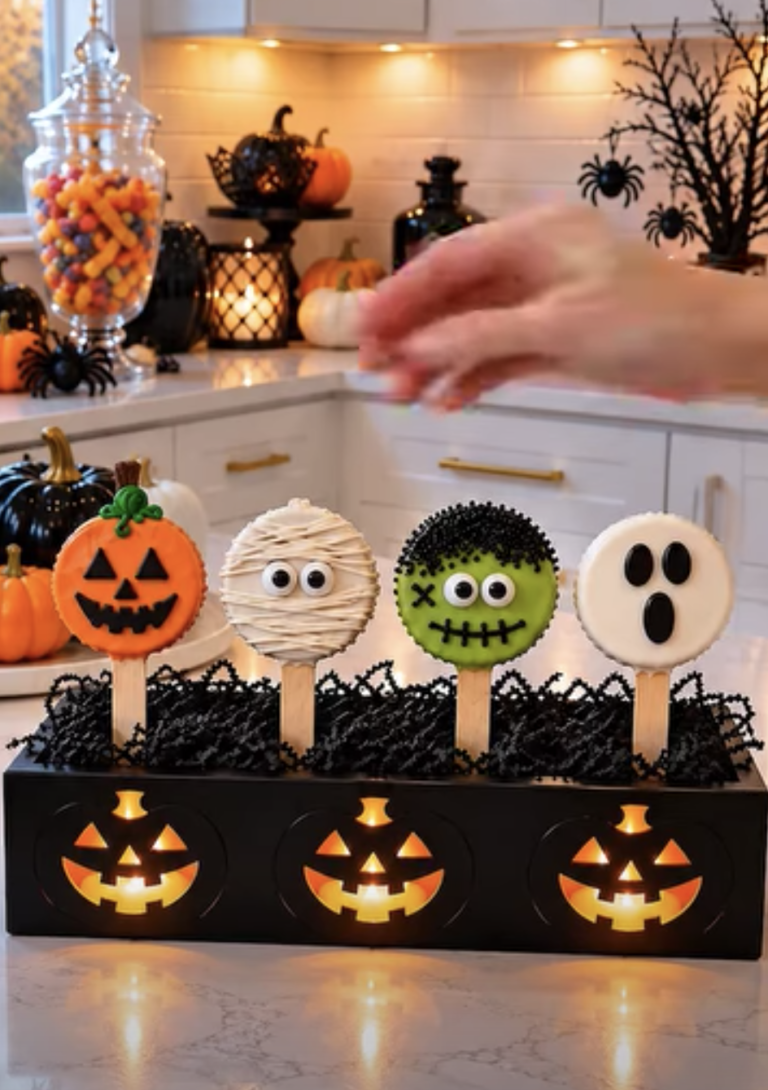
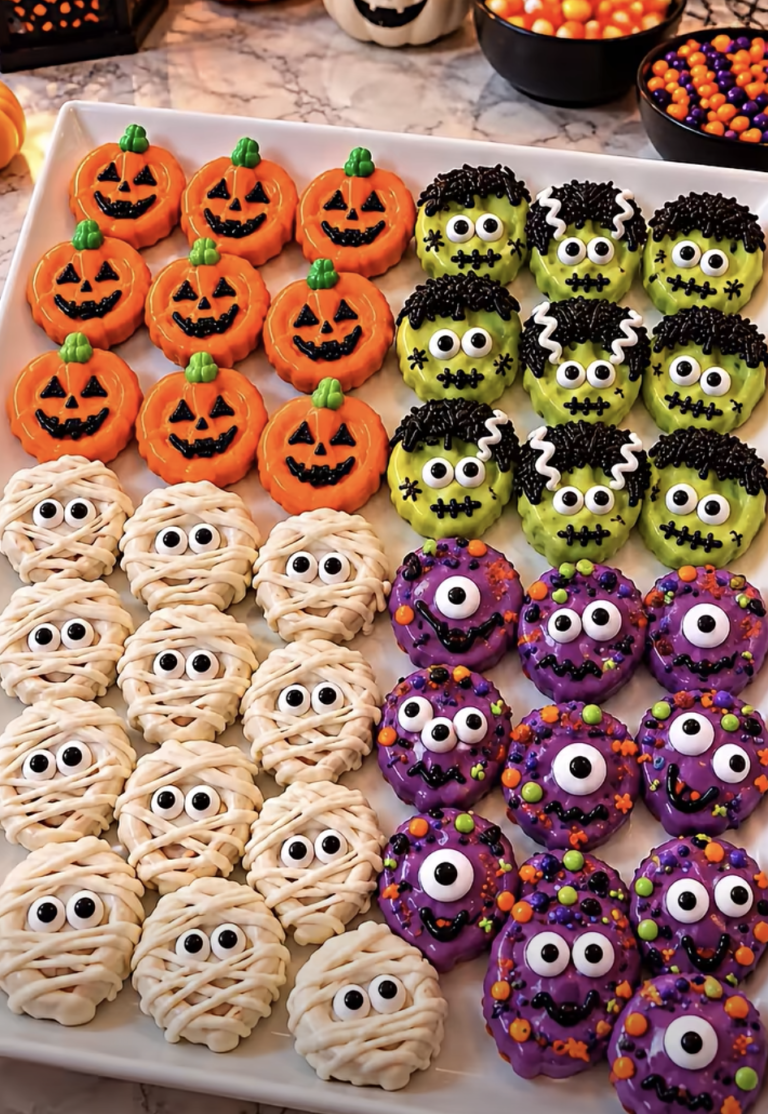
- For mummy pretzels, dip in white candy coating, drizzle additional white coating in thin bandage-like lines, and add candy eyes.
- For monster pretzels, dip in green or purple candy coating and decorate with candy eyes and sprinkles.
- For pumpkin pretzels, dip in orange candy coating and use optional black decorating icing to draw faces after coating sets.
- Allow decorated pretzels to set at room temperature for approximately 20–30 minutes, or refrigerate briefly until firm.
- Serve immediately or transfer fully set pretzels to an airtight container and store in a cool, dry location.
Notes
I first made a batch of decorated pretzels when I needed a quick Halloween treat for a family gathering. I wanted something festive without spending hours baking cookies or decorating cupcakes. I already had pretzels in the pantry, so I picked up colorful candy melts, candy eyes, and Halloween sprinkles. Once I started dipping and decorating, everyone wanted to join in. Some pretzels became funny little monsters, while others turned into white mummies with candy eyes peeking through the coating. The finished treats looked adorable on the dessert table, and their sweet-and-salty flavor made them disappear surprisingly quickly. Now I love making them whenever Halloween celebrations call for something simple and creative.
Whether you’re planning a spooky party, preparing homemade holiday gifts, or enjoying a Halloween craft activity with the family, Halloween Pretzels offer an easy and delicious way to celebrate.
| Recipe Detail | Information |
|---|---|
| Prep Time | 20 minutes |
| Melting and Decorating Time | 15 minutes |
| Setting Time | 30 minutes |
| Total Time | 65 minutes |
| Yield | Approximately 60 mini pretzels |
| Cooking Method | No-bake |
| Difficulty | Easy |
Why You’ll Love These Easy Halloween Pretzels
The Perfect Sweet and Salty Halloween Combination
One of the biggest reasons to love Halloween Pretzels is their irresistible combination of flavors and textures.
Mini pretzels provide a crunchy, salty base that contrasts beautifully with the sweet candy coating.
The candy melts create a smooth outer layer that hardens into a satisfying shell.
As a result, every bite delivers a delicious mixture of sweetness, saltiness, and crunch.
Unlike complicated Halloween desserts, these treats require very little preparation.
You don’t need to mix cake batter, prepare frosting, or use an oven.
Instead, you simply melt the candy coating, dip the pretzels, and add decorations.
The colorful candy melts also make these treats visually appealing.
Orange creates classic pumpkin-inspired designs, while purple adds a playful Halloween touch.
White candy coating works perfectly for mummy pretzels.
Meanwhile, green candy melts help create silly monster faces.
Candy eyeballs add personality to each design.
Halloween sprinkles provide additional color and texture.
You can also use black decorating icing to create small details, such as pumpkin faces or monster mouths.
Because the designs don’t need to look identical, decorating becomes part of the fun.
Some pretzels may look spooky, while others turn out funny or cute.
Ultimately, Halloween Pretzels offer a simple way to create festive treats that taste as good as they look.
Perfect for Parties, Classroom Treats, and Family Activities
Halloween Pretzels are especially convenient for holiday entertaining.
You can prepare them ahead of time, arrange them on a festive platter, and serve them without additional preparation.
Their small size also makes them easy for guests to enjoy.
For Halloween parties, arrange different colors and designs together to create an eye-catching dessert display.
You can also place them in small treat bags for party favors.
Here are several reasons this recipe works so well:
- No baking required: You only need to melt candy coating and decorate.
- Simple ingredients: Pretzels, candy melts, and decorations do most of the work.
- Fun designs: Create pumpkins, monsters, mummies, and colorful Halloween treats.
- Kid-friendly activity: Children can help add candy eyes and sprinkles with adult supervision.
- Make-ahead convenience: Prepare the treats before your Halloween celebration.
- Easy serving: Individual pretzels work well on party platters and snack tables.
Additionally, you can customize the decorations according to your party theme.
For a classic Halloween look, focus on orange, black, purple, and green.
For a cute monster theme, use extra candy eyes and colorful sprinkles.
If you’re preparing classroom treats, check school food policies and allergy restrictions first.
Choose clearly labeled ingredients and package the pretzels individually when necessary.
With their festive appearance and simple preparation, Halloween Pretzels make a wonderful addition to almost any Halloween celebration.
Essential Ingredients and Decorating Supplies for Halloween Pretzels
Choosing the Best Pretzels and Candy Melts
The foundation of delicious Halloween Pretzels starts with choosing the right pretzels.
Mini pretzel twists work especially well because their small size makes them easy to dip, decorate, and serve.
Their twisted shape also creates interesting spaces for candy coating and decorations.
Alternatively, you can use pretzel rods.
Pretzel rods provide a larger surface for creating mummy bandages, monster faces, and colorful drizzles.
However, the number of finished treats will vary depending on the pretzel size.
For this recipe, two cups of mini pretzels produce approximately 60 pieces, depending on the brand and shape.
Next, choose colorful candy melts.
Candy melts offer a convenient alternative to traditional melted chocolate because they come in bright colors and generally set without tempering.
Orange candy melts create classic Halloween color.
Purple candy melts add contrast and work beautifully for monster designs.
White candy melts are ideal for mummy pretzels and decorative drizzles.
Optional green candy melts make fun monster-inspired treats.
For the smoothest coating, melt each color separately according to the package directions.
Use microwave-safe bowls and stir frequently.
Avoid overheating because candy melts can become thick or grainy.
Additionally, keep water away from the melted coating.
Even a small amount of moisture can affect its texture.
With quality pretzels and properly melted candy coating, you can create smooth, colorful Halloween treats with very little effort.
Fun Halloween Decorations and Creative Design Ideas
The decorations make Halloween Pretzels especially fun.
Candy eyeballs instantly transform ordinary dipped pretzels into silly monsters and spooky creatures.
You can use one eye, two eyes, or several eyes for different effects.
Halloween sprinkles add color and texture.
Look for combinations featuring orange, purple, black, green, and white.
Sprinkle them onto the candy coating immediately after dipping.
This helps the decorations stick before the coating hardens.
Black decorating icing provides another way to create detailed designs.
For example, you can draw small pumpkin faces on orange-coated pretzels.
You can also add monster mouths or simple spiderweb patterns.
For mummy pretzels, dip the pretzels in white candy coating.
After the first layer begins to set, drizzle thin lines of additional white coating across the surface.
Then, add candy eyeballs to complete the design.
For green monsters, dip the pretzels in green candy coating and add several candy eyes.
Purple monsters look equally adorable with contrasting white or orange drizzle.
You can also create striped pretzels by drizzling different colors over a solid coating.
For a simple design, dip each pretzel halfway and finish with Halloween sprinkles.
Because the decorations vary, every finished pretzel can look different.
This flexibility makes the recipe especially enjoyable for family decorating activities.
How to Make Halloween Pretzels Step by Step
Melting Candy Coating and Dipping Pretzels
Making Halloween Pretzels begins with preparing your workspace.
First, line a large baking sheet with parchment paper.
This prevents the candy coating from sticking and makes cleanup easier.
Next, arrange the pretzels, candy melts, sprinkles, and candy eyeballs nearby.
Having everything ready helps you decorate quickly before the coating hardens.
Place the orange, purple, white, and optional green candy melts into separate microwave-safe bowls.
Melt each color according to its package instructions.
For many candy melts, short microwave intervals work best.
Stir thoroughly between intervals until the coating becomes smooth.
Avoid overheating.
If the coating feels too hot, allow it to cool slightly before dipping.
Next, pick up a pretzel and dip it halfway into the melted candy coating.
You can also dip the entire pretzel if you prefer a thicker candy shell.
Lift the pretzel and allow excess coating to drip back into the bowl.
Then, place it on the parchment-lined baking sheet.
Repeat with the remaining pretzels.
For pretzel rods, use a spoon to help coat the desired portion.
If you prefer a lighter coating, drizzle melted candy over the pretzels instead of dipping them.
Work in small batches so you have enough time to add decorations.
Decorating Mummies, Monsters, and Colorful Halloween Treats
After dipping the pretzels, begin decorating while the candy coating remains soft.
For classic Halloween Pretzels, sprinkle orange, purple, black, or green decorations over the wet coating.
Next, add candy eyeballs to create playful monster faces.
Press the eyes gently into the coating so they stay in place.
For mummy pretzels, dip the pretzels in white candy melts.
Allow the base coating to become slightly firm.
Then, use a spoon or piping bag to drizzle thin white lines across the surface.
Arrange the lines in different directions to resemble mummy bandages.
Add two candy eyeballs before the drizzle sets completely.
For monster pretzels, use green or purple candy coating.
Add one or more candy eyes and finish with contrasting sprinkles.
You can also draw small mouths with black decorating icing after the coating sets.
For pumpkin-inspired pretzels, use orange candy coating and add simple black icing faces.
Once you finish decorating, place the baking sheet in a cool, dry location.
Allow the coating to set completely at room temperature.
This usually takes approximately 20–30 minutes, depending on room temperature and coating thickness.
If necessary, refrigerate the pretzels briefly to speed up setting.
However, avoid prolonged refrigeration because condensation can affect the coating.
Once firm, carefully lift the Halloween Pretzels from the parchment paper.
Arrange them on a serving platter or transfer them to an airtight container.
Helpful Tips, Creative Variations, and Storage Ideas
Expert Tips for Smooth Coating and Beautiful Decorations
Although Halloween Pretzels are beginner-friendly, a few simple techniques can improve the finished treats.
First, use completely dry bowls and utensils.
Water can cause melted candy coating to thicken or seize.
Next, melt the candy coating slowly.
Short microwave intervals and frequent stirring help prevent overheating.
If the coating becomes too thick, follow the candy melt manufacturer’s instructions for thinning it.
Avoid adding water.
Another important tip involves decorating speed.
Candy melts can harden relatively quickly, especially in a cool room.
Therefore, dip and decorate a few pretzels at a time.
Keep the candy eyeballs and sprinkles within easy reach.
For neater designs, use a small piping bag or a resealable plastic bag with a tiny corner snipped off.
This makes it easier to drizzle mummy bandages and contrasting colors.
If you’re decorating with children, prepare the melted coating yourself and allow it to cool to a safe handling temperature.
Then, let children help with sprinkles and candy eyes.
For the cleanest finish, place dipped pretzels on parchment paper rather than directly on a plate.
Finally, let the coating harden completely before packaging.
Otherwise, the decorations may smear or stick together.
These simple tips help create colorful, attractive Halloween Pretzels with minimal mess.
Delicious Variations, Party Ideas, and Storage Tips
Halloween Pretzels are easy to customize for different celebrations.
For a classic pumpkin theme, dip the pretzels in orange candy coating and decorate with black icing.
For silly monster treats, use green and purple candy melts with several candy eyeballs.
For mummy pretzels, choose white candy coating and create thin decorative drizzles.
You can also make striped pretzels using contrasting colors.
For example, drizzle purple candy coating over orange pretzels.
Alternatively, add white drizzle to green monster pretzels.
If you prefer a chocolate flavor, use melted dark or milk chocolate instead of some of the colored candy melts.
You can also sprinkle crushed cookies over the wet coating for additional texture.
For party serving, arrange the finished treats on a black or orange platter.
You can group them by color or mix the designs for a playful presentation.
For Halloween gift bags, place a few completely set pretzels in food-safe treat bags.
Tie the bags with festive ribbon or use decorative stickers.
To store leftovers, place the pretzels in an airtight container.
Keep them in a cool, dry location away from direct sunlight and heat.
For the best flavor and texture, enjoy them within one to two weeks, depending on the freshness of the pretzels and candy coating.
If your kitchen is particularly warm, you can refrigerate the treats in a tightly sealed container.
However, allow the container to return to room temperature before opening to help reduce condensation.
With proper storage, Halloween Pretzels remain a convenient make-ahead treat for parties and seasonal celebrations.
Ingredients
Yield: Approximately 60 mini pretzels Prep Time: 20 minutes Melting and Decorating Time: 15 minutes Setting Time: 30 minutes Total Time: 65 minutes
- 2 cups mini pretzels or pretzel rods
- 1 cup orange candy melts
- 1 cup purple candy melts
- 1 cup white candy melts
- ½ cup green candy melts (optional)
- ¼ cup candy eyeballs, approximately 60 pieces
- ¼ cup Halloween sprinkles
- 2 tbsp black decorating icing (optional)
Equipment: Large baking sheet, parchment paper, microwave-safe bowls, spoons, small piping bags or resealable plastic bags, and airtight storage container.
Instructions
1. Prepare the baking sheet. Line a large baking sheet with parchment paper. Arrange the pretzels and decorations nearby.
2. Melt the candy coating. Place orange, purple, white, and optional green candy melts into separate microwave-safe bowls. Melt according to package directions, stirring until smooth.
3. Dip the pretzels. Dip each pretzel halfway or completely into the melted candy coating. Allow excess coating to drip back into the bowl.
4. Add decorations. Place the dipped pretzels on parchment paper. Immediately add candy eyeballs and Halloween sprinkles while the coating remains soft.
5. Create mummy pretzels. Dip pretzels in white candy coating. Once the base begins to firm, drizzle thin lines of white coating over the surface to resemble mummy bandages. Add candy eyes.
6. Make monster pretzels. Dip pretzels in green or purple candy coating. Add candy eyeballs and colorful sprinkles to create silly monster faces.
7. Decorate pumpkin pretzels. Dip pretzels in orange coating. Once firm, use optional black decorating icing to draw small pumpkin faces.
8. Allow the coating to set. Leave the decorated pretzels at room temperature for approximately 20–30 minutes, or refrigerate briefly until firm.
9. Serve or store. Arrange the finished Halloween Pretzels on a serving platter or transfer them to an airtight container. Store in a cool, dry place.
Helpful tip: Work in small batches and add decorations quickly before the candy coating hardens. Keep all bowls and utensils completely dry for the smoothest results.
Frequently Asked Questions
1. How far in advance can I make Halloween Pretzels?
You can prepare Halloween Pretzels several days before your celebration. For the best quality, store them in an airtight container in a cool, dry place. They generally maintain their crunch for approximately one to two weeks, depending on the freshness of the pretzels and coating.
2. Can I use regular chocolate instead of candy melts?
Yes. You can use melted milk chocolate, dark chocolate, or white chocolate. However, traditional chocolate may require tempering if you want a firm, glossy coating that sets reliably at room temperature. Candy melts are generally easier for beginners because they come in festive colors and don’t require traditional chocolate tempering.
3. Why is my candy coating too thick for dipping?
Candy coating can become thick if you overheat it or introduce moisture. Melt the candy melts slowly and stir frequently. If the coating remains too thick, use a thinning ingredient recommended by the manufacturer. Avoid adding water because it can cause the coating to seize.
4. Can children help make Halloween Pretzels?
Absolutely. Halloween Pretzels make a fun family decorating activity. Adults should handle the hot candy coating and supervise younger children. Once the coating cools to a safe temperature, children can help add candy eyeballs, sprinkles, and colorful decorations. Keep small candies away from children who may face choking risks.
5. How do I keep Halloween Pretzels from becoming soggy?
Allow the candy coating to set completely before storing the pretzels. Then, place them in an airtight container and keep them away from moisture and heat. Avoid prolonged refrigeration when possible because condensation can affect the coating and pretzel texture. For the best crunch, store them in a cool, dry pantry.
Conclusion
Halloween Pretzels are a fun, colorful, and delicious way to celebrate the spooky season without spending hours in the kitchen.
Crunchy salted pretzels, sweet candy coating, and playful Halloween decorations create an irresistible combination that both kids and adults can enjoy.
With orange pumpkins, purple monsters, white mummies, and green spooky creatures, you can turn simple ingredients into an adorable assortment of festive treats.
Best of all, this no-bake recipe requires only a few ingredients and straightforward steps.
Whether you’re planning a Halloween party, preparing classroom treats, making homemade gifts, or enjoying a family decorating activity, Halloween Pretzels offer endless creative possibilities.
You can also prepare them ahead of time and store them in airtight containers until your celebration.
Serve these sweet-and-salty Halloween Pretzels on a festive platter, package them in treat bags, or add them to a Halloween dessert table.
Their colorful appearance, satisfying crunch, and easy preparation make them a wonderful addition to your seasonal recipe collection.