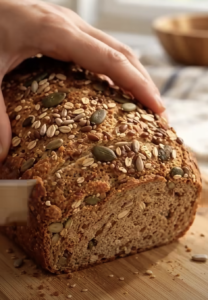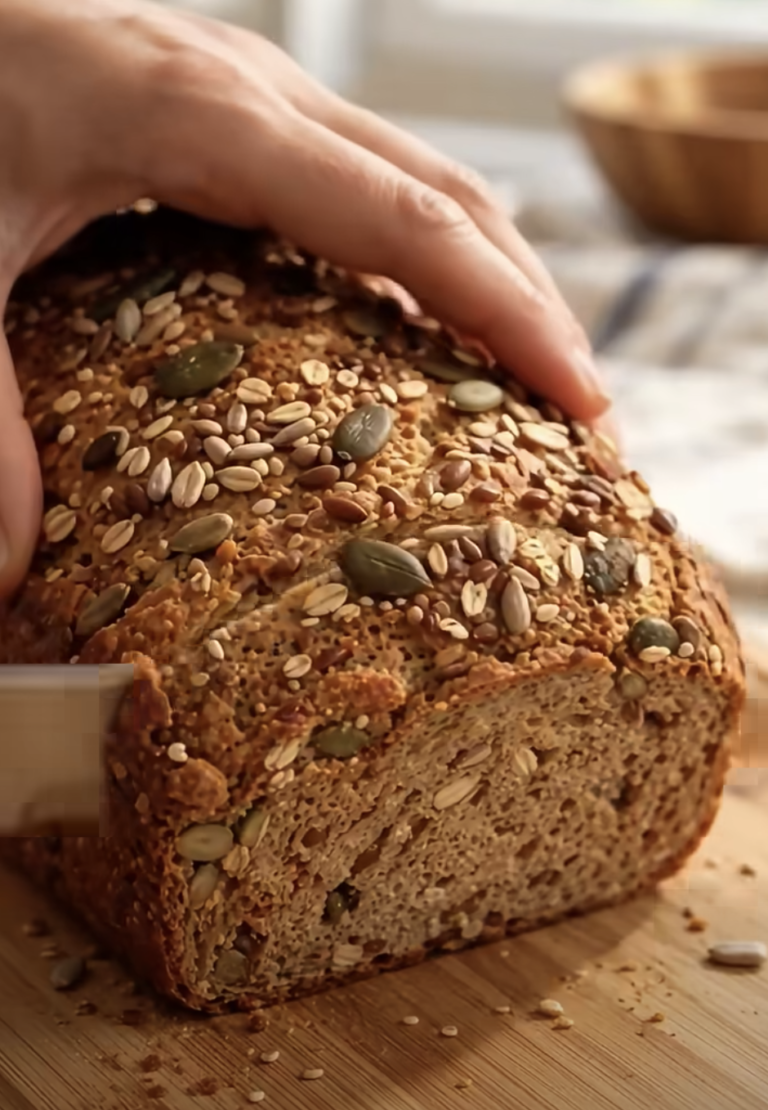
If you want a simple, nutritious alternative to traditional bread, this 3-Ingredient High-Protein Chickpea Bread deserves a place in your kitchen. It combines cooked chickpeas, eggs, and baking powder into a satisfying homemade loaf without flour, yeast, or complicated techniques.
This easy chickpea bread offers a soft, hearty texture, a mild savory flavor, and plenty of possibilities for breakfast, lunch, or snacks. Plus, you only need about 10 minutes of preparation before the oven handles the rest.
Unlike traditional wheat bread, this flourless loaf relies on chickpeas for structure and eggs for binding. As a result, it delivers plant-based fiber alongside protein from both chickpeas and eggs.
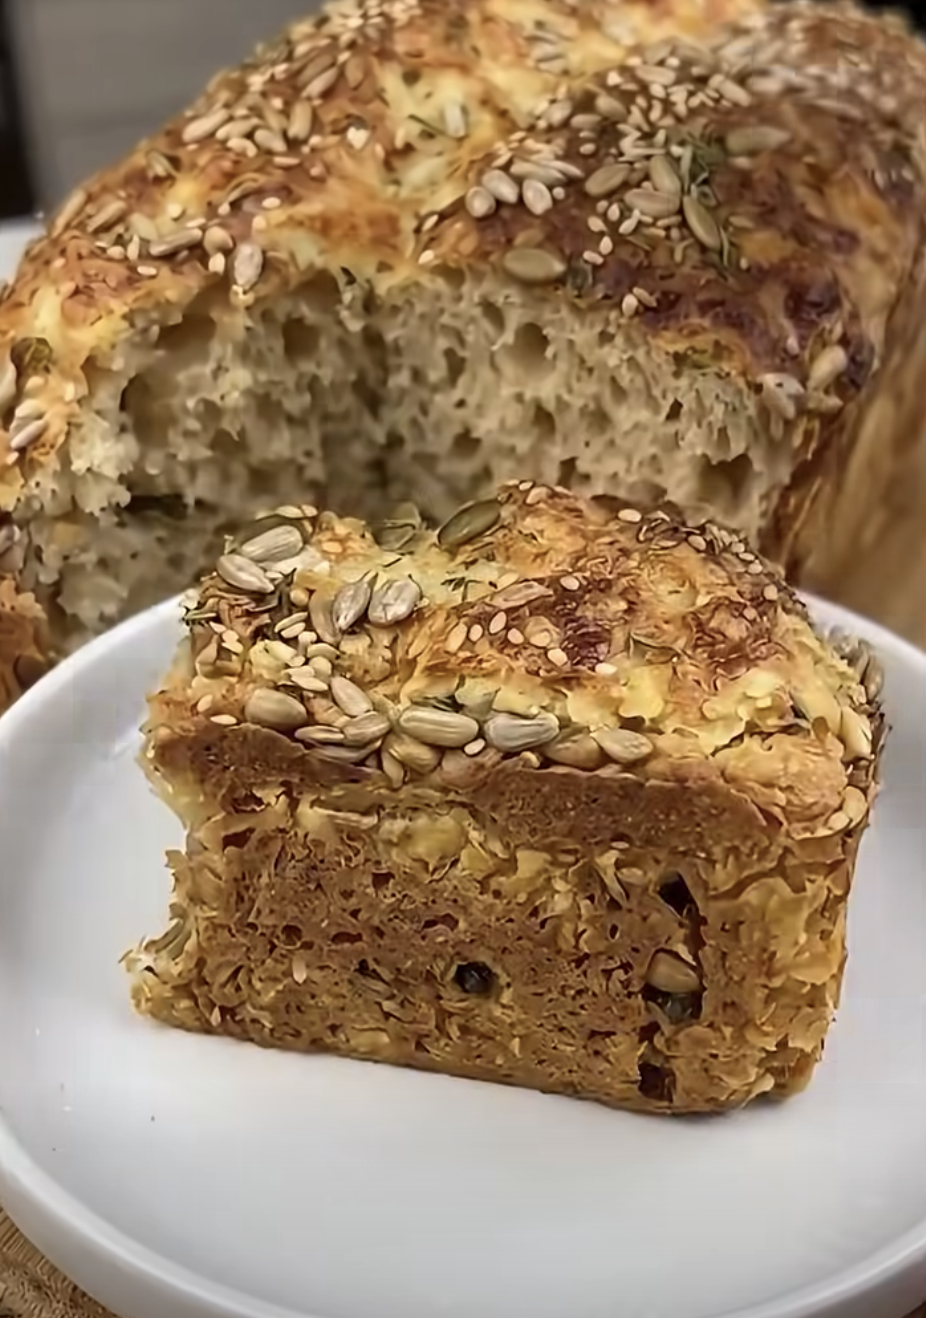
3-Ingredient High-Protein Chickpea Bread – Easy, Flourless & Homemade!
Ingredients
Equipment
Method
- Preheat the oven to 375°F (190°C). Line an 8½ × 4½-inch loaf pan with parchment paper.
- Drain and rinse the cooked chickpeas thoroughly. Leave them in a colander for several minutes to remove excess moisture.
- Add the drained chickpeas and four large eggs to a high-speed blender or food processor.
- Blend for 1–2 minutes, scraping down the sides as necessary, until the mixture becomes completely smooth and creamy.
- Add the baking powder and blend for another 10–15 seconds until evenly combined.
- Pour the batter into the prepared loaf pan and smooth the top with a spatula.
- Bake on the center oven rack for 40–50 minutes until lightly golden and firm in the center. A toothpick should show no wet batter.
- Remove the loaf from the oven. Cool in the pan for 10–15 minutes, then transfer to a wire rack.
- Allow the bread to cool completely before slicing into 8–10 pieces. Serve plain, toasted, or with your preferred toppings.
Notes
The first time I tried making bread with chickpeas, I expected something heavy and overly dense. Instead, I discovered how easily a few pantry staples could turn into a surprisingly satisfying loaf. I loved the idea of skipping flour without relying on expensive specialty ingredients. After a little experimenting, I learned that thoroughly draining the chickpeas and blending the batter until smooth made a noticeable difference. Now, I enjoy keeping a few slices in the refrigerator for quick breakfasts and easy lunches. A lightly toasted slice with avocado, tomatoes, or hummus makes a simple meal feel more substantial.
Why You’ll Love This 3-Ingredient High-Protein Chickpea Bread
A Simple Flourless Bread With Everyday Ingredients
One of the biggest advantages of 3-Ingredient High-Protein Chickpea Bread is its simplicity. You don’t need bread flour, yeast, butter, milk, or special baking skills.
Instead, three basic ingredients create a convenient homemade loaf.
Cooked chickpeas provide the foundation. Their naturally starchy texture helps create structure, while their mild flavor works well with both savory and lightly sweet toppings.
Large eggs bind the chickpeas together and help the bread hold its shape. They also contribute protein and moisture, creating a tender interior.
Baking powder adds lift during baking. Although this bread won’t rise like a traditional yeast loaf, baking powder helps prevent an overly compact texture.
Additionally, the recipe eliminates kneading, proofing, and lengthy resting periods. Simply blend the ingredients, pour the batter into a loaf pan, and bake.
Because the recipe contains no wheat flour, it also suits people who prefer flourless baking. However, anyone who needs a strictly gluten-free diet should check the baking powder label for gluten-containing ingredients or cross-contact warnings.
The finished bread has a different texture from sandwich bread. Expect a moist, firm crumb rather than a fluffy, stretchy interior.
Protein, Fiber, and Everyday Nutrition
Chickpeas offer an impressive combination of plant protein, dietary fiber, and complex carbohydrates. Therefore, they make an excellent foundation for a filling homemade bread.
Eggs add complete protein and important nutrients, including choline and vitamin B12.
Together, these ingredients create a loaf that offers more protein than many basic homemade bread recipes on a comparable serving basis, although exact comparisons depend on slice size and recipe.
For a loaf divided into eight slices, the approximate nutrition per slice includes:
| Nutrient | Approximate amount |
|---|---|
| Calories | 110 |
| Protein | 7 g |
| Carbohydrates | 12 g |
| Fat | 4 g |
| Fiber | 3 g |
These estimates use plain cooked chickpeas and large eggs. Actual values vary with chickpea variety, drained weight, and slice size.
Importantly, this bread contains carbohydrates, so it isn’t a low-carb or keto bread. Nevertheless, its fiber and protein make it a satisfying option for many balanced eating patterns.
How to Make Perfect 3-Ingredient High-Protein Chickpea Bread
Prepare the Chickpeas and Blend a Smooth Batter
The secret to successful 3-Ingredient High-Protein Chickpea Bread starts with proper chickpea preparation.
First, drain the cooked chickpeas thoroughly. If you use canned chickpeas, rinse them under cool running water to remove the packing liquid.
Next, leave them in a colander for several minutes. You can also gently pat them dry with a clean kitchen towel.
This step matters because excess water can make the bread unusually moist or gummy.
Once the chickpeas drain, add them to a high-speed blender or food processor with four large eggs.
Blend the mixture for one to two minutes until it develops a smooth, creamy consistency.
Stop occasionally to scrape down the sides. This ensures that the blender processes every chickpea evenly.
A smooth batter creates a more uniform crumb. Conversely, large chickpea pieces can produce an uneven, crumbly loaf.
After blending, add the baking powder and pulse briefly until it combines with the batter.
Avoid extended blending after adding the baking powder. Instead, mix just enough to distribute it evenly.
The finished batter should look thick, smooth, and pourable.
If your blender struggles, pause and scrape the mixture toward the blades rather than adding extra liquid. Additional water can compromise the final texture.
Bake Until Golden and Cool Before Slicing
Preheat your oven to 375°F (190°C).
Meanwhile, prepare an 8½ × 4½-inch loaf pan with parchment paper or a light coating of cooking spray.
Pour the chickpea batter into the prepared pan and smooth the surface with a spatula.
Next, place the pan on the center oven rack.
Bake for approximately 40–50 minutes. The exact baking time depends on your oven, pan material, and batter moisture.
As the loaf bakes, the top should become lightly golden and the center should gradually firm up.
Around the 40-minute mark, insert a toothpick into the center. The bread should show no wet batter, although a few moist crumbs are fine.
For an additional check, gently press the center. It should feel set rather than liquid or jiggly.
If the top browns too quickly, loosely cover it with aluminum foil for the remaining baking time.
Once the bread finishes baking, remove the pan from the oven and let it rest for 10–15 minutes.
Then, carefully transfer the loaf to a wire rack.
Allow the bread to cool completely before slicing. This final step helps the interior firm up and reduces the chance of a gummy texture.
Use a sharp serrated knife for clean, even slices.
Best Ways to Serve and Customize Chickpea Bread
Delicious Breakfast, Lunch, and Snack Ideas
The mild flavor of 3-Ingredient High-Protein Chickpea Bread makes it incredibly versatile.
For breakfast, lightly toast a slice and spread mashed avocado across the top. Add freshly cracked black pepper and a squeeze of lemon for extra brightness.
Alternatively, serve it alongside scrambled eggs for a hearty morning meal.
If you enjoy savory breakfasts, try cream cheese, sliced tomatoes, and fresh herbs.
For lunch, use two slices to make a sandwich with turkey, lettuce, cucumber, or your favorite vegetables.
Because chickpea bread has a denser texture than traditional sandwich bread, thinner slices often work best.
You can also serve it with hummus, roasted vegetables, or grilled chicken.
Another easy option involves pairing the bread with a warm bowl of soup.
Its hearty texture complements vegetable soup, lentil stew, chili, and tomato soup particularly well.
For an afternoon snack, toast a slice until the edges become lightly crisp. Then, add cottage cheese or a favorite savory spread.
Although this bread tastes delicious plain, toasting can improve its texture, especially after refrigeration.
Here are a few simple topping combinations:
- Mashed avocado, lemon juice, and black pepper
- Hummus, cucumber, and cherry tomatoes
- Cream cheese, smoked salmon, and dill
- Cottage cheese, tomatoes, and fresh basil
- Feta cheese, roasted peppers, and oregano
- Almond butter and thinly sliced banana
The toppings add ingredients to the finished meal, but the bread itself still requires only three.
Easy Flavor Variations Without Complicated Baking
The basic 3-Ingredient High-Protein Chickpea Bread recipe creates a neutral loaf that works with many flavors.
However, you can customize future batches with a few optional additions.
For a Mediterranean-inspired version, add dried oregano, garlic powder, and a small pinch of salt.
Alternatively, mix in finely chopped rosemary or thyme for a fragrant herb bread.
If you enjoy a slightly nutty flavor, sprinkle sesame seeds or sunflower seeds across the surface before baking.
These toppings create additional texture and visual appeal.
For a more savory loaf, add a little grated Parmesan cheese. Keep in mind that cheese changes the nutrition and means the bread no longer contains only three ingredients.
You can also experiment with a small amount of smoked paprika or onion powder.
However, avoid adding large quantities of watery vegetables directly to the batter. Ingredients such as zucchini or fresh tomatoes release moisture and may prevent the loaf from setting properly.
For the most reliable results, prepare the original three-ingredient recipe first.
Then, introduce one small variation at a time.
This approach makes it easier to understand how each addition affects flavor, structure, and baking time.
Storage, Troubleshooting, and Tips for the Best Results
How to Store, Freeze, and Reheat Chickpea Bread
Proper storage helps 3-Ingredient High-Protein Chickpea Bread maintain its flavor and texture.
Because the loaf contains eggs and retains considerable moisture, refrigeration offers the most practical storage option.
First, allow the bread to cool completely.
Then, place it in an airtight container or wrap it securely.
Store the loaf in the refrigerator for up to four days.
For convenience, slice the bread before refrigerating it. This allows you to remove individual portions without repeatedly handling the entire loaf.
If you want longer storage, freezing works well.
Cut the cooled loaf into slices and place parchment paper between them. Next, transfer the slices to a freezer-safe bag or airtight container.
Freeze for up to two months for the best quality.
When you’re ready to eat, thaw a slice in the refrigerator or toast it directly from frozen.
A toaster oven or conventional oven can help restore a lightly crisp exterior.
For food safety, refrigerate the bread within two hours of baking and cooling. Avoid leaving the moist loaf at room temperature overnight.
Also, discard bread that develops mold, unusual odors, or other signs of spoilage.
Common Mistakes and How to Avoid Them
Although this recipe requires only three ingredients, small details can affect the finished loaf.
Mistake 1: Using wet chickpeas
Excess moisture can create a dense, gummy interior.
To prevent this, rinse the chickpeas thoroughly and drain them well before blending.
Mistake 2: Leaving the batter chunky
Large chickpea pieces can make the bread crumble.
Instead, blend until the mixture looks smooth and creamy.
Mistake 3: Using expired baking powder
Old baking powder may provide insufficient lift.
Therefore, check the expiration date and use fresh baking powder for reliable results.
Mistake 4: Removing the loaf too early
The exterior may appear golden while the center remains undercooked.
Always check the middle before removing the bread from the oven.
Mistake 5: Slicing while hot
Warm chickpea bread can feel overly soft and sticky.
Consequently, slicing immediately may damage the crumb.
Allow complete cooling for better structure.
Mistake 6: Expecting traditional yeast-bread texture
Chickpea bread contains no gluten-forming flour or yeast. Therefore, it won’t develop the same airy structure as conventional sandwich bread.
Instead, expect a moist, compact, sliceable loaf.
For the best results, use the recommended pan size, measure carefully, and avoid adding extra water to the batter.
Ingredients
Yield: 1 loaf, approximately 8–10 slices | Prep: 10 minutes | Bake: 40–50 minutes | Oven: 375°F (190°C)
- 2 cups cooked chickpeas, drained and rinsed (approximately 330 g)
- 4 large eggs
- 1½ teaspoons baking powder
These three ingredients create the complete bread. You may use parchment paper to line the loaf pan without adding another food ingredient.
Instructions
- Preheat the oven. Set your oven to 375°F (190°C). Line an 8½ × 4½-inch loaf pan with parchment paper.
- Prepare the chickpeas. Drain and rinse the cooked chickpeas thoroughly. Let them sit in a colander for several minutes to remove excess moisture.
- Blend the chickpeas and eggs. Add the chickpeas and four eggs to a high-speed blender or food processor.
- Create a smooth batter. Blend for 1–2 minutes, scraping down the sides as needed, until the mixture becomes creamy and uniform.
- Add the baking powder. Add 1½ teaspoons baking powder and blend for another 10–15 seconds until combined.
- Fill the loaf pan. Pour the batter into the prepared pan and smooth the surface with a spatula.
- Bake the bread. Place the pan on the center oven rack and bake for 40–50 minutes, until the top turns lightly golden and a toothpick inserted into the center shows no wet batter.
- Cool the loaf. Rest the bread in the pan for 10–15 minutes, then transfer it to a wire rack.
- Slice and serve. Allow the bread to cool completely before cutting it into 8–10 slices. Enjoy plain, toasted, or with your favorite toppings.
Frequently Asked Questions
1. Is 3-Ingredient High-Protein Chickpea Bread gluten-free?
Yes, the recipe uses no wheat, barley, rye, or traditional flour. Chickpeas and eggs naturally contain no gluten. However, choose certified gluten-free baking powder and prevent cross-contact if you need to avoid gluten strictly.
2. Can I use canned chickpeas instead of cooking them from scratch?
Absolutely. Canned chickpeas work well and save preparation time. Simply drain, rinse, and dry them thoroughly before blending. Use approximately 330 grams of drained chickpeas, which usually requires a little more than one standard 15-ounce can.
3. Can I make this chickpea bread without eggs?
The original recipe relies on eggs for binding, moisture, and structure. Flax eggs or other substitutes may produce a very different texture, and they may not hold the loaf together reliably. For a dependable egg-free version, choose a recipe specifically developed without eggs.
4. Why does my chickpea bread turn out gummy in the middle?
Excess chickpea moisture, insufficient blending, underbaking, or slicing too early can cause a gummy center. Drain the chickpeas thoroughly, blend until smooth, bake until the center sets, and cool the loaf completely before slicing.
5. Can I freeze 3-Ingredient High-Protein Chickpea Bread?
Yes. Cool the loaf completely, cut it into individual slices, and place parchment paper between them. Store the slices in a freezer-safe container for up to two months. When needed, thaw them in the refrigerator or toast directly from frozen.
Conclusion
3-Ingredient High-Protein Chickpea Bread proves that homemade bread doesn’t need a long ingredient list or complicated preparation.
With cooked chickpeas, eggs, and baking powder, you can create a satisfying flourless loaf that offers protein, fiber, and versatile serving options.
The recipe works especially well for busy mornings, simple lunches, and make-ahead snacks. Plus, you can refrigerate or freeze individual slices for convenient meals throughout the week.
For the best texture, remember three essential details: drain the chickpeas thoroughly, blend the batter until completely smooth, and let the loaf cool before slicing.
Whether you enjoy it with avocado, hummus, eggs, or soup, this easy chickpea bread offers a practical way to add variety to your homemade meals.