Pineapple Coconut Celebration Cake: A Slice of Tropical Delight
There’s something magical about combining the sweet, tangy taste of pineapple with the creamy richness of coconut. Our Pineapple Coconut Celebration Cake is a testament to this beautiful fusion, offering a taste of the tropics wherever you are. With every bite, you’ll transport yourself to a sunny paradise. Feel free to subscribe to receive more delightful recipes like this one by email!
Why You’ll Love This Recipe
This cake is nothing short of amazing, blending the flavors of a tropical getaway into a moist, delectable treat. It’s both family-friendly and simple enough for even novice bakers to tackle, yet sophisticated enough to impress at any gathering. Its airy texture and rich cream cheese frosting make it a standout dessert that everyone will adore.
Ingredients
– 2 1/2 cups all-purpose flour
– 1 1/2 cups granulated sugar
– 1/2 cup unsalted butter, softened
– 1/2 cup vegetable oil
– 5 large eggs, room temperature
– 1 cup canned crushed pineapple, drained
– 1 cup sweetened shredded coconut
– 2 teaspoons baking powder
– 1/2 teaspoon baking soda
– 1/2 teaspoon salt
– 1 teaspoon vanilla extract
– 1/2 teaspoon coconut extract
For the Frosting:
– 1 cup unsalted butter, softened
– 8 ounces cream cheese, softened
– 4 cups powdered sugar, sifted
– 1 teaspoon vanilla extract
– 1/2 teaspoon coconut extract
– 1/4 cup crushed pineapple, drained
– 1/2 cup sweetened shredded coconut, for topping
Necessary Tools
– Three 8-inch round cake pans
– Mixing bowls
– Electric mixer
– Whisk
– Spatula
– Cooling rack
Ingredient Swaps and Additions
Feel free to experiment! Swap out the sweetened coconut for unsweetened if you prefer a more subtle sweetness or add some chopped nuts like pecans for an added crunch. For a unique twist, consider adding a splash of rum extract for an extra layer of tropical flavor.
Step-by-Step Instructions
1. Preheat your oven to 350°F (175°C). Prepare your cake pans by greasing and flouring them.
2. Whisk together the flour, baking powder, baking soda, and salt in a medium bowl.
3. In a large bowl, beat sugar, butter, and oil until light and fluffy. Add eggs one at a time, then incorporate the extracts.
4. Gradually add dry ingredients to wet, alternating with the crushed pineapple. Stir in shredded coconut.
5. Divide batter evenly among cake pans and bake for 25-30 minutes or until a toothpick comes out clean.
6. Cool cakes in pans for 10 minutes before transferring to a wire rack to cool completely.
7. For the frosting, beat butter and cream cheese until smooth. Gradually add powdered sugar, then add extracts and pineapple.
8. Layer the cakes with frosting, then cover the top and sides. Decorate with shredded coconut.
9. Chill for at least 30 minutes before serving.
Serving Suggestions
This cake pairs beautifully with a fresh fruit salad or a scoop of vanilla ice cream. For a drink, consider a refreshing glass of iced tea or a tropical cocktail.
Pro Tips for Success
– Make sure your butter and eggs are at room temperature for easy blending.
– Drain the pineapple thoroughly to prevent a soggy cake.
– Use a serrated knife for slicing to keep the cake’s layers intact.
**Storing and Reheating**
Store leftovers in an airtight container in the refrigerator for up to 5 days. To enjoy later, allow the cake to come to room temperature before serving.
FAQ Section
Q: Can I use fresh pineapple instead of canned?
A: Yes, fresh pineapple can be used but ensures it’s well-drained to avoid excess moisture.
Q: Can I freeze this cake?
A: Yes, you can freeze the cake layers (unfrosted) wrapped in plastic and foil for up to 2 months. Thaw and frost when ready to serve.
Conclusion
The Pineapple Coconut Celebration Cake is a heartwarming blend of flavors, perfect for any occasion. Its simplicity in preparation makes it a delightful project for bakers of all skill levels. Share your experience with this recipe by leaving reviews or tagging us on Pinterest or Instagram.
Nutritional Information (per serving)
– Calories: 560
– Protein: 5g
– Fat: 29g
– Carbohydrates: 71g
– Sugar: 55g
– Fiber: 1g
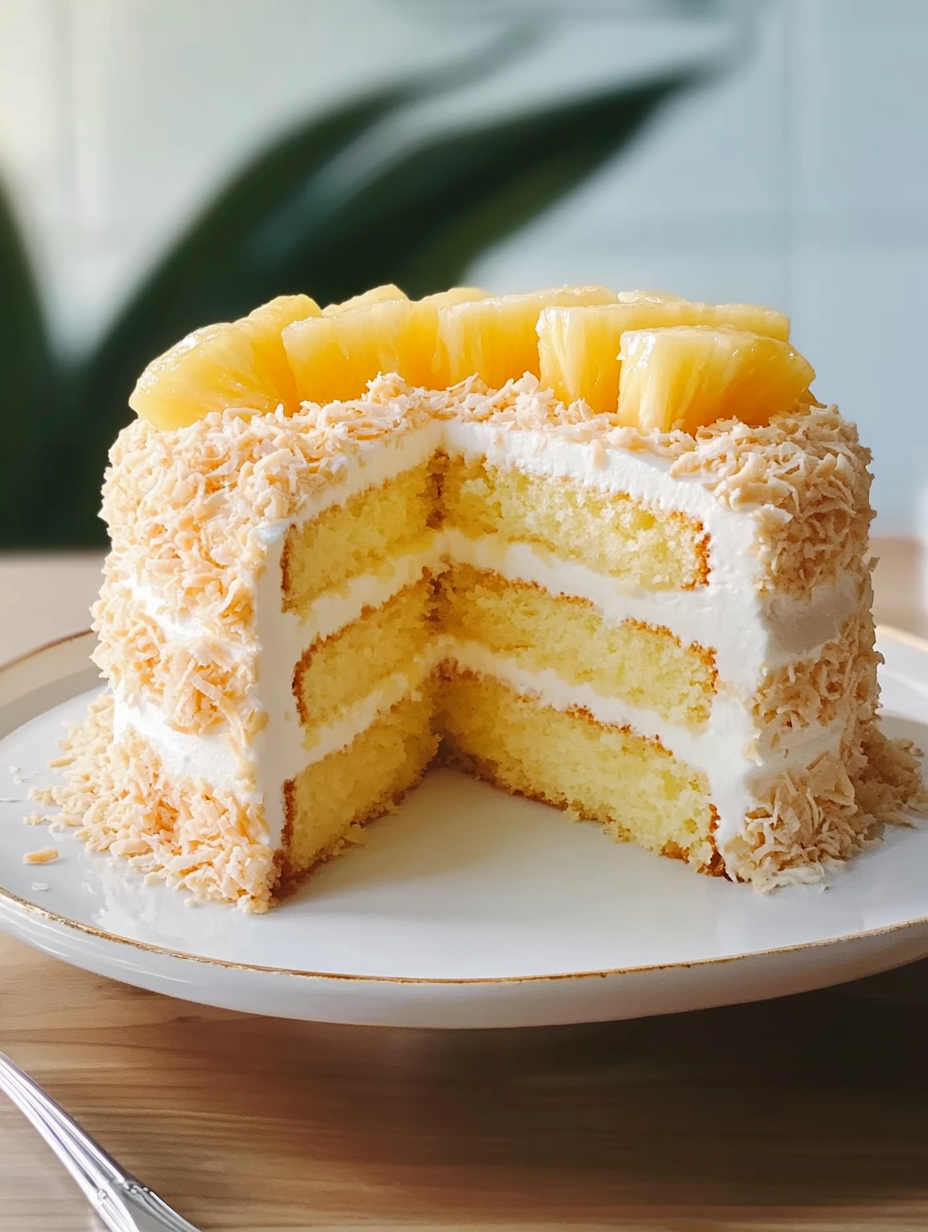
Pineapple Coconut Celebration Cake
Ingredients
Method
- Preheat your oven to 350°F (175°C). Prepare your cake pans by greasing and flouring them.
- In a medium bowl, whisk together the flour, baking powder, baking soda, and salt.
- In a large bowl, beat sugar, butter, and oil until light and fluffy. Add eggs one at a time, then incorporate the extracts.
- Gradually add dry ingredients to wet, alternating with the crushed pineapple. Stir in shredded coconut.
- Divide the batter evenly among the prepared cake pans.
- Bake for 25-30 minutes or until a toothpick comes out clean.
- Cool cakes in pans for 10 minutes before transferring to a wire rack to cool completely.
- For the frosting, beat butter and cream cheese until smooth.
- Gradually add powdered sugar, then add extracts and pineapple.
- Layer the cooled cakes with frosting, then cover the top and sides. Decorate with shredded coconut.
- Chill for at least 30 minutes before serving.