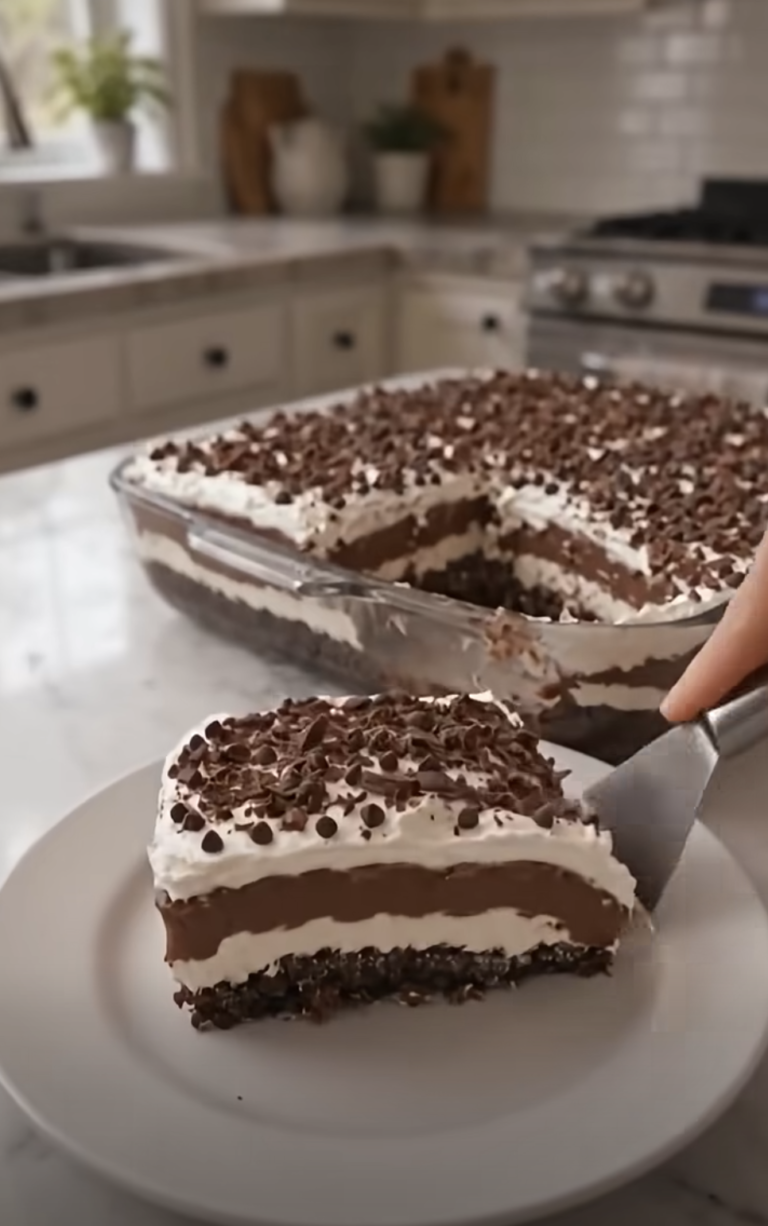
No-Bake Chocolate Peanut Butter Delight brings together a crunchy chocolate cookie crust, a smooth peanut butter cheesecake layer, silky chocolate pudding, and a fluffy whipped topping. Every bite combines chocolate, peanut butter, creaminess, and crunch, which makes this dessert especially satisfying without requiring any baking.
Because this No-Bake Chocolate Peanut Butter Delight needs several hours to chill, it works beautifully as a make-ahead dessert. You can assemble it the night before a party, holiday dinner, potluck, or family gathering and simply decorate it before serving.
The recipe also stays beginner-friendly. The crust takes only a few minutes to mix. The peanut butter filling comes together with cream cheese, powdered sugar, peanut butter, vanilla, and whipped topping. Then instant chocolate pudding creates an easy second layer without extra cooking.
For the best results, give the dessert at least four to six hours in the refrigerator. Overnight chilling works even better because the layers become firmer and easier to slice.
I first made a dessert like this when I needed something rich for a gathering but had no interest in turning on the oven. I had chocolate cookies, peanut butter, and cream cheese in the kitchen, so I layered them with chocolate pudding and whipped topping in a large dish. After chilling overnight, the dessert cut into neat squares with dark cookie crumbs on the bottom, a thick peanut butter center, and glossy chocolate pudding above it. The combination tasted like a chocolate-peanut butter candy bar transformed into a creamy dessert. Since then, I have kept the idea for occasions when I want something impressive but simple.
Why No-Bake Chocolate Peanut Butter Delight Works So Well
The Chocolate Cookie Crust Creates a Firm, Crunchy Base
The crust gives No-Bake Chocolate Peanut Butter Delight its first layer of texture and chocolate flavor.
You need two cups of chocolate cookie crumbs, one-half cup melted unsalted butter, and two tablespoons granulated sugar if you want a slightly sweeter crust.
The sugar is optional because many chocolate sandwich cookies and chocolate wafers already contain plenty of sweetness.
Start by crushing the cookies into fine crumbs.
A food processor makes this easy. However, you can also place the cookies in a sturdy zip-top bag and crush them with a rolling pin.
The finer the crumbs, the more evenly the crust will press into the pan.
Next, pour in the melted butter.
Stir until the crumbs look evenly moistened.
The mixture should resemble damp sand and hold together when you squeeze some between your fingers.
If you use the optional sugar, mix it in before pressing the crust.
Transfer the mixture to a 9-by-13-inch dish.
Then press the crumbs firmly into the bottom.
Use the flat bottom of a measuring cup, glass, or small bowl to compact the crust evenly.
This step helps prevent crumbling later.
Because No-Bake Chocolate Peanut Butter Delight does not go into the oven, chilling takes the place of baking.
Refrigerate the crust for about 20 minutes before adding the peanut butter layer.
As the butter cools, it firms and helps bind the cookie crumbs.
Therefore, do not rush directly into assembly.
A well-chilled crust gives the soft layers above it a stronger foundation.
For even more chocolate flavor, you can use chocolate sandwich cookies with their filling included.
However, plain chocolate wafer crumbs also work well.
Either way, keep the crumb layer even from edge to edge.
That creates balanced slices with crust in every bite.
Ingredients
Equipment
Method
- Combine the chocolate cookie crumbs, melted butter, and optional sugar until evenly moistened. Press firmly into the bottom of a 9-by-13-inch dish and refrigerate for 20 minutes.
- Beat the softened cream cheese and creamy peanut butter together until completely smooth and creamy.
- Add the powdered sugar and vanilla extract and beat for another 1 to 2 minutes until well combined.
- Gently fold 1 1/2 cups whipped topping into the peanut butter mixture until light and fluffy.
- Spread the peanut butter filling evenly over the chilled chocolate crust and refrigerate for about 15 minutes.
- Whisk the instant chocolate pudding mixes with the cold whole milk for about 2 minutes until thick and smooth. Let stand for about 5 minutes to thicken further.
- Carefully spread the chocolate pudding over the peanut butter layer, keeping the layers as distinct as possible. Refrigerate for another 15 minutes.
- Spread 2 1/2 cups whipped topping evenly over the chocolate pudding layer.
- Sprinkle the top with mini chocolate chips, chopped peanut butter cups, and optional roasted peanuts.
- Cover and refrigerate for at least 4 to 6 hours, preferably overnight, until completely set.
- Just before serving, drizzle with chocolate sauce and slightly warmed peanut butter. Cut into squares and serve chilled.
Notes
The Peanut Butter Cheesecake Layer Makes the Dessert Extra Creamy
The peanut butter layer gives No-Bake Chocolate Peanut Butter Delight its rich, creamy center.
It starts with eight ounces of softened cream cheese.
Softened cream cheese is important because cold cream cheese can leave small lumps in the filling.
Place the cream cheese in a large mixing bowl with three-quarters cup creamy peanut butter.
Beat them together until the mixture looks completely smooth.
Next, add three-quarters cup powdered sugar and one teaspoon vanilla extract.
Beat for another one to two minutes.
The powdered sugar sweetens the filling while also helping it stay smooth.
Then gently fold in 1 1/2 cups thawed whipped topping.
Do not beat aggressively after adding the whipped topping.
Instead, use a spatula and fold until no streaks remain.
This technique keeps the filling airy.
The result should look thick but fluffy.
Spread the peanut butter mixture over the chilled chocolate crust.
Use an offset spatula or the back of a large spoon to distribute it evenly.
Work slowly around the edges because you do not want to pull cookie crumbs into the peanut butter layer.
Once smooth, refrigerate the pan for about 15 minutes.
That short chill helps the peanut butter layer firm before the chocolate pudding goes on top.
No-Bake Chocolate Peanut Butter Delight benefits from these brief chilling periods between layers because each one creates a cleaner final appearance.
If you want even stronger peanut butter flavor, sprinkle a small handful of chopped peanut butter cups over this layer before adding the pudding.
However, keep the pieces small so the dessert still slices easily.
You can also add a pinch of salt to the filling if your peanut butter tastes especially sweet.
That tiny amount can sharpen the chocolate-peanut butter contrast.
How to Build the Chocolate Pudding and Topping Layers
Instant Chocolate Pudding Creates a Silky Middle Layer
The chocolate pudding layer makes No-Bake Chocolate Peanut Butter Delight taste rich without requiring melted chocolate or a cooked custard.
You need two 3.9-ounce packages of instant chocolate pudding mix and 3 1/4 cups cold whole milk.
Use cold milk because instant pudding thickens best when the liquid starts cold.
Pour the milk into a mixing bowl.
Then add both packages of pudding mix.
Whisk continuously for about two minutes.
At first, the mixture will look thin.
However, it will quickly become thicker and smoother.
After whisking, let the pudding stand for about five minutes.
This short rest allows it to thicken further.
The pudding should be spreadable rather than runny.
If it still looks loose, give it another few minutes.
Meanwhile, keep the peanut butter layer chilled.
Once the pudding reaches the right consistency, spoon it gently over the peanut butter filling.
Start with small spoonfuls across the surface instead of dumping all the pudding into the center.
Then spread carefully.
This method reduces pressure on the layer underneath and helps keep the layers separate.
Use a light hand with your spatula.
You want a smooth chocolate layer without dragging peanut butter into it.
After spreading the pudding evenly, refrigerate the dessert for another 15 minutes.
Again, that extra chilling time helps No-Bake Chocolate Peanut Butter Delight hold distinct layers.
The chocolate pudding also adds a softer texture that contrasts nicely with the dense peanut butter filling.
Together, the two layers create the classic flavor combination while keeping the dessert easy to eat.
If you want a darker chocolate profile, you can choose a dark chocolate instant pudding mix.
For a slightly sweeter flavor, standard milk chocolate pudding works too.
Still, regular chocolate pudding gives the most balanced result.
Whipped Topping and Candy Pieces Finish the Dessert
The final creamy layer of No-Bake Chocolate Peanut Butter Delight uses 2 1/2 cups thawed whipped topping.
Spread it evenly over the chilled chocolate pudding.
Use broad, gentle strokes so the pudding remains underneath.
The whipped topping adds lightness after the richer cheesecake and pudding layers.
Without it, the dessert could feel too dense.
Next, add the toppings.
Sprinkle one-half cup mini chocolate chips over the whipped layer.
Then add one-half cup chopped peanut butter cups.
If you want extra crunch, add one-quarter cup chopped roasted peanuts.
The peanuts are optional, but they provide a salty contrast that works especially well with the sweet chocolate and peanut butter.
For the best presentation, distribute the toppings evenly rather than concentrating them in the center.
That way, every square gets a little chocolate and peanut butter candy.
At this point, cover the dish and refrigerate it for at least four to six hours.
Overnight chilling gives No-Bake Chocolate Peanut Butter Delight the cleanest texture.
During that time, the peanut butter layer firms, the pudding sets fully, and the cookie crust becomes more stable.
Just before serving, drizzle chocolate sauce across the top.
Then warm a little peanut butter until it becomes pourable and drizzle that over the whipped topping as well.
Do not overheat the peanut butter.
You only need it soft enough to drizzle.
For a decorative look, alternate thin lines of chocolate sauce and peanut butter.
You can also use a spoon to create gentle swirls.
Add the sauces immediately before serving so the top looks fresh and glossy.
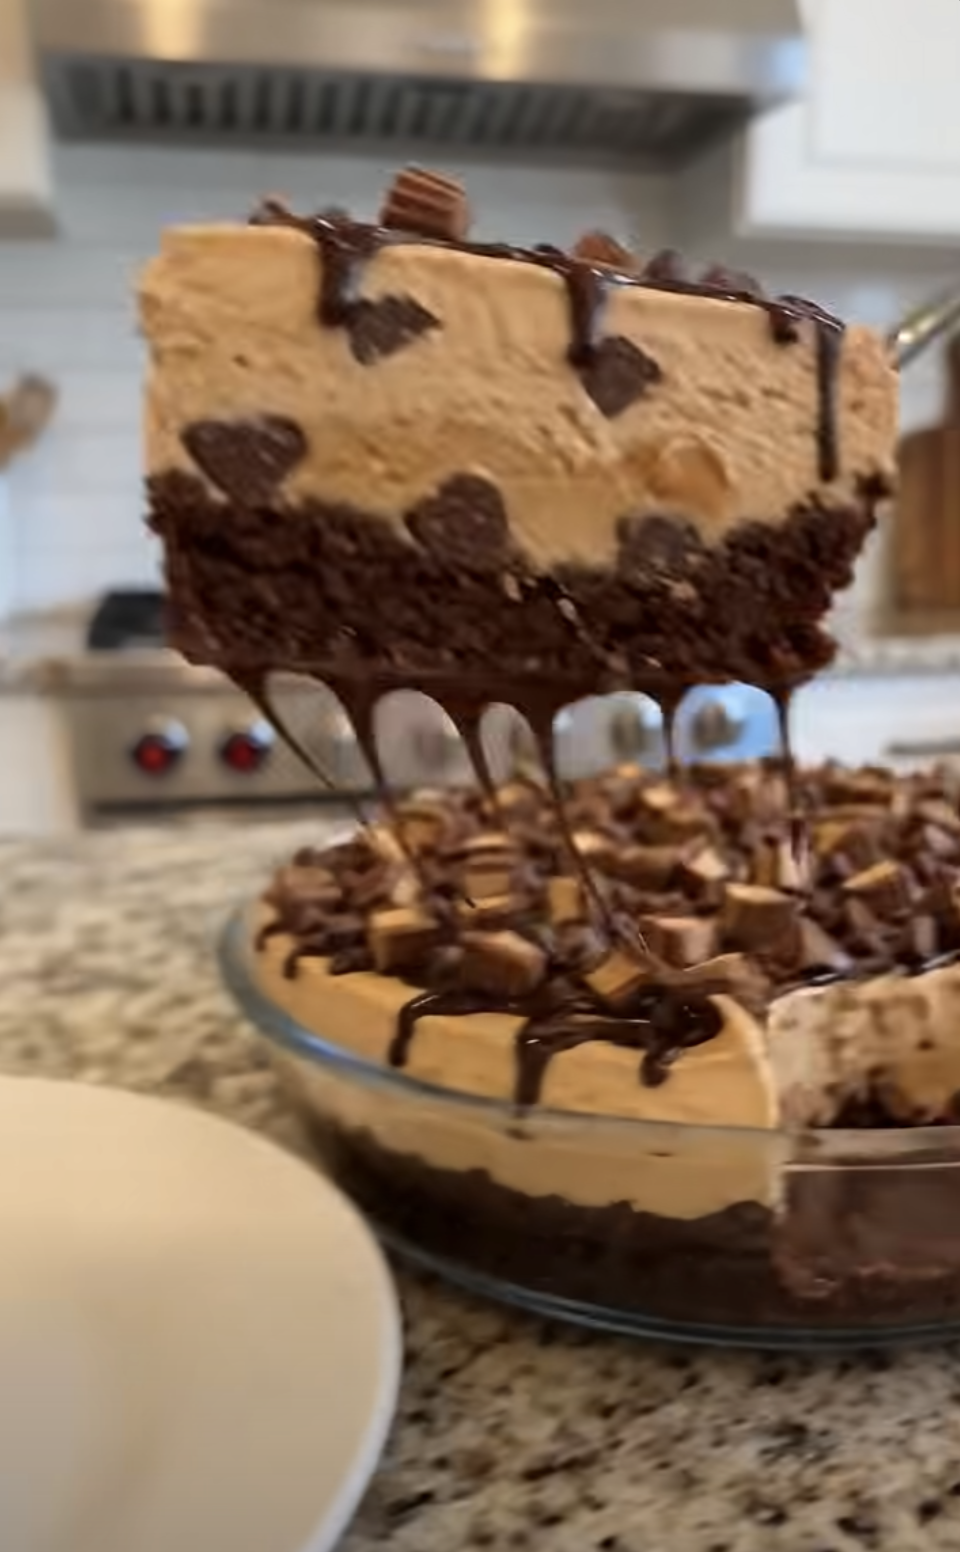
The final dessert should show several clear layers when sliced: dark chocolate crust, pale peanut butter filling, deep chocolate pudding, and white whipped topping with candy pieces.
How to Get Clean Layers and Perfect Slices
Chilling Time Makes a Major Difference
No-Bake Chocolate Peanut Butter Delight needs patience more than complicated technique.
Although you can assemble it quickly, the refrigerator does the final work.
A minimum of four to six hours gives the layers enough time to become firm.
However, overnight chilling produces the best slices.
If you cut the dessert too early, several problems can happen.
The pudding may still feel too soft.
The peanut butter filling may spread.
The whipped topping may shift.
Likewise, the cookie crust may crumble rather than lifting cleanly with each square.
Therefore, make the dessert ahead whenever possible.
A full night in the refrigerator also allows the chocolate and peanut butter flavors to blend.
The cookie crust softens just enough to cut easily while still keeping a slight crunch.
For especially neat portions, place the dessert in the coldest part of the refrigerator.
Keep it covered so it does not absorb other refrigerator odors.
Then, when you are ready to serve, use a sharp knife.
Wipe the blade clean between cuts.
Warm water can also help.
Dip the knife briefly into warm water, dry it completely, and make a clean cut.
Repeat as needed.
This technique prevents chocolate pudding and peanut butter filling from smearing across the layers.
An offset spatula or small dessert server makes lifting the first square much easier.
The first serving may not look perfect because it has less room to release from the pan.
However, the remaining pieces should lift more cleanly.
If presentation matters, cut the first square from a corner and treat it as the cook’s sample.
Then the rest of the No-Bake Chocolate Peanut Butter Delight can come out neatly.
Keep the Layers Distinct During Assembly
Distinct layers make No-Bake Chocolate Peanut Butter Delight especially attractive.
To achieve that look, treat each layer gently.
First, chill the crust before spreading the peanut butter filling.
Second, chill the peanut butter filling before adding the pudding.
Third, let the pudding thicken before spreading it.
Finally, chill the pudding briefly before adding the whipped topping.
These short waits may add a little time, but they greatly improve the final appearance.
Temperature also matters.
Make sure the cream cheese is softened before mixing, but do not let the finished peanut butter layer become warm.
Likewise, use cold milk for the pudding.
Cool ingredients help everything set more quickly.
When spreading each layer, start with small dollops across the surface.
Then connect them with gentle strokes.
If you place one large mound in the center, you may have to press too firmly to spread it toward the edges.
That pressure can disturb the layer underneath.
No-Bake Chocolate Peanut Butter Delight also slices better when the layers have similar thickness from one side of the dish to the other.
Therefore, look at the pan from several angles during assembly.
Smooth low spots and avoid building a thick center.
For the top, spread the whipped topping all the way to the edges.
Then add candy pieces before chilling.
Wait to drizzle the chocolate sauce and melted peanut butter until just before serving.
That final step keeps the sauces from soaking into the topping or losing their glossy appearance.
If you want even more contrast, reserve a few chocolate cookie crumbs and sprinkle them lightly across the top with the candy pieces.
However, do not overload the surface.
A few carefully chosen toppings make the layers underneath stand out even more.
Variations, Storage, and Serving Ideas
Customize No-Bake Chocolate Peanut Butter Delight Easily
One of the best things about No-Bake Chocolate Peanut Butter Delight is how easy it is to customize.
For stronger peanut butter flavor, add chopped peanut butter cups between the cheesecake and pudding layers.
A thin layer works best.
Too many candy pieces can make slicing difficult.
For extra chocolate flavor, scatter a small amount of mini chocolate chips over the peanut butter filling before adding the pudding.
You can also replace some of the chocolate pudding with dark chocolate pudding for a deeper flavor.
If you enjoy salty-sweet desserts, increase the chopped roasted peanuts slightly.
Salted peanuts work particularly well because they balance the sweetness of the pudding and whipped topping.
For a smoother dessert, leave the peanuts out completely.
You can also add a small pinch of flaky salt over the top immediately before serving.
Another variation uses crunchy peanut butter instead of creamy peanut butter.
That adds texture to the cheesecake layer.
However, the filling will not look quite as smooth.
For the cleanest appearance, creamy peanut butter remains the best option.
You can also make individual servings.
Press a small amount of cookie crust into clear cups or jars.
Then layer peanut butter filling, pudding, whipped topping, and candy pieces.
Individual portions work especially well for parties because guests can grab a serving without cutting the dessert.
No-Bake Chocolate Peanut Butter Delight can also become a holiday dessert with simple decoration changes.
Use chocolate curls for a more elegant appearance.
Add seasonal sprinkles for casual gatherings.
Or top each square with half of a peanut butter cup.
Whatever variation you choose, keep the chocolate and peanut butter flavors balanced.
The dessert tastes best when neither one completely overwhelms the other.
Store Leftovers Properly for the Best Texture
Store No-Bake Chocolate Peanut Butter Delight covered in the refrigerator.
For best quality, enjoy it within four days.
Because the dessert contains cream cheese, pudding, milk, and whipped topping, it should remain chilled.
Do not leave the full pan sitting at room temperature for long periods.
Instead, serve portions and return the remaining dessert to the refrigerator.
The texture may change slightly over several days.
The cookie crust becomes softer as it absorbs moisture.
The candy pieces on top may also lose some crunch.
However, the flavor remains delicious when stored properly.
If you expect leftovers, reserve some chopped peanuts, mini chocolate chips, and peanut butter cups separately.
Then add fresh toppings to each serving.
This helps restore texture.
You can also wait to drizzle chocolate sauce and peanut butter over the entire pan until just before serving.
If you know you will only serve part of the dessert, drizzle individual squares instead.
Freezing No-Bake Chocolate Peanut Butter Delight is possible, but the texture may change after thawing.
The whipped topping and pudding can become slightly softer or release moisture.
Therefore, refrigeration gives the best overall result.
If you do freeze portions, wrap them carefully.
Thaw them overnight in the refrigerator rather than at room temperature.
Then add fresh toppings after thawing.
Serve the dessert cold.
It pairs especially well with coffee, milk, or a simple cup of hot tea.
Because the flavors are rich, smaller squares often feel satisfying.
For a party, cut the pan into 15 or 18 portions.
For a family dessert, larger squares work well.
No matter how you serve it, the combination of chocolate cookie crust, peanut butter filling, pudding, whipped topping, and candy pieces makes every layer count.
Frequently Asked Questions
Can I make No-Bake Chocolate Peanut Butter Delight the day before?
Yes. Overnight chilling actually gives the dessert a firmer texture and cleaner layers. Assemble it completely, cover it, refrigerate overnight, and add the chocolate and peanut butter drizzles just before serving.
Can I use crunchy peanut butter instead of creamy peanut butter?
Yes. Crunchy peanut butter adds extra texture to the cheesecake layer. However, creamy peanut butter produces a smoother filling and cleaner appearance.
Why is my chocolate pudding layer too soft?
Make sure you use instant pudding mix and cold whole milk. Whisk for about two minutes and let the pudding stand for about five minutes before spreading it over the peanut butter layer.
Can I use homemade whipped cream instead of whipped topping?
Yes. Stabilized homemade whipped cream works well. Regular homemade whipped cream may soften faster over several days, so whipped topping can provide a slightly more stable make-ahead result.
How long does No-Bake Chocolate Peanut Butter Delight last?
Keep the dessert covered in the refrigerator for up to four days. For the best texture, serve it during the first two to three days.
Conclusion
No-Bake Chocolate Peanut Butter Delight combines several classic dessert flavors in one easy layered dish.
The chocolate cookie crust provides a firm, crunchy base.
The peanut butter cheesecake layer adds richness and creaminess.
Chocolate pudding brings a smooth, silky texture.
Then whipped topping keeps the dessert light enough to balance the richer layers.
Finally, mini chocolate chips, chopped peanut butter cups, peanuts, chocolate sauce, and melted peanut butter make every serving look and taste extra indulgent.
Because No-Bake Chocolate Peanut Butter Delight requires no oven, it works especially well when you want a simple dessert that still looks impressive.
Most of the preparation involves mixing and layering.
Then the refrigerator handles the rest.
For the best results, chill the crust before adding the filling.
Give the peanut butter layer time to firm.
Let the pudding thicken before spreading it.
Then refrigerate the finished dessert for at least four to six hours.
Overnight chilling works even better.
Also, remember that clean slicing starts with patience.
Use a sharp knife and wipe it between cuts.
If needed, warm the knife slightly before each slice.
You can customize the dessert with extra candy pieces, dark chocolate pudding, crunchy peanut butter, or roasted peanuts.
However, the basic combination already delivers everything this dessert needs.
No-Bake Chocolate Peanut Butter Delight is creamy, crunchy, chocolaty, nutty, and easy to prepare ahead.
Serve it cold, drizzle it just before serving, and enjoy a dessert that tastes much more complicated than it actually is.