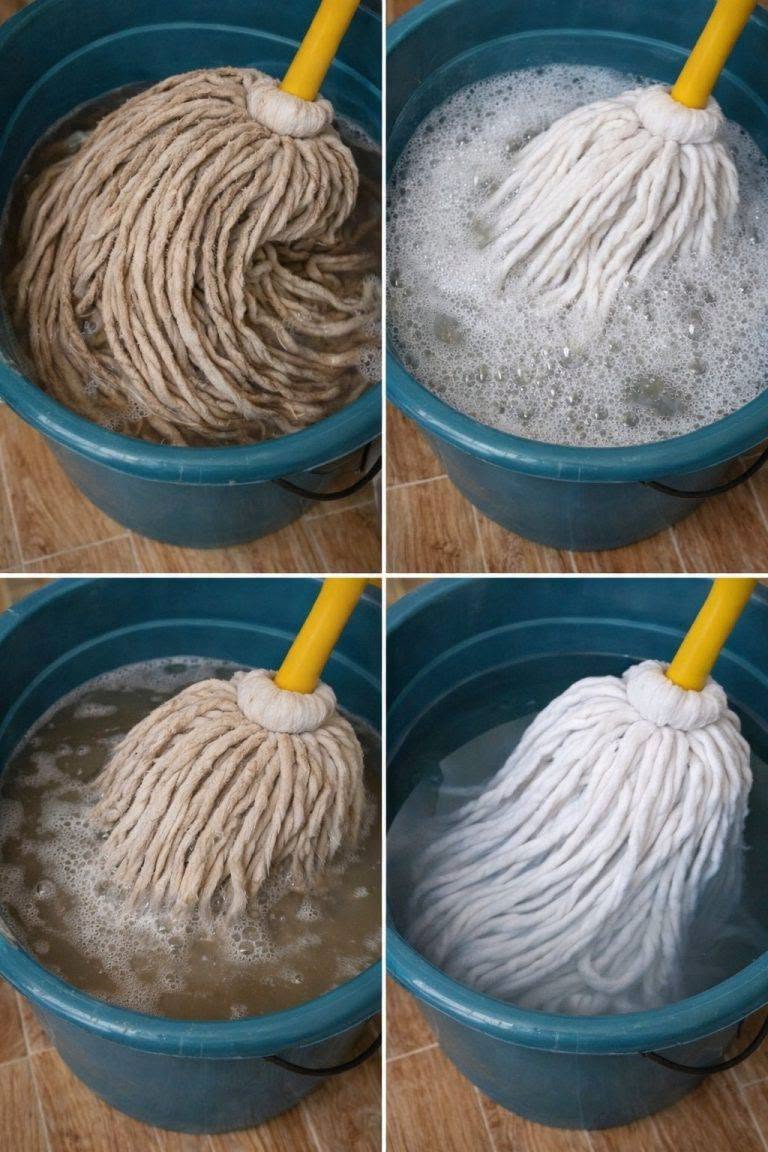
Have you ever looked at your mop after a long cleaning session and thought, “How is that supposed to clean my floors?”
A mop can collect dirt, grease, hair, dust, and microorganisms every time it is used. If it isn’t rinsed and dried properly, it can eventually develop an unpleasant odor and become less effective.
But before you throw it away, take a closer look.
In many cases, a dirty mop doesn’t need to be replaced. It simply needs to be cleaned properly.
And the good news is that mop care doesn’t have to be complicated or expensive.
The Simple Ingredients for a Cleaner Mop
You don’t need a cabinet full of specialty cleaning products.
For routine mop care, you can usually work with:
- Warm or hot water: Helps loosen dirt and residue.
- Mild laundry detergent or dish soap: Useful for removing grease and grime from washable mop heads.
- White vinegar: Can help with mineral deposits and lingering odors, although it should not be treated as a disinfectant.
- A clean bucket or sink: For soaking and rinsing the mop head.
- A well-ventilated place to dry: Essential for preventing lingering dampness and odors.
Always check the manufacturer’s instructions first. Some mop heads can be machine-washed, while others should only be hand-washed.
Why Cleaning Your Mop Matters
Think about everything your mop encounters.
It may pick up crumbs from the kitchen, muddy footprints from the hallway, dust from the living room, and spills from the bathroom.
If the mop head remains dirty and damp after cleaning, you’re allowing that residue to remain trapped in the fibers.
Then, the next time you mop, some of that buildup can be transferred back onto the floor.
That’s why cleaning the mop itself is an important part of cleaning your home.
A properly maintained mop can:
- Remove dirt more effectively
- Reduce unpleasant odors
- Prevent buildup in the mop fibers
- Help keep floors cleaner
- Extend the useful life of the mop head
- Reduce unnecessary replacement costs
Step-by-Step: How to Deep-Clean a Washable Mop Head
Step 1: Remove Loose Debris
Before washing the mop, remove visible hair, lint, food particles, and other debris.
If the mop head is removable, take it off the handle whenever the manufacturer’s instructions allow it.
This makes cleaning much easier.
Step 2: Rinse Thoroughly
Place the mop head under running water or rinse it in a clean bucket.
Keep rinsing until most of the visible dirt and cleaning residue has been removed.
This step is important because you don’t want to trap large amounts of grime in the mop during the washing process.
Step 3: Wash With Mild Detergent
Fill a clean bucket or sink with warm water and add a small amount of mild detergent.
Agitate or soak the mop head according to its care instructions.
For heavily soiled washable mop heads, gently work the fibers with your hands while wearing household gloves.
The goal is to loosen grease and dirt without damaging the material.
Step 4: Rinse Until the Water Runs Clear
This is one of the most important steps.
Rinse the mop thoroughly with clean water.
Keep going until the water is relatively clear and you no longer feel a slippery layer of detergent on the fibers.
Leftover detergent can attract dirt and leave residue on your floor.
Step 5: Use Vinegar Only When Appropriate
If mineral deposits or persistent odors are a problem, a diluted vinegar rinse may be useful for some washable mop materials.
However, vinegar is not a substitute for a disinfectant.
More importantly, never mix vinegar with chlorine bleach or other incompatible cleaning chemicals.
If your mop manufacturer recommends against vinegar, simply skip this step.
Step 6: Dry It Completely
This is arguably the most important part of mop care.
Don’t leave a freshly washed mop sitting in a bucket or bunched up in a corner.
Hang it somewhere with good airflow and allow it to dry completely.
A damp mop provides a much better environment for unpleasant odors and microbial growth than a clean, dry one.
Whenever possible, allow the mop head to dry in a well-ventilated area.
What About Baking Soda?
Baking soda is useful for many household cleaning jobs, but you don’t need to combine it with vinegar to clean your mop.
When vinegar and baking soda are mixed, they react and largely neutralize each other.
For ordinary mop cleaning, you’re better off using a suitable detergent and plenty of clean water.
If you have a particular odor problem, address the cause rather than simply covering it with fragrance.
What About Hydrogen Peroxide?
Three-percent hydrogen peroxide can be useful for certain household cleaning applications, but it isn’t necessary for routine mop washing.
More importantly, don’t create homemade mixtures by combining hydrogen peroxide with vinegar or other cleaning chemicals.
Some combinations can create irritating or hazardous substances.
When it comes to cleaning products, simpler is often safer.
What About Essential Oils?
Essential oils may make a mop smell pleasant, but fragrance isn’t the same thing as cleaning or disinfecting.
You don’t need essential oils to maintain a hygienic mop.
If you enjoy the scent, use products according to their labels and make sure they’re compatible with the mop material and flooring you are cleaning.
When Should You Replace Your Mop?
Cleaning can extend the life of a mop, but nothing lasts forever.
Consider replacing the mop head when:
- The fibers are badly worn or falling apart
- It remains unpleasantly smelly after thorough washing and drying
- The material no longer absorbs or picks up dirt properly
- It has become permanently stained or damaged
- The manufacturer recommends replacement
A mop that has reached the end of its useful life isn’t worth trying to rescue indefinitely.
A Simple Routine That Keeps Your Mop Fresh
You don’t have to wait until your mop becomes visibly filthy.
After each use:
- Remove loose debris.
- Rinse the mop thoroughly.
- Wash it when necessary with an appropriate detergent.
- Squeeze or wring out excess water.
- Hang it so air can circulate around it.
- Let it dry completely before storing it.
For removable microfiber mop heads, check the care label. Many can be machine-washed, which can make regular maintenance much easier.
One Important Rule: Never Mix Cleaning Chemicals
This deserves repeating.
Don’t experiment by combining different cleaning products just because they’re all individually useful.
In particular, never mix chlorine bleach with vinegar, ammonia, or other household cleaners.
Also avoid mixing hydrogen peroxide with vinegar.
Using one appropriate product at a time and following its instructions is a much safer approach.
The Bottom Line
A dirty mop doesn’t necessarily belong in the trash.
In many cases, the mop head can be brought back to life with a thorough rinse, mild detergent, careful washing, and — most importantly — complete drying.
You don’t need a mysterious “magic drop” or a complicated homemade chemical mixture.
The real secret is surprisingly simple:
Clean the mop after use, rinse it thoroughly, and let it dry completely.
Take care of the tool that cleans your floors, and it can continue doing its job effectively for much longer.
More Home Remedies
- Wrinkled Fingers After Water Exposure: What Your Skin May Be Telling You
- Skin Rash With Breathing Trouble? It Could Be a Life-Threatening Allergic Reaction
- I Thought It Was a Piece of Trash on the Bathroom Floor—Until It Moved
- If You Are Getting White Pimples on Your Lips or Intimate Area, Here’s What They Could Mean