Hey there, curious creator! 🌋 If you’re looking for a quick, exciting science experiment that’s full of fizz, color, and joy—you’re going to love this one. Today we’re making a Mini Volcano Eruption with just a few kitchen staples!
This classic activity is always a hit with kids, from toddlers to tweens. It’s a fantastic way to explore chemical reactions, get hands-on with learning, and—let’s be real—watch something bubble and explode in a totally fun (and safe!) way.
💌 Want more fun science experiments like this delivered straight to your inbox? Be sure to subscribe and keep the discovery going!
What Is a Mini Volcano?
A mini volcano is a hands-on science experiment that mimics a real volcanic eruption using a simple acid-base reaction. When you combine baking soda (a base) with vinegar (an acid), you get a fizzy explosion of bubbles—just like lava bursting from a volcano!
It’s quick, inexpensive, and perfect for indoor or outdoor fun.

Why You’ll Love This Experiment
-
Only 3 ingredients—most of which are already in your kitchen
-
Safe, simple, and totally engaging
-
A great intro to chemistry for kids
-
Customizable with colors, variations, and fun themes
-
Quick cleanup and minimal prep
-
Perfect for rainy days, backyard play, or science-themed parties!
Ingredients
Here’s what you need to make your volcano erupt:
-
1 plastic or paper cup
-
2 tablespoons baking soda
-
Vinegar (any kind will work!)
-
Food coloring (optional—but highly recommended for visual impact)
Tools You’ll Need
-
A spoon for scooping
-
Tray or shallow dish to catch the fizz
-
Measuring spoon
-
Optional: dropper or small pitcher for pouring vinegar
Step-by-Step Instructions
1. Set Up Your Eruption Zone
Place your plastic or paper cup on a tray or baking dish. This helps keep the mess contained and makes cleanup easy.
2. Add Baking Soda
Measure out 2 tablespoons of baking soda and pour it into the cup. This is your volcano’s “lava chamber.”
3. Add Color (Optional but Awesome!)
Add a few drops of food coloring to the baking soda for a colorful eruption. Red is classic “lava,” but feel free to experiment with blues, greens, purples—whatever sparks your imagination!
4. Pour the Vinegar
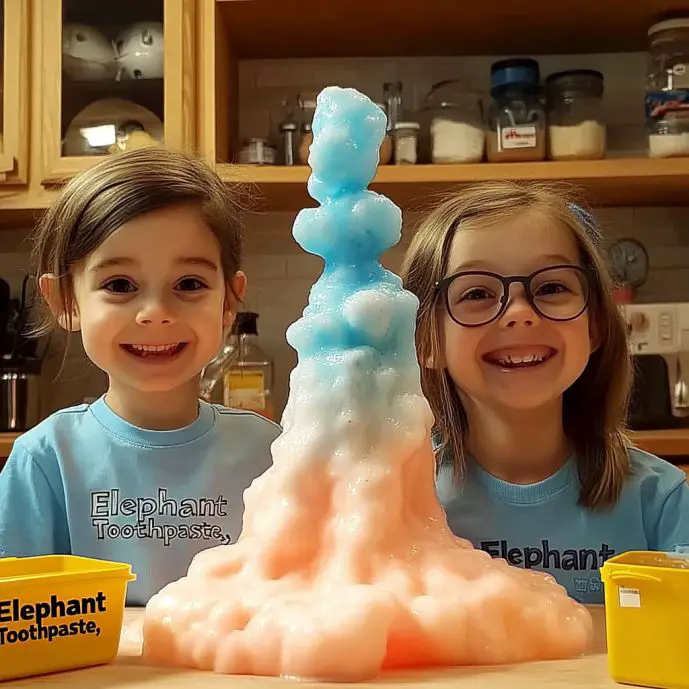
Now the fun begins! Slowly pour vinegar into the cup and watch the bubbly eruption begin. The mixture will foam up and overflow, fizzing like a real volcanic blast!
Tip: Pour a little at a time to make the reaction last longer—or dump it all in at once for a big, bold explosion!
5. Enjoy and Explore
Watch, giggle, and get curious. Try again with different colors, more baking soda, or a different type of vinegar. What changes? What stays the same?
Tips & Variations
-
🌈 Color Mixing: Add two colors and swirl them together for tie-dye eruptions!
-
🍎 Different Vinegars: Test apple cider, white vinegar, or cleaning vinegar—see how each one affects the reaction.
-
🧼 Add a squirt of dish soap to make your lava extra foamy and frothy.
-
🏔️ Make a volcano mountain: Build a cone around your cup with play dough or clay for a realistic volcano look.
-
🔬 Make it a science lesson: Have kids predict what will happen before adding the vinegar, and discuss the chemical reaction afterward.
Science Behind the Eruption
This experiment is a classic example of an acid-base reaction. When vinegar (acetic acid) meets baking soda (sodium bicarbonate), they react to form carbon dioxide gas—which bubbles up and escapes, creating all that fun fizz and foam.
Science + fun = the perfect learning combo!
Frequently Asked Questions (FAQ)
Can I do this indoors?
Absolutely! Just use a tray or do it in the kitchen or bathtub to catch the mess.
Is it safe for toddlers?
Yes! It’s non-toxic and safe with supervision. Just be mindful of small items and cleanup after.
How long does it take?
The setup takes 2 minutes, and the eruption is instant once you add vinegar.
Can I store leftover ingredients?
Definitely—just keep your baking soda and vinegar sealed and dry for the next time.

Conclusion
This Mini Volcano Eruption is a fun, fizzy reminder that learning can be magical. Whether you’re entertaining kids on a rainy day, spicing up a homeschool science lesson, or just looking for some giggle-worthy kitchen science, this experiment never disappoints.
Simple ingredients, big reactions, and endless smiles? That’s a win in my book. 🌋💛
More Hands-On Science Fun
-
Baking Soda Balloon Blast
-
Salt Volcano Eruption
-
Magic Milk Color Explosion
-
DIY Slime Lab
-
Rainbow Walking Water
Show Me Your Eruptions!
Tried this experiment? I’d love to see your bubbly volcanoes in action! Tag your photos on Pinterest or social media with #FizzAndFun and let’s keep the science joy flowing!
Approximate Cost Per Eruption
$1–$2, depending on what’s already in your pantry.
Thanks for exploring with me today. Until next time—stay curious, keep experimenting, and always make room for a little wonder. 🧪✨
Need a printable version of this experiment for a classroom or science party? Just say the word!

Mini Volcano Eruption
Ingredients
For the volcano
- 1 cup plastic or paper cup Any size cup will work.
- 2 tablespoons baking soda This will form the volcano's 'lava chamber.'
- to taste vinegar Any kind will work!
- a few drops food coloring Optional, but recommended for visual impact.
Tools
- 1 spoon spoon For scooping baking soda.
- 1 tray tray or shallow dish To catch the fizz.
- 1 measuring spoon measuring spoon For measuring the baking soda.
- 1 dropper or small pitcher Optional, for pouring vinegar.
Instructions
Setup
- Place your plastic or paper cup on a tray or baking dish to contain the mess.
Prepare the Volcano
- Measure out 2 tablespoons of baking soda and pour it into the cup.
- Add a few drops of food coloring to the baking soda for a colorful eruption.
Eruption
- Slowly pour vinegar into the cup and watch the bubbly eruption begin. The mixture will foam up and overflow.
- Pour a little vinegar at a time to extend the reaction or dump it all in for a big explosion!
Experience
- Enjoy watching the eruption, and try variations with different colors or amounts of baking soda.
Notes
Nutrition
Mini Volcano Eruption
Ingredients
Main ingredients
- 1 cup plastic or paper cup For holding the eruption.
- 2 tablespoons baking soda This is your volcano’s 'lava chamber.'
- Vinegar (any kind will work!) To create the explosive reaction.
- Food coloring Optional but highly recommended for visual impact.
Tools
- 1 spoon For scooping.
- 1 tray or shallow dish To catch the fizz.
- 1 tablespoon measuring spoon For measuring ingredients.
- 1 optional dropper or small pitcher For pouring vinegar.
Instructions
Setup
- Place your plastic or paper cup on a tray or baking dish to keep the mess contained.
Preparation
- Measure out 2 tablespoons of baking soda and pour it into the cup.
- Add a few drops of food coloring to the baking soda for a colorful eruption.
- Slowly pour vinegar into the cup and watch the bubbly eruption start.
- Tip: Pour a little at a time for a prolonged reaction or dump it all at once for a big explosion.
Exploration
- Watch, giggle, and get curious. Experiment with different colors and amounts.
Notes
Nutrition
More Craft Innovations
- I Found a Strange Growth on My Garage Wall—What It Revealed About Hidden Moisture
- After a Decade Together, She Discovered the True Value of Her Contributions
- My Daughter Disappeared After Prom Night—Almost a Year Later, an Ordinary Beanbag Chair Revealed the Truth
- Stop Your Bed Sheets From Balling Up in the Dryer: Simple Tricks That Actually Work