Introduction
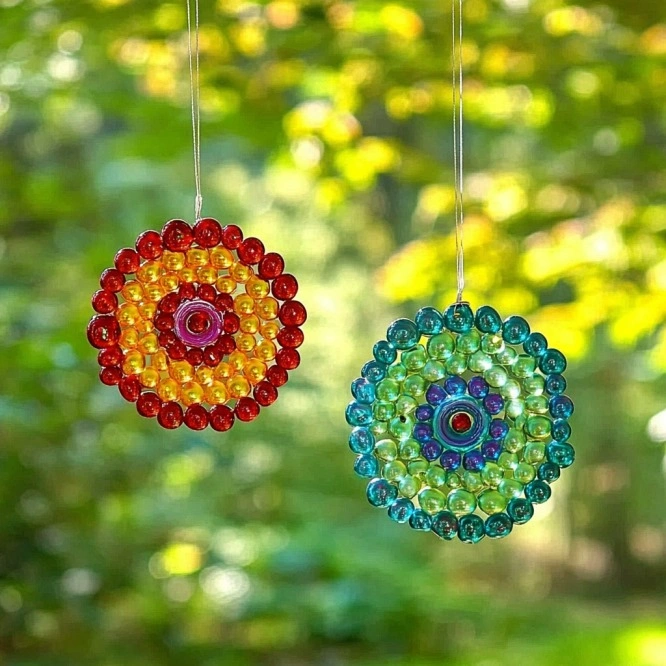
If you’re searching for a creative and visually captivating DIY project, melted bead suncatchers are the perfect choice! These colorful creations not only brighten up any room but also bring an extra spark of creativity to your day. Whether you’re looking for a fun kids’ craft or a charming addition to your home decor, making suncatchers from faceted acrylic beads is a simple and enjoyable activity. So, let’s dive into how you can create these dazzling suncatchers that will shine with beauty and sparkle all year round!

Why You’ll Love This Recipe
Creating melted bead suncatchers is an incredibly satisfying craft project that’s easy to do with minimal supplies. The best part? This craft can be enjoyed by all ages, making it a fantastic activity for kids and adults alike. The mesmerizing colors and patterns formed by the beads as they melt together create an impressive display of light when hung by a window. Not only do these suncatchers look beautiful, but they are also customizable—feel free to experiment with different shapes, colors, and sizes to make them uniquely yours!
Additionally, this is a low-cost and safe project that requires only a few basic tools and ingredients, and the result is a stunning piece of art that adds a cheerful touch to any room. Whether you hang them in your home, classroom, or use them as a gift, these suncatchers are sure to impress. Plus, it’s a great way to teach children about basic science concepts like melting and color mixing while having fun!
Ingredients
To create your own dazzling melted bead suncatchers, you’ll need the following simple ingredients:
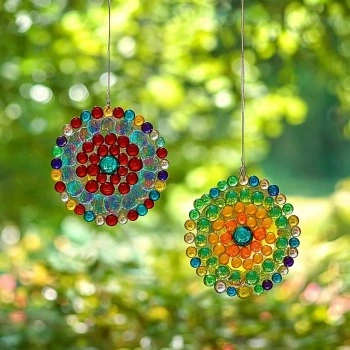
- Faceted acrylic beads (8mm) — These beads come in a variety of colors and shapes, perfect for making colorful patterns. Be sure to use faceted beads for extra sparkle!
- Fishing line — This strong, clear line will help you hang your suncatcher once it’s completed.
- Suction cup — You’ll need this to hang your suncatcher on a window or other smooth surface.
Necessary Tools
Before you start, make sure you have these tools on hand:
- Silicone mold — This will help you shape the melted beads into the perfect suncatcher.
- Toaster oven — A small oven is ideal for melting the beads without overheating your kitchen.
- Baking tray — Use this to place your silicone mold in the toaster oven.
- Scissors — For cutting the fishing line once your suncatcher is ready to hang.
Ingredient Swaps and Additions
While the basic ingredients for a melted bead suncatcher are simple, there are plenty of ways you can customize your design:
- Food coloring — Add a few drops to the melted beads to create multi-colored suncatchers.
- Eco-glitter — For a more sparkly, magical effect, sprinkle some eco-friendly glitter into your mold before baking.
- Mini charms or small crystals — Include extra elements for a unique twist on the design. These will melt with the beads and create beautiful texture and depth.
Step-by-Step Instructions
Step 1: Prepare the Mold
Start by preparing your silicone mold. Carefully add the faceted acrylic beads, arranging them around the edges and filling the inside with a colorful pattern. Make sure that the beads are close enough to each other so that they melt together and form a solid piece once baked. Play with different color combinations to create eye-catching designs!
Step 2: Preheat the Toaster Oven
Next, preheat your toaster oven to 350°F (175°C). Make sure to place the toaster oven outside or in a well-ventilated area to avoid any strong odors or smoke that may occur during baking.
Step 3: Bake the Beads
Once your oven is ready, place your silicone mold on a baking tray and slide it into the toaster oven. Bake for about 10–15 minutes. Keep an eye on the beads while they melt. The goal is for them to fuse together into a cohesive suncatcher, but you don’t want them to burn or over-melt.
Step 4: Cooling
After baking, carefully remove the tray from the toaster oven and allow the suncatcher to cool for about 10 minutes. The mold will be hot, so be cautious when handling it.
Step 5: Attach the Fishing Line
Once your suncatcher has cooled, cut a piece of fishing line about 8 inches long. Thread the fishing line through a hole in the melted beads and tie a secure knot to hold the suncatcher in place.
Step 6: Hang Your Suncatcher
Finally, attach the other end of the fishing line over a suction cup hook, ensuring it’s securely fastened. Now you’re ready to hang your beautiful new suncatcher on a window or any smooth surface where it can catch the light and sparkle!
Pro Tips for Success
- Don’t overcrowd your mold: Leave some space between the beads so they can melt and form a smooth, cohesive piece.
- Use a toaster oven: A regular oven can get too hot for this project, and you may risk burning your beads. A toaster oven is more controlled and ideal for small projects like this.
- Monitor the melting process: Check on your suncatcher every few minutes to ensure the beads don’t over-melt or burn.
Serving Suggestions
These suncatchers are perfect as a fun craft activity at parties, playdates, or school projects. They make excellent decorations for a children’s room or can be gifted to friends and family as handmade gifts. You can also make several in different colors and hang them together for a stunning display.
Storing and Reheating
Suncatchers are meant to be displayed, but if you want to store them for later use or transport, make sure to keep them in a safe, padded container where they won’t get scratched. If they get dirty, gently wipe them with a damp cloth.
Nutritional Information
While this project doesn’t have a nutritional value, it’s a great opportunity for children to explore basic science concepts such as melting points, color mixing, and the cause-and-effect relationship between heat and materials.
FAQs
- Can I use regular plastic beads instead of acrylic beads?
It’s recommended to use acrylic beads for this project because they melt easily and create a smooth, glossy finish. - What if I don’t have a toaster oven?
You can use a conventional oven, but you must be extra careful with the temperature and check the beads often to avoid over-melting. - Can I use other materials in the mold, like small figurines or buttons?
Yes, feel free to add small, heat-resistant materials into the mold. Just ensure they fit and melt properly with the beads. - What’s the best way to clean my suncatcher after it’s been outside?
Clean it with a soft cloth and mild soap if necessary. Avoid using abrasive materials that could scratch the surface. - Can I create larger suncatchers?
Absolutely! You can scale up the mold size and add more beads for larger designs.
Conclusion
Melted bead suncatchers are an enjoyable, simple, and customizable DIY craft that brings vibrant colors and personality to your home. Perfect for kids and adults alike, this project is an excellent way to explore creativity and learn new things while having fun! Whether you’re a beginner or a seasoned crafter, these suncatchers are sure to add a touch of magic to any space. Don’t forget to experiment with colors, patterns, and additional fun elements like glitter or small charms to make your suncatcher truly unique.