Homemade Coconut Chocolate Bars are the perfect no-bake dessert for coconut lovers who crave a rich chocolate coating with a soft, creamy center. These easy bars come together with simple pantry ingredients, yet they taste like a bakery-style candy treat. Every bite delivers sweet coconut flavor wrapped in smooth melted chocolate, making them ideal for holidays, snack trays, or quick desserts.
Unlike store-bought candy bars, these Homemade Coconut Chocolate Bars let you control the ingredients and sweetness while creating a fresher, more satisfying dessert at home. They require minimal preparation, no complicated baking techniques, and very little cleanup. Whether you need a fast dessert for guests or a sweet snack for the week, these bars fit perfectly.
One rainy afternoon, I wanted something sweet but simple without turning on the oven. I found shredded coconut and condensed milk in the pantry and decided to recreate the coconut chocolate bars I used to love as a child. The mixture came together quickly, and after dipping the chilled coconut bars into melted chocolate, they looked just like homemade candy shop treats. Everyone in the house grabbed one straight from the tray before they even fully set. Since then, these Homemade Coconut Chocolate Bars have become a regular weekend dessert because they are easy, affordable, and always disappear fast.
Why Homemade Coconut Chocolate Bars Are So Popular
Rich Coconut Flavor in Every Bite
Homemade Coconut Chocolate Bars stand out because of their soft coconut filling. The shredded coconut creates a chewy texture while the sweetened condensed milk binds everything together into a creamy center. Unlike many packaged candy bars, the coconut flavor tastes fresh and natural.
Because these bars use only a few ingredients, each flavor shines clearly. The vanilla enhances the coconut while the chocolate coating balances the sweetness. Together, the combination creates a dessert that feels indulgent but still light enough to enjoy anytime.
Many people also enjoy these bars because they are naturally easy to customize. Some recipes include dark chocolate for a richer taste, while others add sea salt, nuts, or extra vanilla. No matter the variation, the coconut center remains the star of the dessert.
Easy No-Bake Dessert for Beginners
One of the best things about Homemade Coconut Chocolate Bars is how beginner-friendly they are. Even if you rarely make desserts, this recipe is simple enough to follow confidently.
You only need to mix the filling, shape the bars, chill them, and coat them in chocolate. There is no baking, no complicated equipment, and no advanced decorating required. Because of that, these bars work perfectly for busy days or quick dessert cravings.
Additionally, the recipe stores beautifully in the refrigerator or freezer. That means you can make a batch ahead of time for parties, holiday platters, or weekly treats. Since the bars hold their shape well after chilling, they also travel easily for gatherings and gift boxes.
Ingredients That Make the Best Homemade Coconut Chocolate Bars
Choosing the Right Coconut
The coconut is the main ingredient in Homemade Coconut Chocolate Bars, so choosing the right kind matters. Sweetened shredded coconut creates a softer, sweeter filling while unsweetened coconut gives a more natural flavor and firmer texture.
If you prefer candy-style bars similar to classic coconut candies, sweetened shredded coconut works best. However, unsweetened coconut can help reduce overall sweetness while still creating a rich coconut flavor.
Finely shredded coconut blends more smoothly into the filling and creates bars that hold together better. Larger coconut flakes may create a rougher texture and make shaping more difficult.
Fresh coconut can also work in some cases, although it contains more moisture and may shorten storage time. For consistency and convenience, packaged shredded coconut remains the easiest option.
Best Chocolate for Coating
Chocolate coating transforms these coconut bars into a true dessert treat. Milk chocolate creates the sweetest version, while dark chocolate balances the coconut with deeper flavor.
Semi-sweet chocolate remains one of the most popular choices because it provides richness without becoming overpoweringly sweet. Many home bakers also combine milk and dark chocolate for a balanced finish.
Adding a small amount of coconut oil or butter to the melted chocolate helps create a smoother coating. It also gives the chocolate a glossy finish after setting.
For the cleanest dipping process, chill the coconut bars well before coating them. Cold bars stay firm and easier to handle during dipping.
If desired, drizzle extra chocolate over the top for a decorative finish. A sprinkle of coconut flakes can also add texture and visual appeal.
How to Make Homemade Coconut Chocolate Bars Perfectly
Mixing and Shaping the Coconut Filling
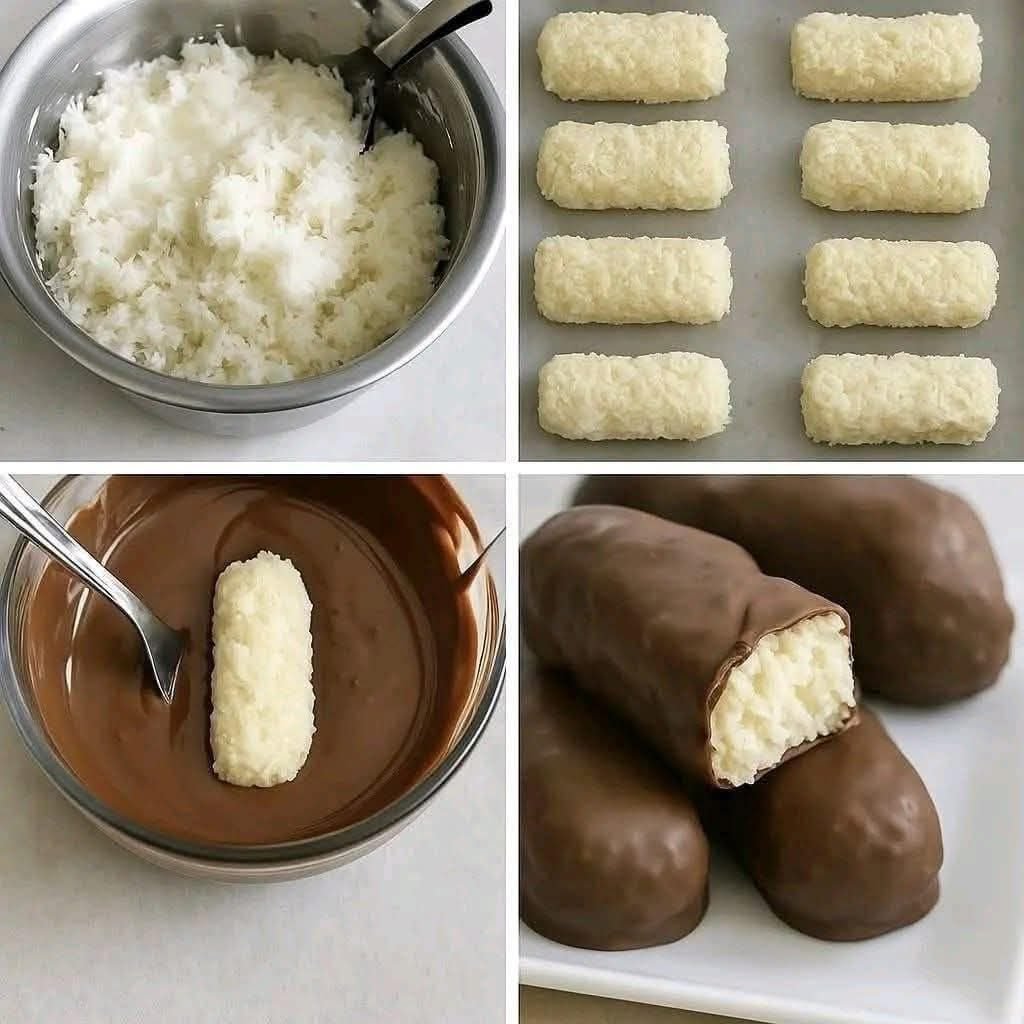
Making Homemade Coconut Chocolate Bars begins with combining shredded coconut, sweetened condensed milk, and vanilla extract in a large bowl. Stir until the mixture becomes evenly coated and thick enough to shape.
At this stage, the mixture should feel sticky but manageable. If it seems too dry, add a little more condensed milk. If it feels overly wet, mix in additional coconut.
Line a tray or baking dish with parchment paper before shaping the bars. You can shape the mixture into rectangles by hand or press it into a pan before slicing later.
Uniform shapes help the bars chill evenly and create a more professional appearance. After shaping, refrigerate the bars for at least one hour so they become firm enough for dipping.
Cold bars are much easier to coat in melted chocolate because they hold their shape better and reduce mess during the process.
Dipping and Setting the Chocolate Coating
Once the bars are chilled, melt the chocolate slowly using a microwave or double boiler. Stir frequently until smooth and glossy.
Using two forks or dipping tools makes coating easier. Lower each coconut bar into the melted chocolate, turn gently to coat, and lift carefully to remove excess chocolate.
Place the coated bars back onto parchment paper and allow the chocolate to set completely. Refrigerating the bars speeds up the process and helps create a firm shell.
For extra flavor, drizzle white chocolate across the tops or sprinkle flaky sea salt onto the coating before it hardens.
Properly chilled Homemade Coconut Chocolate Bars develop the perfect texture with a soft coconut center and crisp chocolate shell.
Serving and Storing Homemade Coconut Chocolate Bars
Best Ways to Serve These Coconut Bars
Homemade Coconut Chocolate Bars taste best slightly chilled because the coconut filling stays firm while the chocolate coating remains crisp.
These bars fit beautifully on dessert platters during holidays, birthdays, and family gatherings. Their small size also makes them ideal for snack trays or afternoon coffee breaks.
For a richer dessert presentation, serve them alongside hot coffee, iced espresso drinks, or cold milk. The creamy coconut pairs especially well with coffee flavors.
Many people also package these bars in decorative containers during the holiday season. Since they hold their shape well, they make thoughtful homemade gifts that look impressive without requiring advanced baking skills.
You can even cut the bars into smaller bite-sized squares for party platters. Mini portions work well for dessert tables where guests want a variety of sweets.
Storage Tips for Freshness
Homemade Coconut Chocolate Bars store very well, which makes them convenient for meal prep and holiday baking.
Keep the bars in an airtight container in the refrigerator for up to one week. Place parchment paper between layers to prevent sticking.
For longer storage, freeze the bars in a sealed container for up to three months. Thaw them in the refrigerator before serving.
Because the bars contain condensed milk and chocolate, refrigeration helps maintain the best texture and freshness. Keeping them cool also prevents the chocolate coating from softening too much in warm temperatures.
If you enjoy firmer chocolate, serve the bars directly from the refrigerator. For a softer texture, allow them to sit at room temperature for a few minutes before eating.
Frequently Asked Questions
Can I use unsweetened coconut?
Yes. Unsweetened coconut works well if you prefer a less sweet dessert. However, the bars may taste slightly less creamy than versions made with sweetened coconut.
Can I freeze Homemade Coconut Chocolate Bars?
Absolutely. Freeze them in an airtight container for up to three months. Thaw in the refrigerator before serving.
What chocolate works best for coating?
Semi-sweet chocolate is one of the best options because it balances the sweetness of the coconut filling. Milk chocolate and dark chocolate also work well.
Do these bars need baking?
No. Homemade Coconut Chocolate Bars are completely no-bake, making them quick and beginner-friendly.
How long do the bars need to chill?
The coconut filling should chill for at least one hour before dipping into melted chocolate.
Conclusion
Homemade Coconut Chocolate Bars are one of the easiest desserts you can make while still delivering rich flavor and beautiful presentation. Their creamy coconut center and smooth chocolate coating create a classic combination that never goes out of style.
Because these bars require no baking and only a handful of ingredients, they fit perfectly into busy schedules while still feeling homemade and special. They also adapt easily to personal preferences with different chocolate varieties and decorative toppings.
Whether you prepare them for holidays, parties, family desserts, or simple afternoon cravings, Homemade Coconut Chocolate Bars always bring comforting flavor and satisfying texture. Once you make a batch, they quickly become a regular favorite in the kitchen.
More Dessert
- Can’t Believe I’ve Been Drinking Coca-Cola for Years and Just Noticed the ‘Hidden Detail’ in the Logo!
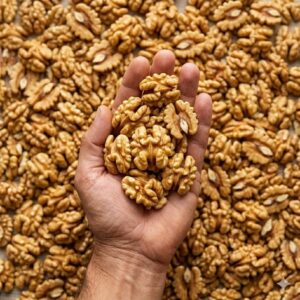
- The Power of the Walnut: 5 Science-Backed Health Benefits (And How Many You Should Actually Eat)
- The Mystery of Lobster’s Green Goodies: What Is Tomalley and Should You Eat It?
- Southern Tea Cake Cookies Recipe: Soft Buttery Classic Cookies