Before we dive in, I just want to say thank you. Whether you’ve been crafting with me for a while or just stumbled in from a Pinterest search or a nature walk gone wonderfully crafty—you’re in the right place. This post is a love letter to slow creativity, to nature’s tiny treasures, and to simple projects that spark joy. 🌿✨
And if this kind of thing makes your heart flutter (like mine does!), I’d love to send you more ideas like this right to your inbox. Subscribe below to get the full recipe and future crafty inspiration delivered directly to you! 💌
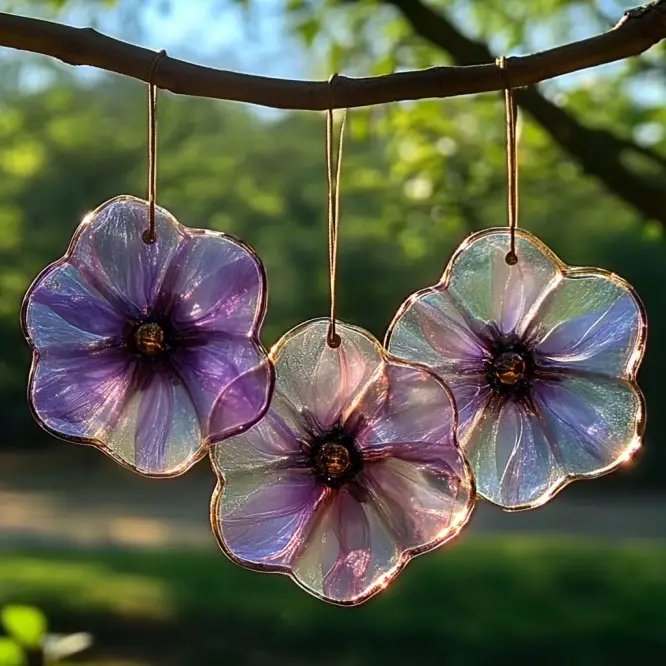
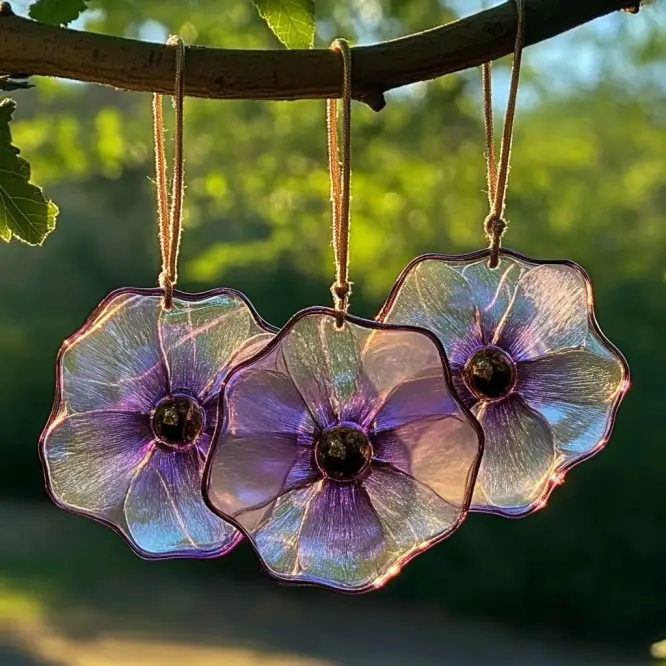
What Are DIY Bioplastic Suncatchers?
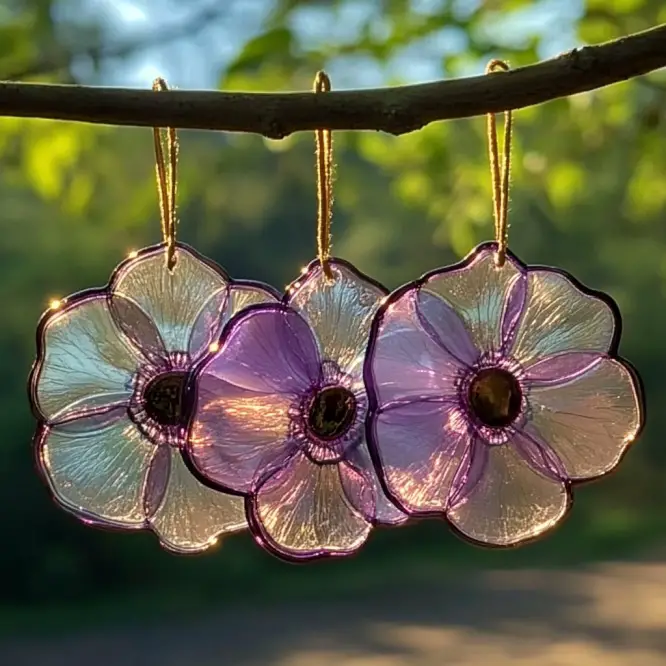
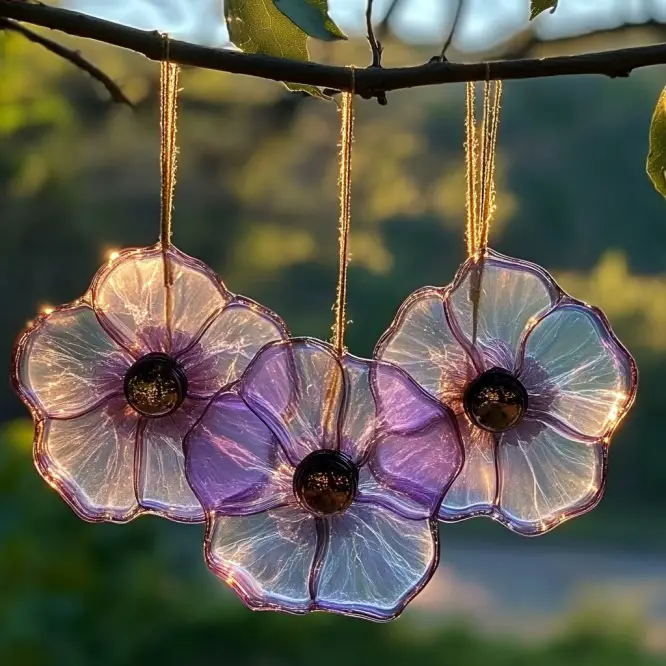
These beautiful suncatchers are crafted using homemade bioplastic made from gelatin and water, and they showcase the natural textures and colors of foraged plant life. Think of them as nature’s stained glass—sunlight streaming through delicate petals, the veins of leaves becoming art.
Perfect for rainy day crafting, eco-friendly classrooms, or simply adding a whimsical touch to your windows, these suncatchers are equal parts science experiment and nature appreciation.
Why You’ll Fall in Love With This Craft
- Eco-Friendly Fun: Made with all-natural, biodegradable materials!
- Educational & Engaging: A great blend of art and science for kids and curious adults alike.
- Totally Customizable: No two suncatchers are the same—just like the leaves and blooms you gather.
- Budget-Friendly: Uses everyday items and found materials. Nothing fancy needed!
- Window-Ready Wonder: These suncatchers literally light up your space.
What Do They Look Like?
Imagine the translucent glow of sunlight beaming through a pressed violet, a fern frond, or a swirl of petals. Each suncatcher is a miniature masterpiece—full of life, color, and fleeting beauty. When the sun hits just right? Magic. ✨
Benefits of Bioplastic Suncatchers
- Completely non-toxic and safe for little hands
- Helps kids learn about biodegradable materials
- Encourages creative expression and environmental stewardship
- A gentle intro into DIY bioplastics and nature crafting
Ingredients
- 1 part unflavored gelatin powder
- 4 parts boiling water
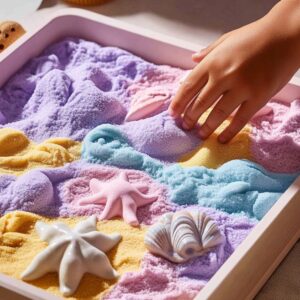
- Natural loose parts like:
- Petals
- Leaves
- Twigs
- Pinecones
- Herbs
- Plastic lids (from yogurt, sour cream, or similar)
- String or yarn (for hanging)
- Mixing bowl & spoon
- Towel or tray (for drying)
Tools You’ll Need
- A heat-safe mixing bowl
- A spoon for stirring
- Plastic lids to act as molds
- A tray or towel to lay out your molds
- Scissors for trimming yarn
Customize It!
🌸 Add Edible Flowers: Try pansies or nasturtiums for bright, edible flair.
🌈 Color the Gelatin: A drop or two of natural food coloring turns your bioplastic into a kaleidoscope.
🎨 Layering for Depth: Pour thin layers of tinted gelatin between natural items for a “floating” effect.
🍃 Change With the Seasons: Spring blossoms, summer greens, autumn leaves—endless variety.
Step-by-Step Instructions
1. Forage for Nature’s Art Supplies
Take a nature walk and gather flowers, leaves, twigs—anything that catches your eye. Look for color, shape, and contrast.
2. Design Your Suncatchers
Lay your natural items in plastic lids. No wrong answers—abstract, spiraled, or symmetrically laid out.
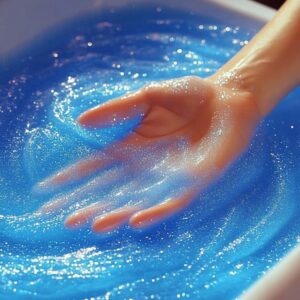
3. Mix Your Gelatin Bioplastic
In a bowl, combine 1 part gelatin powder with 4 parts boiling water. Stir until completely dissolved. It’ll look a bit like syrupy tea.
4. Pour the Gelatin
Carefully pour a thin layer over your nature items in each lid. Cover just enough to hold everything in place.
5. Add Hanging Loops
While it’s still warm, gently press in a loop of yarn to hang your suncatchers later.
6. Let Them Dry
Leave them at room temperature for 1–2 days. Place a light tray on top to keep them flat while drying.
7. Pop & Hang
Once firm and dry, gently pop out your suncatchers and hang them in a sunny window. 🌞
What to Pair With Your Suncatcher Project
- A pot of herbal tea and a favorite playlist
- A rainy afternoon and a curious child
- A nature journaling session afterward
Pairing crafts with intentional moments turns them into memories.
Tips for Stunning Results
- Press your nature finds in a book for a few hours to flatten them before crafting.
- Use tweezers to arrange delicate petals.
- Keep gelatin warm while pouring—it sets quickly!
How to Store or Preserve
These are temporary beauties, and that’s part of the charm! Expect them to last a week or two, longer if kept cool and dry. For more durability, consider making new ones each season. Compost the old ones—nature back to nature. 🌱
FAQs
Can I use agar instead of gelatin?
Agar doesn’t work the same way in this project. Gelatin creates the necessary flexible, glassy texture.
Are these safe for kids?
Yes! Just supervise when handling hot water. All materials are natural and non-toxic.
Can I use fresh flowers?
Absolutely! But keep in mind they may change color slightly as they dry.
In a Nutshell
These DIY bioplastic suncatchers are a heartfelt, hands-on way to connect with the natural world—and each other. They’re simple, satisfying, and stunning in the light.
Give them a try, and you’ll see: nature is the best artist.
Want More Nature-Inspired Projects?
If you loved this, you’ll adore:
- Pressed Flower Bookmarks
- DIY Herbal Playdough
- Eco Paint with Beet Juice and Spirulina
Share the Sunshine
✨ Tried this recipe? I’d love to see it!
📌 Pin your creations on Pinterest and tag me!
📸 Share your photos and leave a review below—let’s inspire each other.
Nutritional Information
While this isn’t something you’ll be snacking on (😉), here’s a fun fact:
Gelatin is protein-rich and fully biodegradable—yay science!
Happy crafting, friends! May your windows be ever filled with color and light. 🌞💛
DIY Bioplastic Suncatchers with Foraged Nature Finds
Ingredients
Equipment
Method
- Go outside and gather your favorite petals, herbs, leaves, or tiny twigs. Look for a mix of colors and shapes to add visual interest.
- Lay your gathered items inside clean plastic lids (from yogurt, sour cream, etc.) as molds. Arrange however you like—symmetrical, spiraled, or abstract.
- In a heat-safe bowl, combine 1 part gelatin powder with 4 parts boiling water. Stir until completely dissolved and smooth.
- Carefully pour the gelatin mixture into each lid, just enough to cover the natural items and hold them in place.
- Press a small loop of string or yarn into the gelatin while it’s still warm to create a hanging hook.
- Let the suncatchers dry at room temperature for 24–48 hours. Lay a tray or towel gently over top to help them dry flat. Flip midway through drying for best results.
- Once firm, carefully pop each suncatcher out of its lid mold and hang in a sunny window using the string loop.