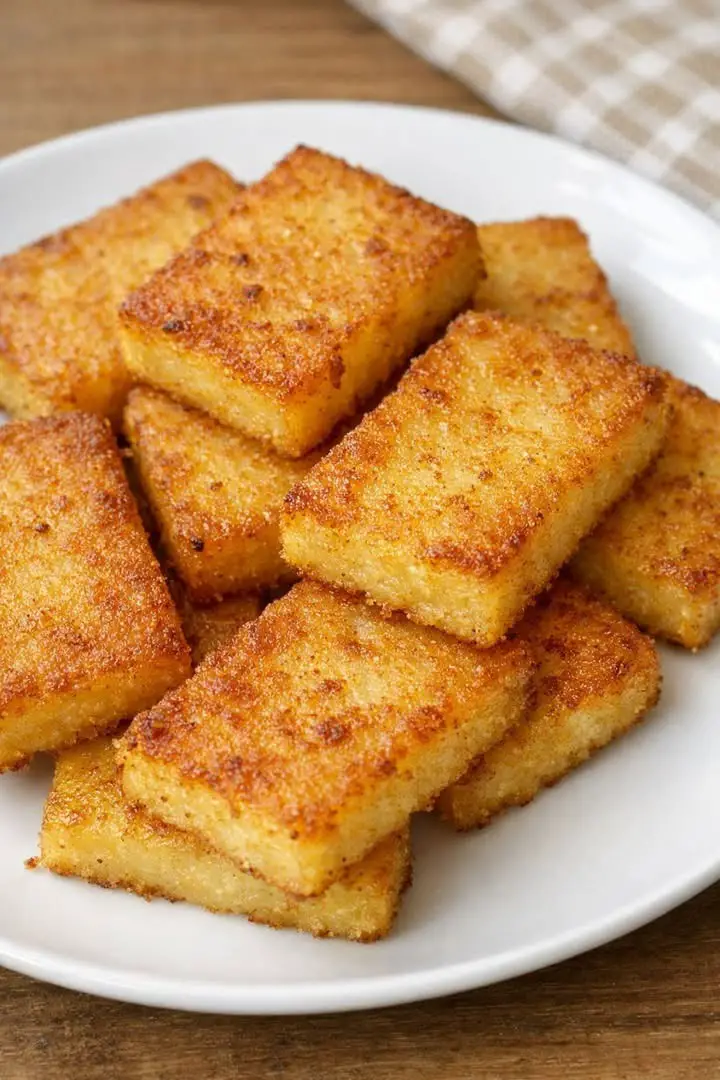
Crispy Fried Cornmeal Mush Slices are the kind of old-fashioned comfort food that never goes out of style. Made from simple pantry staples, this humble dish transforms creamy cornmeal into golden, crispy slices with a soft, tender center. Whether served sweet with syrup or savory with eggs, it delivers a satisfying texture and flavor that feels both nostalgic and timeless.
6
Because this recipe relies on basic ingredients and straightforward steps, it’s perfect for beginners and experienced cooks alike. Even better, it can be made ahead of time, making busy mornings much easier.
I remember my first time trying fried cornmeal mush on a quiet weekend morning. The smell of butter sizzling in the pan filled the kitchen as the slices turned golden. When I took that first bite, the contrast between the crispy outside and creamy inside was unforgettable. Since then, it has become a comforting go-to whenever I want something simple yet deeply satisfying.
Ingredients
Equipment
Method
- Bring water or milk to a boil and whisk in cornmeal.
- Cook and stir until thickened.
- Pour into a greased dish and refrigerate until firm.
- Slice into pieces once firm.
- Fry slices in butter or oil until golden and crispy.
Notes
What Makes Cornmeal Mush So Special
A Classic Dish with Deep Roots
Cornmeal mush has been a staple for generations, especially in homes that valued simple, affordable meals. Made from cornmeal, water, and salt, it starts as a creamy porridge.
However, once chilled, it transforms into something entirely different. Slicing and frying it creates a crispy exterior while keeping the inside soft.
Because of this transformation, the dish feels both versatile and exciting. It can be enjoyed in many different ways, depending on your mood and preference.
Texture That Keeps You Coming Back
The magic of this dish lies in its texture. The outside becomes golden and crisp, while the inside stays smooth and comforting.
This contrast makes each bite interesting and satisfying. Additionally, the neutral flavor allows you to customize it easily.
Whether you prefer sweet or savory toppings, the base adapts beautifully.
Ingredients That Keep It Simple
Basic Pantry Staples
This recipe uses just a few simple ingredients:
- Cornmeal
- Water or milk
- Salt
- Butter or oil for frying
Because the ingredient list is so short, each component matters. The cornmeal provides the base, while the liquid determines the texture.
Using milk instead of water creates a richer flavor. Meanwhile, salt enhances the overall taste without overpowering it.
Optional Additions for Flavor
Although the basic recipe is simple, you can easily enhance it. Adding a bit of butter to the mush while cooking creates extra richness.
For sweet versions, serve with maple syrup or honey. For savory options, pair with eggs, cheese, or even sautéed vegetables.
Because the base is neutral, it works well with almost any topping.
Step-by-Step Cooking Instructions
Making the Cornmeal Mush
Start by bringing water or milk to a gentle boil in a saucepan. Slowly whisk in the cornmeal to prevent lumps.
Reduce the heat and continue stirring until the mixture thickens. This usually takes several minutes.
Once thick and smooth, pour the mixture into a greased dish. Spread it evenly and let it cool completely. Then refrigerate until firm.
Frying to Golden Perfection
Once the mush is fully chilled, slice it into rectangles or squares.
Heat butter or oil in a skillet over medium heat. Place the slices in the pan and cook until golden brown on one side.
Flip carefully and cook the other side until crisp. Remove from the pan and serve warm.
For best results, avoid overcrowding the pan so each slice crisps evenly.
Tips, Variations, and Serving Ideas
Getting the Perfect Texture
Make sure the mush is fully chilled before slicing. This helps it hold its shape during frying.
Use a nonstick or well-seasoned pan to prevent sticking. Also, allow enough time for each side to develop a golden crust.
If you want extra crispiness, cook slightly longer on each side.
Creative Ways to Serve
Serve these slices with maple syrup for a classic breakfast. The sweetness pairs perfectly with the crispy texture.
For a savory option, top with a fried egg or sprinkle with cheese. You can also serve alongside bacon or sausage.
If you want something different, try adding herbs or spices to the mush before chilling. This creates a unique twist on the traditional flavor.
Frequently Asked Questions
Can I make cornmeal mush ahead of time?
Yes, it’s ideal for making ahead and storing in the refrigerator.
How long does it last in the fridge?
It can last up to 4–5 days when stored properly.
Can I freeze cornmeal mush?
Yes, slice it first, then freeze for easy reheating.
What’s the difference between mush and polenta?
They are very similar, but mush is typically simpler and more traditional.
Can I bake instead of fry?
Yes, baking is an option, though frying gives the crispiest texture.
Conclusion
Crispy Fried Cornmeal Mush Slices offer a perfect blend of simplicity and comfort. With their golden crust and creamy interior, they bring a timeless flavor that feels both familiar and satisfying.
Because they are easy to prepare and endlessly versatile, they fit into any meal—from breakfast to dinner. Once you try them, you’ll understand why this humble dish has stood the test of time.
More Creative Crafts
- The Quiet Language of a Yellow Ribbon: What It Means When You See One on a Dog
- Finding Head Lice in a Loved One’s Hair: What It Means and the Best Way to Handle It
- Can the Shape of Your Legs Reveal Your Personality? Separating Myth From Reality
- What Does the Last Digit of Your Birth Year Say About You? A Gentle Guide to Self-Reflection and Life’s Beautiful Numbers