
First off, thank you for being here. Seriously. Whether you’re a science-loving parent, a creative educator, or just someone hunting for that perfect rainy-day activity, this project is going to wow you—and your little makers! There’s something incredibly rewarding about combining art and chemistry, and this one? It literally sparkles.
This isn’t just a fun afternoon craft. It’s a hands-on science experiment, an invitation to explore, and a lesson in patience—all wrapped into one sparkly experience. And yes, it’s easier than you think!
Want more magical, educational activities like this in your inbox? Subscribe below and never miss a crafty, kid-friendly DIY again!
What Is Pipe Cleaner Crystal Growing?
This activity is part science experiment, part art project—and completely mesmerizing! With just a few household items, you’ll grow real crystals on colorful pipe cleaner shapes using Borax and hot water. The science? It’s all about supersaturation and crystal formation—no lab coat required!
Kids love this project because it feels like a magical transformation. You start with fuzzy little pipe cleaners, and overnight they turn into glittering crystal sculptures. YES—actual crystals!
Why You’ll Love This Activity
- 🌟 Teaches science through play—supersaturation, solubility, and crystallization, all in one!
- 🎨 Customizable designs—make stars, hearts, snowflakes, or even letters
- 🧠 Boosts STEM learning in a hands-on, creative way
- ⏳ Low-effort, high-reward—just mix, hang, and wait!
- 💎 Looks amazing—like something straight out of a fairy tale!
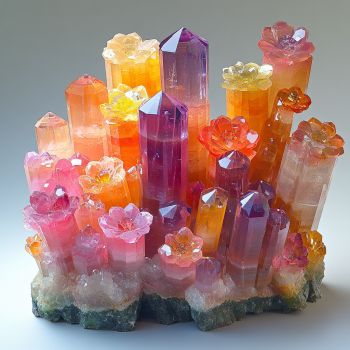
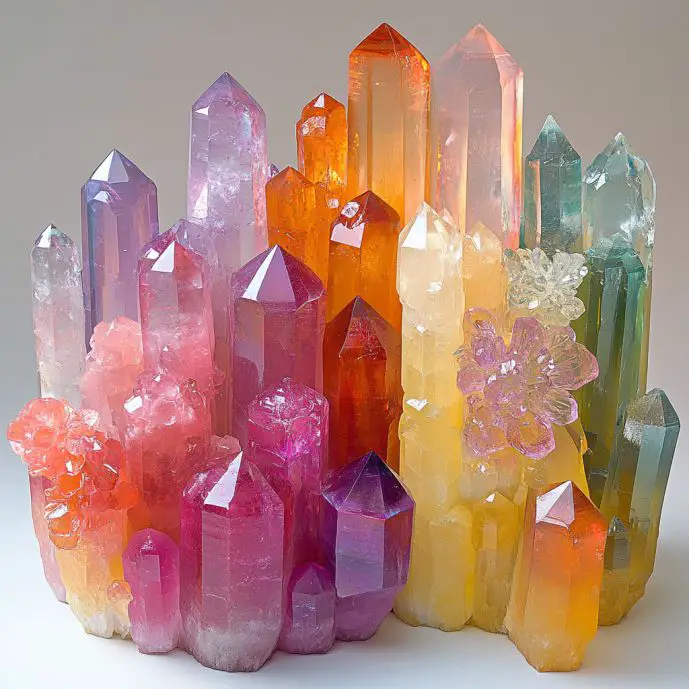
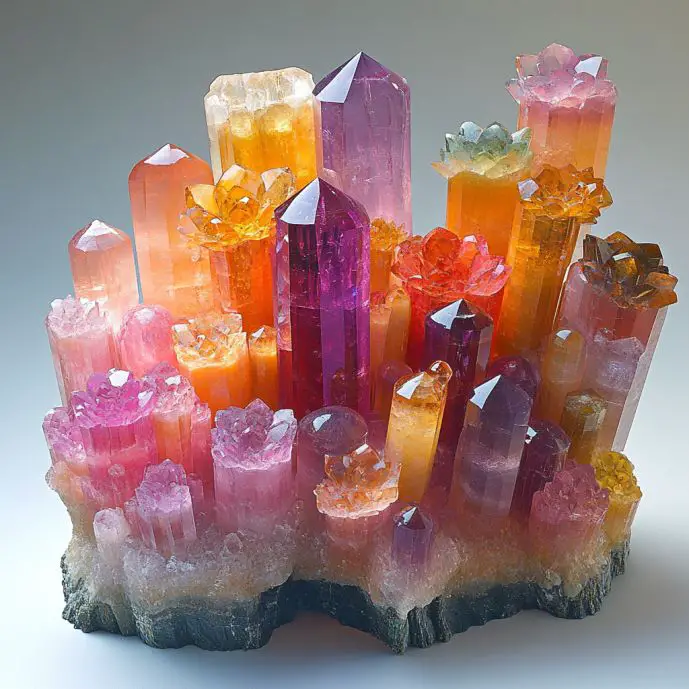
What Do the Crystals Look Like?
Picture frosted sugar or glistening snow—but on pipe cleaners! As the Borax solution cools, it forms jagged, beautiful crystals that cling to every twist and curve of your creation. They catch the light, sparkle like magic, and feel like a tiny science miracle you can hold in your hand.
Every shape turns out different, and that’s part of the joy. Some come out chunky and bold, others dainty and delicate. All of them are stunning.
Ingredients & Tools
You’ll Need:
- ✅ Pipe cleaners (any color or combo works!)
- ✅ Borax powder (found in the laundry aisle)
- ✅ Hot water (just below boiling)
- ✅ Glass jar or heat-safe dish
- ✅ Spoon (for stirring)
- ✅ Chopsticks, pencils, or sticks (for hanging your shapes)
- ✅ String or thread (optional, for longer hangs)
- ✅ Paper towels (for drying crystals)
Step-by-Step Instructions
1. Warm the Water
Heat your water until hot but not boiling. If using a microwave, be careful—it can get hotter than it looks!
2. Pour and Mix
Pour the hot water into your glass dish. Use about 2 cups of hot water.
3. Add Borax
Stir in ¼ cup of Borax per 2 cups of water. Mix thoroughly until all the Borax dissolves. A little sediment is okay, but try to dissolve as much as possible.
4. Shape the Pipe Cleaners
Twist your pipe cleaners into any shape you like—hearts, stars, spirals, snowflakes, initials! Leave a small straight piece at the top for hanging.
5. Set Up for Soaking
Rest a pencil or chopstick across the top of your jar/dish. Hang the pipe cleaner shape so it’s completely submerged but not touching the bottom. Use string if needed.
6. Let It Sit Overnight
Place the setup somewhere stable and undisturbed for at least 12–24 hours. Crystals will begin to form as the solution cools and settles.
7. Reveal the Crystals
Carefully lift out your creation. Gasp. Smile. Admire.
8. Dry & Display
Lay the crystals on a paper towel for a few hours to dry completely. Then hang them in a window, decorate your desk, or give them as gifts!
Tips for Beautiful Crystals
- 🌡️ Use the hottest water you safely can—this helps dissolve more Borax, creating a better solution.
- 🔍 Try different Borax-to-water ratios to see how they affect crystal size.
- 🎨 Color matters! Bright pipe cleaners show off the crystals best.
- ✂️ Cut smaller shapes to grow crystals faster and reduce solution waste.
- 🚫 Don’t bump or move the container while crystals are forming—it disturbs the process!
Storage and Longevity
Crystals are durable but delicate. To keep them sparkly:
- Store in a dry area (humidity can soften or dull them).
- Avoid direct sunlight for long periods to preserve colors.
- Keep away from little mouths—Borax is not edible, so display only!
Frequently Asked Questions (FAQs)
Is Borax safe to use with kids?
Yes, with supervision. Borax is safe for this type of project, but it’s not edible and shouldn’t be inhaled or ingested. Always wash hands afterward and keep younger kids from touching the solution.
Can I reuse the Borax solution?
Yes! You can reheat and reuse it a couple of times, though crystal formation may decrease as the solution becomes less saturated.
What if my crystals didn’t form?
Make sure:
- Your water was hot enough
- You used enough Borax
- The container wasn’t disturbed
- The pipe cleaner was fully submerged
Try again—it’s science AND art, and sometimes experiments need tweaking!
Summary – Why This Project Sparkles Inside & Out
Pipe Cleaner Crystal Growing is the kind of craft that sticks with you—not just visually, but emotionally too. It’s simple enough for beginners, educational enough for classrooms, and magical enough to keep kids (and adults!) fascinated for hours.
From fuzzy wires to glittering gems in less than a day? That’s something special. 💎
More Sparkly DIYs to Try Next:
- ❄️ Snowflake Salt Painting
- 🌈 Rainbow Bubble Foam Sensory Play
- 🍭 Homemade Rock Candy Science Experiment
Let me know which one you’d like me to share next!
Show Us Your Crystals! 💖
Tried this experiment? We’d love to see your dazzling creations!
📌 Pin it on Pinterest, tag me, or comment below with a photo.
✨ Your creativity might just inspire someone else to give it a try!
“Nutritional” Value (Non-Edible Craft)
- 🧠 100% Curiosity
- 🎨 150% Creativity
- 💎 0 Calories, 0 Waste, All Wonder
Thanks again for crafting with me. May your science always sparkle and your creativity never run dry! 💫
Pipe Cleaner Crystal Growing
Ingredients
Method
- Warm the water until hot but not boiling.
- Pour about 2 cups of hot water into your glass dish.
- Stir in ¼ cup of Borax per 2 cups of water until dissolved.
- Twist pipe cleaners into shapes like hearts, stars, or snowflakes.
- Rest a pencil or chopstick across the top of your jar/dish to hang the pipe cleaner.
- Submerge the pipe cleaner shape completely without touching the bottom.
- Let it sit undisturbed overnight for 12–24 hours.
- Carefully lift out your creation and admire the formed crystals.
- Lay the crystals on a paper towel to dry completely.
- Display the crystals in a window or as gifts.


