Introduction
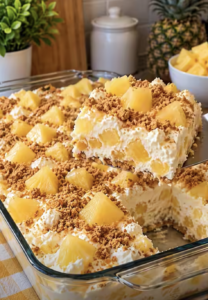
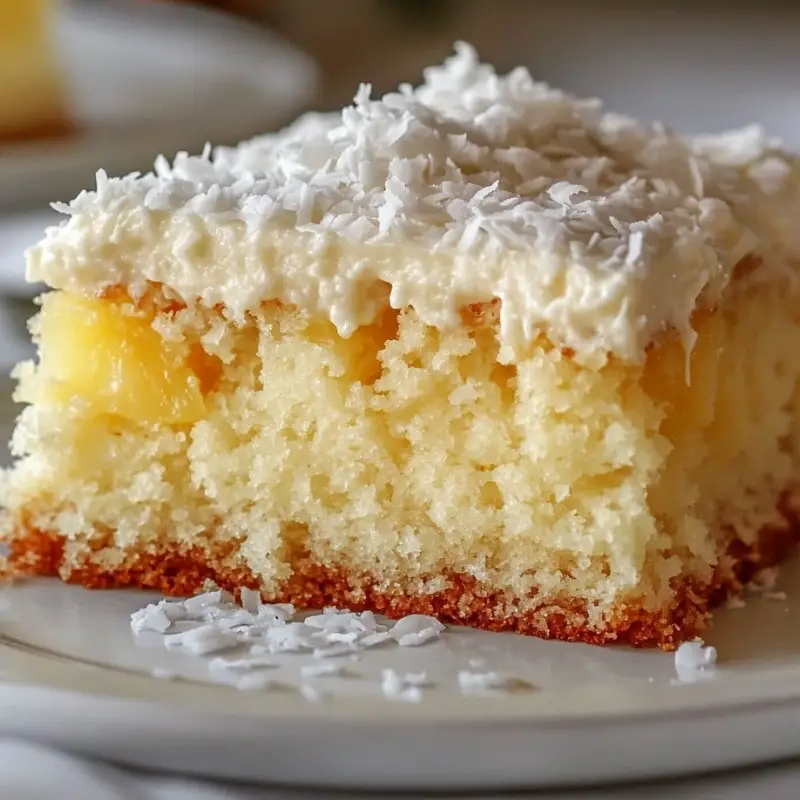
This Tropical Pineapple Cake with Coconut Frosting brings a taste of the islands to your kitchen. Perfectly moist and sweetened with juicy pineapple, it’s an easy-to-make dessert that’s sure to impress your family and friends, making any day feel like a getaway to paradise.
Detailed Ingredients with measures
200g all-purpose flour
150g granulated sugar
1 tsp baking soda
0.5 tsp salt
250g crushed pineapple, undrained
120ml vegetable oil
2 large eggs
1 tsp vanilla extract
120g unsweetened shredded coconut
240g powdered sugar
100g cream cheese, softened
50g butter, softened
20ml coconut milk
Prep Time
15 mins
Cook Time, Total Time, Yield
Cook Time: 35 mins
Total Time: 50 mins
Yield: 12 servings
Directions:
1. Preheat oven to 175°C (350°F). Grease a 9×13 inch baking pan.
2. In a large bowl, stir together the flour, sugar, baking soda, and salt.
3. Add the crushed pineapple with juice, oil, eggs, and vanilla extract. Mix until combined.
4. Pour the batter into the prepared baking pan and smooth out the top with a spatula.
5. Bake for 30-35 minutes or until a toothpick inserted into the center of the cake comes out clean.
6. While the cake is baking, prepare the frosting by beating together the cream cheese and butter in a medium bowl until smooth.
7. Gradually add the powdered sugar, mixing until creamy and fluffy.
8. Stir in the coconut milk and half of the coconut flakes until well combined.
9. Allow the cake to cool completely in the pan before frosting.
10. Spread the coconut frosting evenly over the cooled cake, then sprinkle the remaining coconut flakes on top for decoration.
11. Refrigerate for at least 30 minutes before serving to let the frosting set.
Detailed Directions and Instructions
Step 1: Preheat the Oven
Start by preheating your oven to 175°C (350°F). This ensures even baking to achieve that perfect, golden-brown crust. Prepare a 9×13 inch baking pan by greasing it well to prevent sticking.
Step 2: Mix Dry Ingredients
In a large mixing bowl, combine the all-purpose flour, granulated sugar, baking soda, and salt. Stir these ingredients together until well mixed, allowing the dry ingredients to infuse their flavors.
Step 3: Combine Wet Ingredients
Add the crushed pineapple (including the juice), vegetable oil, eggs, and vanilla extract to the dry mixture. Use a spatula or wooden spoon to mix until the batter is just combined and smooth.
Step 4: Prepare for Baking
Pour the batter into your prepared baking pan. With a spatula, smooth out the top to create an even surface that will bake uniformly.
Step 5: Bake the Cake
Place the pan in the oven and bake for 30-35 minutes. To check for doneness, insert a toothpick into the center of the cake; it should come out clean. This process fills your kitchen with the enticing aroma of baked pineapple.
Step 6: Make the Coconut Frosting
While the cake is baking, prepare the frosting. In a medium bowl, beat together the softened cream cheese and butter until smooth and creamy, mixing until it resembles a light and fluffy mixture.
Step 7: Add Sugar and Coconut
Gradually add the powdered sugar to the cream cheese mixture, continuing to mix until the frosting becomes creamy and airy. Stir in the coconut milk and incorporate half of the shredded coconut until fully blended.
Step 8: Cool the Cake
Once the cake is done baking, allow it to cool completely in the pan. This crucial step prevents the frosting from melting and sliding off when applied.
Step 9: Frost the Cake
Once cooled, spread the coconut frosting evenly over the surface of the cake using a spatula. For an extra tropical touch, sprinkle the remaining coconut flakes on top for decoration.
Step 10: Refrigerate Before Serving
Refrigerate the frosted cake for at least 30 minutes before serving. This helps the frosting set beautifully, ensuring each slice maintains its shape and the frosting is delectable to taste.
Notes
Storage Tips
Store any leftover cake in an airtight container in the refrigerator. It remains delicious for up to 3-4 days. The flavors will deepen and meld, making each bite even more enjoyable!
Texture and Flavor
This cake features a moist, dense crumb with bursts of sweet pineapple flavor, complemented by the creamy, rich coconut frosting. The textures play beautifully together, creating a dessert that feels indulgent yet light.
Serving Suggestions
Serve this cake chilled or at room temperature. It pairs wonderfully with a scoop of vanilla ice cream or a dollop of whipped cream for an additional layer of indulgence. Enjoy it alongside a refreshing drink like iced tea or a tropical smoothie for the ultimate island experience!
Cook techniques
Mixing Ingredients
Ensure all your dry ingredients are well combined before adding wet ingredients. This prevents clumping and ensures a uniform texture in your cake.
Baking the Cake
Preheat your oven to the correct temperature for even baking. Use a toothpick to check for doneness; it should come out clean when the cake is fully baked.
Cooling the Cake
Let the cake cool completely in the pan. This helps prevent the frosting from melting and ensures a smooth application.
Making Frosting
Beat the cream cheese and butter until smooth before adding powdered sugar. Gradual incorporation of sugar helps achieve a creamy, fluffy texture.
Applying Frosting
Use a spatula to spread the frosting evenly over the cooled cake. This will give a professional-looking finish and even flavor distribution.
Setting the Frosting
Refrigerating the frosted cake for at least 30 minutes helps the frosting set, making it easier to slice and serve.
FAQ
Can I use fresh pineapple instead of crushed pineapple?
Yes, you can use fresh pineapple, but make sure to crush it finely and retain some juice for moisture.
How can I store leftover cake?
Store leftover cake in an airtight container in the refrigerator for up to 5 days.
Can I make this cake in advance?
Yes, you can bake the cake in advance and store it unfrosted in an airtight container at room temperature for up to 2 days or in the refrigerator for longer.
What can I substitute for coconut milk?
You can substitute coconut milk with regular milk or almond milk, but it may change the flavor profile slightly.
Is this cake suitable for gluten-free diets?
You can use a gluten-free all-purpose flour blend to make the cake gluten-free, ensuring all other ingredients are also gluten-free.
Conclusion
The Tropical Pineapple Cake with Coconut Frosting is a delightful dessert that encapsulates the essence of the tropics. Its moist texture and sweet pineapple flavor, paired with creamy coconut frosting, create a perfect harmony that is refreshing and indulgent. Ideal for gatherings or even a simple family treat, this cake transforms any occasion into a joyful celebration of flavor. Enjoy this slice of paradise!
Classic Coconut Cake
Experience a classic coconut cake layered with rich coconut cream filling and topped with toasted coconut flakes for an extra crunch.
Hummingbird Cake
Combine the tropical flair of this cake with bananas, pecans, and spices, and frost it with cream cheese icing for a delicious twist.
Caribbean Rum Cake
Infuse your cake with Caribbean rum for a more adult flavor, complemented by a buttery glaze that soaks into the cake for added moisture.
Pineapple Upside-Down Cake
Transform the pineapple into an upside-down cake, featuring caramelized pineapple rings and cherries, creating a stunning presentation.
Coconut Lime Pound Cake
Zest things up with a pound cake that combines coconut with zesty lime, adding a bright citrus note that pairs beautifully with the flavors of the tropics.
Tropical Fruit Salad
Serve a refreshing fruit salad alongside the cake, mixing tropical delights like mango, kiwi, and papaya to enhance the island vibe.
Frozen Coconut and Pineapple Dessert
Create a frozen treat using blended coconut milk and pineapple chunks, offering a cool, creamy option that complements the cake perfectly during hot weather.
Tropical Pineapple Cake with Coconut Frosting
Ingredients
For the Cake
- 200 g all-purpose flour
- 150 g granulated sugar
- 1 tsp baking soda
- 0.5 tsp salt
- 250 g crushed pineapple, undrained
- 120 ml vegetable oil
- 2 large eggs
- 1 tsp vanilla extract
For the Coconut Frosting
- 120 g unsweetened shredded coconut
- 240 g powdered sugar
- 100 g cream cheese, softened
- 50 g butter, softened
- 20 ml coconut milk
Instructions
Preparation
- Preheat oven to 175°C (350°F). Grease a 9×13 inch baking pan.
- In a large bowl, stir together the flour, sugar, baking soda, and salt.
- Add the crushed pineapple with juice, oil, eggs, and vanilla extract. Mix until combined.
- Pour the batter into the prepared baking pan and smooth out the top with a spatula.
Baking
- Bake for 30-35 minutes or until a toothpick inserted into the center of the cake comes out clean.
Making the Frosting
- While the cake is baking, prepare the frosting by beating together the cream cheese and butter in a medium bowl until smooth.
- Gradually add the powdered sugar, mixing until creamy and fluffy.
- Stir in the coconut milk and half of the coconut flakes until well combined.
Finishing
- Allow the cake to cool completely in the pan before frosting.
- Spread the coconut frosting evenly over the cooled cake, then sprinkle the remaining coconut flakes on top for decoration.
- Refrigerate for at least 30 minutes before serving to let the frosting set.