Introduction
Who said you need to wait until the end of the year to enjoy the delightful taste of peppermint? On this glorious 9th day of September 2024, we are embarking on a whimsical culinary journey with a no-bake peppermint cheesecake that marries the cool freshness of peppermint with the creamy richness of cheesecake. This dessert is more than just food; it is a celebration in itself. Perfect for a light-hearted gathering, an unexpected treat for guests, or even as a luscious end-of-summer indulgence, this peppermint dream is bound to become a staple in your dessert repertoire.
Detailed Ingredients
Creating the perfect peppermint dream no-bake cheesecake starts with sourcing the finest ingredients. Here’s what you’ll need:
– 2 cups chocolate cookie crumbs: The foundation of a scrumptious crust, providing a decadent and slightly bitter contrast to the sweet filling.
– ½ cup unsalted butter, melted: This allows the cookie crumbs to bind together effortlessly.
– 16 ounces cream cheese, softened: The star of the cheesecake, lending that characteristic creamy texture and tangy taste.
– 1 cup powdered sugar: Essential for sweetness without the grainy texture.
– 1 teaspoon vanilla extract: Adds depth and warmth to balance the peppermint.
– 1 ½ teaspoons peppermint extract: The key flavor component, offering a fresh and invigorating taste.
– 1 ¼ cups heavy whipping cream: Whips into a light, airy texture, essential for a no-bake cheesecake.
– 2 tablespoons granulated sugar: Used to stabilize the whipped cream and add sweetness.
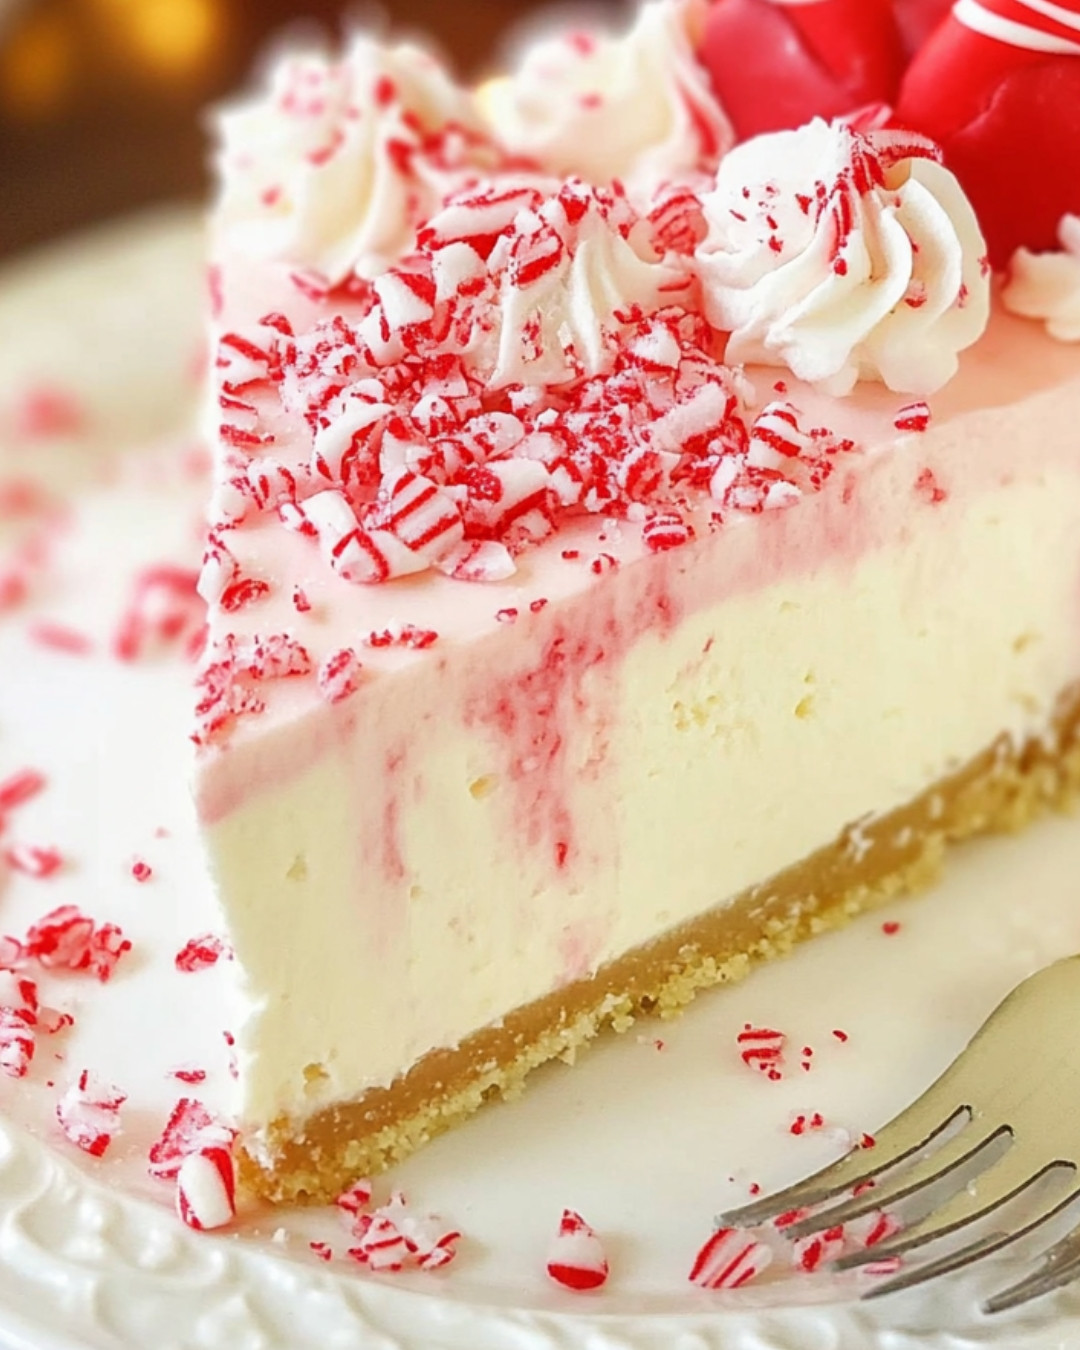
– Red food coloring, optional: A fun touch for visual appeal, creating a marbled effect.
– Crushed peppermint candies, for garnish: Adds a hint of crunch and bursts of peppermint flavor.
– Whipped cream, for topping: Provides an additional layer of indulgence.
Prep Time, Cook Time, Total Time, Yield
– Prep Time: 25 minutes
– Cook Time: 0 minutes
– Total Time: 6 hours 25 minutes
– Yield: 10-12 servings
Detailed Directions and Instructions
Crafting this divine peppermint dream is as joyous as indulging in its flavors. Follow these step-by-step directions for a flawless dessert:
1. Begin by preparing your crust. In a medium-sized mixing bowl, combine the chocolate cookie crumbs and melted butter. Stir until the crumbs are uniformly moist. Press this mixture firmly into the base of a 9-inch springform pan. Ensure it is tightly packed, providing a sturdy foundation for your cheesecake. Place in the refrigerator to chill while you move on to the filling.
2. For the filling, take a large bowl and beat the cream cheese until it is silky smooth and creamy. This step is crucial for a beautifully textured cheesecake. Add in the powdered sugar, vanilla extract, and peppermint extract. Beat the mixture again until all ingredients are well combined, ensuring no lumps remain.
3. In a separate bowl, pour in the heavy whipping cream. Add the granulated sugar and whip until stiff peaks form. This may require using an electric mixer to achieve the desired consistency.
4. Gently fold the whipped cream into the cream cheese mixture. This process should be done slowly to maintain the airy texture. If you wish to add a subtle pink hue, incorporate a few drops of red food coloring. Use a spatula to create gentle swirls for a marbled effect without overmixing.
5. Once combined, spread the cheesecake filling evenly over the prepared crust. Smooth the top for a pristine finish. Cover the pan and allow the cheesecake to chill in the refrigerator for at least 6 hours, or until fully set.
6. After the cheesecake has set, carefully remove the sides of the springform pan. For a decorative flourish, pipe or dollop whipped cream on top of the cheesecake. Sprinkle with crushed peppermint candies to finish.
7. Slice into portions, serve, and watch as your guests are enchanted by this refreshing and creamy treat.
Notes
– Ensure cream cheese is fully softened to avoid lumps in your cheesecake filling.
– For best results, pass the crumbs through a sieve for an even finer texture.
– Make sure whipped cream has stiff peaks to ensure stability when mixed.
Cook Techniques
Achieving the perfect no-bake cheesecake involves a few specific techniques:
– Folding: This is a gentle mixing technique to incorporate whipped cream into the cream cheese without deflating it, maintaining a light texture.
– Pressing: When forming the crust, use a glass with a flat base to press down evenly, ensuring a solid foundation.
– Chilling: Allowing the cheesecake sufficient time to chill results in a firm set, crucial for achieving clean slices.
FAQ
Q: Can I use a different type of crust?
A: Absolutely! A graham cracker crust or even an oreo crust can work well for different flavor profiles.
Q: How long can I store the cheesecake in the refrigerator?
A: Properly covered, this no-bake cheesecake can last up to 4 days in the refrigerator.
Q: Can I freeze the cheesecake?
A: Yes, you can freeze it for up to one month. Just ensure it is well wrapped to avoid freezer burn.
Q: What if I don’t have a springform pan?
A: You can use a pie dish, though the removal may be slightly more delicate.
Conclusion
The Peppermint Dream No-Bake Cheesecake is truly a delightful marriage of flavors and textures that brings an unexpected twist to traditional seasons for peppermint goodness. Offering a refreshingly cool and creamy treat, it’s perfect for those who wish to escape the usual dessert choices. Its vibrant flavors make any occasion special, inviting happiness to every bite.
More Recipes Suggestions and Combination
If the Peppermint Dream No-Bake Cheesecake has tantalized your taste buds, here are more dessert ideas to complement it:
– Lemon and Ginger No-Bake Cheesecake: Bright lemon flavors with a hint of ginger.
– Chocolate Hazelnut No-Bake Cheesecake: Rich and indulgent, with a nutty twist.
– Raspberry Vanilla Bean No-Bake Cheesecake: Delicate and floral, perfect for summer.
Each of these recipes embraces the ease of no-bake preparation while offering distinct flavor profiles. The world of no-bake cheesecakes is rich and varied, inviting you to explore countless delicious possibilities.
Peppermint Dream No-Bake Cheesecake
Ingredients
Method
- In a medium-sized mixing bowl, combine the chocolate cookie crumbs and melted butter until uniformly moist.
- Press the mixture firmly into the base of a 9-inch springform pan and chill in the refrigerator.
- In a large bowl, beat the softened cream cheese until silky smooth.
- Add the powdered sugar, vanilla extract, and peppermint extract, blending until well combined.
- In a separate bowl, whip the heavy cream with granulated sugar until stiff peaks form.
- Gently fold the whipped cream into the cream cheese mixture. Optionally, add red food coloring for a marbled effect.
- Spread the cheesecake filling evenly over the crust and smooth the top.
- Cover the pan and refrigerate for at least 6 hours or until fully set.
- Remove the sides of the springform pan, top with whipped cream and crushed peppermint candies.
- Slice into portions and serve.
Notes
Peppermint Dream No-Bake Cheesecake
Ingredients
Method
- Combine chocolate cookie crumbs and melted butter in a bowl, then press into the base of a 9-inch springform pan.
- In a large bowl, beat the cream cheese until silky smooth. Add powdered sugar, vanilla extract, and peppermint extract, and mix until combined.
- In a separate bowl, whip heavy cream with granulated sugar until stiff peaks form.
- Gently fold whipped cream into the cream cheese mixture. Optionally add red food coloring for a marbled effect.
- Spread the cheesecake filling evenly over the crust and smooth the top. Cover and chill for at least 6 hours.
- Once set, remove the springform pan and top with whipped cream and crushed peppermint candies.
- Slice, serve, and enjoy!