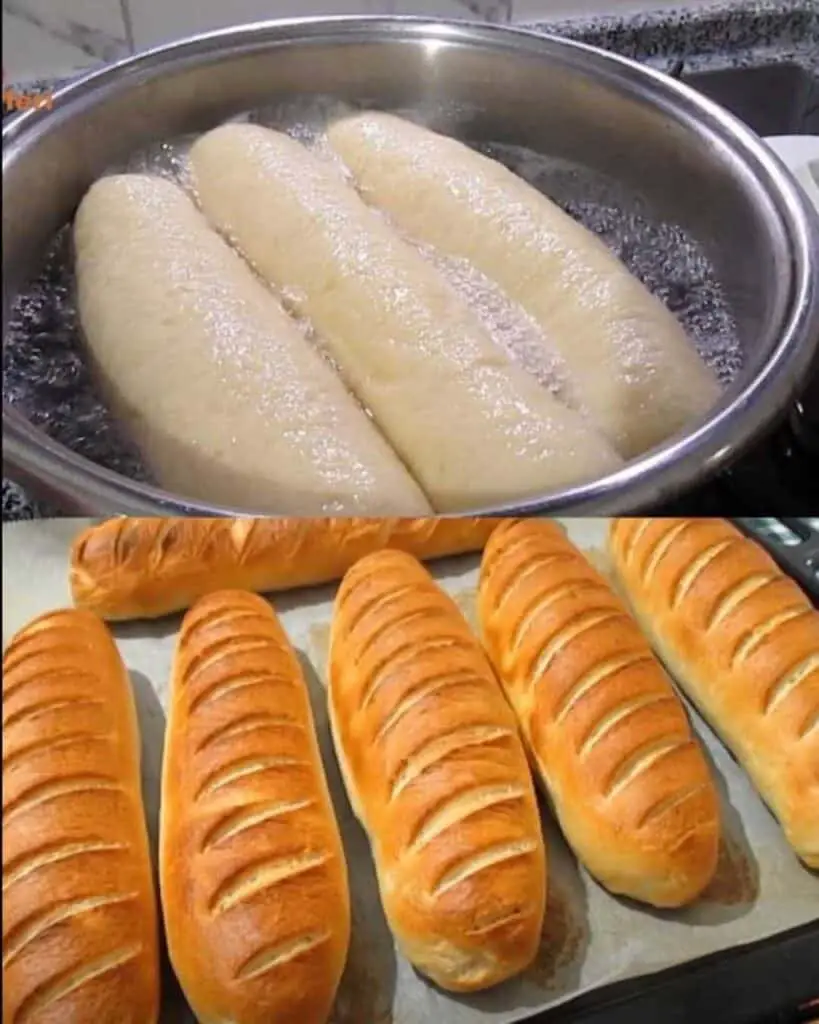
I don’t know about you, but there’s something about the smell of fresh bread that fills a kitchen with warmth and comfort. And when I discovered a way to make it without an oven? Game-changer. Whether your oven is on the fritz, you live in a small space, or you just want to try something new — this No-Oven Stovetop Bread is the perfect solution.
It’s soft, golden, and delicious, and you can make it with basic pantry ingredients and a stovetop. I promise you — once you try it, you’ll be making it again and again!
✨ Want more cozy, creative bread recipes like this one?
Subscribe to my newsletter for recipes you can trust — no-fuss, flavor-packed, and straight from my kitchen to yours!
What Is Stovetop Bread?
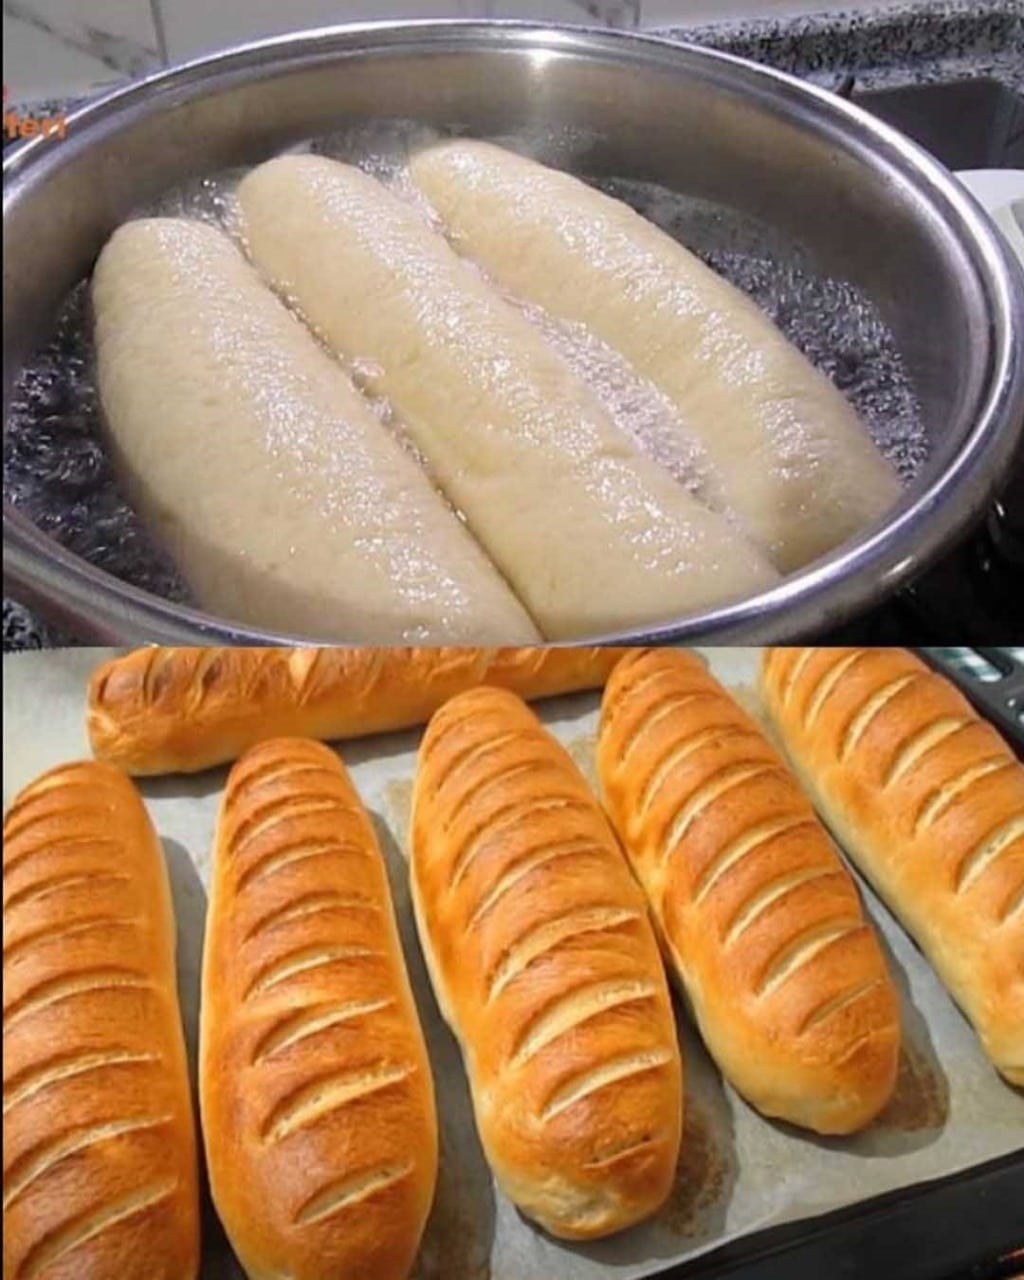
Stovetop bread is exactly what it sounds like — bread that’s cooked entirely on the stovetop instead of in the oven. This method uses boiling water to par-cook the dough, followed by a golden pan-toast to finish it off. The result is crusty on the outside, soft and fluffy on the inside, and absolutely irresistible.
Why You’ll Love This Recipe
- 🧡 No oven required! Ideal for hot days, small kitchens, or oven-free households.
- ⏱ Quick to make compared to traditional bread.
- 👩🍳 Beginner-friendly – no fancy tools or techniques required.
- 🥖 Versatile – shape it how you like, flavor it how you love.
- 💡 Kid-approved and great for sandwiches, dipping, or snacking!
What It Tastes Like
Think of a soft dinner roll meets a golden flatbread — light and tender inside, with a slight chewy crust outside. It has a mild, buttery flavor with a touch of richness from the milk and butter. Add herbs and spices and it becomes a whole new bread experience every time!
Why This Bread Is Worth Making
- Healthier than store-bought with no preservatives.
- Budget-friendly with simple, everyday ingredients.
- A fun hands-on project (that smells amazing).
- Great for beginners and kids to help with.
Ingredients (Makes 8–10 medium-sized breads)
- 2 cups warm milk
- 5 tablespoons butter
- 1 tablespoon canola or vegetable oil
- 1 teaspoon dry yeast
- 1 teaspoon sugar
- 1 teaspoon salt
- 5 cups all-purpose flour
- 2.5 to 3 liters water (for boiling)
Tools You’ll Need
- Mixing bowl
- Wooden spoon or dough hook
- Measuring cups & spoons
- Large pot (for boiling)
- Large skillet or frying pan
- Clean towel or paper towels
- Slotted spoon
Ingredient Additions & Substitutions
- Swap milk for water or dairy-free milk (almond, oat, etc.)
- Use olive oil instead of canola for a Mediterranean twist.
- Add chopped fresh herbs like parsley, dill, or rosemary.
- Mix in grated cheese, garlic powder, or sun-dried tomatoes for flavor bombs.
- Want a sweeter version? Add a touch of honey or cinnamon to the dough.
Step-by-Step Instructions
1. Prepare the Dough
In a bowl, mix warm milk, sugar, and yeast. Let it sit for 5–10 minutes until bubbly.
Add in the salt, oil, butter, and flour. Mix until a soft dough forms.
Adjust with more flour or milk if needed to get a non-sticky, pliable dough.
2. Knead & Let It Rise
Turn dough onto a floured surface and knead for 8–10 minutes until smooth and elastic.
Place in a greased bowl, cover, and let rise in a warm place for about 1 hour or until doubled in size.
3. Boil the Dough (Yes, Really!)
Bring 2.5–3 liters of water to a boil in a large pot. Add a teaspoon of salt.
Punch down the risen dough and shape into small balls or disks.
Boil the shaped dough for 1–2 minutes, just until they float.
Remove with a slotted spoon and let drain on a clean towel.
4. Cook on the Stovetop
Heat a nonstick skillet or pan over medium heat (no oil needed).
Place the par-cooked dough pieces in the pan.
Cook for 2–3 minutes per side, pressing gently with a spatula, until golden brown and cooked through.
5. Serve & Enjoy!
Serve warm with butter, honey, jam, hummus, or even garlic butter.
They’re fantastic on their own or as a side to any meal!
What to Serve With Stovetop Bread
- Butter and jam for breakfast or tea time
- Soup or stew — especially lentil, tomato, or chicken soup
- Dips like baba ganoush, hummus, or spinach artichoke
- Sandwiches or mini sliders
- As a naan substitute with curry!
Tips for Perfect Stovetop Bread
- Don’t skip the boiling step — it gives that soft interior and golden crust.
- Let the dough rise fully for best fluffiness.
- Keep the pan at medium heat to avoid burning.
- Pressing with a spatula helps create even browning.
- Want even more crisp? Brush with butter before toasting!
Storage Instructions
- Store cooled bread in an airtight container at room temp for up to 2 days.
- To reheat: pop them in a hot dry skillet for a few minutes or warm in the microwave wrapped in a damp paper towel.
- Freezer-friendly: Freeze after cooking in a zip bag for up to 1 month. Reheat from frozen.
FAQs
Can I skip the boiling step?
Boiling is key for texture and puff. It only takes a minute — don’t skip it!
Can I bake this instead?
Yes! Bake at 375°F (190°C) for 18–20 minutes until golden if you prefer.
Can I make it gluten-free?
You can try using a 1:1 gluten-free flour blend, but the texture may vary.
What if I don’t have yeast?
Try a flatbread version using baking powder instead — it won’t rise as much but will still be tasty!
Wrapping It All Up
This No-Oven Stovetop Bread is the perfect combination of simplicity and soul-satisfying goodness. It’s fun to make, easy to customize, and a total winner whether you’re feeding a family or just yourself on a quiet Sunday morning.
👉 Give it a try, and tell me what flavor variations you come up with!
More No-Oven Recipes You’ll Love
- One-Pan Stovetop Focaccia
- Skillet Cornbread with Jalapeño
- No-Bake Garlic Herb Flatbread
- Pan-Fried Cheese-Stuffed Buns
Let’s Get Social!
If you make this stovetop bread, I’d love to see it!
Leave a comment below, pin it on Pinterest, or tag me on Instagram @mmmrecipes — your creations make my day! 💛
Nutritional Information (per bread, approx.)
- Calories: 230
- Carbs: 34g
- Protein: 6g
- Fat: 8g
- Sugar: 2g
- Fiber: 1g
- Sodium: 220m
No-Oven Stovetop Bread
Ingredients
Dough Ingredients
- 2 cups warm milk Can be substituted with water or dairy-free milk.
- 5 tablespoons butter Use olive oil for a Mediterranean twist.
- 1 tablespoon canola or vegetable oil
- 1 teaspoon dry yeast Can be substituted with baking powder for a flatbread version.
- 1 teaspoon sugar
- 1 teaspoon salt
- 5 cups all-purpose flour Try a 1:1 gluten-free flour blend as a substitute.
- 2.5 to 3 liters water for boiling
Instructions
Prepare the Dough
- In a bowl, mix warm milk, sugar, and yeast. Let it sit for 5–10 minutes until bubbly.
- Add in the salt, oil, butter, and flour. Mix until a soft dough forms.
- Adjust with more flour or milk if needed to get a non-sticky, pliable dough.
Knead & Let It Rise
- Turn dough onto a floured surface and knead for 8–10 minutes until smooth and elastic.
- Place in a greased bowl, cover, and let rise in a warm place for about 1 hour or until doubled in size.
Boil the Dough
- Bring 2.5–3 liters of water to a boil in a large pot. Add a teaspoon of salt.
- Punch down the risen dough and shape into small balls or disks.
- Boil the shaped dough for 1–2 minutes, just until they float.
- Remove with a slotted spoon and let drain on a clean towel.
Cook on the Stovetop
- Heat a nonstick skillet over medium heat (no oil needed).
- Place the par-cooked dough pieces in the pan.
- Cook for 2–3 minutes per side, pressing gently with a spatula, until golden brown and cooked through.
Serve & Enjoy
- Serve warm with butter, honey, jam, hummus, or garlic butter.
- They're fantastic on their own or as a side to any meal!