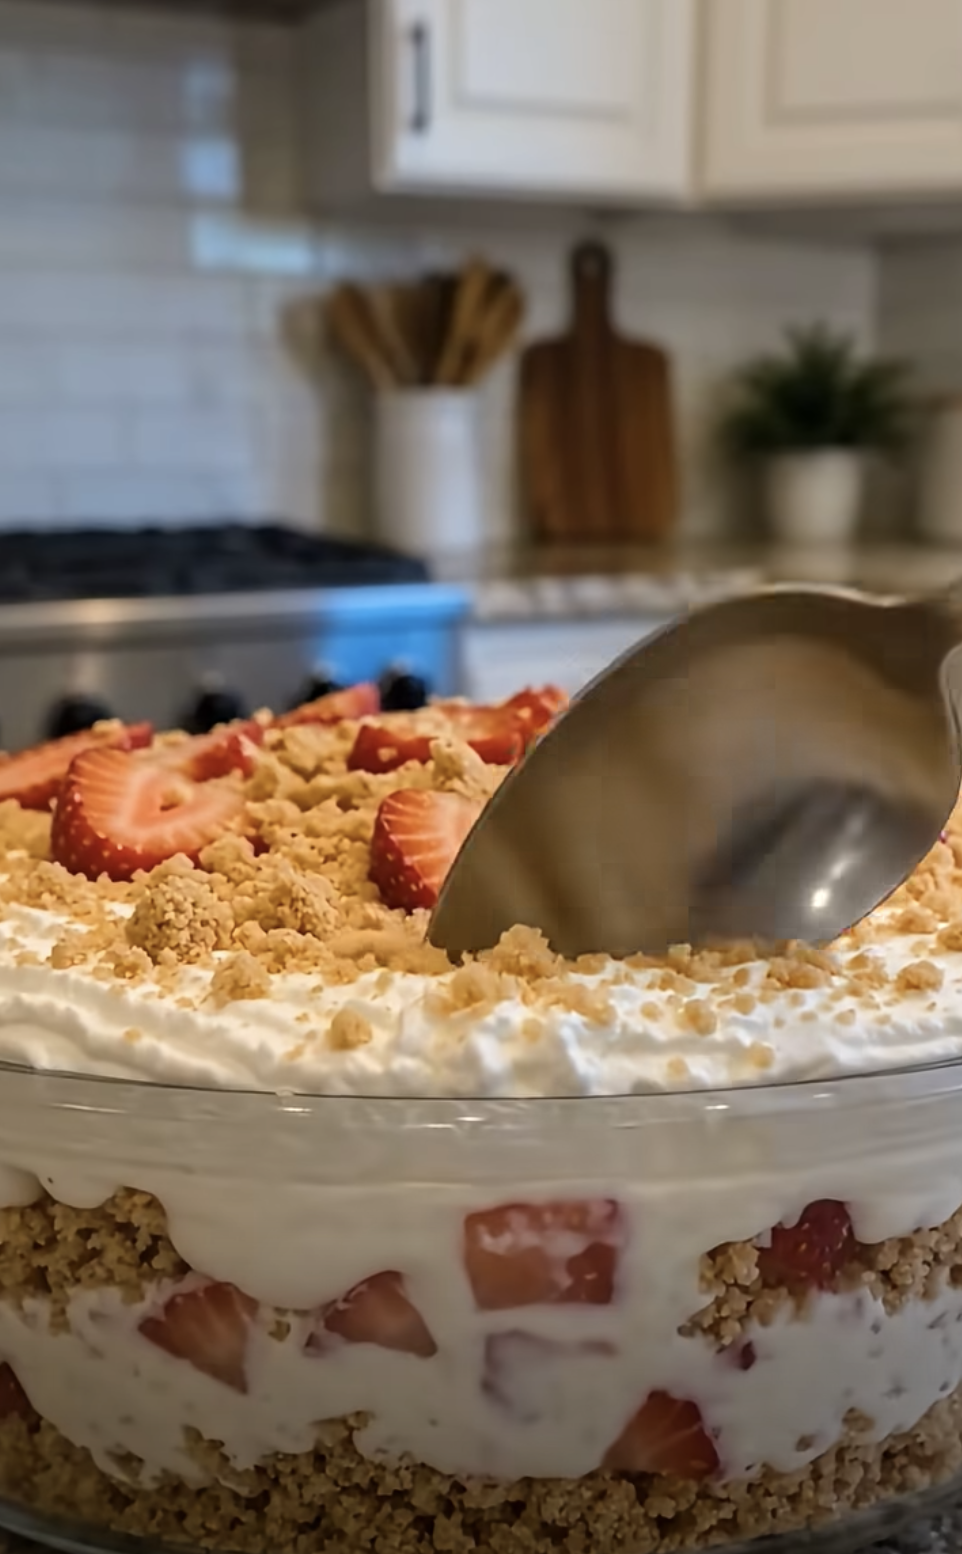
No-Bake Strawberry Shortcake Dessert brings together everything that makes a chilled strawberry dessert so satisfying. It starts with a buttery vanilla wafer crust, followed by a fluffy cheesecake layer, a glossy homemade strawberry filling, whipped topping, and a sweet strawberry crunch finish.
Because this No-Bake Strawberry Shortcake Dessert requires no oven, it works especially well during warm weather, for holidays, or whenever you need a make-ahead dessert without adding extra heat to the kitchen. The combination of creamy filling, juicy strawberries, crisp cookie crumbs, and light whipped topping creates a dessert that feels rich without becoming heavy.
Another advantage comes from the simple assembly. Each layer uses familiar ingredients, and most of the work involves mixing, spreading, and chilling. Therefore, even beginners can make the dessert successfully.
For the best texture, give the finished dessert at least four to six hours in the refrigerator. Overnight chilling works even better because the layers have time to firm and the flavors blend beautifully.
I first made a version of this dessert for a summer gathering when I needed something I could prepare the night before. I wanted strawberry shortcake flavor, but I did not want to bake biscuits or assemble individual servings. The vanilla wafer crust solved that problem immediately. After adding the cheesecake filling, strawberries, whipped cream, and crunchy topping, I covered the pan and forgot about it until the next day. When I cut the first square, the layers held together beautifully, and the contrast between creamy filling and strawberry crunch made everyone go back for seconds. Since then, it has become one of my favorite warm-weather desserts.
Why No-Bake Strawberry Shortcake Dessert Works So Well
The Vanilla Wafer Crust Adds Buttery Crunch
The base of No-Bake Strawberry Shortcake Dessert starts with vanilla wafer cookie crumbs, melted butter, and a small amount of granulated sugar.
This simple crust provides two important things.
First, it gives the dessert structure.
Second, it creates a buttery cookie flavor that pairs naturally with strawberries and cream.
You will need two cups of vanilla wafer crumbs for the crust. Crush the cookies until they resemble fine crumbs. A food processor makes this step quick, although a rolling pin and zip-top bag work just as well.
Next, mix the crumbs with one-half cup melted unsalted butter and two tablespoons granulated sugar.
Stir until every crumb looks evenly moistened.
The mixture should resemble damp sand and hold together when pressed between your fingers.
Then transfer it into a 9-by-13-inch dish.
Press the crumbs firmly across the bottom in an even layer. Use the flat bottom of a measuring cup or glass to compact the crust.
This step matters because a loosely packed crust can crumble when you cut the No-Bake Strawberry Shortcake Dessert later.
Once packed, refrigerate the crust for at least 20 minutes.
The cold temperature firms the butter and helps the crust become more stable before you add the cheesecake filling.
Because this recipe does not bake the crust, chilling takes the place of oven time.
Therefore, do not skip it.
For a slightly stronger vanilla flavor, you can add a small splash of vanilla extract to the crust mixture. However, the vanilla wafers already provide plenty of sweetness and aroma.
You can also reserve a few extra crumbs for decorating the top.
The finished crust should remain firm enough to support the layers while still softening slightly after several hours in the refrigerator.
That balance gives No-Bake Strawberry Shortcake Dessert its classic creamy-crunchy texture.
Ingredients
Equipment
Method
- Combine the vanilla wafer crumbs, melted butter, and sugar until evenly moistened. Press firmly into the bottom of a 9-by-13-inch dish and refrigerate for at least 20 minutes.
- Add the diced strawberries, sugar, and lemon juice to a saucepan. Cook over medium heat for 4 to 5 minutes, stirring occasionally.
- Mix the cornstarch with 2 tablespoons water until smooth. Stir it into the strawberries and cook for another 1 to 2 minutes until the juices become thick and glossy. Remove from the heat and cool completely.
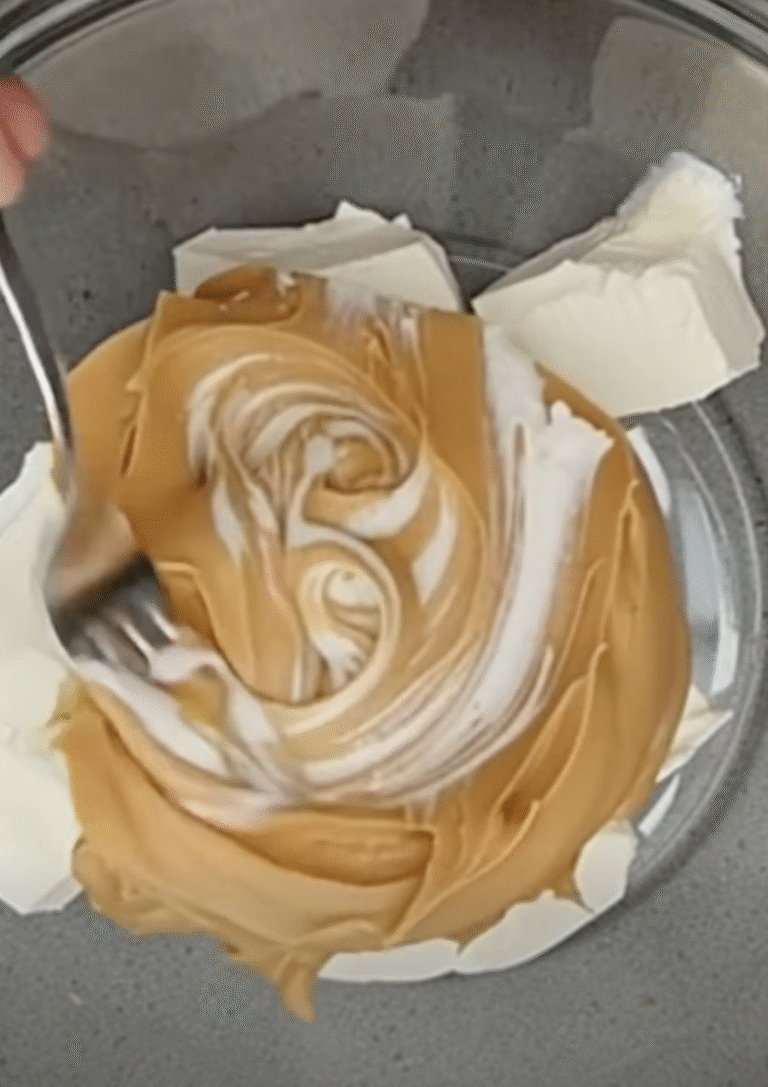
- Beat the softened cream cheese and powdered sugar for 2 to 3 minutes until smooth. Mix in the vanilla extract and lemon juice.
- In a separate bowl, whip the cold heavy cream until stiff peaks form. Gently fold the whipped cream into the cream cheese mixture until light and fluffy.
- Spread the cheesecake filling evenly over the chilled vanilla wafer crust.
- Spoon the completely cooled strawberry mixture over the cheesecake layer and gently spread it to the edges.
- Spread the whipped cream or whipped topping evenly over the strawberry layer.
- Combine the crushed vanilla wafers, crushed freeze-dried strawberries, and melted butter. Sprinkle the strawberry crunch evenly over the dessert.
- Cover and refrigerate for at least 4 to 6 hours, preferably overnight.
- Just before serving, decorate with fresh strawberry slices and additional strawberry crunch. Cut into squares and serve chilled.
Notes
The Cheesecake Filling Makes Every Slice Light and Creamy
The cheesecake layer turns No-Bake Strawberry Shortcake Dessert into something richer than an ordinary strawberry shortcake.
It uses softened cream cheese, powdered sugar, vanilla, lemon juice, and freshly whipped heavy cream.
Start with 16 ounces of softened cream cheese.
Room-temperature cream cheese mixes much more smoothly than cold cream cheese, so let it soften before you begin.
Place it in a large mixing bowl with one cup powdered sugar.
Beat the mixture for two to three minutes until completely smooth and fluffy.
Then add two teaspoons vanilla extract and one tablespoon fresh lemon juice.
The vanilla adds warmth, while the lemon brightens the filling and complements the strawberries.
Next, whip 1 1/2 cups cold heavy whipping cream in a separate bowl.
Cold cream whips best, so keep it refrigerated until you need it.
Beat until stiff peaks form.
When you lift the beaters, the whipped cream should hold its shape rather than falling back into the bowl.
Now fold the whipped cream gently into the cream cheese mixture.
Use a spatula and work gradually.
Avoid aggressive stirring because you want to preserve the air in the whipped cream.
That air gives the cheesecake layer its soft, mousse-like texture.
Once combined, the filling should look smooth, thick, and fluffy.
Spread it evenly over the chilled vanilla wafer crust.
Use an offset spatula or the back of a spoon to push the filling gently toward the edges.
At this point, No-Bake Strawberry Shortcake Dessert already has a rich base, but the fruit layer is what gives the dessert its fresh strawberry character.
How to Make the Strawberry Layer and Crunch Topping
Cook the Strawberry Filling Until Thick and Glossy
The strawberry layer gives No-Bake Strawberry Shortcake Dessert its bright flavor and beautiful color.
You will need three cups of fresh strawberries, hulled and diced.
Place the berries in a saucepan with one-third cup granulated sugar and one tablespoon fresh lemon juice.
Set the pan over medium heat.
Cook for four to five minutes, stirring occasionally.
As the strawberries warm, they release juice and begin to soften.
However, do not cook them until they completely break down.
You still want small pieces of fruit throughout the filling.
Meanwhile, stir one tablespoon cornstarch with two tablespoons water in a small bowl.
Mix until completely smooth.
This cornstarch slurry thickens the strawberry juices without creating lumps.
Once the strawberries have softened, pour in the slurry while stirring.
Continue cooking for another one to two minutes.
The liquid will turn thick and glossy.
When you drag a spoon through the mixture, the juices should briefly hold a path before flowing back together.
Remove the pan from the heat.
Now comes one of the most important steps in No-Bake Strawberry Shortcake Dessert: let the strawberry filling cool completely.
Do not spoon warm strawberries over the cheesecake layer.
Warm filling can soften the cream cheese mixture and create messy layers.
Therefore, transfer the strawberry mixture to a shallow bowl if you want it to cool faster.
You can also refrigerate it once it stops steaming.
When completely cold, spoon the strawberries over the cheesecake filling.
Spread them gently to the edges without pressing down too firmly.
For even more strawberry flavor, add thin slices of fresh berries between the cheesecake layer and the cooked strawberry mixture.
That optional layer gives the dessert additional freshness and texture.
Strawberry Crunch Adds the Finishing Texture
The topping makes No-Bake Strawberry Shortcake Dessert especially memorable.
Instead of finishing with plain whipped cream alone, the recipe adds a crunchy mixture of vanilla wafers and freeze-dried strawberries.
You will need one cup crushed vanilla wafer cookies, one-half cup crushed freeze-dried strawberries, and three tablespoons melted unsalted butter.
Combine the cookie crumbs and crushed strawberries in a bowl.
Then pour in the melted butter.
Stir until the mixture looks evenly coated.
The freeze-dried strawberries give the topping an intense strawberry flavor without adding extra moisture.
That detail matters because fresh strawberries would soften the crunch quickly.
Once the strawberry filling has been spread over the cheesecake layer, add 1 1/2 cups whipped cream or whipped topping.
Spread it gently over the strawberries.
Try not to drag the strawberry mixture into the whipped layer.
Then sprinkle the strawberry crunch generously over the top.
You can cover the entire surface or leave a small amount of whipped topping visible around the edges.
Save a little extra crunch for serving.
The topping creates a texture contrast in every bite.
The crust feels buttery and firm.
The cheesecake layer stays soft.
The cooked strawberries add juicy sweetness.
The whipped cream keeps everything light.
Finally, the crunch topping adds crisp cookie pieces and concentrated strawberry flavor.
That combination gives No-Bake Strawberry Shortcake Dessert the appeal of both strawberry shortcake and strawberry cheesecake in one pan.
If you prefer a finer topping, crush the ingredients more thoroughly.
For a chunkier finish, leave some larger cookie pieces.
Either version works well.
How to Assemble and Chill No-Bake Strawberry Shortcake Dessert
Layer Everything Carefully for Clean Squares
Assembly determines how attractive No-Bake Strawberry Shortcake Dessert looks when you cut it.
Start with the chilled crust.
Spread the cheesecake filling over it in an even layer.
Use light pressure so you do not disturb the crumbs underneath.
Next, spoon the completely cooled strawberry mixture over the cheesecake.
Spread it carefully from edge to edge.
If you want to add fresh sliced strawberries between the layers, place them over the cheesecake filling before adding the cooked strawberries.
Then spread the whipped cream or whipped topping over the strawberry layer.
Use gentle strokes.
The goal is to keep the layers separate rather than swirling them together.
Finally, add the strawberry crunch.
Sprinkle it evenly over the top.
At this point, the dessert looks finished, but it still needs time in the refrigerator.
Cover the dish tightly.
Then refrigerate for at least four to six hours.
Overnight chilling gives the best results.
As No-Bake Strawberry Shortcake Dessert chills, the cheesecake filling becomes firmer.
The crust also sets more securely.
Meanwhile, the flavors blend and the entire dessert becomes easier to slice.
If you try to cut it too soon, the layers may slide.
Therefore, patience creates a much neater presentation.
When you are ready to serve, remove the dessert from the refrigerator.
Add fresh strawberry slices and extra crunch just before cutting.
Use a sharp knife for clean squares.
Wipe the blade between cuts if you want particularly tidy edges.
A small offset spatula or pie server helps lift each portion from the pan.
Serve the dessert chilled.
Because the filling contains cream cheese and whipped cream, it tastes best cold and should not sit at room temperature for long periods.
Make-Ahead Preparation Makes Serving Easy
One of the best reasons to make No-Bake Strawberry Shortcake Dessert is convenience.
You can prepare the entire dessert the day before serving.
That makes it ideal for parties, potlucks, birthdays, summer dinners, and holidays.
In fact, overnight chilling improves the texture.
If you want to break the recipe into smaller tasks, prepare the strawberry filling first.
Cook it, cool it, and refrigerate it in a covered container.
Then make the crust and cheesecake filling later.
You can also prepare the strawberry crunch ahead of time.
However, store it separately at room temperature in an airtight container until assembly.
Keeping the crunch dry prevents it from softening before it reaches the dessert.
Once assembled, cover No-Bake Strawberry Shortcake Dessert well.
Plastic wrap, a fitted lid, or tightly sealed foil all work.
Keep the dessert refrigerated until serving.
If you plan to decorate with fresh strawberries, wait until shortly before serving.
Fresh strawberry slices can release juice as they sit.
Therefore, adding them at the last moment keeps the top looking fresh.
You can also pipe whipped cream around the edges for a more decorative finish.
For a casual presentation, simply spread the whipped topping and scatter the crunch over everything.
Both approaches taste equally good.
Because the dessert comes from a 9-by-13-inch dish, it serves a crowd easily.
Cut smaller squares for parties or larger portions for family dessert.
No-Bake Strawberry Shortcake Dessert holds especially well when chilled overnight, so you can focus on the rest of your meal instead of making dessert at the last minute.
Variations, Storage, and Serving Ideas
Customize the Dessert With Simple Flavor Changes
No-Bake Strawberry Shortcake Dessert already has plenty of strawberry flavor, but you can easily customize it.
For an extra-fruity version, add a layer of thinly sliced fresh strawberries between the cheesecake filling and cooked strawberry layer.
This creates more texture and makes each slice look especially colorful.
You can also add a little lemon zest to the cheesecake filling.
The zest reinforces the lemon juice and gives the creamy layer a brighter flavor.
For a stronger vanilla note, add a small amount of vanilla bean paste instead of part of the vanilla extract.
If you want more crunch, increase the strawberry topping slightly.
You can also reserve some of the topping and sprinkle it onto individual servings right before eating.
That keeps it especially crisp.
Another easy variation involves the crust.
Although vanilla wafers create the classic flavor, graham cracker crumbs can work as a substitute.
Shortbread cookies also make a rich, buttery base.
However, changing the cookie may require a slight adjustment to the melted butter because different crumbs absorb fat differently.
You can also make individual servings.
Press the crust into small dessert cups or jars.
Then layer cheesecake filling, strawberries, whipped topping, and crunch.
Individual portions eliminate slicing and work especially well for parties.
For a strawberry-lemon version, increase the lemon juice slightly and add fresh lemon zest.
For an extra-cheesecake flavor, reduce the whipped cream slightly so the cream cheese tastes more prominent.
No matter which variation you choose, keep the balance of textures.
No-Bake Strawberry Shortcake Dessert tastes best when you have a firm crust, fluffy filling, juicy fruit, creamy topping, and crisp strawberry crumbs in every serving.
Store Leftovers Properly for the Best Texture
Keep No-Bake Strawberry Shortcake Dessert covered in the refrigerator.
For best quality, enjoy it within three to four days.
The dessert remains safe and pleasant when stored properly, but the textures gradually change.
The vanilla wafer crust becomes softer as it absorbs moisture.
Likewise, the strawberry crunch loses some crispness after several days.
Therefore, the first two days usually provide the best contrast.
If you expect leftovers, reserve some strawberry crunch in a separate airtight container.
Then sprinkle fresh crunch over each serving.
This simple trick restores texture even after the dessert has chilled for a couple of days.
Avoid leaving the dessert at room temperature for extended periods.
Because the filling contains cream cheese and whipped cream, keep it refrigerated whenever possible.
When serving at a party, place the pan back into the refrigerator after everyone has taken a portion.
Freezing is possible, although the texture may change after thawing.
The whipped topping and cheesecake layer can become slightly softer or less smooth.
Fresh strawberries may also release extra liquid.
Therefore, refrigeration provides the best overall texture.
If you do freeze individual portions, wrap them tightly and thaw them slowly in the refrigerator.
Add fresh strawberries and extra crunch after thawing rather than before.
No-Bake Strawberry Shortcake Dessert pairs beautifully with coffee, iced tea, lemonade, or a simple cup of hot tea.
Because the dessert already contains several rich layers, you do not need much else with it.
Serve it cold and let the strawberry flavor do the work.
Frequently Asked Questions
Can I make No-Bake Strawberry Shortcake Dessert the day before?
Yes. In fact, overnight refrigeration gives the dessert more time to firm and helps the flavors blend. Assemble it completely, cover it well, and add fresh strawberry decorations just before serving.
Can I use frozen strawberries?
Fresh strawberries provide the best texture. However, you can use thawed frozen strawberries for the cooked filling. Drain excess liquid if necessary, and make sure the finished mixture cools completely before layering.
Why is my cheesecake filling too soft?
The cream cheese may have been overly warm, the heavy cream may not have reached stiff peaks, or the dessert may need more chilling time. Refrigerate the completed dessert for at least four to six hours.
Can I use whipped topping instead of homemade whipped cream?
Yes. You can use whipped topping for the top layer. The cheesecake filling, however, gets its light texture from whipped heavy cream, so fresh whipped cream works especially well there.
How long does No-Bake Strawberry Shortcake Dessert last?
Keep it covered in the refrigerator for up to three to four days. For the best texture, serve it within the first two days and add extra crunch immediately before serving.
Conclusion
No-Bake Strawberry Shortcake Dessert delivers everything you want from a warm-weather dessert without requiring an oven.
The vanilla wafer crust gives each slice a buttery base.
The cheesecake filling stays soft, rich, and fluffy.
The cooked strawberry layer adds bright fruit flavor.
Then whipped cream and strawberry crunch finish the dessert with lightness and texture.
Because No-Bake Strawberry Shortcake Dessert needs several hours in the refrigerator, it also works beautifully as a make-ahead recipe.
Prepare it in the evening.
Cover the pan.
Then serve it the next day with almost no additional work.
For the best result, remember three important details.
First, pack the vanilla wafer crust firmly.
Second, cool the strawberry filling completely before spreading it over the cheesecake layer.
Third, give the assembled dessert enough time to chill.
Those simple steps help the layers stay neat and create clean slices.
You can also customize the dessert easily.
Add extra fresh strawberries.
Use lemon zest.
Make individual portions.
Switch the cookie crust.
Or save extra strawberry crunch for sprinkling over each serving.
No-Bake Strawberry Shortcake Dessert works because every layer brings something different.
You get creaminess, fruitiness, crunch, sweetness, and just enough lemon to keep the flavors fresh.
Serve it cold, decorate it with sliced strawberries, and enjoy a dessert that looks impressive while remaining surprisingly simple to prepare.