Introduction
Indulge in this creamy and luscious no-bake raspberry cheesecake that combines the tartness of fresh raspberries with a smooth, rich cheesecake layer. Perfect for any occasion, this dessert is easy to make and sure to impress your guests.
Detailed Ingredients
– 200g graham cracker crumbs
– 100g unsalted butter, melted
– 600g cream cheese, softened
– 150g powdered sugar
– 250ml heavy cream
– 200g fresh raspberries
– 100g raspberry jam
– 1 tsp vanilla extract
– 10g gelatin
– 50ml water
Prep Time
Prep Time: 30 minutes
Cook Time, Total Time, Yield
Cook Time: 0 minutes
Total Time: 4 hours 30 minutes
Yield: 12 servings
Indulging in this delightful no-bake raspberry cheesecake is a surefire way to impress guests or satisfy your sweet tooth. With its easy preparation and elegant presentation, this dessert is destined to become a favorite!
Detailed Directions and Instructions
Prepare the Crust
In a mixing bowl, combine the graham cracker crumbs with the melted unsalted butter until the crumbs are evenly coated. Press this mixture firmly into the bottom of a 23cm springform pan to form a sturdy crust. For the best results, refrigerate the crust for at least 30 minutes to allow it to set and become firm.
Dissolve the Gelatin
In a small bowl, sprinkle the gelatin over the water and let it sit for about 5 minutes. After this time, gently heat the mixture while stirring until the gelatin is fully dissolved. This step is crucial for giving the cheesecake its structure.
Make the Cheesecake Filling
In a large mixing bowl, beat the softened cream cheese along with the powdered sugar until the mixture is smooth and creamy. Once smooth, add in the dissolved gelatin, the heavy cream, and the vanilla extract. Continue to beat the mixture until everything is well combined and fluffy.
Incorporate Fresh Raspberries
Gently fold in the fresh raspberries into the cheesecake mixture. Be careful during this step to avoid crushing the raspberries, as you want to maintain their juicy form for delightful bursts of flavor in every bite.
Pour into Crust
Carefully pour the cheesecake mixture over the chilled crust. Use a spatula to smooth the top and ensure an even surface for the raspberry layer.
Add Raspberry Jam
Warm the raspberry jam slightly and drizzle it over the top of the cheesecake layer. Utilize a knife or skewer to create a beautiful marble effect by swirling the jam gently into the cheesecake, allowing the vibrant red to peek through the creamy layer.
Chill the Cheesecake
Refrigerate the cheesecake for at least 4 hours, or until it is fully set. This chilling time is essential for achieving the perfect texture—firm yet creamy.
Remove from Springform Pan
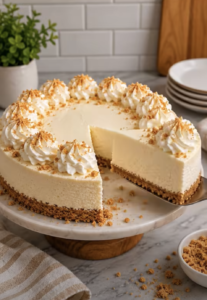
Before serving, carefully run a knife around the edge of the pan to loosen the cheesecake. Remove the sides of the springform pan, revealing the gorgeous layered dessert. If desired, garnish with additional fresh raspberries for an attractive presentation.
Notes
Serving Suggestions
This no-bake raspberry cheesecake delight is perfect for picnics, dinner parties, or as a special treat for holidays. Pair it with a dollop of whipped cream or a drizzle of chocolate sauce for an even more indulgent experience.
Storage Tips
To store leftovers, cover the cheesecake tightly with plastic wrap and keep it in the refrigerator for up to 3 days. For longer storage, you may freeze individual slices, wrapped well, for up to one month. Thaw in the refrigerator before serving.
Texture and Flavor Notes
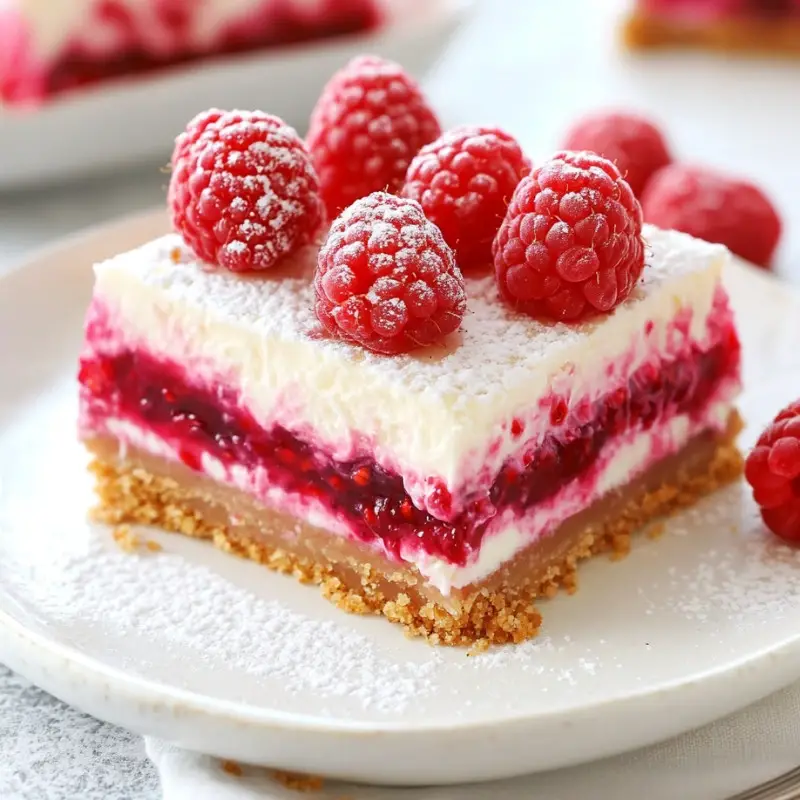
Expect a harmonious blend of creamy, velvety cheesecake perfectly complemented by the tartness of fresh raspberries. The crust adds a delightful crunch, making each bite a balanced experience of flavors and textures that will leave your guests raving.
Customization Ideas
Feel free to get creative! Swap the raspberry jam for other fruit jams or purees, such as strawberry or blueberry. You can also experiment with the crust by using other types of cookies or adding nuts for extra flavor.
Cook techniques
Crust Preparation
Combine graham cracker crumbs with melted butter to create a cohesive mixture, which is then pressed firmly into the bottom of a springform pan to form a stable base for the cheesecake.
Gelatin Dissolving
Sprinkle gelatin over water and let it sit briefly before gently heating and stirring until fully dissolved. This step is crucial for ensuring that the cheesecake sets properly without an unpleasant texture.
Cheesecake Mixture
Beat softened cream cheese with powdered sugar until smooth, then gradually incorporate gelatin, heavy cream, and vanilla extract. This technique ensures a rich and creamy texture in the final cheesecake.
Folding in Raspberries
Gently fold in fresh raspberries to the cheesecake mixture, taking care not to crush them. This technique helps maintain the raspberries’ shape and fresh appearance in the dessert.
Marbling the Jam
Warm the raspberry jam slightly before drizzling it over the cheesecake layer. Use a knife or skewer to swirl the jam into the cheesecake for an attractive marbled effect.
Chilling for Setting
Refrigerate the cheesecake for at least 4 hours to allow it to set completely. This step is essential to achieve the desired firmness and texture.
FAQ
Can I use other types of fruit for this cheesecake?
Yes, you can substitute fresh raspberries with other fruits like strawberries, blueberries, or peaches for a different flavor profile.
Do I need to use gelatin?
Gelatin is necessary for this no-bake cheesecake to help it set. If you prefer a vegetarian option, consider using agar-agar as a substitute.
How long can I store the cheesecake?
The no-bake raspberry cheesecake can be stored in the refrigerator for up to 5 days when covered properly.
What can I use instead of graham cracker crumbs?
You can use digestive biscuits, Oreo crumbs, or any similar type of cookie crumbs as a substitute for graham cracker crumbs.
Can I make this cheesecake ahead of time?
Absolutely! This cheesecake can be made a day in advance, making it a convenient option for parties and gatherings. Just ensure it’s well-covered in the fridge.
Conclusion
This No-Bake Raspberry Cheesecake Delight is a fantastic dessert that beautifully balances the creamy richness of cheesecake with the bright, tart flavor of fresh raspberries. Its effortless preparation and stunning presentation make it an ideal choice for gatherings, celebrations, or simply treating yourself. Enjoy the refreshing taste and creamy texture of this elegant dessert that everyone will love!
More recipes suggestions and combination
No-Bake Strawberry Cheesecake
Swap the raspberries for fresh strawberries for a delightful variation that’s equally delicious.
No-Bake Lemon Cheesecake
Add some zing to your dessert table by incorporating lemon zest and juice for a refreshing lemon twist.
No-Bake Chocolate Cheesecake
For chocolate lovers, mix in melted chocolate or cocoa powder to create a rich, decadent chocolate cheesecake.
Mixed Berry Cheesecake
Combine several berries, such as blueberries and blackberries, to enhance the flavor profile and add a variety of colors.
Nutty Crust Variation
Replace graham cracker crumbs with crushed nuts or a nut-based crust for a gluten-free alternative that adds a unique texture.
Cheesecake Parfaits
Layer cheesecake filling and raspberry jam in individual serving glasses for a fun, portable dessert option.
Raspberry Swirl Brownies
Use the raspberry jam to swirl into brownie batter before baking for a delectable combining of flavors.
Vanilla Bean Cheesecake
Incorporate vanilla bean paste instead of extract for a more fragrant cheesecake that’s incredibly smooth.
No-Bake Raspberry Cheesecake
Ingredients
For the crust
- 200 g graham cracker crumbs
- 100 g unsalted butter, melted
For the cheesecake filling
- 600 g cream cheese, softened
- 150 g powdered sugar
- 250 ml heavy cream
- 1 tsp vanilla extract
- 10 g gelatin
- 50 ml water
For the topping
- 200 g fresh raspberries
- 100 g raspberry jam
Instructions
Preparation
- In a mixing bowl, combine the graham cracker crumbs with the melted unsalted butter until the crumbs are evenly coated. Press this mixture firmly into the bottom of a 23cm springform pan to form a sturdy crust. Refrigerate the crust for at least 30 minutes to allow it to set.
- In a small bowl, sprinkle the gelatin over the water and let it sit for about 5 minutes. Gently heat the mixture while stirring until the gelatin is fully dissolved.
- In a large mixing bowl, beat the softened cream cheese along with the powdered sugar until the mixture is smooth and creamy. Add in the dissolved gelatin, heavy cream, and vanilla extract. Continue to beat until everything is well combined and fluffy.
- Gently fold in the fresh raspberries into the cheesecake mixture to maintain their shape.
- Carefully pour the cheesecake mixture over the chilled crust. Smooth the top with a spatula.
- Warm the raspberry jam slightly and drizzle it over the top of the cheesecake layer. Swirl the jam gently into the cheesecake with a knife or skewer.
Chilling
- Refrigerate the cheesecake for at least 4 hours, or until it is fully set.
- Run a knife around the edge of the pan to loosen the cheesecake and remove the sides of the springform pan before serving.
- Garnish with additional fresh raspberries if desired.