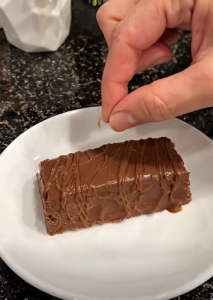
No-Bake Lotus Biscoff Dessert Bars combine a buttery cookie crust, creamy cookie butter filling, and glossy Biscoff topping in one easy chilled dessert. Every layer highlights the warm caramelized flavor of Lotus Biscoff cookies and spread, while the whipped cream keeps the cheesecake-style center light and smooth.
Because these bars require no oven, preparation stays simple. First, press Biscoff crumbs and melted butter into an 8×8-inch pan. Then add a creamy filling made with cream cheese, powdered sugar, vanilla, Biscoff spread, and freshly whipped cream. Finally, finish everything with another layer of cookie butter and plenty of crushed cookies.
No-Bake Lotus Biscoff Dessert Bars need at least four to six hours in the refrigerator. However, an overnight chill gives the filling plenty of time to become firm enough for neat slices. Serve them straight from the refrigerator for the best texture.
I started making cookie butter desserts when I wanted something different from the usual chocolate or fruit-filled no-bake bars. What surprised me was how much flavor Biscoff cookies bring without needing many extra ingredients. Their caramelized, gently spiced flavor works especially well with tangy cream cheese. I also learned that these bars become much easier to cut when I make them the night before. The hardest part is leaving them alone in the refrigerator. Still, the wait pays off. By the next day, the crust feels firm, the filling holds its shape, and the glossy cookie butter topping makes every square look ready for a dessert table.
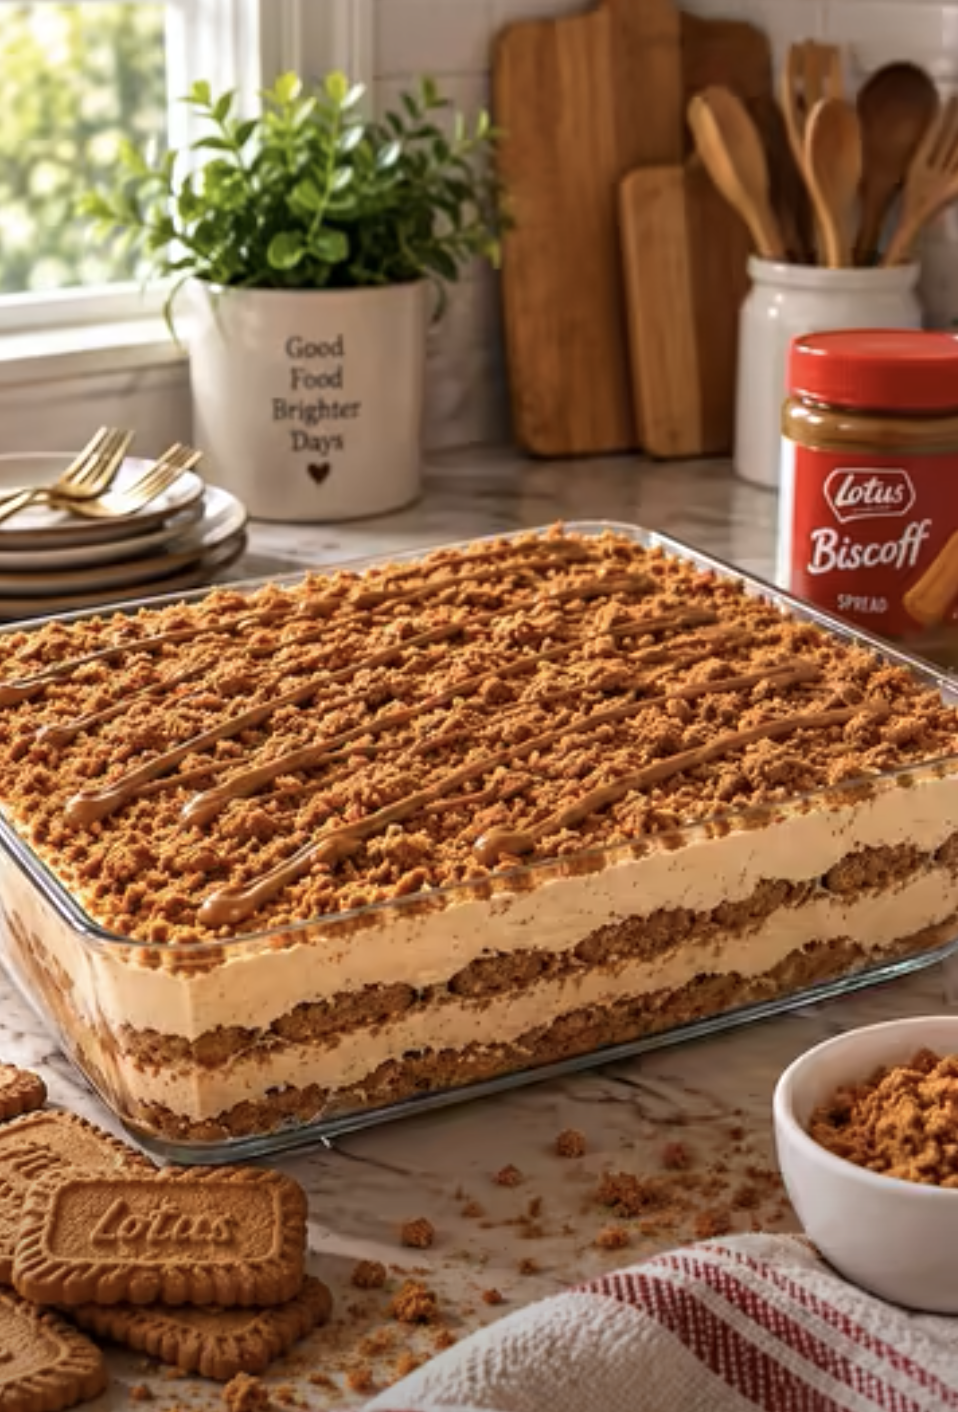
No-Bake Lotus Biscoff Dessert Bars: Creamy Cookie Butter Treat
Ingredients
Equipment
Method
- Line an 8×8-inch baking pan. Combine the Biscoff cookie crumbs and melted butter until evenly moistened.
- Press the cookie mixture firmly into the bottom of the prepared pan and refrigerate for 15 to 20 minutes.
- Beat the softened cream cheese and powdered sugar until smooth. Add the vanilla extract and 3/4 cup Biscoff spread and mix until creamy.
- Whip the heavy whipping cream in a separate bowl until stiff peaks form. Gently fold it into the Biscoff cream cheese mixture.
- Spread the filling evenly over the chilled Biscoff cookie crust and smooth the top.
- Warm 1/2 cup Biscoff spread just until pourable, then drizzle or spread it over the cheesecake layer.
- Sprinkle the crushed or broken Biscoff cookies evenly over the topping.
- Cover and refrigerate for at least 4 to 6 hours, preferably overnight, until completely set.
- Lift the chilled dessert from the pan, cut into bars with a sharp knife, and serve cold.
Notes
Building the Biscoff Cookie Crust
Combine the Cookie Crumbs and Butter
Start with 2 cups Lotus Biscoff cookie crumbs.
For an even crust, crush the cookies into fine crumbs before measuring. Larger pieces can make the base more difficult to compact.
Place the crumbs in a mixing bowl and pour in ½ cup melted unsalted butter.
Stir thoroughly until the butter evenly coats the crumbs.
The finished mixture should look evenly moistened and hold together when pressed.
Next, line an 8×8-inch baking pan. Leave enough lining extending over the sides to create handles. Later, those handles will make it much easier to lift the entire chilled dessert from the pan.
Transfer the Biscoff crumb mixture into the prepared pan.
Press and Chill the Crust
Spread the crumb mixture evenly across the bottom of the pan.
Then press it down firmly.
The flat bottom of a measuring cup works particularly well because it compresses the crumbs while creating a smooth, even surface.
Pay attention to the corners and edges so the crust has approximately the same thickness throughout.
A firmly packed base gives No-Bake Lotus Biscoff Dessert Bars enough structure to support their creamy filling.
Place the prepared crust in the refrigerator for 15 to 20 minutes.
During that time, the butter will begin to firm, which helps bind the cookie crumbs together.
Meanwhile, prepare the cookie butter cheesecake filling.
Making the Creamy Biscoff Filling
Beat the Cream Cheese and Cookie Butter
Place 8 ounces softened cream cheese in a large mixing bowl.
Add ½ cup powdered sugar.
Beat the ingredients together until smooth and creamy.
Next, add 1 teaspoon vanilla extract and ¾ cup Lotus Biscoff spread.
Continue mixing until the cookie butter becomes completely incorporated into the cream cheese.
The filling should have an even color and a smooth consistency without visible streaks of plain cream cheese.
Using softened cream cheese makes this process considerably easier. Cold cream cheese can remain lumpy even after extended mixing.
Therefore, allow it to soften before preparing your No-Bake Lotus Biscoff Dessert Bars.
Fold in Freshly Whipped Cream
Pour 1 cup heavy whipping cream into a separate mixing bowl.
For easier whipping, use cold heavy cream.
Beat the cream until stiff peaks form.
Once whipped, add it to the Biscoff cream cheese mixture.
Gently fold the whipped cream into the filling with a spatula.
Avoid aggressive stirring because you want to preserve the air incorporated into the cream.
Continue folding until everything looks smooth and evenly combined.
The whipped cream gives the filling a lighter consistency while the cream cheese provides richness and structure.
Once combined, the filling should look thick, creamy, and fluffy.
Now remove the chilled Biscoff crust from the refrigerator.
Assembling and Topping the Dessert Bars
Spread the Filling Over the Chilled Crust
Spoon the prepared Biscoff filling onto the chilled cookie crust.
Use an offset spatula or regular rubber spatula to spread it toward all four corners.
Smooth the surface as evenly as possible.
Because the topping will follow the shape of this layer, creating a relatively flat surface now gives the finished No-Bake Lotus Biscoff Dessert Bars a cleaner appearance.
Work gently so you don’t disturb the compressed cookie crust underneath.
Once the filling looks level, prepare the final Biscoff layer.
You don’t need to refrigerate the filling separately before adding the topping. However, avoid making the topping excessively hot because you don’t want it to melt the creamy layer.
Add Biscoff Spread and Cookie Pieces
Measure ½ cup Lotus Biscoff spread.
Warm it only until it becomes easy to pour or spread.
Then drizzle or gently spread the softened cookie butter over the cheesecake layer.
For a smooth finish, spread the Biscoff from edge to edge. Alternatively, create a drizzle pattern if you prefer some of the creamy filling to remain visible.
Next, crush or break 6 to 8 Lotus Biscoff cookies.
Sprinkle the cookie pieces generously across the top.
Using a combination of fine crumbs and larger pieces creates more texture and makes the finished dessert immediately recognizable as Biscoff bars.
Chilling and Serving Biscoff Bars
Refrigerate Until Completely Set
Cover the pan and place the No-Bake Lotus Biscoff Dessert Bars in the refrigerator.
Chill for at least 4 to 6 hours.
For an even firmer texture, refrigerate the dessert overnight.
This extended chilling time gives the cream cheese filling time to firm while the butter in the cookie crust becomes completely cold.
As a result, the layers hold together much better when you cut them.
Avoid rushing this stage, particularly if you want clean, defined squares.
The bars should feel thoroughly chilled and firm before you remove them from the pan.
Cut Clean Bars and Serve Chilled
Once completely set, use the lining to carefully lift the entire dessert from the 8×8-inch pan.
Place it on a cutting board.
Use a large, sharp knife to cut the dessert into bars or squares.
For cleaner edges, wipe the knife after each cut. You can also briefly warm the blade, wipe it completely dry, and then slice through the chilled layers.
Serve No-Bake Lotus Biscoff Dessert Bars cold.
Each piece should have a firm cookie crumb base, thick creamy Biscoff center, glossy cookie butter topping, and crunchy cookie pieces.
Keep any remaining bars refrigerated so the filling stays firm.
Ingredients
For the Crust
- 2 cups Lotus Biscoff cookie crumbs
- ½ cup unsalted butter, melted
For the Filling
- 8 ounces cream cheese, softened
- ½ cup powdered sugar
- 1 teaspoon vanilla extract
- ¾ cup Lotus Biscoff spread
- 1 cup heavy whipping cream
For the Topping
- ½ cup Lotus Biscoff spread
- 6–8 Lotus Biscoff cookies, crushed or broken into pieces
Instructions
- Line an 8×8-inch baking pan. Combine the Biscoff cookie crumbs and melted butter until evenly moistened.
- Press the crumb mixture firmly and evenly into the bottom of the prepared pan. Refrigerate for 15 to 20 minutes.
- Beat the softened cream cheese and powdered sugar until smooth. Add the vanilla extract and ¾ cup Biscoff spread, then beat until creamy.
- In a separate bowl, whip the cold heavy whipping cream until stiff peaks form. Gently fold it into the cream cheese mixture.
- Spread the Biscoff filling evenly over the chilled cookie crust and smooth the surface.
- Gently warm ½ cup Biscoff spread until pourable. Drizzle or spread it evenly over the cheesecake layer.
- Sprinkle 6 to 8 crushed or broken Biscoff cookies over the top.
- Cover and refrigerate for at least 4 to 6 hours, preferably overnight, until completely set.
- Lift the chilled dessert from the pan, cut it into bars, and serve cold.
Frequently Asked Questions
How long should No-Bake Lotus Biscoff Dessert Bars chill?
Refrigerate the bars for at least 4 to 6 hours. However, an overnight chill gives the creamy filling and buttery crust more time to become firm.
Do I need to bake the Biscoff cookie crust?
No. Melted butter binds the Biscoff crumbs together, while refrigeration firms the crust. Press it firmly into the pan before chilling.
Should I melt the Biscoff spread for the topping?
Warm the spread only enough to make it easily pourable or spreadable. You don’t want it excessively hot when it goes over the chilled cheesecake filling.
How do I get clean slices?
Make sure the bars have chilled completely. Then lift the dessert from the pan and cut it with a sharp knife, wiping the blade clean between slices.
Can I prepare these Biscoff dessert bars ahead of time?
Yes. In fact, preparing them the day before serving works particularly well because an overnight chill helps the layers become firm and easy to slice.
Conclusion
No-Bake Lotus Biscoff Dessert Bars pack plenty of caramelized cookie flavor into a simple layered dessert.
The Biscoff cookie crumb crust provides a buttery foundation. Meanwhile, cream cheese, powdered sugar, vanilla, cookie butter, and whipped cream create a light yet rich filling.
A glossy layer of Biscoff spread and crushed cookies finishes the top with even more cookie butter flavor and a little crunch.
Most importantly, give No-Bake Lotus Biscoff Dessert Bars enough time to chill. Four to six hours works, but overnight refrigeration produces an especially firm texture. Once set, simply lift the dessert from the pan, cut it into squares, and serve chilled.