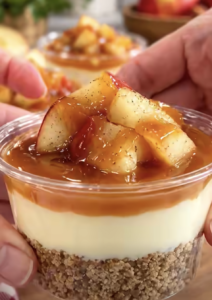
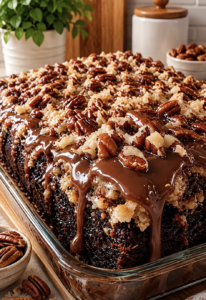
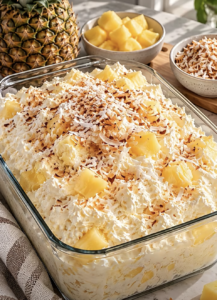
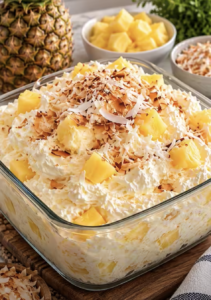
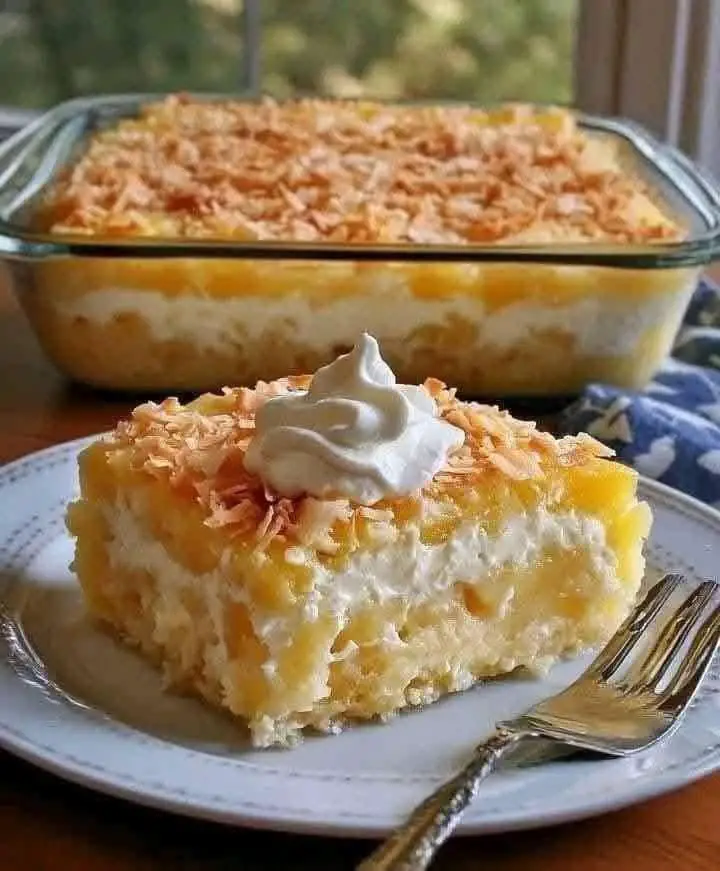
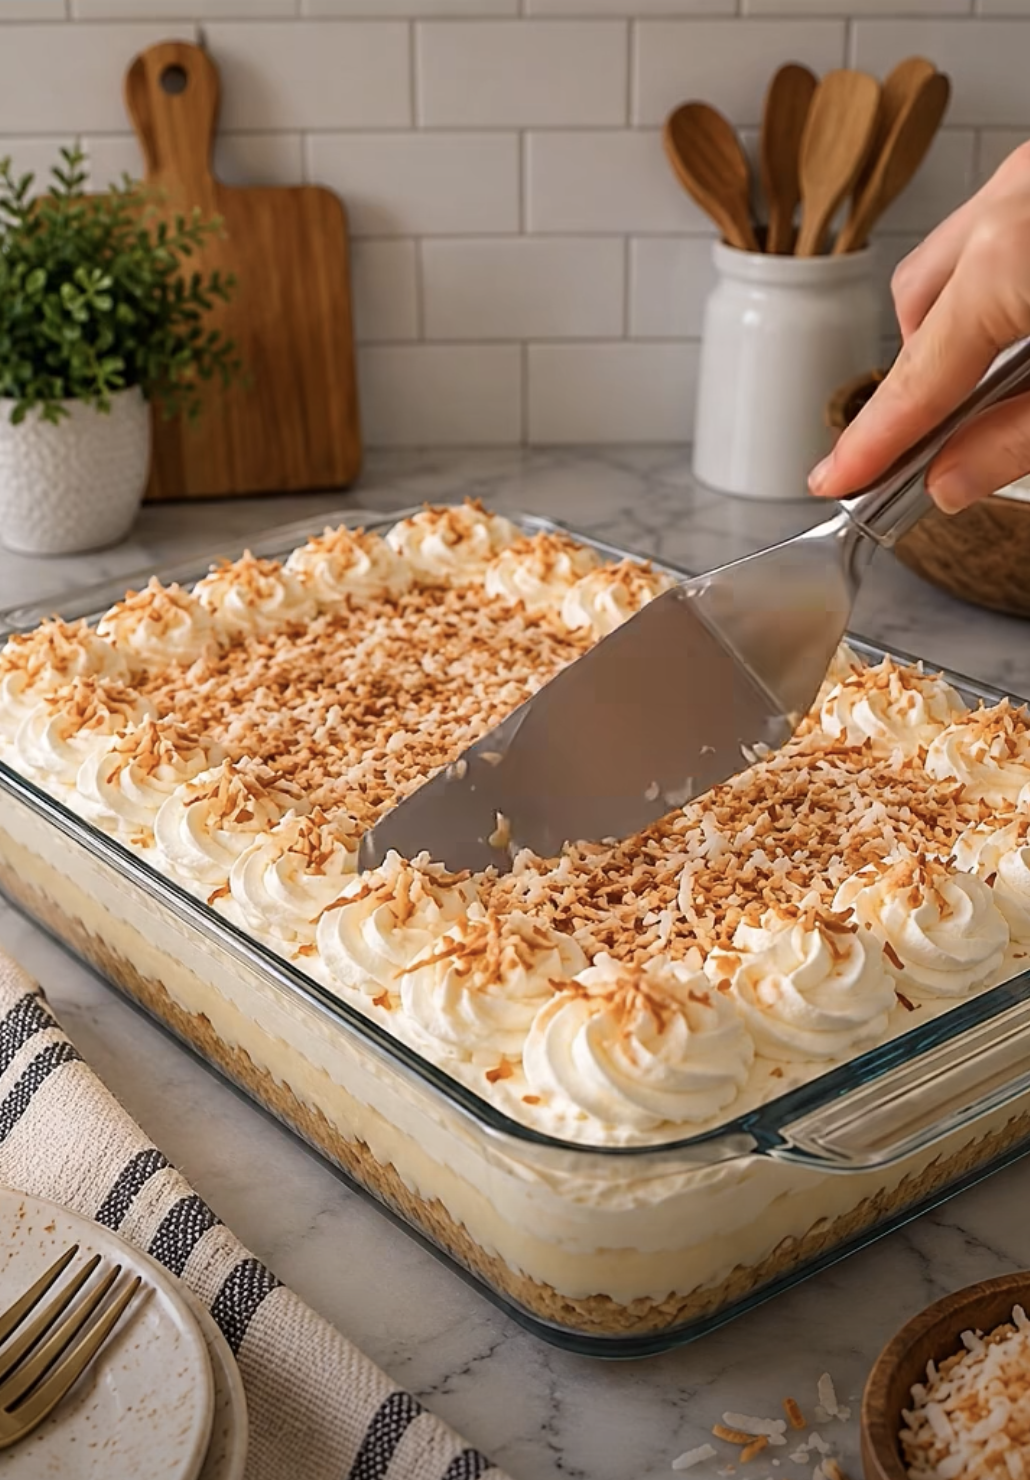
No-Bake Coconut Cream Dream Dessert is the kind of chilled dessert that feels rich, light, creamy, and indulgent all at once. It starts with a buttery vanilla wafer or graham cracker crust, followed by a smooth coconut cream layer, a cool pudding layer, and a fluffy whipped topping. Toasted coconut adds a little crunch and a deeper nutty flavor on top.
This No-Bake Coconut Cream Dream Dessert works especially well when you need a make-ahead dessert for warm weather, holidays, potlucks, or family gatherings. Because it never goes into the oven, the preparation stays simple. Most of the work involves mixing, layering, and chilling.
The long chilling time also improves the texture. The crust softens slightly, the creamy layers firm up, and the coconut flavor blends throughout the dessert.
I started making layered no-bake desserts because they were easier to prepare ahead than cakes that needed baking, cooling, frosting, and decorating. Coconut quickly became one of my favorite versions because the flavor works so well with cream cheese, vanilla, and whipped topping. I also liked how the dessert tasted even better after sitting overnight. The layers became firmer, the crust softened just enough to cut cleanly, and the toasted coconut added a wonderful contrast on top. Since then, I have liked this style of dessert whenever I want something that looks impressive without requiring complicated preparation.
Equipment
- 9×13 inch baking dish
- Large mixing bowl For preparing the coconut cream layer.
- Medium mixing bowl For preparing the pudding layer.
- – Electric mixer For beating the cream cheese mixture until smooth.
- Whisk For mixing the pudding layer.
- Rubber spatula For folding and spreading the layers.
- Small skillet For toasting coconut if desired.
Ingredients
- 2 cups crushed vanilla wafers or graham crackers
- 1/2 cup unsalted butter, melted
- 2 tbsp granulated sugar
- 8 oz cream cheese, softened
- 1/2 cup powdered sugar
- 1 tsp vanilla extract
- 1 cup coconut cream
- 1 cup sweetened shredded coconut
- 1 1/2 cups whipped topping, thawed, for coconut layer
- 3.4 oz instant coconut or vanilla pudding mix
- 1 1/2 cups cold milk
- 1/2 cup coconut milk
- 1 1/2 cups whipped topping, for topping
- 1/2 cup sweetened shredded coconut, for garnish
- 1/4 cup toasted coconut flakes, optional
- 1/4 cup white chocolate curls, optional
Instructions
- Combine the crushed vanilla wafers or graham crackers with the melted butter and granulated sugar until evenly moistened.
- Press the crumb mixture firmly into the bottom of a 9×13-inch baking dish. Refrigerate for 15 to 20 minutes.
- Beat the softened cream cheese and powdered sugar until smooth. Add the vanilla extract and coconut cream and mix until creamy.
- Fold in 1 cup shredded coconut, followed by 1 1/2 cups whipped topping, until light and evenly combined.
- Spread the coconut cream mixture evenly over the chilled crust.
- Whisk the instant pudding mix with the cold milk and coconut milk for about 2 minutes, until thickened.
- Carefully spread the pudding mixture evenly over the coconut cream layer.
- Spread 1 1/2 cups whipped topping evenly over the pudding layer.
- Toast the garnish coconut in a dry skillet over medium-low heat if desired. Cool completely, then sprinkle it over the whipped topping and add optional white chocolate curls.
- Cover and refrigerate for at least 4 to 6 hours, preferably overnight. Slice into squares and serve chilled.
Notes
Nutrition
Building a Firm Buttery Cookie Crust
Choose Vanilla Wafers or Graham Crackers
The crust gives No-Bake Coconut Cream Dream Dessert a sturdy base while adding buttery flavor.
Start with 2 cups finely crushed vanilla wafers or graham crackers.
Vanilla wafers create a sweeter, softer flavor that pairs especially well with coconut. Graham crackers add a slightly deeper toasted flavor.
Either option works well.
Place the crumbs in a medium bowl.
Add ½ cup melted unsalted butter and 2 tablespoons granulated sugar.
Stir until every crumb looks evenly moistened.
The mixture should resemble damp sand and hold together when pressed between your fingers.
If some crumbs remain dry, keep stirring before transferring the mixture to the pan.
Next, lightly grease a 9×13-inch baking dish if desired.
Pour the crumb mixture into the dish.
Spread it evenly across the bottom before pressing.
A flat-bottomed measuring cup works especially well for creating an even crust.
The firmer you press the crumbs, the better the base will hold together when you slice the chilled dessert.
Chill the Crust Before Adding Filling
Once the crust looks level, place the baking dish in the refrigerator for about 15 to 20 minutes.
This short chilling period allows the melted butter to firm.
As a result, the crust becomes more stable before you spread the coconut filling over it.
Do not skip this step.
If you add the cream layer immediately, the crumbs may lift and mix into the filling.
While the crust chills, prepare the coconut cream layer.
This timing keeps the process efficient and gives the base enough time to set.
The crust does not need to become rock hard.
It only needs to feel firm when lightly touched.
After the dessert finishes chilling for several hours, the crust will soften slightly from contact with the creamy layers.
That creates the ideal texture for No-Bake Coconut Cream Dream Dessert.
It should remain firm enough to support each square, but soft enough to cut easily with a serving spatula.
If you want stronger coconut flavor, you can replace a small portion of the cookie crumbs with finely crushed coconut cookies.
However, keep most of the base as crumbs so it still holds together properly.
Making the Coconut Cream and Pudding Layers
Blend the Coconut Cream Filling Until Smooth
For the creamy middle layer, place 8 ounces softened cream cheese in a large mixing bowl.
Add ½ cup powdered sugar.
Beat until the mixture becomes smooth and fluffy.
Softened cream cheese matters here.
Cold cream cheese can leave small lumps that become difficult to remove later.
Once smooth, add 1 teaspoon vanilla extract and 1 cup coconut cream.
Beat again until the mixture looks creamy and fully combined.
Then fold in 1 cup sweetened shredded coconut.
The coconut adds texture and intensifies the flavor of No-Bake Coconut Cream Dream Dessert.
Next, add 1½ cups thawed whipped topping.
Fold it in gently with a spatula.
Do not beat aggressively.
Gentle folding keeps the mixture light and airy.
Continue until no large streaks of whipped topping remain.
Remove the chilled crust from the refrigerator.
Spoon the coconut cream mixture over the crust.
Spread it carefully into an even layer.
Use light pressure so you do not disturb the crumbs underneath.
Add a Cool Coconut Pudding Layer
The pudding layer adds another creamy texture and helps the dessert feel even more luxurious.
In a clean bowl, combine one 3.4-ounce package instant coconut or vanilla pudding mix with 1½ cups cold milk and ½ cup coconut milk.
Whisk for about 2 minutes.
The mixture should begin thickening quickly.
Cold liquids help instant pudding set properly.
Full-fat coconut milk gives the strongest coconut flavor, although regular coconut milk also works.
Once the pudding thickens, carefully spoon it over the coconut cream layer.
Spread it evenly from edge to edge.
Work gently so the two layers stay distinct.
The contrast between the slightly tangy cream cheese filling and the smooth pudding layer gives No-Bake Coconut Cream Dream Dessert much of its appeal.
If you use vanilla pudding, the coconut flavor will remain slightly softer and creamier.
If you use coconut pudding, the finished dessert will taste more intensely coconut-forward.
Both versions work well.
After spreading the pudding layer, the dessert is ready for its final whipped topping and garnish.
Finishing With Whipped Topping and Toasted Coconut
Add a Light Fluffy Topping
Spread 1½ cups whipped topping evenly over the pudding layer.
Use an offset spatula or the back of a spoon.
You can make the surface completely smooth or create gentle swirls for a softer presentation.
The whipped topping balances the richer layers underneath and gives No-Bake Coconut Cream Dream Dessert its light finish.
At this stage, the dessert already looks finished.
However, the garnish adds both flavor and texture.
Sweetened shredded coconut works especially well on top.
You can use it as-is for a soft, snowy appearance.
For deeper flavor, toast the coconut first.
Toasted coconut develops a warm, nutty taste and gives the dessert a beautiful golden finish.
You can also add white chocolate curls for a more decorative presentation.
Keep the garnish simple if you prefer a casual family dessert.
For a holiday or party, the toasted coconut and chocolate curls make the layered dessert look more polished.
Toast the Coconut Carefully
Place ½ cup sweetened shredded coconut in a dry skillet.
Set the skillet over medium-low heat.
Stir frequently.
Coconut can go from pale to burned very quickly, so do not walk away from the pan.
After a few minutes, the coconut should begin turning lightly golden and smell fragrant.
Immediately remove it from the skillet.
Transfer it to a plate and let it cool completely.
Do not sprinkle hot coconut over the whipped topping.
Heat can soften the topping and create condensation.
Once cooled, scatter the toasted coconut evenly across No-Bake Coconut Cream Dream Dessert.
Add white chocolate curls if desired.
The finished top should look light, fluffy, and textured.
If you prefer even more coconut flavor, use both toasted coconut and a small amount of untoasted coconut.
That combination creates two different textures while keeping the dessert visually appealing.
Once garnished, cover the baking dish carefully.
Avoid pressing plastic wrap directly against the whipped topping if possible.
Then move the dessert to the refrigerator for its final chilling period.
Chilling, Serving, and Storing the Dessert
Chill Long Enough for Clean Layers
No-Bake Coconut Cream Dream Dessert needs at least 4 to 6 hours in the refrigerator.
However, overnight chilling produces the best texture.
During that time, the cream cheese layer firms, the pudding sets fully, and the crust softens slightly while still holding its shape.
The layers also become easier to slice cleanly.
If you try to cut the dessert too early, the pudding and coconut cream layer may shift.
For neat squares, wait until the dessert feels firm throughout.
Before cutting, use a sharp knife and wipe the blade between slices.
A small serving spatula makes it easier to lift each square from the baking dish.
Serve the dessert directly from the refrigerator.
Because the layers contain cream cheese, milk, coconut milk, and whipped topping, it tastes best well chilled.
For an attractive serving, add an extra sprinkle of toasted coconut to each piece.
You can also add a small white chocolate curl on top.
Store Leftovers for the Best Texture
Cover leftover No-Bake Coconut Cream Dream Dessert tightly and keep it refrigerated.
For the best texture, enjoy it within 3 to 4 days.
The dessert usually tastes excellent the next day because the flavors have had more time to blend.
However, as it sits longer, the crust may continue softening.
That does not make it unpleasant, but the texture changes.
Avoid leaving the dessert at room temperature for long periods.
Instead, remove only what you plan to serve and return the rest to the refrigerator.
Freezing is possible, but the pudding and whipped layers may change texture after thawing.
For that reason, refrigeration works better.
If you need to make No-Bake Coconut Cream Dream Dessert ahead for an event, prepare it the night before.
That gives it enough time to set without requiring last-minute work.
Add delicate white chocolate curls shortly before serving if you want them to stay especially neat.
Ingredients
- 2 cups crushed vanilla wafers or graham crackers
- ½ cup unsalted butter, melted
- 2 tablespoons granulated sugar
- 8 ounces cream cheese, softened
- ½ cup powdered sugar
- 1 teaspoon vanilla extract
- 1 cup coconut cream
- 1 cup sweetened shredded coconut
- 1½ cups whipped topping, thawed
- 1 package (3.4 ounces) instant coconut or vanilla pudding mix
- 1½ cups cold milk
- ½ cup coconut milk
- 1½ cups whipped topping, for the topping
- ½ cup sweetened shredded coconut, for garnish
- Toasted coconut flakes, optional
- White chocolate curls, optional
Instructions
- Stir the crushed vanilla wafers or graham crackers with the melted butter and granulated sugar until evenly moistened.
- Press the crumb mixture firmly into the bottom of a 9×13-inch baking dish. Refrigerate for 15 to 20 minutes.
- Beat the softened cream cheese and powdered sugar until smooth. Add the vanilla extract and coconut cream, then beat until creamy.
- Fold in 1 cup shredded coconut, followed by 1½ cups whipped topping.
- Spread the coconut cream mixture evenly over the chilled crust.
- Whisk the instant pudding mix with the cold milk and coconut milk for about 2 minutes, until thickened.
- Carefully spread the pudding mixture over the coconut cream layer.
- Spread 1½ cups whipped topping over the pudding.
- Toast the remaining coconut in a dry skillet over medium-low heat if desired. Cool completely, then sprinkle it over the topping with optional white chocolate curls.
- Cover and refrigerate for at least 4 to 6 hours, preferably overnight, then slice and serve chilled.
Frequently Asked Questions
Can I use vanilla pudding instead of coconut pudding?
Yes. Vanilla pudding works very well in No-Bake Coconut Cream Dream Dessert. Coconut pudding gives a stronger coconut flavor, while vanilla pudding creates a softer, creamier flavor.
What kind of coconut cream should I use?
Use unsweetened coconut cream for the richest coconut flavor without adding too much extra sweetness. Stir it well before measuring if the solids and liquid have separated.
Can I make No-Bake Coconut Cream Dream Dessert the night before?
Yes. In fact, overnight chilling works especially well because the layers have more time to firm and the crust softens slightly for easier slicing.
Can I use graham crackers instead of vanilla wafers?
Absolutely. Graham crackers create a slightly deeper toasted flavor, while vanilla wafers make the crust sweeter and softer. Both work well.
How long does No-Bake Coconut Cream Dream Dessert keep?
Store it covered in the refrigerator and enjoy it within about 3 to 4 days for the best texture.
Conclusion
No-Bake Coconut Cream Dream Dessert delivers rich coconut flavor in a cool, creamy dessert that requires no oven.
A buttery cookie crust creates the base. Then a fluffy cream cheese and coconut layer adds richness, while chilled pudding provides another smooth layer. Whipped topping keeps the dessert light, and toasted coconut gives the top a fragrant golden finish.
The key to the best texture lies in chilling.
Give No-Bake Coconut Cream Dream Dessert at least 4 to 6 hours in the refrigerator. Overnight chilling works even better because the layers become firm enough to slice cleanly.
Use full-fat coconut milk and unsweetened coconut cream when you want the strongest coconut flavor.
Then finish the dessert with toasted coconut and optional white chocolate curls for a simple but elegant presentation.
Whether you serve it at a potluck, holiday dinner, summer gathering, or family meal, No-Bake Coconut Cream Dream Dessert offers a creamy make-ahead treat that feels special without complicated preparation.