Keeping your stovetop in top condition starts with knowing How To Clean the Hob Burners In A Few Simple Steps. A clean hob not only looks great, but it also improves cooking performance and safety. When grease, food residue, and grime build up, burners can clog and produce uneven flames. Fortunately, with a few simple household ingredients and a clear method, you can restore your burners to like-new condition without harsh chemicals.
A few months ago, I noticed my stovetop wasn’t performing the way it used to. The flame looked uneven, and cooking took longer than usual. At first, I ignored it, thinking it was just normal wear. However, one weekend, I decided to take everything apart and give it a proper clean. I was surprised at how much buildup had collected over time. After following a simple cleaning routine, the difference was immediate. The burners worked perfectly again, and the whole kitchen felt fresher. Since then, I’ve made this cleaning method part of my regular routine.
Why Clean Hob Burners Regularly
Improve Cooking Performance
When burners get clogged with grease or food debris, the gas flow becomes uneven. As a result, flames may flicker or weaken. By cleaning regularly, you ensure consistent heat distribution, which leads to better cooking results every time.
Additionally, clean burners allow you to cook more efficiently. You won’t need to adjust heat levels constantly, and your meals will cook evenly without unexpected temperature changes.
Enhance Safety and Hygiene
Dirty burners can pose safety risks. Grease buildup increases the chance of flare-ups, while blocked gas ports may cause incomplete combustion. Therefore, regular cleaning reduces these risks significantly.
At the same time, maintaining a clean hob improves kitchen hygiene. Food residue and grease can harbor bacteria and unpleasant odors. A spotless stovetop keeps your cooking space fresh and inviting.
Essential Ingredients and Tools
Simple Household Ingredients
You don’t need expensive cleaners to tackle stubborn grime. Instead, rely on these effective and affordable items:
- White distilled vinegar (50 ml)
- Baking soda (½ cup)
- Warm water
These ingredients work together to break down grease, remove stains, and neutralize odors naturally.
Basic Cleaning Equipment
In addition to ingredients, gather the following tools:
- Old toothbrush or soft scrub brush
- Microfiber cloth
- Large pot or heat-safe bowl
- Small piece of cardboard (optional for debris removal)
Using the right tools makes the process easier and prevents damage to your burners.
Step-by-Step Cleaning Method
Soaking and Loosening Dirt
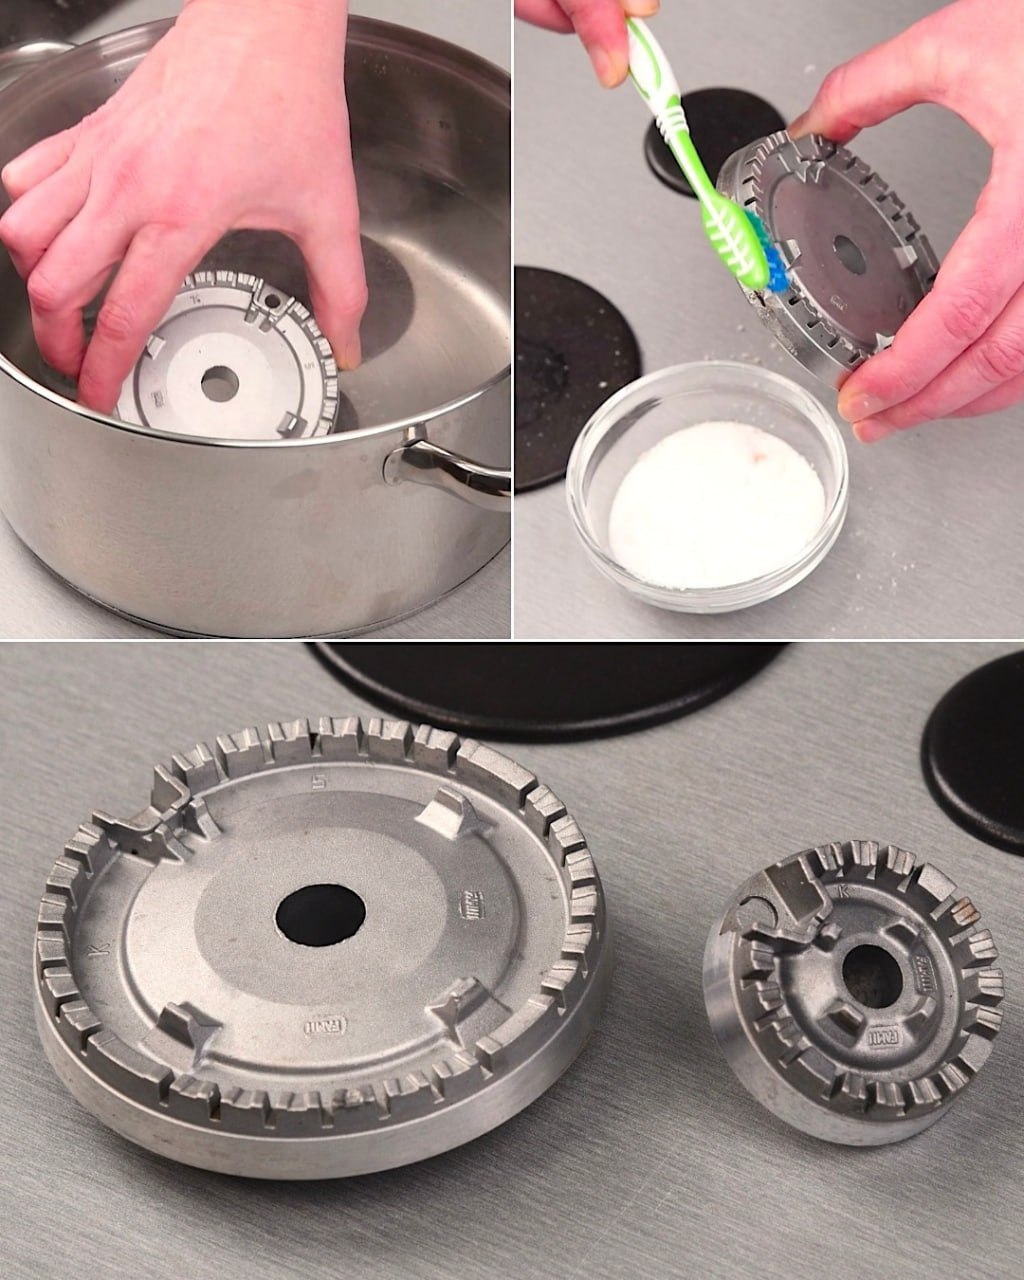
Start by removing the burners and placing them in a large pot or bowl. Then, pour warm water and add vinegar. Let them soak for 20–30 minutes. This step helps loosen grease and hardened residue.
After soaking, sprinkle baking soda over the burners. You’ll notice a gentle fizzing reaction that helps lift stubborn grime. This combination works effectively without damaging metal surfaces.
Scrubbing and Rinsing
Next, use an old toothbrush to scrub each burner carefully. Focus on small holes and edges where debris often accumulates. If needed, use a piece of cardboard to gently remove stuck particles.
Once cleaned, rinse thoroughly with warm water. Then, dry each component completely using a microfiber cloth. Proper drying prevents rust and ensures safe reinstallation.
Equipment
- large pot or bowl
- toothbrush
- microfiber cloth
Ingredients
- 50 ml white distilled vinegar
- 1/2 cup baking soda
- 2 cups warm water
Instructions
- Remove burners and place them in a large pot or bowl filled with warm water and vinegar.
- Let the burners soak for 20–30 minutes to loosen grease and residue.
- Sprinkle baking soda over the burners and allow it to react with the vinegar.
- Scrub gently using an old toothbrush, focusing on small holes and edges.
- Rinse thoroughly with warm water to remove all residue.
- Dry completely with a microfiber cloth before reassembling.
Notes
Maintenance Tips for Long-Lasting Results
Daily and Weekly Habits
Consistency makes a big difference. After each use, wipe the hob surface with a damp cloth to remove fresh spills. This simple habit prevents buildup from hardening over time.
Additionally, perform a deeper clean once a week. Even a quick scrub keeps burners functioning properly and reduces the need for heavy cleaning later.
Avoid Common Mistakes
While cleaning, avoid using harsh chemicals or abrasive tools. These can damage the burner surface and reduce lifespan. Instead, stick to gentle, natural solutions.
Also, never reassemble burners while they are still damp. Moisture can affect performance and lead to rust. Always ensure everything is fully dry before placing it back.
Frequently Asked Questions
How often should I clean my hob burners?
You should clean them lightly after each use and perform a deep clean once a week for best results.
Can I use lemon instead of vinegar?
Yes, lemon juice works similarly due to its acidity, though vinegar is slightly stronger.
What if my burners are heavily clogged?
Soak them longer and repeat the baking soda treatment if necessary.
Is it safe to use metal brushes?
It’s better to avoid them, as they can scratch and damage the surface.
Why is my flame still uneven after cleaning?
Check for remaining debris or ensure all parts are properly aligned during reassembly.
Conclusion
Learning How To Clean the Hob Burners In A Few Simple Steps can transform your kitchen routine. With just a few natural ingredients and simple tools, you can restore your stovetop’s performance, improve safety, and maintain a spotless cooking space. Regular care not only saves time in the long run but also ensures every meal cooks evenly and efficiently. Once you try this method, it quickly becomes a habit you won’t want to skip.