
Thank you so much for stopping by! If you’re anything like me, you’re always looking for a simple, hands-on way to keep the little ones engaged, learning, and creating. This Homemade Playdough recipe? It’s the ultimate crowd-pleaser. It’s soft, squishy, delightfully colorful, and best of all — you probably already have everything you need in your kitchen right now.
Whether you’re crafting dinosaurs, baking imaginary cupcakes, or just giving busy hands something soothing to knead, this playdough is an instant win. I’m telling you — it’s saved rainy days, boosted playdates, and even calmed a tantrum or two over here!
💌 Want more crafty kid recipes like this sent straight to your inbox? Subscribe below and I’ll send them your way!
What Is Homemade Playdough?
Homemade playdough is a soft, moldable dough you can make in just minutes using flour, salt, water, oil, and food coloring. No cooking, no fancy ingredients, and no long waits. Just mix, knead, and play!
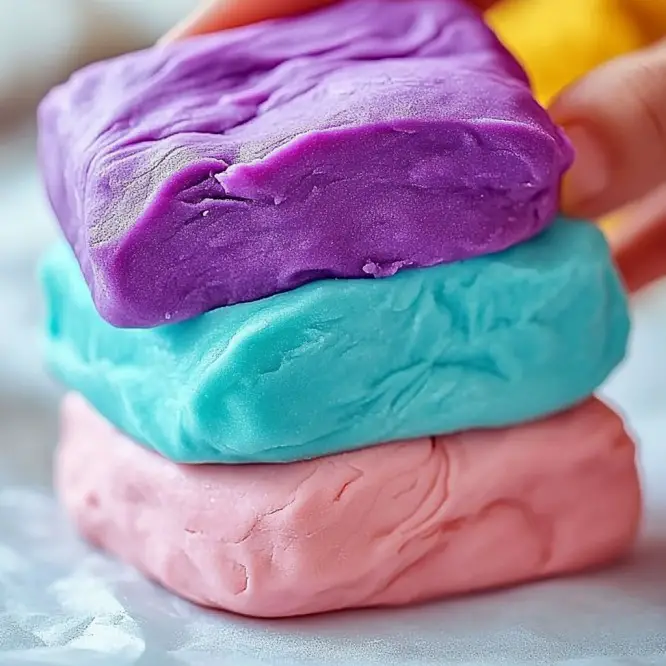
It’s just as good (if not better) than store-bought, and the best part? You get to customize every batch — from the color to the scent to the glitter. 💖
Why You’ll Love This DIY Playdough
- 🧂 Only 5 pantry staples!
- ⏱ Ready in 10 minutes or less
- 🧠 Supports sensory play and creativity
- 💰 Budget-friendly
- 🎨 Totally customizable — color, scent, sparkle!

What Does It Feel Like?
Imagine something ultra-soft, stretchy, and just the right amount of squishy — that’s this playdough. It’s firm enough to hold shapes but pliable enough for tiny hands to roll, twist, and squish with ease.
And when it’s fresh? It smells like whatever scent you’ve added — vanilla cupcake, lavender fields, citrus zest… dreamy!
Benefits of Homemade Playdough
- Encourages fine motor skill development
- Sparks imaginative play
- Offers a calming, sensory-rich experience
- Fosters independent creativity
- Great for thematic learning — shapes, letters, animals, you name it!
Ingredients
Here’s all you need to make one batch:
- 1 cup all-purpose flour
- ½ cup salt
- ½ cup water
- 2 teaspoons vegetable oil
- ½ teaspoon food coloring (any color you love!)
Supplies Needed
- 🥣 Mixing bowl
- 🥄 Spoon or spatula
- 🧼 Clean surface for kneading
- 🧴 Measuring cups and spoons
- 🛍 Airtight container or zip-top bag for storage
Ingredient Substitutes & Add-Ons
- 🌿 Add a few drops of lavender or peppermint extract for scented dough
- ✨ Mix in biodegradable glitter for sparkle (yes, please!)
- 🌈 Use gel food coloring for deeper, more vibrant colors
- 🌾 Gluten-free flour blends also work — just tweak the water slightly
Step-by-Step: How to Make Homemade Playdough
1. Mix the Dry Ingredients
In a medium bowl, stir together 1 cup of flour and ½ cup of salt until evenly combined.
2. Tint the Water
In a measuring cup, add your food coloring to ½ cup of water and stir until it’s evenly colored.
3. Combine Wet and Dry
Pour the colored water into the flour and salt mixture.
4. Add the Oil
Drizzle in 2 teaspoons of vegetable oil.
5. Stir & Form the Dough
Mix it all together with a spoon until it begins to come together. Then switch to your hands and knead away.
6. Knead Until Smooth
Knead for 2–3 minutes, either in the bowl or on a clean surface. The dough should become smooth, soft, and pliable.
7. Adjust as Needed
If the dough is sticky, sprinkle in a little more flour (a teaspoon at a time) and knead until perfect.
What to Do With It
The possibilities are endless! Try:
- Creating shapes and letters with cookie cutters
- Pretend baking with mini rolling pins and muffin tins
- Building animals, foods, or themed scenes
- Storing it in party favor jars for birthday giveaways
Tips for the Best Homemade Playdough
- Always knead it well — it’ll transform the texture completely!
- Store in a sealed container to keep it soft for weeks
- Double the recipe for bigger batches or multiple colors
- Let kids help with the process (pouring, mixing, kneading = learning fun!)
Storage Instructions
- Keep your playdough in a resealable plastic bag or airtight container
- Store in a cool, dry place
- Lasts up to 2–3 weeks — sometimes longer!
- If it dries out a bit, knead in a drop or two of water to refresh
FAQs About Homemade Playdough
Is this recipe safe for toddlers?
Yes! It’s non-toxic and taste-safe (though super salty — not tasty!). Always supervise during play.
Can I make multiple colors?
Absolutely! Divide the dough before kneading and add different colors to each section.
Can I freeze or refrigerate it?
It’s best stored at room temp in a sealed container. Fridge can dry it out faster.
What if it’s too sticky or too dry?
Too sticky? Add flour. Too dry? Add a splash of water or a tiny bit more oil. Easy fixes!
Final Thoughts: The Joy of Homemade Playdough
This Homemade Playdough recipe is everything I love in a kid activity — simple, affordable, educational, and most of all, FUN. There’s something so grounding and delightful about creating with your hands, and this dough brings that magic to life with every squish.
Whether you’re keeping little ones busy on a quiet afternoon, making gifts for friends, or just adding a new twist to your craft routine, this is one recipe you’ll come back to again and again. (We sure do!)
More Creative Recipes to Try with Kids
- 🫧 Salt Painting with Watercolors
- 🎆 4th of July Fireworks Sensory Jar
- 🍦 Pretend Ice Cream Dough (using conditioner & cornstarch!)
- 🌈 Rainbow Rice Sensory Bin
Share Your Colorful Creations!
📸 I’d love to see your playdough masterpieces!
Snap a pic and tag me on Pinterest, or leave a comment below and tell me: what color did you make? Did you add glitter or a scent?
Let’s make squishy, squooshy magic together — one batch at a time. 💕
“Nutritional” Info (Just for Fun!)
Calories: Zero
Creativity: Through the roof
Shelf life: 2–3 weeks
Mess factor: Totally manageable
Joy level: Maxed out
Happy kneading, friends!
Homemade Playdough
Ingredients
Method
- In a medium bowl, stir together 1 cup of flour and ½ cup of salt until evenly combined.
- In a measuring cup, add your food coloring to ½ cup of water and stir until it’s evenly colored.
- Pour the colored water into the flour and salt mixture.
- Drizzle in 2 teaspoons of vegetable oil.
- Mix it all together with a spoon until it begins to come together. Then switch to your hands and knead until smooth.
- Knead for 2–3 minutes, either in the bowl or on a clean surface. The dough should become smooth, soft, and pliable.
- If the dough is sticky, sprinkle in a little more flour (a teaspoon at a time) and knead until perfect.


