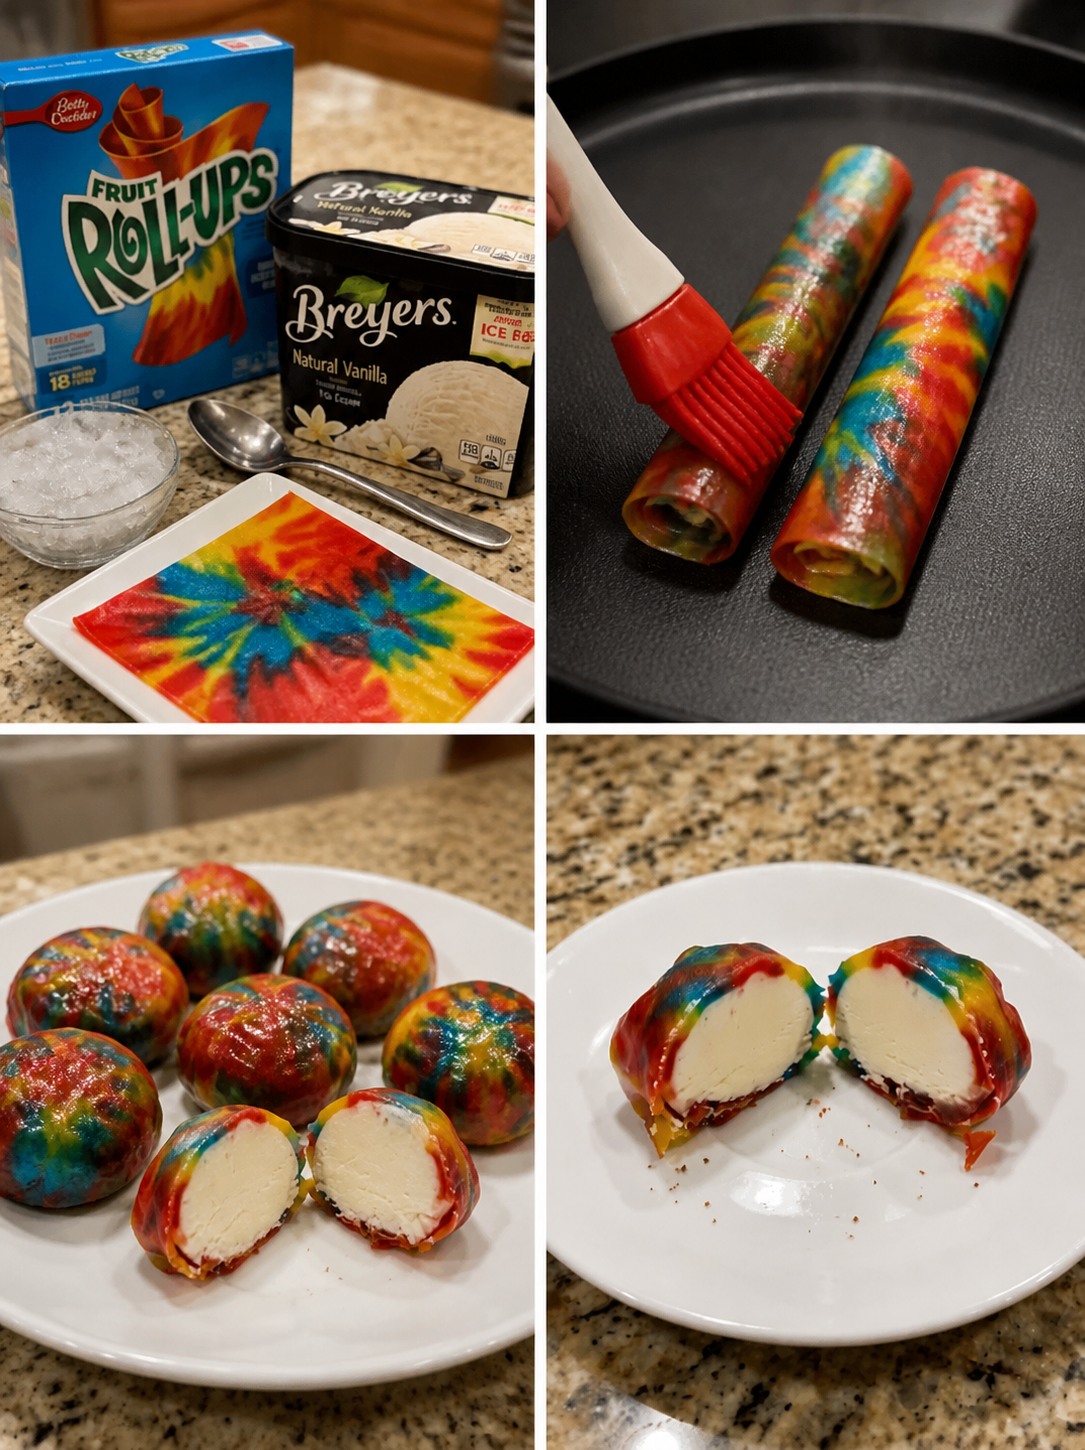
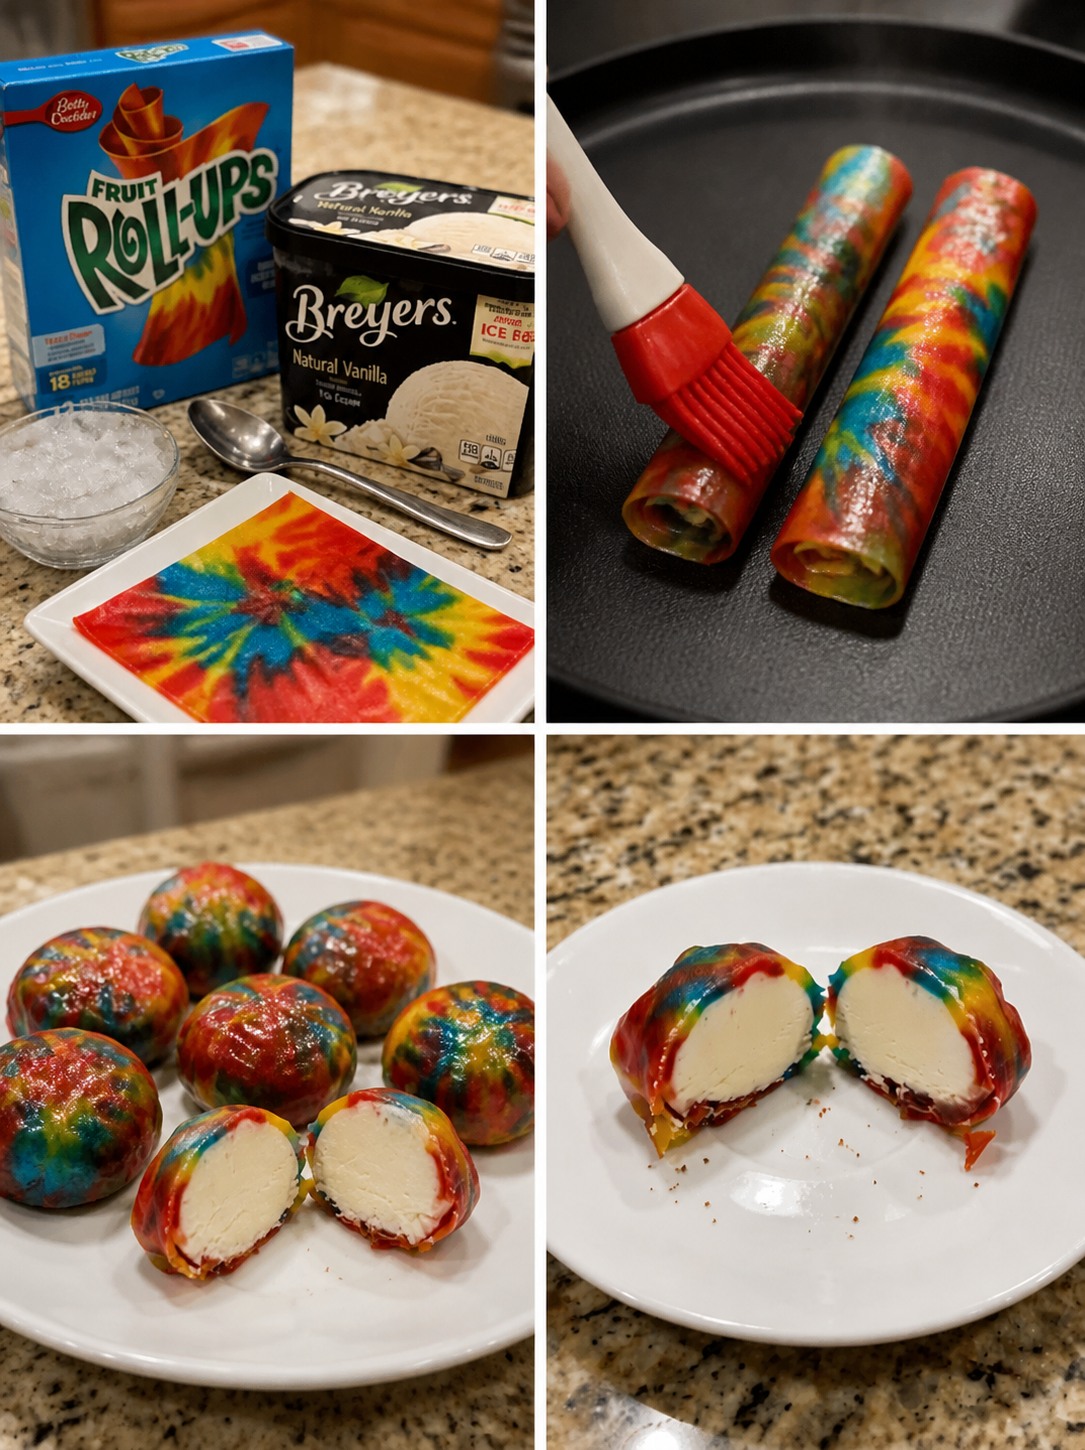
Fruit Roll-Up Ice Cream Bites are the colorful frozen treat that turns two simple store-bought ingredients into a crunchy, chewy, creamy dessert in minutes. The outside starts soft and fruity, then hardens around cold vanilla ice cream for a fun shell that cracks slightly when you bite into it. Inside, the ice cream stays smooth, sweet, and creamy.
This playful treat became popular because it feels like a magic trick. You wrap a scoop of ice cream in fruit leather, freeze it briefly, and suddenly the texture changes. The fruit roll-up turns crisp on the outside while the ice cream stays cold in the center. Best of all, Fruit Roll-Up Ice Cream Bites require no baking, no mixing bowls, and no complicated prep.
One hot afternoon, I wanted a quick dessert that felt fun but did not require turning on the oven. I had vanilla ice cream in the freezer and fruit roll-ups in the pantry, so I tried wrapping one around a small scoop. At first, it looked too simple to be memorable. However, after a few minutes in the freezer, the outside became crunchy and the inside stayed creamy. Everyone wanted to try one, and the whole batch disappeared almost immediately. Since then, Fruit Roll-Up Ice Cream Bites have become a quick treat for summer nights, movie snacks, and last-minute dessert cravings.
Ingredients
Equipment
Method
- Place a clean cutting board or plate in the freezer for 10 minutes.
- Fill a small bowl with ice cubes and cold water.
- Scoop a small ball of vanilla ice cream with a melon baller or small cookie scoop.
- Unwrap the fruit roll-up and lay it flat, sticky side up, on the chilled board.
- Dip your fingertips in the ice water, pat dry, and place the ice cream scoop in the center of the fruit roll-up.
- Fold the corners of the fruit roll-up over the ice cream and gently pinch to seal completely.
- Transfer the sealed bite to the freezer for 5 minutes.
- Serve immediately for the crunchiest texture.
Notes
Why Fruit Roll-Up Ice Cream Bites Are So Fun
A Crunchy Frozen Texture
Fruit Roll-Up Ice Cream Bites are all about texture. The fruit roll-up starts flexible, which makes it easy to wrap around the ice cream. Then, once the frozen ice cream touches it, the outside firms up and creates a crunchy shell.
That contrast makes every bite exciting. The outside tastes fruity and sweet, while the vanilla ice cream adds a creamy center. Because the shell freezes fast, you only need a few minutes before serving.
This dessert works best when you move quickly. Ice cream melts fast, especially when handled by warm hands. Therefore, chilling the board and cooling your fingertips helps everything stay neat.
Perfect for Quick Treats
These bites are great when you want something fun without a long recipe. You only need fruit roll-ups, vanilla ice cream, and ice water for handling.
They work well for:
- Summer desserts
- Sleepover snacks
- Birthday treats
- Movie nights
- After-school sweets
- Quick freezer desserts
Since each bite is made individually, you can prepare one serving or several. You can also use different fruit roll-up colors for a bright dessert tray.
Ingredients for Fruit Roll-Up Ice Cream Bites
Main Ingredients
You only need a few ingredients:
- Tie-dye fruit roll-ups
- Vanilla ice cream
- Ice cubes
- Cold water
Tie-dye fruit roll-ups give the bites a colorful look. However, any fruit roll-up flavor works.
Vanilla ice cream creates a classic flavor, but you can use strawberry, chocolate, cookies and cream, mango, or sherbet. Softer ice cream flavors may melt faster, so scoop small portions and work quickly.
Ice water helps chill your fingertips before handling the ice cream. This small step makes shaping easier and keeps the ice cream from melting too quickly.
Best Flavor Variations
Fruit Roll-Up Ice Cream Bites are easy to customize. Vanilla ice cream keeps the flavor simple, but fruity flavors pair especially well with the chewy shell.
Try these combinations:
- Strawberry fruit roll-up with vanilla ice cream
- Tropical fruit roll-up with mango sorbet
- Berry fruit roll-up with strawberry ice cream
- Tie-dye fruit roll-up with cookies and cream
- Watermelon fruit roll-up with lime sherbet
For extra fun, add sprinkles inside before sealing. However, avoid overfilling because the roll-up needs to close fully around the ice cream.
How to Make Fruit Roll-Up Ice Cream Bites
Chill the Tools First
Start by placing a clean cutting board or plate in the freezer for about 10 minutes. This gives you a cold surface to work on.
Next, fill a small bowl with ice cubes and cold water. You will use this to chill your fingertips before touching the ice cream.
Keep the ice cream in the freezer until the moment you need it. Also, unwrap only one fruit roll-up at a time so it does not dry out or stick to your work area.
Wrap the Ice Cream
Scoop a small ball of ice cream with a melon baller or small cookie scoop. Smaller scoops work best because they are easier to seal.
Place one fruit roll-up flat on the chilled board, sticky side up.
Dip your fingertips into the ice water, then pat them dry. Place the ice cream scoop in the center of the fruit roll-up.
Fold the corners over the ice cream quickly. Pinch the edges gently until the ice cream is fully sealed.
Transfer the sealed bite to the freezer for about 5 minutes. Then eat right away for the best crunch.
Tips for the Best Fruit Roll-Up Ice Cream Bites
Work Fast and Keep Everything Cold
Cold tools make this recipe much easier. If the board warms up, switch to another chilled plate or return it to the freezer for a few minutes.
Use small scoops of ice cream. Large scoops are harder to wrap and may melt before the fruit roll-up seals.
Also, avoid pressing too hard while sealing. Gentle pinching works better and keeps the shell from tearing.
If you make several bites, freeze them as you go instead of leaving them on the counter.
Serving and Storage Tips
Fruit Roll-Up Ice Cream Bites taste best immediately after chilling. The crunchy texture lasts only while the shell stays cold.
You can make them a little ahead, but they may become very firm if frozen too long. Let them sit for a minute before eating if needed.
For a party, prepare a few at a time and serve them quickly. Keep extra fruit roll-ups and ice cream ready so guests can watch them being made.
FAQ
Can I use any flavor of ice cream?
Yes. Vanilla works well, but strawberry, chocolate, sherbet, and mango sorbet also taste great.
Why did my fruit roll-up tear?
It may have been stretched too much or overfilled. Use a smaller scoop of ice cream next time.
Can I make these ahead of time?
You can freeze them briefly, but they taste best right after the 5-minute chill.
Do I need ice water?
Ice water helps keep your fingers cold so the ice cream melts more slowly.
Can I make mini versions?
Yes. Cut the fruit roll-up into smaller pieces and use tiny scoops of ice cream.
Conclusion
Fruit Roll-Up Ice Cream Bites are quick, colorful, crunchy, and creamy. With just fruit roll-ups and ice cream, you can make a fun frozen dessert in about 10 minutes.
They are best served right away, when the outside has that crisp frozen texture and the inside stays soft and creamy. Keep this easy treat in mind for hot days, parties, or whenever you want a playful dessert with almost no prep.