Before we dive into the fizz and foam, I just want to say thank you. Thank you for being the kind of grown-up, educator, or curious soul who loves creating moments of awe and learning! Whether you’re a parent looking for a weekend science project, a teacher prepping for a classroom demo, or just a curious experimenter yourself—this one’s for you.
This DIY Volcano Eruption Experiment is the kind of hands-on activity that never gets old. It’s messy in the best way, wildly fun, and sneakily educational. Best part? It uses ingredients you likely already have at home. Let’s walk through everything you need to know to pull off this crowd-pleaser.
📩 Want a printable version of this recipe and future fun experiments straight to your inbox? Be sure to subscribe below!
What is the Volcano Eruption Experiment?
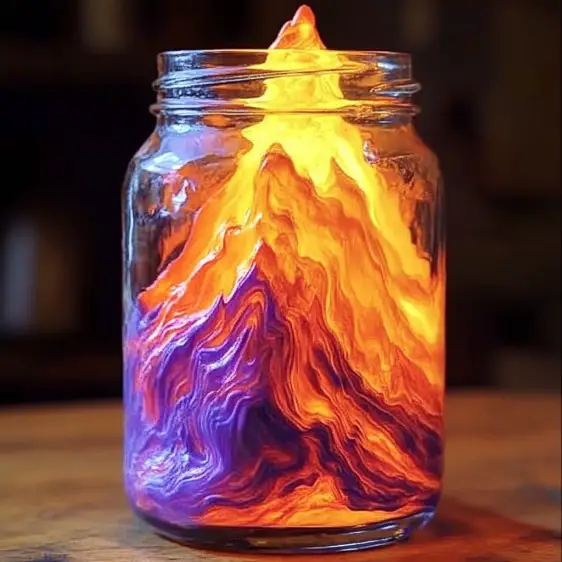
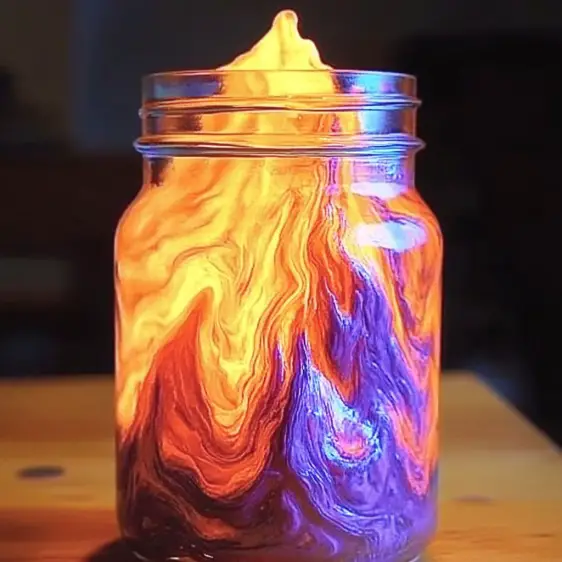
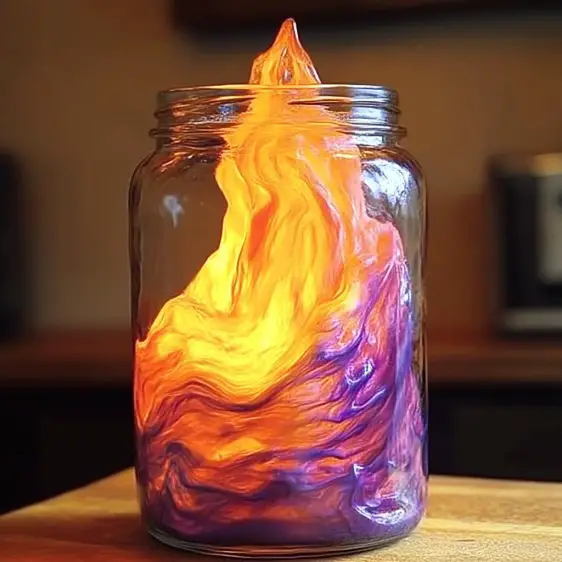
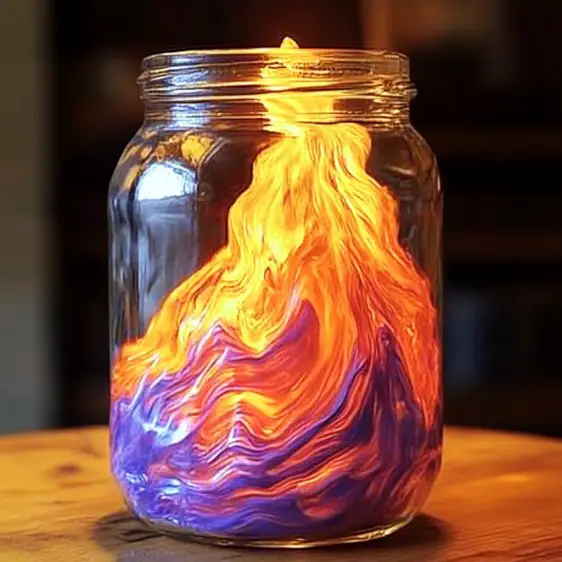
This experiment mimics the eruption of a volcano using a simple chemical reaction between baking soda and vinegar. When combined, they create carbon dioxide gas—resulting in an exciting, bubbly overflow that looks just like lava! Dish soap and food coloring bring even more drama and delight.
Why You’ll Love This Experiment
- Educational and Fun: It’s a perfect mix of science and play!
- Easy Setup: Uses common household items.
- Kid-Approved: It’s safe, colorful, and exciting—what’s not to love?
- Customizable: Change the colors, tweak the ingredients, and make it your own.
What Does It Look and Feel Like?
Imagine a vibrant stream of foamy lava bubbling out of your DIY volcano—bright red, purple, or even rainbow if you’re feeling wild! The fizzing sound adds excitement, while the foam builds up and spills over the sides just like a real eruption.
Benefits of This Activity
- Introduces kids to basic chemistry concepts like acids and bases.
- Encourages problem-solving and curiosity.
- Promotes hands-on learning and sensory exploration.
- Great for group activities—from classrooms to birthday parties.
🧂 Ingredients You’ll Need
- 1 small jar or clear plastic bottle
- 2 tablespoons baking soda
- 1/4 cup vinegar
- 1 tablespoon water
- Optional: Dish soap for added foamy texture
- Optional: Food coloring to mimic lava
- Optional: Small funnel
- A tray or large dish to catch the eruption
🧰 Tools & Setup
- Tray or Large Dish: Catches spills and makes cleanup a breeze.
- Small Funnel: Helps get baking soda into the jar without a mess.
- Spoon: If no funnel, a spoon works great for scooping and pouring.
🍭 Optional Additions & Variations
- Glitter: Because who says lava can’t sparkle?
- Essential Oils: Add a scent to your volcano!
- Playdough Volcano Base: Wrap your jar in brown or gray playdough to create a realistic volcano mountain.
👩🔬 Step-by-Step Instructions
- Prep Your Volcano Base:
Place your jar or bottle in the center of a tray to catch all the fizzy fun. - Add Baking Soda:
Spoon or funnel 2 tablespoons of baking soda into your container. - Enhance the Foam (Optional):
Add a drop or two of dish soap for an extra bubbly eruption. - Add Some Color (Optional):
A few drops of red, orange, or neon food coloring really sells the lava effect. - Mix Vinegar & Water:
In a separate cup, mix 1/4 cup vinegar with 1 tablespoon of water. - Erupt Your Volcano!
Pour the vinegar-water mixture into your volcano and watch the magic happen!
🌈 Serving Suggestion (for Fun!)
Okay, no one’s eating this one—but if you’re doing this at a party or classroom setting, pair it with:
- A mini science trivia game
- Printable volcano coloring pages
- “Lava Punch” (red fruit punch with floating gummy worms!)
🧪 Tips for the Best Eruption
- Don’t skimp on the dish soap—it gives the foam structure and longevity.
- Want a slower eruption? Pour the vinegar in gradually.
- Reuse the volcano! Just rinse, reload, and erupt again!
🧊 Storage & Cleanup
- No long-term storage needed—just rinse the jar or bottle when done.
- Clean any spills with warm soapy water (especially if food coloring was used).
- Store extra baking soda and vinegar in a cool, dry place for next time.
📚 General Info
- Time Required: 5 minutes prep, 1 minute for the eruption
- Skill Level: Beginner-friendly
- Best Age Group: 3+ with adult supervision
❓Frequently Asked Questions
Can I reuse the volcano after one eruption?
Absolutely! Just rinse out the jar and reload your ingredients.
Is this experiment safe for kids?
Yes, it’s totally kid-safe with adult supervision. Just don’t let little ones taste the ingredients.
What if I don’t have dish soap?
You can still do the experiment! The eruption will be less foamy but still dramatic.
Can I do this outside?
100% yes. It’s great for patios, driveways, or the backyard—less mess to clean!
💬 Final Thoughts
The Volcano Eruption Experiment is one of those timeless activities that sparks laughter, learning, and awe. It’s inexpensive, customizable, and memorable—which makes it exactly the kind of experiment worth doing again and again.
So grab your ingredients, gather your audience, and prepare for some fizzy fun!
🍑 More Hands-On Fun (Recommended Recipes)
- DIY Rock Candy Science Experiment
- Homemade Slime (3 Ways!)
- Rainbow Walking Water Experiment
📸 Let’s See Your Volcanoes!
Tried this experiment? Snap a photo and tag it on Pinterest or share in the comments below—we love seeing your creative eruptions!
🥄 Nutritional Info (just kidding… kind of)
This isn’t edible, but if it were?
Calories: 0
Fizz Factor: 100%
Satisfaction Level: Off the charts!
Happy erupting! 🌋
Volcano Eruption Experiment
Ingredients
Method
- Place your jar or bottle in the center of a tray to catch all the fizzy fun.
- Spoon or funnel 2 tablespoons of baking soda into your container.
- Add a drop or two of dish soap for an extra bubbly eruption (optional).
- Add a few drops of red, orange, or neon food coloring for a lava effect (optional).
- In a separate cup, mix 1/4 cup vinegar with 1 tablespoon of water.
- Pour the vinegar-water mixture into your volcano and watch the magic happen!


