Before we get into all the sparkly, glowing fun, let me just say thank you. Thank you for being here, for making time for creativity, and for keeping a little magic in your life—whether it’s for you, your kids, or just because we all need some wonder sometimes. 🧚♀️✨
This DIY Fairy Jar is the kind of craft that makes hearts flutter. It’s whimsical, budget-friendly, and so simple that even the littlest hands (with some supervision!) can help bring it to life. Whether you’re planning a sleepover activity, adding magic to a garden party, or just want something calming and beautiful glowing on your shelf—this is it!
📩 Want the instructions delivered straight to your inbox? Subscribe now and get this DIY and more magical projects sent right to you!
What Is a Fairy Jar?
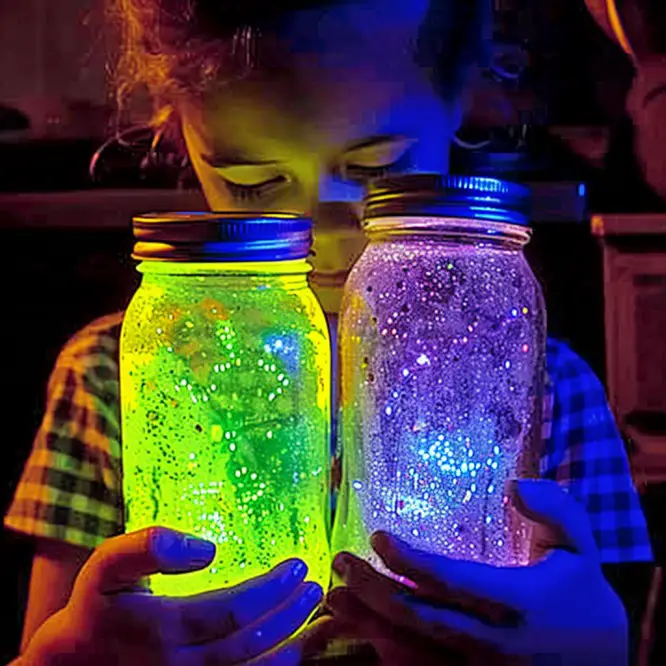
A Fairy Jar is a glowing, glittering mason jar craft that captures the charm of twinkling fairies in a jar. Using just a few easy-to-find materials like a glow stick and glitter, this little jar transforms into a mini light show—one that looks like it came straight out of a fantasy forest.
Why You’ll Love This Craft
- So easy, so fast – Takes less than 10 minutes to make!
- Budget-friendly – Most items can be found at the dollar store.
- Fun for all ages – Great for kids’ parties, sensory play, or cozy adult evenings.
- Customizable – You can switch up the colors, add miniatures, or even paint the outside of the jar.
What Does It Look Like?
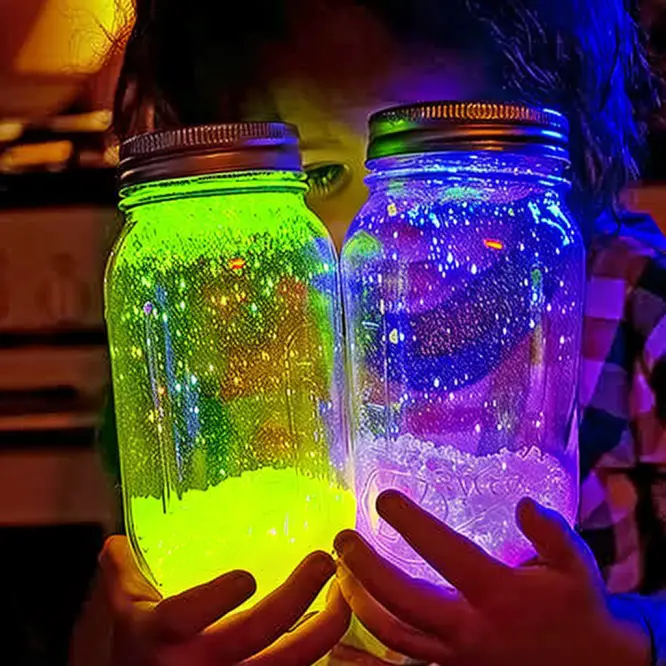
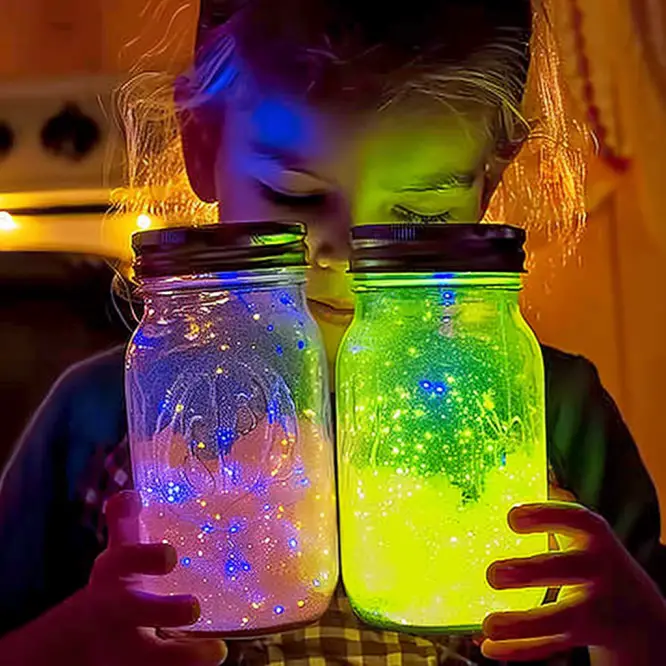
Picture this: A gentle glow—soft pink, electric blue, or mystical green—dancing through flecks of glitter as it swirls inside a mason jar. The light reflects off the sparkles, bouncing softly in a dark room. It’s dreamy, peaceful, and absolutely enchanting.
Benefits of This DIY Craft
- Encourages creativity and hands-on play.
- A sensory-friendly activity (especially when used with calming lights and textures).
- Makes a perfect nightlight for kids or mood light for a cozy reading nook.
- Can be used as a party favor or handmade gift!
Ingredients & Supplies
What You’ll Need:
- 1 mason jar with a lid (any size works, but smaller jars are great for kids!)
- 1 glow stick (pick your favorite color!)
- Glitter (fine or chunky—go wild!)
- Towel or paper towels (for cleanup)
- Scissors or a craft knife (adult supervision required!)
Optional Add-Ins
- Mini fairy figurines
- Star-shaped confetti
- Glow-in-the-dark stickers
- A dash of biodegradable glitter for an eco-friendly option
Step-by-Step Instructions
Let’s Make Your Fairy Jar!
- Prep Your Workspace:
Lay a towel or paper towel on your surface to catch any glitter or glow stick liquid. This is a messy—but fun—project! - Choose Your Colors:
Pick the glitter and glow stick combo that speaks to your mood or theme. - Activate and Cut the Glow Stick:
Snap the glow stick to activate it. Then, carefully cut off the bottom of the glow stick over the towel. (This step is for adults only.) - Add Glow to the Jar:
Gently squeeze the glow stick to pour the glowing liquid into the mason jar. - Add the Glitter:
Go generous here. Add as much glitter as you like—the more, the more magical! - Seal and Shake:
Secure the lid on the jar tightly and give it a good shake to mix everything. - Enjoy the Magic:
Turn off the lights and bask in the glow of your very own fairy wonderland.
What to Pair with Your Fairy Jar
- Use them as glowing centerpieces at a nighttime garden party.
- Line them along a windowsill for dreamy nighttime ambiance.
- Place one on your nightstand as a DIY nightlight.
- Add one to a storytime corner or reading nook to create a calming environment.
Tips for the Perfect Fairy Jar
- Double Jar Method: If you’re worried about glow stick liquid being exposed, put a smaller jar inside a larger one and decorate the outer jar with glitter or stickers.
- Use Gloves: Glow stick liquid can be messy—wear gloves when cutting and pouring.
- Use Different Glitter Sizes: Mixing fine and chunky glitter adds depth to the visual effect.
- Add a Ribbon or Tag: These make great gifts—tie a ribbon around the lid or add a little “Fairy Dust” label.
Storage Instructions
Fairy jars are best enjoyed right away since the glow stick will start to fade after a few hours. But once the light dims, they still look beautiful as daytime décor. You can reuse the jar later with a new glow stick!
Frequently Asked Questions
How long do fairy jars glow?
Usually 4–6 hours, depending on the brand and size of the glow stick.
Is the glow stick liquid safe?
Most glow stick liquids are non-toxic, but not intended for skin contact or ingestion. Always supervise children during this craft.
Can I reuse the jar?
Absolutely! Just rinse it out and start fresh with a new glow stick and glitter.
Can I use a plastic jar?
Yes! Plastic jars work well, especially for younger kids since they’re unbreakable.
Wrap-Up: Pure Magic in a Jar
With just a few simple ingredients, you can create a DIY Fairy Jar that turns any evening into a scene straight out of a fairy tale. It’s simple, stunning, and absolutely unforgettable. Whether you’re crafting with kids or adding a little enchantment to your space—this project delivers every time.
🧚♂️ If you try this craft, I’d love to see your fairy jars!
📸 Tag me on Pinterest and share your magical creations. Let’s inspire each other!
Want More Magical DIYs?
If you loved this, don’t miss these sparkly, glow-worthy crafts:
- 🌙 Glow-in-the-Dark Moon Rocks
- 🧼 Galaxy Soap DIY for Kids
- 🪄 [DIY Potion Bottles for Halloween or Play]
✨Nutritional Information (Just for Fun!)
Calories: 0
Joy Sparked: 100%
Creativity Unleashed: Off the charts!
If magic had a mason jar version, this would be it. Now go—create something enchanting!
Fairy Jar Craft
Ingredients
Method
- Lay a towel or paper towel on your surface to catch any glitter or glow stick liquid.
- Pick the glitter and glow stick combo that speaks to your mood or theme.
- Snap the glow stick to activate it. Then, carefully cut off the bottom of the glow stick over the towel. (This step is for adults only.)
- Gently squeeze the glow stick to pour the glowing liquid into the mason jar.
- Add as much glitter as you like—the more, the more magical!
- Secure the lid on the jar tightly and give it a good shake to mix everything.
- Turn off the lights and bask in the glow of your very own fairy wonderland.


