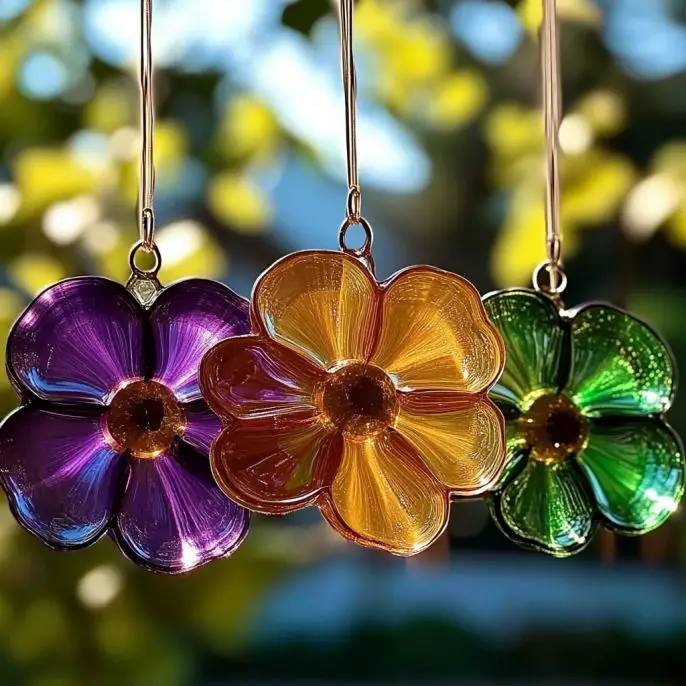
Hi there, friend! ☀️ Today’s craft brings together science, art, and sustainability in the most beautiful way. If you’ve ever dreamed of catching sunlight with something you made yourself, you’re going to fall in love with these DIY Bioplastic Suncatchers.
They’re a perfect fusion of creativity and eco-consciousness—made from cornstarch, vinegar, and water, these suncatchers are fully biodegradable and a wonderful way to teach kids (and grown-ups!) about how we can create less waste and more wonder.
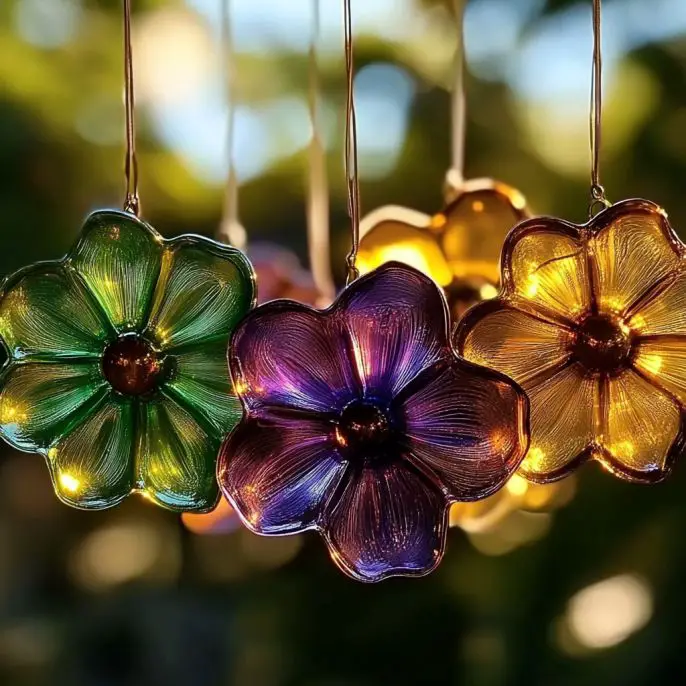
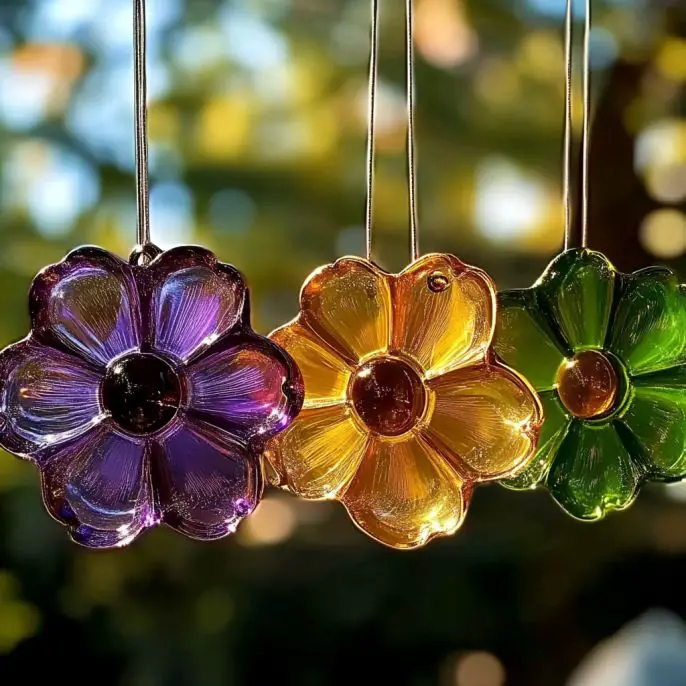
They shimmer in windows, dangle joyfully from tree branches, and give your home or classroom a dose of handmade magic. And yes—making them is just as fun as hanging them!
💌 Want more sustainable, creative projects? Don’t forget to subscribe so you never miss a moment of joyful making.
What Are Bioplastic Suncatchers?
These suncatchers are crafted from a homemade bioplastic mixture that starts as a gel and dries into a firm, translucent material. Think of it like eco-friendly plastic you can whip up in your kitchen. Add color, shape it however you want, let it dry—and voilà! Your sunlight-catching art is ready to glow.
This project is part science experiment, part creative expression, and all-around awesome.
Why You’ll Love This Craft
Uses natural, biodegradable materials
Doubles as a STEM lesson + art project
Completely customizable with color, shape, and design
Safe and fun for kids and adults alike
A beautiful way to bring color to your windows
Perfect for Earth Day, science fairs, or weekend projects
Ingredients & Supplies
½ cup cornstarch
1 cup water
1 tablespoon white vinegar
1 tablespoon glycerin (optional, for flexibility)
Food coloring (optional, for color)
Wax paper or parchment paper
Spoon or craft stick
Pipettes, cookie cutters, or straws (optional for shaping)
String or ribbon for hanging
Step-by-Step Instructions
1. Mix the Bioplastic Base
In a small saucepan, combine:
½ cup cornstarch
1 cup water
1 tablespoon vinegar
1 tablespoon glycerin (optional, but adds flexibility)
Whisk it until the cornstarch is fully dissolved and the mixture is smooth.
2. Heat the Mixture
Place your saucepan over medium heat. Stir constantly—the mixture will start to thicken slowly. In just a few minutes, it will transform into a clear, gel-like paste. As soon as it thickens and looks glossy, remove from heat.
3. Add Your Colors
Now’s the time to get creative! Add a few drops of food coloring to the mixture and stir until evenly blended. You can divide it into small bowls if you want to work with multiple colors.
4. Shape Your Suncatchers
Lay wax or parchment paper flat on your work surface. Spoon or pour the bioplastic onto the paper, spreading it into thin layers with a spoon or stick. You can:
Use cookie cutters or silicone molds
Pour different colors in swirls for a marbled effect
Use pipettes to “paint” with color
Create abstract blobs, hearts, or butterfly wings!
5. Design While It’s Warm
Gently press shapes or textures into the warm mixture using straws or tools. Want to hang it later? Use a straw to poke a small hole near the top while it’s still soft.
6. Let It Dry
Leave your suncatchers out to dry at room temperature—preferably somewhere flat and undisturbed. Drying time can range from 6 to 24 hours, depending on thickness and humidity.
7. Peel, Trim & Hang
Once dry, your suncatchers will be firm and slightly flexible with a translucent glow. Gently peel them off the paper. If you didn’t cut them earlier, you can now trim into final shapes with scissors. Thread string through the hole and hang them proudly!
Tips & Variations
🌈 Layer colors before the mix sets for a rainbow or tie-dye effect
✨ Add glitter or tiny confetti to the mixture before drying for sparkle
🪞 Use stamps or textured materials to create patterns
🐝 Try nature shapes like leaves, flowers, or bees for a seasonal theme
🎁 Gift idea: Package a few in a clear bag with a note and ribbon—perfect for handmade presents!
Frequently Asked Questions (FAQ)
Are bioplastic suncatchers waterproof?
No—they are not designed to withstand water. Keep them indoors or in dry spots for best results.
Can I use these outside?
You can hang them outdoors temporarily, but avoid rain or high humidity, as moisture may soften the plastic over time.
How long do they last?
They hold up well indoors for several weeks to months. Over time, since they’re natural, they may begin to degrade—making them wonderfully eco-friendly.
What if my mixture is too thick or too runny?
If too thick: Add a splash of water.
If too runny: Let it simmer longer on the stove until it gels up.
Conclusion
Making DIY Bioplastic Suncatchers is more than just a craft—it’s a reminder of how creativity and care for the earth can go hand in hand. You’re not just making something pretty—you’re learning, experimenting, and building beauty from the ground up (literally!).
Hang them in your windows, gift them to friends, or use them as conversation-starters about sustainability and art. However you use them, these little sun-catchers are sure to bring joy—and maybe even a little sparkle—to your space.
More Eco-Friendly Crafts to Explore
DIY Aroma Stones
Upcycled Butterfly Suncatchers
Reusable Beeswax Wraps
Nature Pressed Flower Art
Homemade Paper with Seeds
Show Me Your Suncatchers!
Did you try this project? I’d love to see your glowing creations! Tag your photos on Pinterest or share them on social with the hashtag #BioplasticMagic. Let’s inspire each other to create more beauty with less waste. 🌍✨

Approximate Cost Per Batch
$3–$5, depending on ingredients and extras like glitter or molds.
Thank you for crafting sustainably with me today. Until next time—keep creating, keep dreaming, and keep letting the light in. 🌞💛
Want a printable instruction sheet for this activity or an eco-craft planner? Just let me know!
Bioplastic Suncatchers
Ingredients
Method
- In a small saucepan, combine cornstarch, water, vinegar, and glycerin (if using). Whisk until the cornstarch is fully dissolved and the mixture is smooth.
- Place your saucepan over medium heat. Stir constantly until the mixture thickens into a clear, gel-like paste. Remove from heat once glossy.
- Add a few drops of food coloring to the mixture and stir until evenly blended. You can divide it into small bowls for multiple colors.
- Lay wax or parchment paper flat. Spoon or pour the bioplastic onto the paper, spreading into thin layers. Use cookie cutters or molds for shapes.
- Press shapes or textures into the warm mixture using straws or tools. Poke a small hole for hanging if desired.
- Leave the suncatchers out to dry at room temperature for 6 to 24 hours depending on thickness and humidity.
- Once dry, gently peel off the paper, trim into final shapes if needed, and thread string through the hole to hang.
Notes
Bioplastic Suncatchers
Ingredients
Method
- In a small saucepan, combine cornstarch, water, vinegar, and glycerin (if using). Whisk until fully dissolved and smooth.
- Place your saucepan over medium heat and stir constantly. The mixture will thicken into a clear, gel-like paste. Remove from heat as soon as it thickens.
- Add food coloring to the mixture and stir until evenly blended. You can separate into bowls to work with multiple colors.
- Lay wax or parchment paper flat on your work surface. Spoon or pour the bioplastic onto the paper, spreading it into thin layers.
- Use cookie cutters or straws to shape the suncatchers. Poke holes for hanging while still warm.
- Leave to dry at room temperature for 6 to 24 hours, depending on thickness and humidity.
- Once dry, gently peel off the paper, trim into desired shapes, and thread string to hang.