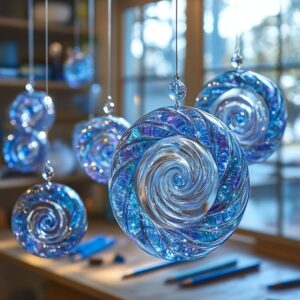
Creating your own DIY aroma stones is a fun, therapeutic, and eco-friendly way to bring a natural fragrance into your home. Whether you want to elevate your space with relaxing lavender, invigorate it with peppermint, or refresh it with citrus blends, aroma stones offer a beautiful and safe alternative to synthetic air fresheners. This simple craft combines everyday ingredients like baking soda and cornstarch with essential oils to create stunning scent stones that you can place in drawers, closets, bathrooms, or even your car. In this guide, you’ll discover everything you need to know to make aroma stones at home, along with expert tips, customization options, and answers to common questions.
Why You’ll Love This DIY Aroma Stone Recipe
There’s something incredibly satisfying about making your own home products, and aroma stones are no exception. Here’s why you’ll fall in love with this craft:
- All-natural and non-toxic: Skip the artificial chemicals and embrace clean, natural ingredients that are safe for your family and pets.
- Customizable scents: Tailor each batch to your personal preferences or the season — think warm vanilla for winter or citrus blends for spring.
- Reusable and sustainable: Once they lose their scent, just refresh them with a few more drops of essential oil.
- Beautiful decor: With the right molds and a touch of color, these stones can double as mini works of art.
- Budget-friendly: Made with pantry staples and a few drops of essential oil, this project is easy on your wallet.
Whether you’re an essential oil enthusiast, a DIY lover, or simply looking for a creative weekend activity, making aroma stones is a delightful experience with long-lasting rewards.
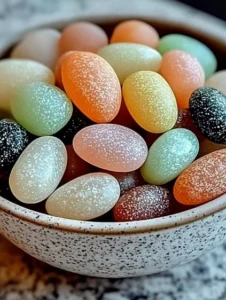
Ingredients
Here’s what you’ll need to create your own batch of homemade aroma stones:
- 1/2 cup baking soda – Helps absorb and hold the fragrance.
- 1/2 cup cornstarch – Binds the ingredients and gives the stones a silky texture.
- 1/4 cup warm water – Activates the mixture and creates a moldable paste.
- 15–30 drops of essential oil – Choose from lavender, lemon, peppermint, eucalyptus, or blend your own.
- Optional: natural coloring – Use mica powder or a drop of food coloring to tint your stones.
Necessary Tools
To get started, gather the following tools:
- Mixing bowl
- Spoon or spatula
- Silicone molds, cookie cutters, or ice cube trays
- Parchment paper or drying tray
- Dropper or small spoon for precise oil measuring
Having these tools on hand will make the process smooth and mess-free, especially when working with oils and powders.
Ingredient Swaps and Additions
Personalization is part of the fun. Here are a few ideas to adapt the recipe to your needs:
- Cornstarch alternative: Try arrowroot powder or rice flour if cornstarch is unavailable.
- Baking soda substitute: While less common, fine white kaolin clay can offer a similar absorbent texture.
- Essential oil blends:
- Relaxing: Lavender + Chamomile + Vanilla
- Energizing: Orange + Peppermint + Lemon
- Purifying: Eucalyptus + Tea Tree + Rosemary
- Visual accents: Add dried herbs or edible flowers like lavender buds or rose petals to the molds.
- Decorative touches: Sprinkle a touch of glitter or gold mica powder to enhance the visual appeal.
Step-by-Step Instructions
Step 1: Mix the Dry Ingredients
In a medium mixing bowl, combine the baking soda and cornstarch. Stir thoroughly until the mixture is fully blended and lump-free.
Step 2: Add Water Gradually
Pour in the warm water little by little, stirring continuously. You’re aiming for a thick, moldable paste. If it’s too dry and crumbly, add a teaspoon of water at a time. If it’s too runny, add a spoonful of baking soda or cornstarch until the texture is just right.
Step 3: Scent Your Mixture
Add 15–30 drops of your favorite essential oil(s) and stir well. Start small; you can always add more. Remember, the scent will become more pronounced once the stones dry.
Step 4: Add Coloring (Optional)
If desired, mix in a small amount of mica powder or a single drop of food coloring. Be cautious with food coloring as it may stain porous surfaces.
Step 5: Mold the Stones
Using a spoon, gently fill your molds, cookie cutters, or trays about 3/4 of the way. Smooth the surface with the back of the spoon.
Step 6: Air Dry
Place the filled molds on parchment paper in a dry, well-ventilated area. Let them sit undisturbed for 6–24 hours. Thinner stones dry faster; thicker ones need more time.
Step 7: Unmold and Enjoy
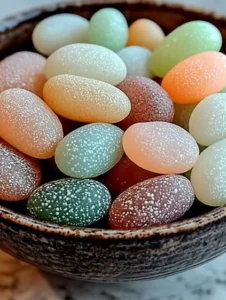
Once completely dry, pop your stones out of the molds. They should feel hard to the touch and lightweight.
Pro Tips for Success
- Humidity matters: High humidity may slow drying time. Use a fan or dehumidifier if needed.
- Scent intensity: Essential oils become more concentrated once dry, so go light at first.
- Proper storage: Store unused stones in an airtight container to prevent moisture absorption.
- Revive old stones: When the scent fades, just add a few drops of essential oil directly to the stone.
- Perfect mold release: Silicone molds work best for easy removal without crumbling.
Serving Suggestions (How to Use Aroma Stones)
Aroma stones are wonderfully versatile. Here are some favorite ways to enjoy them:
- In the bathroom: Keep a bowl of stones near the sink for a spa-like scent.
- Inside drawers or closets: Tuck a few stones into lingerie drawers or linen closets for gentle freshness.
- Car fresheners: Add a couple to a small sachet bag and place it in your car.
- Yoga or meditation spaces: Choose calming blends to enhance relaxation.
- As gifts: Package them in small mesh bags or jars as handmade presents.
Storing and Refreshing Aroma Stones
- Storage: Keep unused or unscented stones in an airtight container in a cool, dry place.
- Refreshing scent: Once the fragrance fades (usually after a few weeks), add a few drops of essential oil directly onto the stones to revive them.
- Shelf life: Aroma stones can last for months if stored properly and refreshed regularly.
Nutritional Information
(Since aroma stones are not edible, nutritional values do not apply. However, here’s a breakdown of their eco- and health-friendly benefits:)
- Non-toxic: No harmful chemicals or synthetic fragrances.
- Biodegradable: Made with natural, compostable materials.
- Safe for kids and pets: When used and stored appropriately.
FAQs
1. Can I bake aroma stones to dry them faster?
It’s not recommended, as heat may reduce the potency of essential oils. Air drying preserves fragrance better.
2. How long do aroma stones last?
Their scent typically lasts 2–4 weeks. The stones themselves last indefinitely and can be refreshed as needed.
3. What are the best essential oils for aroma stones?
Lavender, eucalyptus, citrus, peppermint, and sandalwood are excellent choices. Use what you love.
4. Can I use fragrance oils instead of essential oils?
Yes, but ensure they are skin-safe and phthalate-free. Essential oils are more natural and therapeutic.
5. My stones are crumbling—what went wrong?
The mixture may have been too dry. Try adding more water next time, and ensure even mixing before molding.
Conclusion
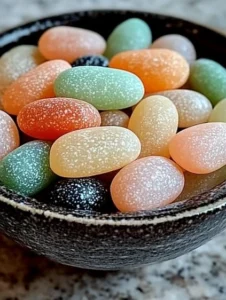
DIY aroma stones are an easy and satisfying way to bring delightful, natural fragrances into your home without relying on synthetic chemicals. They’re beautiful, sustainable, and endlessly customizable. Whether you’re crafting for yourself or gifting to others, these little scent stones are sure to impress. Want to explore more eco-friendly DIYs or learn about essential oil combinations? Start with the links below and keep the creativity flowing!


