Crispy Butter Cheese Sticks are golden, buttery, cheesy snacks with delicate crisp edges and a rich sharp cheddar flavor. Made with softened butter, self-rising flour, and shredded cheddar cheese, these homemade cheese sticks offer a delicious alternative to store-bought crackers and savory pastries.
The recipe requires only three main ingredients. A little cold milk helps bring the dough together when necessary, while optional garlic powder and dried parsley add extra flavor.
Best of all, you don’t need yeast, complicated equipment, or advanced baking skills.
Simply mix the dough, shape it into thin sticks, and bake until golden.
The butter creates a rich, tender texture. Meanwhile, the cheddar adds savory flavor, and the self-rising flour gives the sticks enough structure to hold their shape.
As the cheese sticks bake, their edges become lightly crisp while their centers develop a delicate, crumbly texture.
These Crispy Butter Cheese Sticks make an excellent choice for afternoon snacks, holiday appetizers, lunchbox treats, party platters, and casual gatherings.
You can enjoy them warm from the oven or allow them to cool for a firmer, crispier texture.
I first started making homemade cheese sticks when I wanted a simple savory snack to serve with soup. I had butter, self-rising flour, and a block of sharp cheddar in the kitchen, so I decided to turn them into little cheese pastries. I mixed the ingredients, rolled the dough into thin sticks, and arranged them on a baking sheet. As they baked, the kitchen filled with the comforting smell of butter and toasted cheese. The finished sticks had golden edges and a rich cheddar flavor. I served them alongside tomato soup, and they disappeared quickly. Since then, I’ve enjoyed making them for snacks and family gatherings.
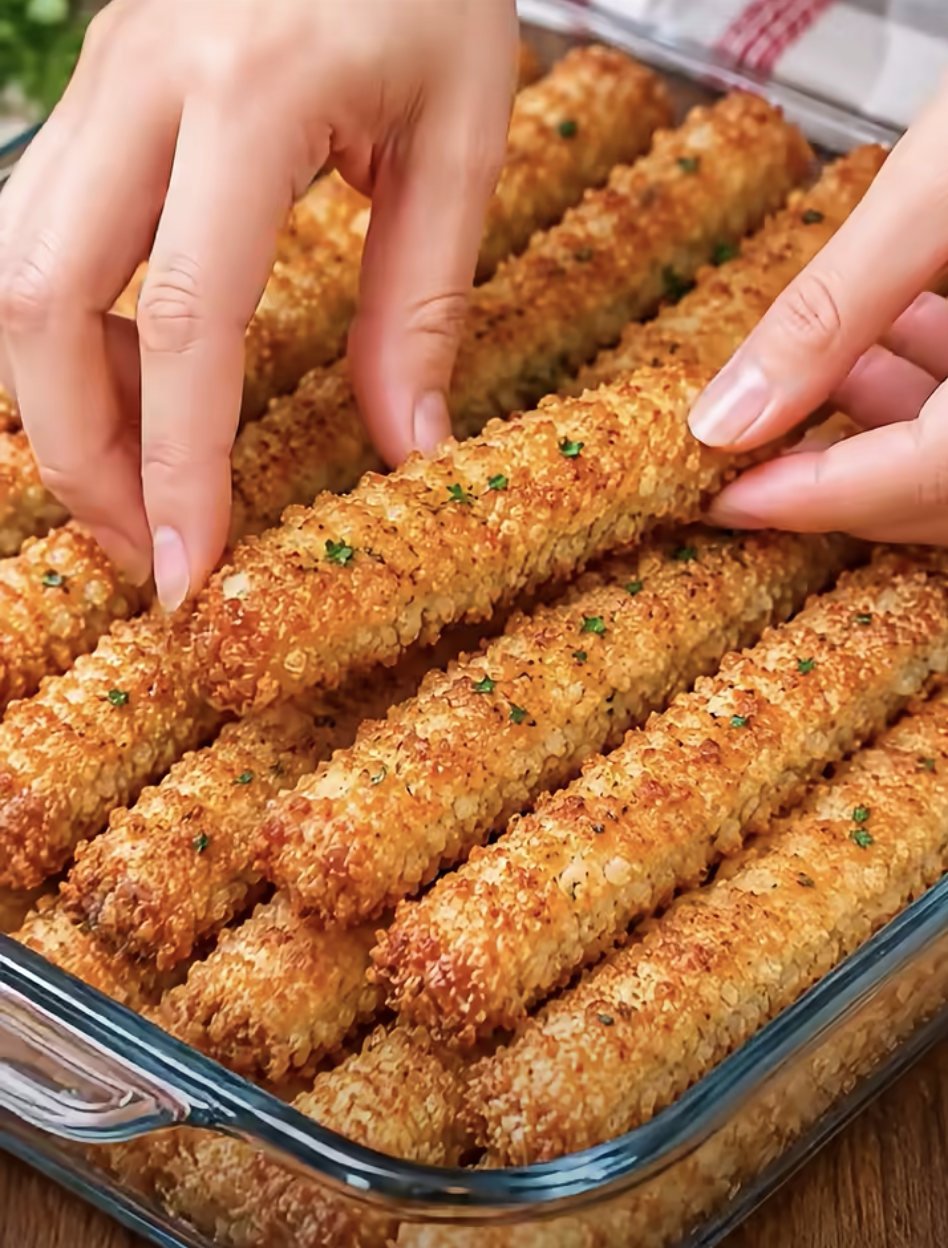
Crispy Butter Cheese Sticks – Easy Homemade Cheddar Cheese Snacks
Ingredients
Equipment
Method
- Preheat oven to 350°F (175°C). Line a large baking sheet with parchment paper.
- Place softened salted butter in a large mixing bowl. Beat until smooth and creamy.
- Gradually add self-rising flour, mixing until a crumbly dough forms.
- Stir in finely shredded sharp cheddar cheese. Add garlic powder if desired.
- Knead gently until mixture forms a cohesive dough. If too dry, add cold milk one tablespoon at a time, using only as much as necessary.
- Divide dough into approximately 24 equal portions. Roll each portion into a long stick about 1/2 inch thick.
- Arrange sticks on prepared baking sheet, leaving a little space between them.
- Sprinkle dried parsley over sticks if desired.
- Bake for approximately 18–25 minutes until sticks become golden brown and lightly crisp around edges.
- Remove from oven and allow sticks to cool for 5–10 minutes before serving warm or at room temperature.
Notes
Why You’ll Love Crispy Butter Cheese Sticks
Rich Buttery Flavor with Golden, Crispy Edges
One of the biggest reasons to love Crispy Butter Cheese Sticks is their delicious combination of butter and sharp cheddar cheese.
Butter creates the rich foundation of the dough.
As the sticks bake, the butter melts and helps create a tender, delicate texture.
Meanwhile, sharp cheddar contributes a bold, savory flavor.
The cheese also helps the edges develop a beautiful golden color.
Together, these ingredients create a snack that tastes rich without requiring complicated preparation.
Another advantage is the texture.
The finished sticks should have lightly crisp edges and a tender, slightly crumbly center.
However, the exact texture depends on the thickness of the dough.
Thinner sticks generally become crispier.
Meanwhile, thicker sticks tend to remain softer in the middle.
For the best balance, shape the dough into sticks approximately half an inch thick.
This allows the exterior to brown while the inside cooks through.
Another important factor is the baking time.
The recipe calls for approximately 18–25 minutes at 350°F (175°C).
However, smaller sticks may finish sooner.
Therefore, check them near the beginning of the suggested baking window.
The edges should look golden brown.
The tops should also develop a light toasted color.
After baking, allow the sticks to cool for five to ten minutes.
This resting period helps them firm up.
As a result, they become easier to handle and develop a more satisfying texture.
A Simple Homemade Snack for Any Occasion
Crispy Butter Cheese Sticks work beautifully for many different occasions.
Their simple ingredient list makes them especially convenient.
You don’t need yeast or a long rising time.
Instead, you can prepare the dough in a single mixing bowl.
The recipe also requires very little shaping.
Simply divide the dough into small portions.
Then roll each portion into a thin stick.
Arrange the sticks on a baking sheet and bake until golden.
Another benefit is their versatility.
You can serve them as an afternoon snack.
They also make a delicious accompaniment to soups and salads.
For example, pair them with tomato soup.
The rich cheddar flavor complements the tangy tomatoes.
You can also serve them with vegetable soup or creamy potato soup.
For parties, arrange the cheese sticks on a platter.
Add a small bowl of marinara sauce or another favorite dip.
Their convenient shape makes them easy to pick up and enjoy.
The recipe also works well for holiday gatherings.
You can prepare the dough ahead of time and refrigerate it briefly before shaping.
Then bake a fresh batch when you’re ready to serve.
For lunchboxes, allow the sticks to cool completely before packing.
Their savory flavor provides a pleasant alternative to sweet snacks.
Whether you’re preparing a casual family snack or a party appetizer, these homemade cheddar sticks deliver delicious buttery flavor with minimal effort.
Choosing the Best Ingredients for Crispy Butter Cheese Sticks
Softened Salted Butter and Self-Rising Flour
The foundation of Crispy Butter Cheese Sticks starts with one cup of softened salted butter.
Butter provides richness, moisture, and flavor.
For the best results, use butter that feels soft enough to mix easily.
However, avoid melting it.
Melted butter changes the dough’s consistency and may cause the sticks to spread too much during baking.
Instead, allow the butter to soften at room temperature.
Then beat it until smooth and creamy.
This creates an even foundation for the flour.
Next, add two cups of self-rising flour.
Self-rising flour contains flour, baking powder, and salt.
Therefore, you don’t need to add a separate leavening ingredient.
The flour provides structure and helps the sticks maintain their shape.
Add it gradually to the softened butter.
Mix until the mixture becomes crumbly.
At this stage, the dough may not look completely smooth.
That’s normal.
The cheddar cheese and gentle kneading will help bring everything together.
If you don’t have self-rising flour, you can make a substitute.
For every cup of all-purpose flour, combine one and a half teaspoons of baking powder and one-quarter teaspoon of salt.
However, because the recipe already uses salted butter and cheddar cheese, you may prefer a slightly reduced amount of added salt.
For the original recipe, self-rising flour remains the easiest choice.
It provides consistent results and simplifies preparation.
Sharp Cheddar, Cold Milk, and Optional Seasonings
The next essential ingredient in Crispy Butter Cheese Sticks is one cup of finely shredded sharp cheddar cheese.
Sharp cheddar provides a rich, savory flavor.
It also contributes to the golden color of the finished sticks.
For the best results, shred the cheese finely.
Finely shredded cheddar distributes more evenly throughout the dough.
It also makes the sticks easier to shape.
You can use packaged shredded cheddar.
However, freshly shredded cheese often blends more smoothly.
Next, prepare two to four tablespoons of cold milk.
Milk is optional.
You only need it if the dough feels too dry to hold together.
Start by kneading the butter, flour, and cheese mixture gently.
If the dough remains crumbly, add one tablespoon of cold milk.
Mix again.
Continue adding milk gradually until the dough holds together.
However, avoid adding too much.
Excess milk can make the dough sticky and difficult to shape.
Next, consider adding half a teaspoon of garlic powder.
Garlic powder provides a gentle savory flavor that complements the cheddar.
You can also add half a teaspoon of dried parsley.
Parsley contributes a subtle herbal note and attractive color.
Both seasonings are optional.
The butter, flour, and cheddar already create a delicious snack.
For a stronger cheese flavor, use extra-sharp cheddar.
For a milder version, choose mild cheddar.
However, sharp cheddar provides the classic rich flavor that makes these cheese sticks especially satisfying.
How to Make Crispy Butter Cheese Sticks
Mixing the Dough and Shaping the Cheese Sticks
Making Crispy Butter Cheese Sticks begins with preheating your oven.
Set the temperature to 350°F (175°C).
Next, line a large baking sheet with parchment paper.
This helps prevent sticking and makes cleanup easier.
Then place one cup of softened salted butter in a large mixing bowl.
Beat the butter until smooth and creamy.
You can use a hand mixer or a sturdy spoon.
Next, gradually add two cups of self-rising flour.
Mix until the butter and flour form a crumbly mixture.
Avoid overmixing.
You want the ingredients to combine without making the dough tough.
Next, add one cup of finely shredded sharp cheddar cheese.
If desired, add half a teaspoon of garlic powder.
Stir until the cheese distributes evenly.
Then gently knead the mixture.
Use your hands to press the ingredients together.
The dough should begin to form a cohesive ball.
If it remains too dry, add cold milk.
Start with one tablespoon.
Mix gently.
Then add more milk only if necessary.
You may need anywhere from zero to four tablespoons, depending on the flour and moisture in the cheese.
Once the dough holds together, divide it into small portions.
Roll each portion into a long stick approximately half an inch thick.
Try to keep the sticks similar in size.
This helps them bake evenly.
Next, arrange the sticks on the prepared baking sheet.
Leave a little space between them.
If desired, sprinkle dried parsley over the tops.
The sticks are now ready for baking.
Baking Until Golden and Achieving the Best Texture
After shaping the dough, place the baking sheet in the preheated oven.
Bake at 350°F (175°C) for approximately 18–25 minutes.
During baking, the butter melts and helps create a tender texture.
Meanwhile, the cheddar cheese develops a rich, toasted flavor.
The edges should gradually turn golden brown.
However, baking time depends on the thickness of the sticks.
Thinner sticks may bake more quickly.
Therefore, begin checking them around 18 minutes.
Look for lightly browned edges.
The tops should also appear dry and golden.
If the sticks still look pale, continue baking for a few minutes.
However, avoid baking them until they become excessively dark.
Overbaking can create a bitter flavor and dry texture.
Once the sticks reach your preferred color, remove the baking sheet from the oven.
Place it on a heat-safe surface.
Allow the sticks to cool for approximately five to ten minutes.
This resting time is important.
Freshly baked cheese sticks may feel slightly soft.
As they cool, the butter and cheese firm up.
The texture becomes more stable and pleasantly crisp.
Next, transfer the sticks to a serving platter.
Use a spatula if necessary.
For the best flavor, serve them slightly warm or at room temperature.
You can enjoy them plain.
However, they also pair beautifully with marinara sauce, tomato soup, or creamy dips.
The finished sticks should have a golden exterior, rich cheddar flavor, and delicate buttery texture.
Serving, Storing, and Customizing Your Cheese Sticks
Delicious Dips, Soups, and Party Serving Ideas
Crispy Butter Cheese Sticks taste delicious on their own.
However, you can pair them with several simple dips and side dishes.
One of the best choices is marinara sauce.
The tangy tomato flavor balances the rich butter and cheddar.
You can also serve the sticks with creamy ranch dressing.
Ranch adds a cool, savory contrast.
For a slightly spicy option, offer a mild cheese dip.
The extra cheese creates an indulgent appetizer.
Another delicious choice is tomato soup.
Dip the warm cheese sticks into the soup for a comforting combination.
You can also serve them with creamy potato soup.
The rich cheddar flavor complements the smooth potatoes.
For a lighter meal, pair the sticks with a fresh green salad.
The crisp vegetables help balance the buttery pastry.
You can also serve them alongside a vegetable platter.
Carrot sticks, cucumber slices, and celery provide freshness.
For parties, arrange the cheese sticks in a shallow bowl or on a serving platter.
Place small dipping bowls nearby.
This creates an attractive finger-food presentation.
For holiday gatherings, you can prepare a large batch.
Arrange the sticks in neat rows or stack them casually in a basket.
Their golden color makes them especially inviting.
You can also serve them as an alternative to crackers with a cheese board.
However, remember that they already contain cheddar.
Therefore, pair them with fresh fruit, olives, or vegetables for variety.
These simple serving ideas make the cheese sticks suitable for snacks, appetizers, and casual meals.
Storage, Reheating, Make-Ahead Tips, and Variations
Proper storage helps Crispy Butter Cheese Sticks maintain their delicious flavor.
After baking, allow the sticks to cool completely.
Then transfer them to an airtight container.
Because the recipe contains butter and cheese, refrigeration offers a practical storage option.
Store the sticks in the refrigerator for up to four days.
For the best texture, reheat them briefly before serving.
Arrange the sticks on a baking sheet.
Warm them in a 300°F (150°C) oven for approximately five to eight minutes.
This helps restore some of their crispness.
You can also use an air fryer.
However, check them frequently to prevent overbrowning.
For longer storage, freeze the baked cheese sticks.
Allow them to cool completely.
Then arrange them in a freezer-safe container.
Separate layers with parchment paper if necessary.
For the best quality, enjoy within two months.
Reheat from frozen in a moderate oven until warm and crisp.
The recipe also works well for make-ahead preparation.
You can mix the dough in advance.
Wrap it tightly and refrigerate for up to 24 hours.
Then allow it to soften slightly before shaping.
For extra garlic flavor, add a little more garlic powder.
You can also use smoked paprika for a subtle smoky note.
For a spicy variation, add a pinch of cayenne pepper.
You can also substitute part of the cheddar with Parmesan cheese.
However, Parmesan changes the dough’s moisture and salt balance.
For the simplest preparation, stick with the original butter, self-rising flour, and sharp cheddar combination.
Ingredients
Yield: approximately 24 cheese sticks | Prep time: 15 minutes | Bake time: 18–25 minutes | Cooling time: 5–10 minutes | Total time: approximately 38–50 minutes
- 1 cup salted butter, softened
- 2 cups self-rising flour
- 1 cup sharp cheddar cheese, finely shredded
- 2–4 tablespoons cold milk, only if needed
- ½ teaspoon garlic powder, optional
- ½ teaspoon dried parsley, optional
Instructions
- Preheat the oven. Preheat your oven to 350°F (175°C). Line a large baking sheet with parchment paper.
- Cream the butter. Place one cup of softened salted butter in a large mixing bowl. Beat until smooth and creamy.
- Add the flour. Gradually add two cups of self-rising flour, mixing until a crumbly dough forms.
- Mix in the cheese. Stir in one cup of finely shredded sharp cheddar cheese. Add garlic powder if desired.
- Bring the dough together. Knead gently until the mixture forms a cohesive dough. If it feels too dry, add cold milk one tablespoon at a time, using only as much as necessary.
- Shape the sticks. Divide the dough into approximately 24 equal portions. Roll each portion into a long stick about ½ inch thick.
- Arrange on the baking sheet. Place the sticks on the prepared baking sheet, leaving a little space between them.
- Add optional parsley. Sprinkle dried parsley over the sticks if desired.
- Bake until golden. Bake for approximately 18–25 minutes, until the sticks become golden brown and lightly crisp around the edges.
- Cool and serve. Remove from the oven and allow the sticks to cool for 5–10 minutes before serving warm or at room temperature.
Frequently Asked Questions
1. Can I make Crispy Butter Cheese Sticks without self-rising flour?
Yes. For two cups of all-purpose flour, add three teaspoons of baking powder and approximately half a teaspoon of salt. However, because the recipe uses salted butter and cheddar, you can reduce the added salt slightly.
2. Why are my cheese sticks soft instead of crispy?
The sticks may be too thick or may need a little more baking time. For crispier results, roll the dough into thinner sticks and bake until the edges become golden. Allow them to cool before serving because they firm up as they rest.
3. Can I use a different type of cheese?
Absolutely. Mild cheddar, extra-sharp cheddar, and some hard cheeses work well. However, different cheeses contain different amounts of moisture, so you may need to adjust the milk slightly.
4. Can I prepare the cheese stick dough ahead of time?
Yes. Prepare the dough, wrap it tightly, and refrigerate it for up to 24 hours. Allow it to soften slightly before shaping, then bake according to the recipe.
5. Can I freeze homemade butter cheese sticks?
Yes. Allow the baked sticks to cool completely, then freeze them in an airtight freezer-safe container. For the best quality, enjoy within two months. Reheat in the oven until warm and crisp.
Conclusion
Crispy Butter Cheese Sticks are an easy, delicious homemade snack that combines rich salted butter, self-rising flour, and sharp cheddar cheese.
The butter creates a tender, delicate texture.
Meanwhile, the cheddar provides bold savory flavor.
The self-rising flour gives the sticks structure and helps them bake into beautiful golden snacks.
For the best results, use softened butter and finely shredded cheese.
Then mix the ingredients gently and add cold milk only if necessary.
Shape the dough into thin sticks and bake at 350°F (175°C) until golden.
Finally, allow the sticks to cool briefly so they develop their best texture.
Serve them with tomato soup, marinara sauce, creamy dips, or a fresh salad.
Whether you’re preparing an afternoon snack, holiday appetizer, or party platter, these easy homemade cheese sticks deliver comforting buttery flavor with minimal effort.