Before we dive into the joy of fluttering wings and rainbow hues, can I just say—thank you. ❤️ Whether you’re here as a teacher, a parent, a grandparent, or just someone with a love of creativity, I’m so glad you stopped by. There’s something heartwarming about hands covered in marker ink and the quiet awe of watching colors bloom across a coffee filter.
This project is a special one. Chromatography Coffee Filter Butterflies blend art, science, and imagination into a single afternoon of magic—and the results? Absolutely stunning. I’m kicking myself for not having shot it when I first tried it with my niece… she was mesmerized!
Ready to watch colors dance and wings come to life? ✨
👉 Be sure to subscribe for more creative crafts and hands-on projects like this one, sent straight to your inbox!
What Are Chromatography Coffee Filter Butterflies?
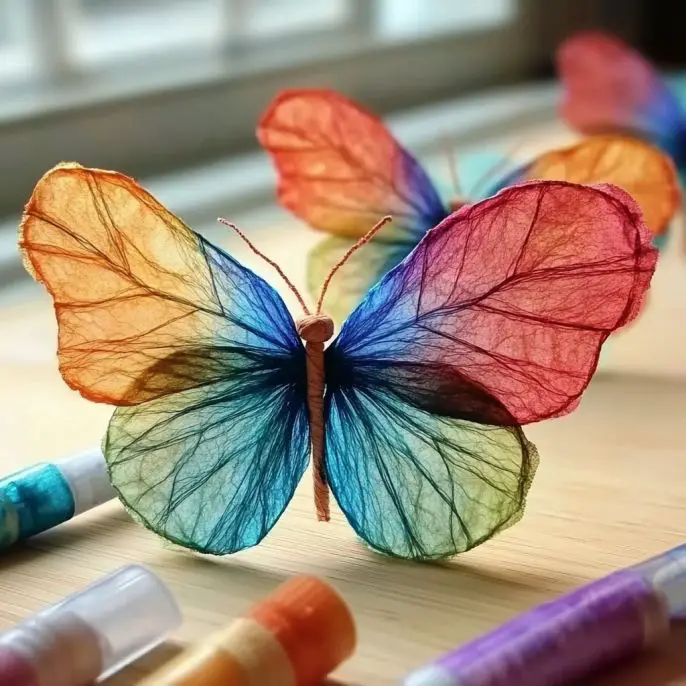
These butterflies begin as simple coffee filters and markers—but when water is added, the science of chromatography turns every doodle into a swirling canvas of color. Once dry, the filters are folded and wrapped with pipe cleaners to become vibrant butterfly creations that can hang from windows, walls, or even float gently from a classroom ceiling.
Why You’ll Love This Craft
Combines learning with play – A fun intro to science for young minds
Low-mess + low-cost – Minimal cleanup, maximum joy
Creative freedom – Every butterfly is beautifully unique
Display-worthy – These are not just crafts; they’re art!
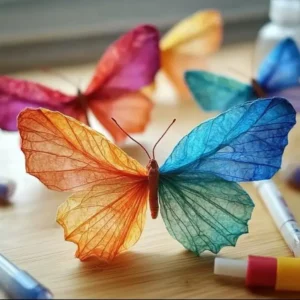
What Do They Look Like?
They’re anything but boring!! The colors bleed and blend in watercolor-like patterns—turquoise swirling into lavender, oranges stretching into magenta, hints of green sneaking through a sea of blue. Pinched into shape, they look like tiny works of stained glass, delicate and bright.
Benefits of This Craft
Encourages creativity and fine motor skills
Demonstrates simple science principles
Fosters focus and mindfulness
Ideal for solo play, group activities, or classroom settings

Ingredients You’ll Need
🧺 Supplies:
White coffee filters (basket-style work best)
Washable markers (water-based; bold and bright colors recommended)
Spray bottle or pipettes filled with water
Pipe cleaners (for body and antennae)
Tray or baking sheet (to contain water and avoid mess)
Optional: googly eyes, glitter, stickers for decorating
How to Make Chromatography Coffee Filter Butterflies
🦋 Step-by-Step Instructions:
Flatten the coffee filter
Lay it out on your work surface to create a blank canvas.Draw your design
Use markers to color bold patterns, dots, spirals, or random bursts of color. The more color, the more beautiful the blend!Prepare your tray
Place the decorated filter on a tray or baking sheet to catch any water.Apply water
Lightly mist the filter using a spray bottle, or carefully drip water with a pipette. Watch the magic happen as the colors start to spread and blend! (Tip: avoid soaking it—just a gentle mist will do.)Dry completely
Let the filter dry on the tray or speed it up with a hair dryer on low heat.Shape your butterfly
Pinch the center of the filter together like an accordion to form wings.Add the body
Wrap a pipe cleaner around the center pinch to form the body. Leave the ends free and curl them into antennae.Optional fun!
Glue on googly eyes, twist antennae into fun shapes, or add glitter for extra sparkle.Display your butterflies
Tape them to windows, hang them with string as a mobile, or clip them onto a garland!
Tips & Variations
✨ Make it Yours:
Try monochrome filters and watch the surprising hidden colors emerge.
Use glitter glue, sticker gems, or metallic markers for extra dazzle.
Let kids write their names or a tiny wish on each butterfly wing.
What to Pair This With
Planning a whole themed day? Try pairing this craft with:
A nature walk to observe real butterflies
A butterfly-themed book like The Very Hungry Caterpillar
A DIY butterfly feeder for your yard
A snack of butterfly-shaped sandwiches or fruit kabobs!
Storage & Preservation
While these butterflies are paper-based, they last surprisingly well indoors.
Avoid humid areas, as moisture may affect the colors.
Store extras flat in a large envelope or box.
To reuse for display, refresh crumpled wings with a quick press using a book or low-heat iron (no steam!).
General Information
This activity is ideal for:
Ages 3+ (with adult help for spraying and drying)
Classroom science lessons
Rainy-day crafts
Birthday party activities
Spring-themed events or Earth Day
Frequently Asked Questions
Can I use permanent markers?
Nope! Stick with washable, water-based markers—permanent ink won’t spread with water and misses the whole chromatography magic.
What if I don’t have a spray bottle?
A pipette, medicine dropper, or even a small spoon will do just fine. Just apply the water gently.
Do I have to use white coffee filters?
Yes—white filters work best because they’re unbleached and show off the color spreading clearly.
Are these butterflies eco-friendly?
They can be! Use recycled coffee filters and biodegradable pipe cleaners, and skip the glitter if you’re going green.
Conclusion
These Chromatography Coffee Filter Butterflies are more than just a craft—they’re an experience. Watching colors bloom, feeling the thrill of creation, and then proudly displaying the finished piece is what childhood memories are made of. And trust me, you’ll want to make one yourself too. 😄
Looking for more butterfly fun or kid-friendly crafts? Be sure to check out:
🧡 Peach Paper Plate Fans – a sweet summer-themed craft
🧡 Watercolor Salt Paintings – where texture meets color in a magical mix
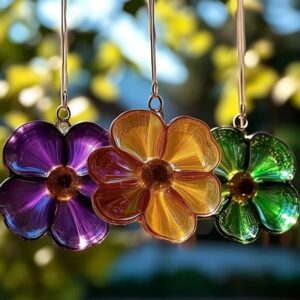
🧡 DIY Rainbow Suncatchers – for turning any window into a kaleidoscope
📸 Share Your Wings!
Tried this craft? I’d LOVE to see your butterflies!
📌 Pin your photos on Pinterest and tag me so I can admire your creations.
💬 Drop a comment or review below and tell me how it went—did the colors surprise you too?
🥄 Nutritional Information
(Just kidding! But your creativity levels? 💯)
Let your imagination take flight—literally! 🦋

Chromatography Coffee Filter Butterflies
Ingredients
Method
- Flatten the coffee filter on your work surface.
- Draw your design with markers, using bold patterns or random bursts of color.
- Place the decorated filter on a tray or baking sheet.
- Lightly mist the filter with water using a spray bottle or drip with a pipette, and watch the colors blend.
- Let the filter dry completely on the tray or speed up with a hair dryer on low heat.
- Pinch the center of the dried filter to shape it into butterfly wings.
- Wrap a pipe cleaner around the center pinch to form the body and curl the ends into antennae.
- Optionally, glue on googly eyes, twist antennae, or add glitter.
- Display your butterflies by taping them to windows, hanging them, or clipping them onto a garland.
Notes
Chromatography Coffee Filter Butterflies
Ingredients
Method
- Flatten the coffee filter. Lay it out on your work surface to create a blank canvas.
- Draw your design. Use markers to color bold patterns, dots, spirals, or random bursts of color. The more color, the more beautiful the blend!
- Prepare your tray. Place the decorated filter on a tray or baking sheet to catch any water.
- Apply water. Lightly mist the filter using a spray bottle or carefully drip water with a pipette. Avoid soaking it; just a gentle mist will do.
- Dry completely. Let the filter dry on the tray or speed it up with a hair dryer on low heat.
- Shape your butterfly. Pinch the center of the filter together like an accordion to form wings.
- Add the body. Wrap a pipe cleaner around the center pinch to form the body and curl the ends into antennae.
- Optional fun! Glue on googly eyes, twist antennae into fun shapes, or add glitter for extra sparkle.
- Display your butterflies. Tape them to windows, hang them with string as a mobile, or clip them onto a garland.