Hello, sweet friend! 🌞 If you’re looking for a creative, calming project that adds beauty and a little sparkle to your space, I have the perfect one for you: DIY Butterfly Suncatchers!
This craft is pure joy—simple enough for kids, fun for adults, and oh-so-pretty when the sun hits just right. It’s a hands-on way to bring color and light into your home, classroom, or even your garden shed window. I’ve made these on lazy afternoons and rainy weekends, and they never fail to lift my spirits.
So let’s get started—this one’s too pretty to pass up!
💌 Want more beautiful crafts like this delivered to your inbox? Don’t forget to subscribe and stay inspired with every season.
What Are Butterfly Suncatchers?
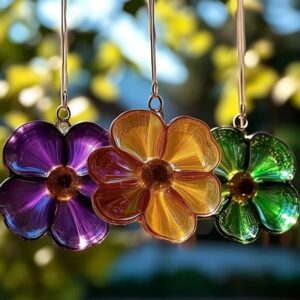
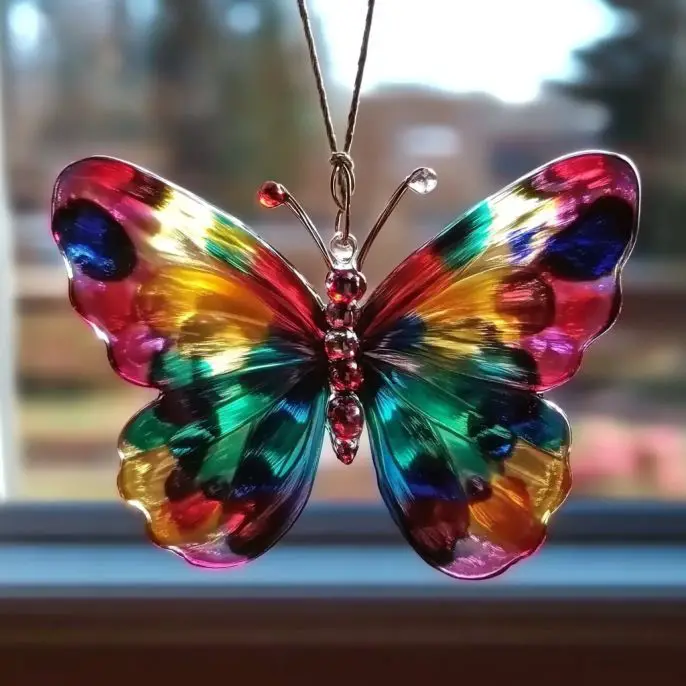
These suncatchers are made using clear glue, food coloring, and butterfly-shaped silicone molds to create delicate, colorful butterflies that catch the light in the most magical way. Once dried, they become translucent, sturdy little art pieces you can hang near windows or string into a mobile!
Perfect for spring, summer, or anytime you need a little color in your day.
Why You’ll Love This Craft
Only a few supplies needed—most from your craft stash or kitchen
No special tools or heat—just patience and creativity
Great for all ages—little ones can swirl colors, older kids can layer and design
Customizable with glitter, sequins, and dreamy color combos
Beautiful keepsake or gift idea
Ingredients & Materials
Clear school glue (Elmer’s works beautifully)
Butterfly-shaped silicone molds
Food coloring (any colors you love!)
Toothpicks
Parchment paper (to protect your surface)
Optional: glitter, sequins, string, hole punch
Tools You’ll Need
Toothpicks or a skewer (for swirling colors)
Clean, flat workspace
Drying area that won’t be disturbed for 1–3 days
Hole punch (for stringing and hanging)
Step-by-Step Instructions
1. Prep Your Surface
Lay down parchment paper on your table or countertop. This protects your space and makes cleanup a breeze.
2. Place the Molds
Set your butterfly silicone molds on top of the parchment. Make sure they’re flat and steady—you don’t want any tipping once the glue is added.
3. Fill with Glue
Carefully pour clear school glue into each butterfly mold. Fill almost to the top, leaving just a little space for swirling and decorating.
4. Add Color
Drop in a few drops of food coloring—just one or two per mold to start. You can always add more later, or mix shades for something new!
5. Swirl the Design
Using a toothpick, gently swirl the colors together to create a marbled effect. Avoid over-mixing—those swirls are where the magic lives!
6. Let It Dry
Leave your creations flat to dry. Depending on your room’s humidity, it can take anywhere from 24 to 72 hours. You’ll know they’re ready when the glue is completely dry, clear, and firm to the touch.
7. Remove from Molds
Once dry, gently pop your butterfly suncatchers out of the silicone molds. If your molds are flexible, they should release easily.
8. Hang & Display!
If you’d like to hang them, use a hole punch to create a hole at the top of each suncatcher. Thread with string or ribbon and hang in a sunny window, on a branch, or even in your garden!
Tips & Variations
Layer your colors: Drop one color, let it settle, then add another for a cool ombré effect.
Glittery goodness: Sprinkle a little glitter or mix in sequins for sparkle that shimmers in the sunlight.
Earthy elegance: Use muted or pastel tones for a more natural look—gorgeous for boho or farmhouse-style décor.
Mobile magic: Make multiple butterflies and hang them from a hoop or stick to create a suncatcher mobile.
Safety Notes
This project uses non-toxic glue, but it’s best to supervise little ones and keep materials out of mouths.
Drying time matters—don’t rush the process! Wait until the glue is fully hardened and clear before unmolding for the best result.
Frequently Asked Questions (FAQ)
Can I use regular molds instead of silicone?
Silicone molds are best because the dried glue peels out cleanly. Hard plastic molds may crack the design.
Do I have to use food coloring?
Nope! You can also use liquid watercolors or even mix a drop of acrylic paint into the glue before pouring.
How long do they last?
They’re surprisingly sturdy! Keep them out of direct rain and they’ll stay lovely for months or more indoors.
Can I make these in other shapes?
Absolutely! Any silicone mold works—flowers, stars, animals… whatever brings you joy!
Conclusion
These Butterfly Suncatchers are a little bit whimsical, a little bit crafty, and a whole lot of lovely. Whether you’re crafting with kids, decorating your space, or just looking for a peaceful, creative project, these beauties are a surefire way to bring more color and light into your world.
So grab your glue, pick your palette, and let your creativity take flight. 🦋💛
More Creative Crafts to Try
DIY Glow-in-the-Dark Fireflies
Homemade Play Dough
Puffy Paint Window Art
Colorful Coffee Filter Butterflies
Rainbow Salt Jars
Show Me Your Suncatchers!
Made your own? I’d love to see them! Share your colorful butterflies on Pinterest or tag me on social with your glowing window display. Let’s keep the creativity flying high!
Approximate Cost per Craft
$3–$6 depending on the number of supplies and whether you already have the molds.
Thanks so much for crafting with me today. Until next time—keep creating, keep imagining, and let a little more sunshine in. 🌈✨🦋
Want a printable instruction sheet or classroom activity version? Just let me know!
Butterfly Suncatchers
Ingredients
Method
- Lay down parchment paper on your table or countertop to protect your space.
- Set your butterfly silicone molds on top of the parchment, ensuring they are flat and steady.
- Carefully pour clear school glue into each butterfly mold, filling almost to the top.
- Drop in a few drops of food coloring, starting with just one or two per mold.
- Using a toothpick, gently swirl the colors together to create a marbled effect.
- Leave your creations flat to dry for 24 to 72 hours until the glue is completely dry and firm.
- Once dry, gently pop your butterfly suncatchers out of the silicone molds.
- Use a hole punch to create a hole at the top of each suncatcher, then thread with string or ribbon to hang them.
Notes
Butterfly Suncatchers
Ingredients
Method
- Lay down parchment paper on your table or countertop to protect your space and make cleanup easier.
- Set your butterfly silicone molds on top of the parchment, ensuring they are flat and steady.
- Carefully pour clear school glue into each butterfly mold, filling almost to the top.
- Drop in a few drops of food coloring into the glue—one or two per mold initially.
- Using a toothpick, gently swirl the colors together to create a marbled effect without over-mixing.
- Leave your creations flat to dry. This can take anywhere from 24 to 72 hours depending on humidity.
- Ensure the glue is completely dry, clear, and firm to the touch before proceeding.
- Gently pop your butterfly suncatchers out of the silicone molds.
- If desired, use a hole punch to create a hole at the top of each suncatcher for hanging.
- Thread with string or ribbon, and hang them in a sunny window, on a branch, or in your garden.