Before we dive into the science-meets-fun magic of making your own bouncy balls, I just want to say thank you. Thank you for stopping by, for being curious, and for bringing a little wonder into your day—whether it’s for your kids, your classroom, or just your own inner child. You’re going to LOVE this project. It’s quick, colorful, budget-friendly, and—best of all—it works. I promise, once you see your homemade bouncy ball spring off the table, you’ll be hooked!
Want more DIY science fun straight to your inbox? 📩 Subscribe now and I’ll send you this recipe and more hands-on projects that spark joy and curiosity!
Why Make Bouncy Balls at Home?
Homemade bouncy balls aren’t just a nostalgic throwback to 90s vending machines (though… totally that too!). They’re also an amazing mix of science, art, and play. In less than 15 minutes, you’ll go from stirring glue to launching your very own rubbery, springy creation across the kitchen floor.
This recipe is simple enough for young kids (with supervision), exciting enough for tweens, and surprisingly satisfying for adults (yes, I was bouncing mine around the living room at midnight. No regrets).
What You’ll Love About This Project
🧪 STEM learning meets sensory play
🌈 Customizable colors and textures
💸 Super affordable with household items
🧤 Minimal mess (especially with gloves!)
⚡ Instant gratification—it sets in minutes!
What Do Homemade Bouncy Balls Feel Like?
Rubbery. Smooth. Firm, but slightly squishy. These bouncy balls have a satisfying “give” when you squeeze them and a genuine bounce when you drop them. Think somewhere between a racquetball and a dense slime—fun and oddly addicting!
Benefits of Making Your Own
Builds fine motor skills and creativity in kids
Encourages early chemistry learning through polymer formation
Great for rainy-day activities, science fairs, or birthday parties
Reduces screen time with something hands-on and cool
No harsh chemicals—kid-safe ingredients you likely already have!
🧂 Ingredients
1 tablespoon white school glue (PVA glue)
½ teaspoon borax powder
3 tablespoons warm water
1 tablespoon cornstarch
Food coloring (pick your fave!)
Optional: glitter or tiny beads for extra flair
How to Make Super Bouncy Balls at Home
Ingredients
Equipment
Method
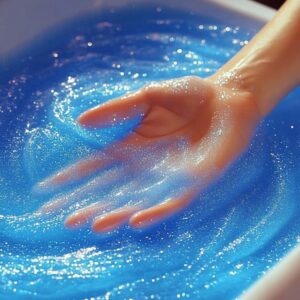
- In a cup, mix ½ tsp of borax with 3 tbsp warm water. Stir until completely dissolved. Set aside.
- In a second cup, combine 1 tbsp of white glue and a few drops of food coloring. Mix until smooth and fully tinted.
- Add 1 tbsp cornstarch to the colored glue. Stir well—it may be thick, so keep mixing!
- Slowly pour in the borax water a little at a time while stirring constantly. The mixture will start clumping and thickening quickly.
- When stirring becomes difficult, knead the mixture with your hands (wear gloves if desired) until it forms a rubbery lump.
- Roll the kneaded material between your palms into a ball. It may feel sticky at first but will smooth out as you shape it.
- Let your bouncy ball rest for 5–10 minutes to finish setting and firming up.
- Bounce it on a hard surface and enjoy! Store in a zip-top bag or container when not in use.
Notes

🛠️ Tools You’ll Need
Disposable cup or small mixing bowl
Spoon or popsicle stick
Plastic gloves (optional, but makes cleanup easier)
Zip-top bag or airtight container for storage
Paper towels or a tray to catch any drips
🧪 Can I Use Something Besides Borax?
Not really for this specific recipe. Borax is what reacts with the glue to create the rubbery polymer texture that makes the ball “bounce.” Without it, you’ll end up with more of a goo than a bounce. But don’t worry—it’s used in small amounts and is safe with proper supervision.
Step-by-Step Instructions
1. Make the Borax Solution
In a cup, mix ½ tsp of borax with 3 tbsp warm water. Stir until it completely dissolves. Set aside.
2. Mix Glue + Color
In a second cup, combine 1 tbsp of white glue and a few drops of your favorite food coloring. Mix until smooth and fully tinted.
3. Add Cornstarch
To the colored glue, add 1 tbsp cornstarch. Stir well. It might be thick, but keep mixing!
4. Add the Borax Solution
Slowly pour in the borax water a little at a time, stirring constantly. The mixture will start clumping and thickening almost immediately.
5. Knead It
Once stirring gets tricky, it’s time to get your hands in there (gloves on if you like). Knead the mixture until it forms a smooth, rubbery lump.
6. Shape It
Roll it into a ball between your palms. It might be sticky at first, but keep going—it’ll smooth out.
7. Let It Set
Let your ball rest for 5–10 minutes. This gives it time to firm up fully.
8. Bounce Away!
Toss it on a hard surface and enjoy that magical bounce. 🎉
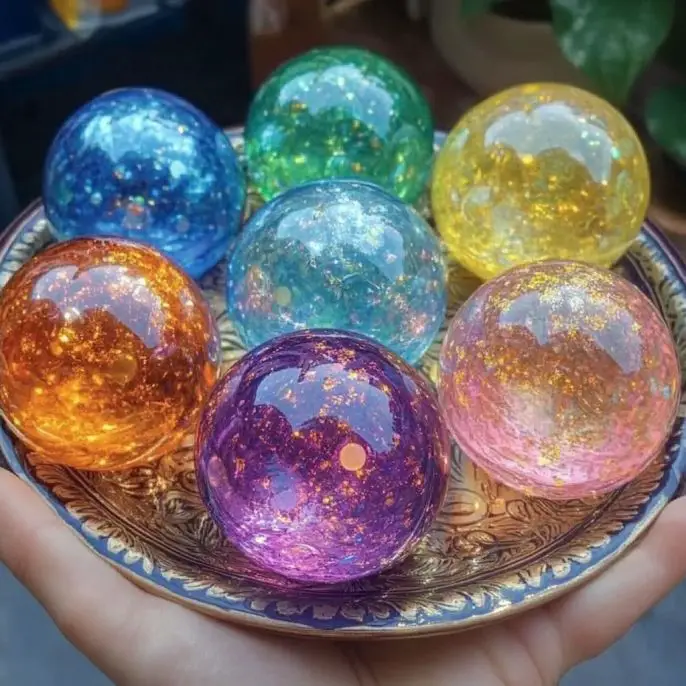
🥳 Fun Variations to Try
Color mixing: Try red + blue for purple, yellow + red for orange, etc.
Glitter bombs: Add a pinch of glitter for sparkle-tastic flair.
Tiny beads or sequins: For a cool texture and look.
Glow-in-the-dark glue: YES, it works!
🧺 Storage Tips
These bouncy balls can dry out over time. To keep them fresh:
Store in an airtight container or zip-top bag.
If it starts drying, knead in a tiny bit of water to soften it.
Don’t store in hot places—warmth = gooeyness.
🧠 General Info + Science Behind It
This project works thanks to a chemical reaction between borax and polyvinyl acetate (PVA, the main ingredient in school glue). The reaction forms polymers—long, stretchy chains that trap water and create that bouncy, rubbery texture. Cool, right?
🙋 FAQ
Can I use clear glue instead of white?
Yes! Clear glue works and gives a more “gemstone” look. You’ll need to stir a little more thoroughly to mix in the cornstarch.
Is this safe for toddlers?
Yes—with adult supervision. Don’t let them eat it (it’s not toxic but definitely not food). Gloves make cleanup easier too!
How long will the ball last?
If stored properly, your bouncy ball can last up to a week or two. It may lose a little bounce over time, but it’s easy to make another!
🧁 Conclusion
Making bouncy balls at home is a fast, fun, and surprisingly educational project that delivers BIG joy with just a few small ingredients. Whether you’re hosting a DIY craft party, filling a rainy afternoon, or teaching kids about science, this activity is a total winner.
It’s one of those things that makes you go—”Wait… I can actually do that??” YES. Yes you can!
🍑 Want More Fun Like This?
If you loved this project, check out these reader favorites:
📸 Tried It? Show It Off!
If you made your own bouncy balls, I’d LOVE to see!
Tag me on Pinterest, or leave a comment below with your color combos and wild bounces! 🌈💥
🔍 Nutritional Info (Wait, What?)
Just kidding—these aren’t edible, so no calorie count here. 😅
But they ARE mentally satisfying, stress-relieving, and very, very fun.
Thanks again for bouncing in today 💕
Until next time—stay curious, stay creative, and never stop making magic at home.