A chillingly cool craft that’s part science, part art—and all fun! Perfect for spooky decor, sensory play, or just a creative afternoon with the kids.
Hi, creative friends! 💙
If you’re looking for a hands-on activity (literally!) that combines imagination, a touch of science, and a dash of drama, you’re in for a treat. This Frozen Ice Hand Craft is one of those projects that’s super simple to make, yet never fails to wow kids and adults alike. Whether you’re prepping for Halloween, a frozen-themed party, or a rainy day boredom buster, this icy sculpture makes a splash!
Don’t want to miss out on more creative crafts and science experiments? Subscribe here and get weekly inspiration delivered straight to your inbox!
What Is the Frozen Ice Hand Craft?
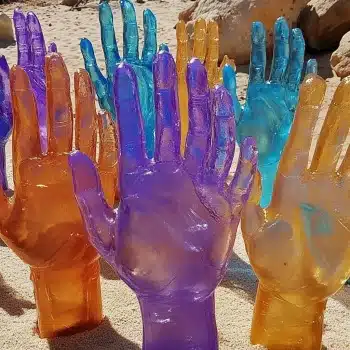
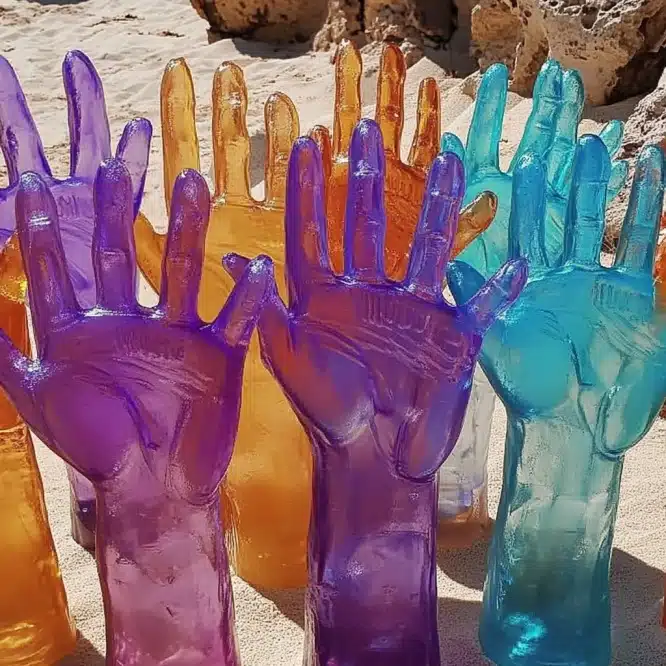
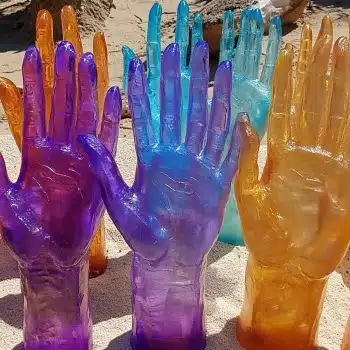
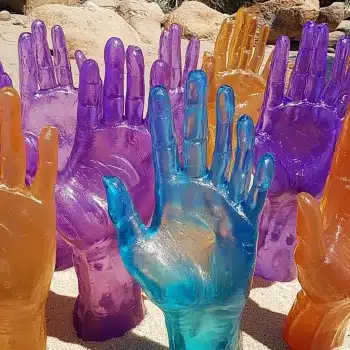
It’s a DIY ice sculpture in the shape of a hand—made from a glove, food coloring, and your freezer! Not only does it look awesome, but it also teaches kids about freezing, melting, and how salt affects ice. Add some food coloring for drama, sprinkle a little salt, and you’ve got a mesmerizing melting masterpiece.
Why You’ll Love This Craft 🥰
- Incredibly easy with minimal setup
- Combines art, science, and sensory play
- Great for classrooms, parties, or spooky home decor
- Can be customized with colors, patterns, or multiple hands!
- Fun for all ages (yes, grownups love it too!)
What You’ll Need 🛒
- Latex gloves (clear or light-colored work best)
- Water
- Food coloring (any color—or mix them!)
- Twist ties or string
- Shallow baking pan
- Salt (table salt or rock salt both work)
Optional:
- A dish or tray for display
- A spoon or dropper for applying saltwater
How to Make a Frozen Ice Hand 🖐️
Step 1: Fill the Glove
Fill a clean latex glove with water, leaving about 2 inches of space at the top to allow for expansion during freezing.
Step 2: Add Color
Add a few drops of food coloring into the glove. You can mix colors for a marbled look or use a single bold hue. Gently shake or knead the glove to distribute the color evenly.
Step 3: Seal It Tight
Twist the top of the glove and secure it with a twist tie. Make sure it’s tight—no leaks allowed!
Step 4: Freeze
Place the glove in a shallow baking pan (this keeps it stable) and freeze overnight or until completely solid.
Step 5: Reveal the Ice Hand
Once fully frozen, take the glove out and carefully peel it off. You may want to use scissors to snip the wrist for easier removal. Voilà—a spooky, glistening ice hand!
Step 6: Display & Melt Magic
Place the hand in a decorative dish or tray. For a dramatic melting effect, sprinkle salt over the surface, especially the fingers. Then pour a little warm salty water over the top and watch as cracks form, the hand melts, and the colors swirl. It’s mesmerizing! 😍
Tips & Variations 🧊🌈
- Use multiple colors in one glove for a tie-dye look.
- Try different glove sizes for smaller or larger hands—great for themed displays.
- Add a glow stick inside the glove before freezing for an eerie glow!
- Want a smoother finish? Use distilled water for clearer ice.
- Use it as a Halloween punch bowl chiller—freeze without food coloring and place in red or green punch for spooky vibes!
Learning Moments 📚
This craft doubles as a mini science lesson! Talk to kids about:
- How water expands when frozen
- How salt lowers the freezing point of ice
- Why cracks form when salt is applied
- How temperature affects the speed of melting
Encourage kids to observe and describe what they see, feel, and hear. The crackling sounds and dripping fingers are a sensory treat!
Frequently Asked Questions (FAQ) 🙋♀️
Can I use other gloves besides latex?
Yes! Just make sure they’re non-powdered and leak-proof. Vinyl gloves can also work but may be harder to peel off.
What if my glove leaks in the freezer?
Double-check for holes before filling. Place the glove in a pan with a lip to contain leaks just in case.
Can I use coarse salt?
Absolutely! Coarse salt like kosher or rock salt adds more texture and melts ice even faster.
How long does the ice hand last?
Depending on room temperature, it can last 20–60 minutes before fully melting. Keep it in a cooler space to extend the fun.
Final Thoughts 💙
Whether you’re crafting with kids, decorating for a party, or just exploring the magic of ice and color, this Frozen Ice Hand Craft is a simple yet striking way to play, learn, and create. It’s one of those why didn’t I try this sooner? projects that you’ll come back to every season.
So grab some gloves, fill them up, and make some icy magic—no special skills required! 🧊✨
More Cool Crafts to Try:
- Rainbow Ice Painting
- Balloon Baking Soda Experiment
- Crystal Growing Jars for Kids
Share Your Ice Art! 📸
Did your ice hand turn out spooky, sparkly, or rainbow-hued? Tag me on Pinterest and drop a comment with your photos! I love seeing your chilly creations.
Stay curious, stay creative—and keep those little hands busy! ❄️💕
Frozen Ice Hand Craft
Ingredients
Method
- Fill a clean latex glove with water, leaving about 2 inches of space at the top to allow for expansion during freezing.
- Add a few drops of food coloring into the glove. Mix colors for a marbled look or use a single bold hue and shake gently to distribute the color.
- Twist the top of the glove and secure it with a twist tie, ensuring it is tight to avoid leaks.
- Place the glove in a shallow baking pan and freeze overnight or until completely solid.
- Once fully frozen, carefully peel off the glove. You may need to use scissors to snip the wrist for easier removal.
- Place the ice hand in a decorative dish or tray. For dramatic melting, sprinkle salt over the surface and pour a little warm salty water.