Before we get started—thank you for being here! Whether you’re a longtime crafter or just dipping your toes into DIY with the kiddos, your presence means the world to me. This sweet little project is one of those “rainy afternoon turns into a rainbow kind of moment” activities, and I’m thrilled to share it with you. 💛
Want the full step-by-step emailed to you (along with other creative ideas like this one)? Be sure to subscribe below so you never miss a burst of color or inspiration.
A Craft That Shines (Literally!)
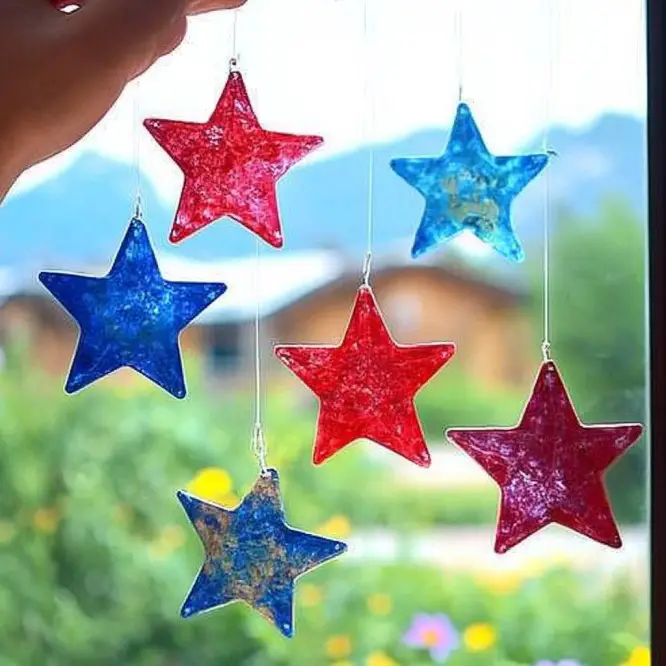
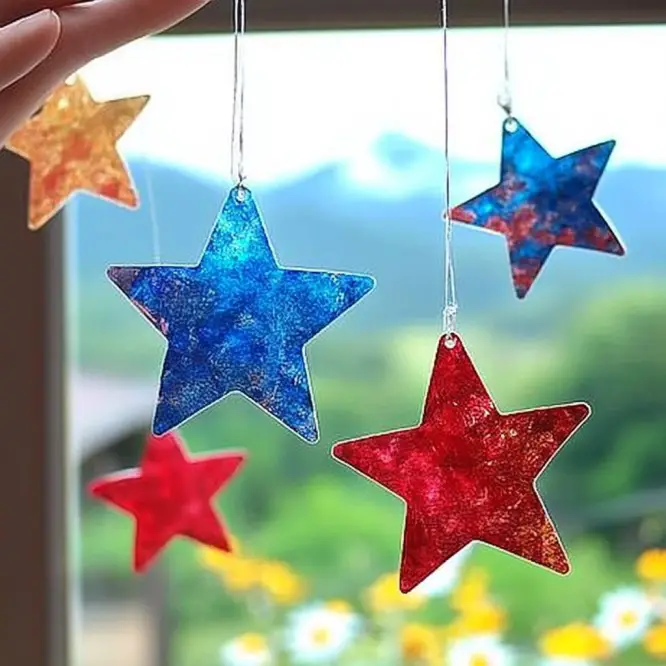
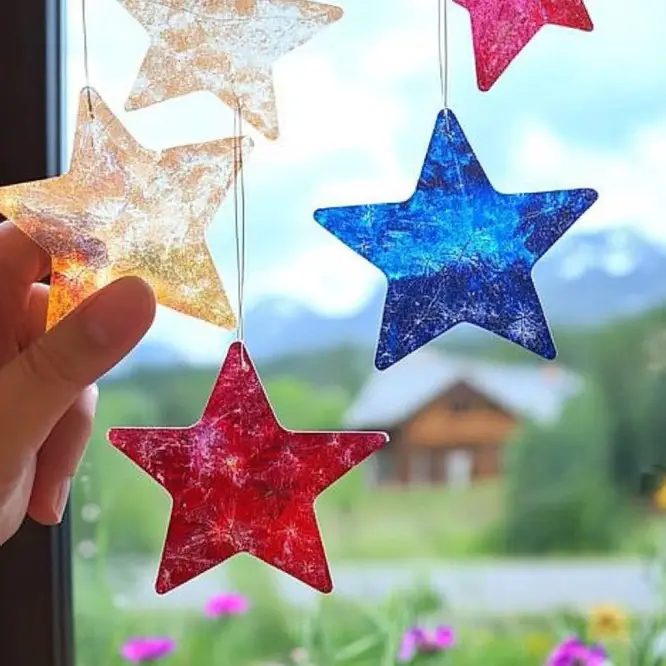
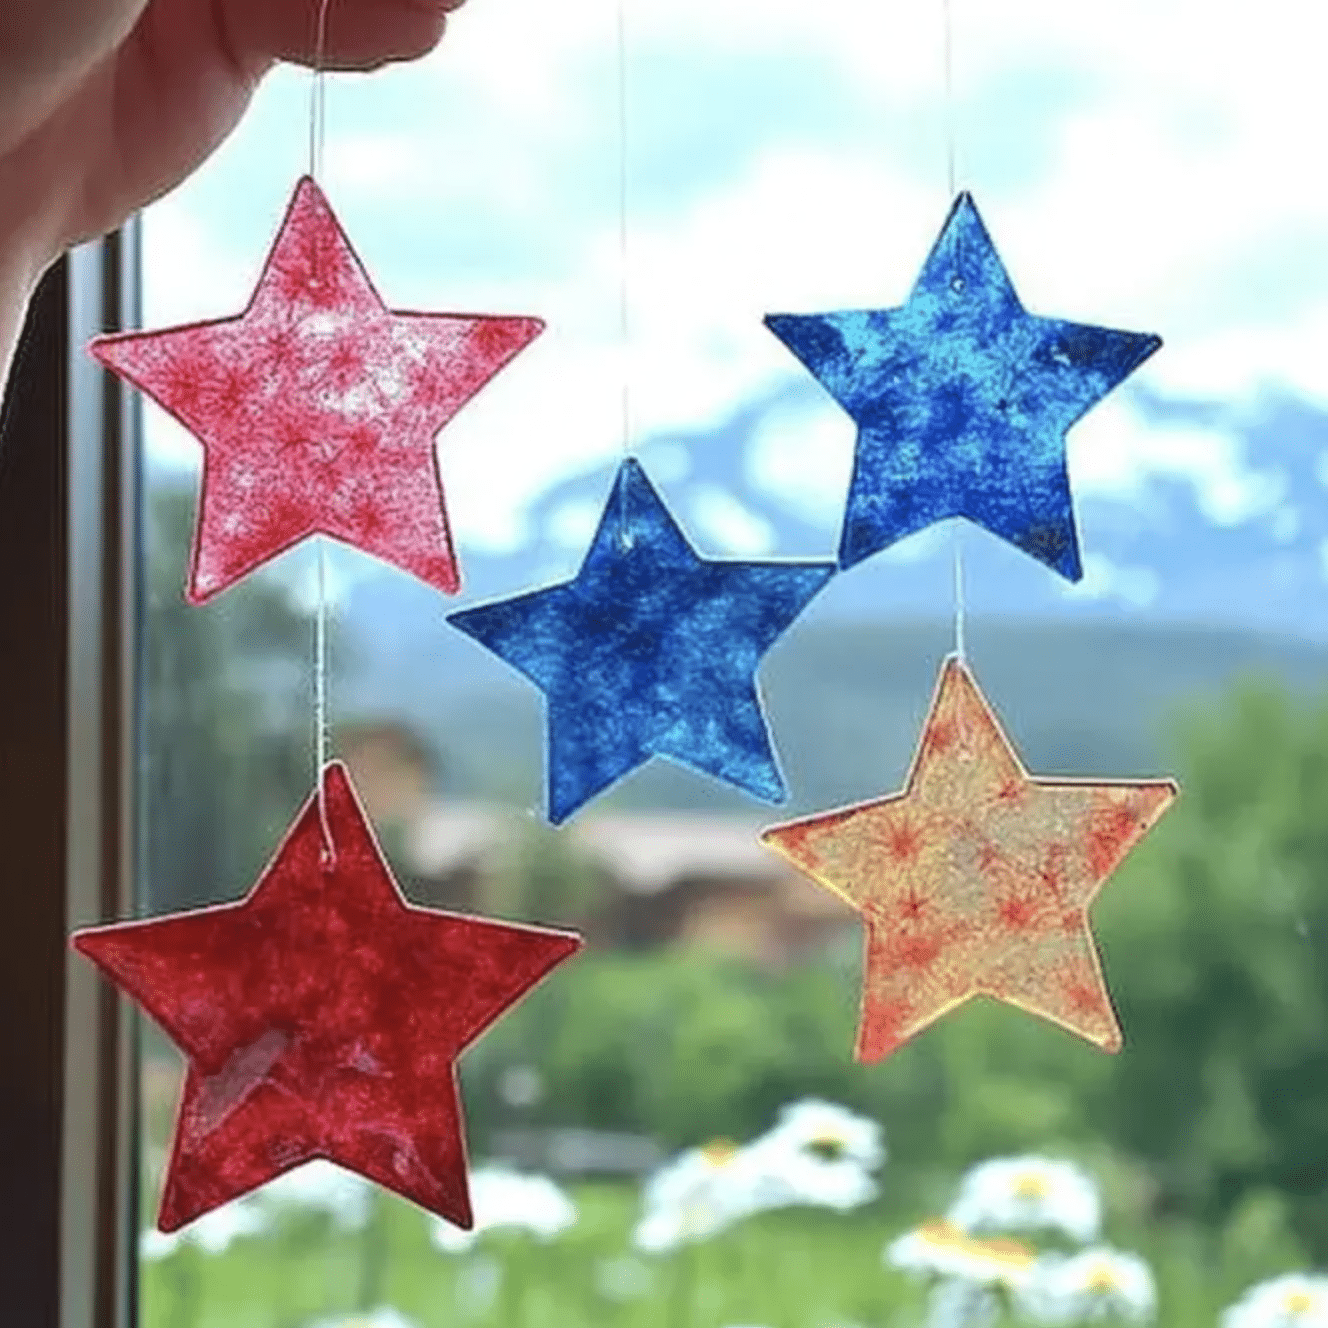
These Crayon Star Sun Catchers are what I like to call scrap magic. Using broken crayons and a bit of heat, we’re transforming would-be trash into stunning little stained-glass stars that dance in the sunlight. This is a perfect upcycled craft that adds color, joy, and charm to your windows—anything but boring!!
Why You’ll Absolutely Love These
- Kid-friendly and fun to make together.
- Zero waste—we’re reusing those crayon nubs that always seem to collect in the junk drawer.
- Minimal materials needed (you probably have them at home already).
- Customizable for holidays, seasons, or simply your mood!
- Therapeutic and satisfying—there’s something magical about watching crayon colors melt into swirling beauty.
What Do They Look (and Feel) Like?
Imagine rays of sunshine dancing through colorful, translucent stars—each one a swirl of melted magic. These suncatchers glow with every color of the rainbow, softening winter windows or adding a cheerful pop to a sunny kitchen corner. They feel like holding a little piece of joy.
The Benefits of Making Crayon Sun Catchers
- Encourages creativity: Mix and match colors, try out new shapes, and watch your kids (or your inner child!) light up.
- Improves fine motor skills for little hands, especially with tracing, cutting, and threading.
- Eco-conscious: A brilliant way to reuse old materials and reduce craft waste.
- Great sensory experience: From the crayon scent to the feel of shavings, it’s a multi-sensory adventure.
Ingredients & Materials You’ll Need
🖍️ Ingredients:
- Old crayons (paper peeled)
- Wax paper
- Parchment paper
🧰 Tools:
- Manual crayon sharpener or knife (adult supervision required!)
- Iron
- Star stencil or cookie cutter
- Hole punch
- Baker’s twine or string
Optional Additions & Variations
- Try different shapes: Hearts for Valentine’s Day, pumpkins for fall, snowflakes for winter!
- Add glitter to the crayon shavings for a sparkly effect.
- Layer colors intentionally for an ombré or rainbow effect.
- Scented crayons? Even better—adds another sensory delight!
Step-by-Step: How to Make Crayon Star Sun Catchers
Step 1: Peel & Prep
Remove any leftover paper from your crayons. This is key for a clean melt.
Step 2: Shave the Crayons
Use a sharpener to create small shavings, or carefully shave slivers with a knife. Mix up colors for a stunning effect.
Step 3: Build Your Wax Paper Envelope
Lay out a 12×12” piece of wax paper. Sprinkle crayon shavings evenly across the surface. Fold it over, then double-fold the edges to seal.
Step 4: Protect with Parchment
Place your wax paper envelope between two pieces of folded parchment paper.
Step 5: Gently Iron
Set your iron to low. Press gently over the parchment, moving in circles to melt the crayons evenly. Watch the colors blend into magic!
Step 6: Cool Completely
Once melted, let the whole thing cool down before handling it. Trust me—it’s worth the wait.
Step 7: Cut Your Stars
Use a star-shaped stencil or cookie cutter to trace and cut shapes out of the crayon sheet.
Step 8: Punch and Thread
Punch a hole near the top of each star, then thread a bit of twine or string through for hanging.
Step 9: Display with Pride!
Hang your star in a sunny window and watch it glow. ✨
What to Pair With This Craft
- Lemonade & cookies: It’s a perfect break while your stars cool.
- A playlist of cheerful music: Set the mood for creativity.
- A craft-themed storytime: Pair with a book like The Day the Crayons Quit.
Tips for Perfect Stars Every Time
- Don’t overfill the wax paper—too much crayon can overflow and make a mess.
- Use a towel under your ironing surface for extra protection.
- Encourage your kids to “plan” their color palette—it makes the end result even more special.
- Let the melted wax set fully before cutting, or you might end up with sticky scissors.
Storage Tips
- Store your finished suncatchers flat between sheets of wax paper if you’re saving them for later seasons.
- Keep out of direct heat—these will melt again if near radiators or heaters!
- For long-term use, laminate the star shapes (after cutting) to protect them.
Frequently Asked Questions
Can I use baking paper instead of parchment?
Yes, just make sure it’s non-stick and won’t bond to the wax paper under heat.
Are these safe for toddlers?
The craft involves hot tools and sharp edges, so adult supervision is a must. But toddlers can definitely help with safe parts like sprinkling the shavings!
What if I don’t have a stencil?
No problem! You can draw a star outline by hand or print one online.
Can I reuse the melted wax sheets?
Absolutely! If you’re not happy with a melt, reheat it and reshape.
In a Nutshell: Why You Need to Try This
These Crayon Star Sun Catchers are everything a craft should be—simple, joyful, beautiful, and full of purpose. They transform everyday scraps into window-worthy art, and they’re the kind of project that feels just as good making as it does displaying.
🌈 Want more craft magic like this?
Be sure to check out my other colorful creations, like:
- Peach Pit Painted Garden Stones
- DIY Citrus Stamped Napkins
- Peach Paper Fans for Summer Parties
Share the Sunshine!
Tried this craft?
Leave a review below and tag your starry masterpieces on Pinterest—I’d love to see what you created and share it with our crafty community.
Nutritional Info
Well, not much to nibble on here—unless you count the snack you munch while crafting! 😄
Still, here’s your metaphorical breakdown:
- Creativity: 100%
- Color Therapy: 95%
- Mess Potential: 30% (manageable!)
- Satisfaction Level: Off the charts
Here’s to more sunny windows and colorful days. Keep crafting, keep shining! 🌟
Crayon Star Sun Catchers
Ingredients
Equipment
Method
- Remove any leftover paper from your crayons. This is key for a clean melt.
- Use a sharpener or knife to create shavings. Mix colors for a beautiful blend.
- Lay out a 12x12” piece of wax paper. Sprinkle crayon shavings, fold over, and seal edges.
- Place your wax paper between two sheets of parchment for heat protection.
- Set iron to low. Gently press over parchment, moving in circles to melt crayons.
- Let the melted crayon sheet cool fully before handling or cutting.
- Trace and cut stars using a stencil or cookie cutter on the cooled sheet.
- Punch a hole near the top of each star and thread string through for hanging.
- Hang in a sunny window and enjoy your colorful display!