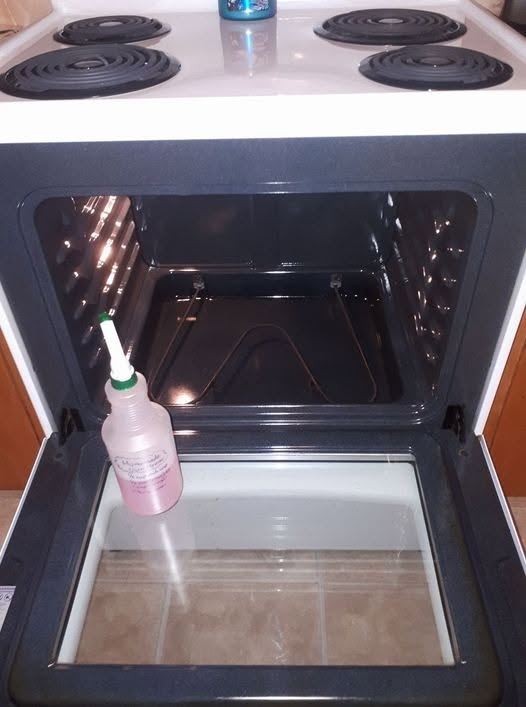
This Homemade Oven Cleaner Will Have Your Stove Sparkling when baked-on grease, old food splatters, and stubborn residue make your oven look far worse than you expected. Instead of immediately reaching for a powerful commercial spray, you can often loosen everyday grime with a simple baking soda paste, warm water, and a small amount of dish soap.
Although vinegar often appears in homemade cleaning recipes, it works best as a separate finishing step rather than as the main ingredient mixed directly into baking soda. When you combine vinegar and baking soda, they fizz dramatically, but they also neutralize much of each other’s cleaning action. Therefore, using baking soda first and vinegar later usually makes better practical sense.
This method works especially well for routine oven maintenance and moderate buildup. However, very heavy carbonized grease may still require repeated cleaning or a product specifically approved by your oven manufacturer.
The first time I tried a homemade oven cleaner, I expected a quick wipe and instant results. Instead, I learned that patience mattered more than scrubbing. I spread a thick baking soda paste over the greasy areas, closed the oven door, and left it alone for several hours. When I came back, the hardened residue had softened enough to lift with a damp cloth and plastic scraper. The biggest surprise was how much easier the job became after letting the paste sit. Since then, I have relied on soaking time first and elbow grease second, especially when dealing with old spills.
Why This Homemade Oven Cleaner Will Have Your Stove Sparkling
Baking Soda Loosens Grease and Baked-On Residue
This Homemade Oven Cleaner Will Have Your Stove Sparkling because baking soda gives you a mild abrasive that can help loosen residue without the aggressive fumes associated with many heavy-duty oven cleaners.
Baking soda, also known as sodium bicarbonate, has a fine powdery texture. Therefore, when you combine it with a small amount of water, it forms a soft paste that clings to vertical and horizontal oven surfaces.
That texture helps in two ways.
First, the paste stays in contact with the grime instead of running immediately toward the bottom of the oven. Second, the fine particles provide gentle mechanical action when you wipe the surface later.
For everyday grease and food spills, that combination can make cleanup much easier.
However, baking soda does not magically dissolve every layer of burned-on material. Thick, blackened residue may require several applications.
The sitting time matters too.
If you spread the paste onto dirty surfaces and immediately wipe it away, you may not give it enough time to soften the buildup. Instead, leave the paste in place for several hours or overnight when the oven remains cool and unused.
Then, wipe the softened debris away with a damp cloth.
A plastic scraper or non-scratch cleaning tool can help with stubborn spots. However, avoid metal tools that may scratch enamel or other finished surfaces.
Also, always check your oven manual before applying homemade cleaners to specialty coatings, self-cleaning liners, heating elements, or catalytic panels.
This Homemade Oven Cleaner Will Have Your Stove Sparkling most effectively when you work with the oven’s materials rather than against them.
Why Vinegar Works Better as a Finishing Step
Many homemade cleaning instructions tell you to mix baking soda and vinegar together from the beginning.
The fizz looks powerful.
However, the bubbling comes from an acid-base reaction. Baking soda is alkaline, while vinegar contains acetic acid. When you mix them together, they react and begin neutralizing each other.
Therefore, the dramatic foam does not automatically mean stronger cleaning.
A better approach involves using the baking soda paste first.
Let it sit on the grime. Then, after wiping away most of the paste, lightly spray remaining baking soda residue with vinegar.
At that stage, the fizz can help loosen traces of powder and make them easier to wipe away.
This Homemade Oven Cleaner Will Have Your Stove Sparkling because each ingredient gets a chance to do its job separately.
You can also add a small amount of dish soap to the baking soda paste when grease creates the biggest problem.
Dish soap helps break up greasy residue, while baking soda adds gentle scrubbing power.
Still, more soap does not mean better results.
Too much dish soap can create a thick film that takes several rinses to remove. Therefore, use only a small amount.
Likewise, avoid spraying large quantities of vinegar into electrical openings, heating components, fan vents, sensors, or areas the manufacturer warns against wetting.
A lightly dampened cloth often gives you more control than a heavily saturated spray.
Finally, remember that homemade does not automatically mean harmless for every surface.
Natural ingredients can still damage some finishes if you use them incorrectly. Therefore, test a small hidden area first when you feel unsure.
How to Make and Use This Homemade Oven Cleaner
Make the Baking Soda Cleaning Paste
This Homemade Oven Cleaner Will Have Your Stove Sparkling with only a few simple ingredients.
Start with about 1/2 cup of baking soda.
Place it in a small bowl. Then, add 2 tablespoons of water and stir.
If the mixture feels too dry, add another tablespoon of water.
You want a thick paste that spreads easily but does not run.
For greasy ovens, mix in 1 tablespoon of mild dish soap.
However, avoid heavily scented or specialty soaps that may leave a strong residue behind.
Before you begin cleaning, make sure the oven feels completely cool.
Turn it off and remove the racks if your oven manual allows you to clean them separately.
Next, remove loose crumbs and debris from the bottom with a dry cloth or handheld vacuum made for household cleanup.
Do not apply the paste directly to heating elements, gas burner openings, electrical contacts, fans, vents, sensors, or other sensitive components.
Instead, focus on the coated oven walls, floor, and door areas that your appliance manufacturer approves for manual cleaning.
Spread a thin but visible layer of paste over greasy spots.
For heavily soiled areas, apply a slightly thicker coating.
Then, leave the paste in place.
A few hours may be enough for light buildup. However, overnight contact can help with older spills.
During this time, keep the oven off.
Do not heat baking soda paste inside the oven.
This Homemade Oven Cleaner Will Have Your Stove Sparkling through soaking and gentle wiping, not through baking the cleaning mixture onto the surface.
Wipe, Rinse, and Finish With Vinegar
After the paste has had time to work, begin removing it with a damp microfiber cloth or soft sponge.
Wipe one section at a time.
You will probably need to rinse the cloth frequently because the baking soda can collect grease and turn brown or gray as you work.
For stubborn residue, use a plastic scraper held at a shallow angle.
Work gently.
If the spot refuses to move, apply another small amount of paste and let it sit longer rather than forcing it off.
Once you remove most of the baking soda, spray a small amount of white vinegar onto any remaining powdery residue.
You should see light fizzing.
Then, wipe again with a clean damp cloth.
Repeat this process until no chalky film remains.
This step matters because leftover baking soda can create white streaks when the oven dries.
Therefore, rinse carefully.
You may need two or three passes with clean water.
For the oven door, pay special attention to grease that collects around the glass.
However, avoid flooding seams where liquid might get between layers of glass.
Some oven doors use vents or openings that can trap moisture inside.
If you need to clean between glass panels, follow the manufacturer’s instructions rather than trying to force liquid into those areas.
Finally, dry the cleaned surfaces with a soft cloth and leave the oven door open briefly so remaining moisture can evaporate.
This Homemade Oven Cleaner Will Have Your Stove Sparkling most reliably when the final rinse removes both grease and cleaning residue.
Cleaning Oven Racks, Doors, and Stubborn Spots
How to Handle Oven Racks Without Damaging Them
Oven racks often collect more grease than the oven walls.
However, rack finishes vary.
Some stainless or chrome racks tolerate soaking well, while certain coated racks may require different care.
Therefore, check the manual first.
If soaking is allowed, place the racks in a large sink, bathtub, or sturdy container lined with an old towel.
The towel helps protect the surface underneath from scratches.
Add warm water and a small amount of dish soap.
Let the racks soak for several hours.
Then, scrub them gently with a non-scratch sponge or soft brush.
For stubborn spots, apply a small amount of baking soda paste.
Allow it to sit before scrubbing.
However, avoid harsh steel wool unless your oven manufacturer specifically permits it.
Steel wool can scratch or remove protective finishes.
After cleaning, rinse the racks thoroughly and dry them completely before returning them to the oven.
This Homemade Oven Cleaner Will Have Your Stove Sparkling more effectively when you clean the racks separately because you gain easier access to the interior walls.
It also prevents old grease from transferring back onto freshly cleaned surfaces.
If your racks use ball-bearing glides or specialty mechanisms, do not soak them unless the manufacturer allows it.
Water and detergent may affect lubrication or moving parts.
Instead, follow the specific cleaning directions for those components.
Small details like these can prevent unnecessary damage.
A clean oven should not come at the cost of scratched enamel, ruined coatings, or damaged rack hardware.
Therefore, gentle methods and manufacturer guidance remain the safest combination.
Tackle Heavy Buildup Without Aggressive Scrubbing
Some oven stains refuse to disappear after one cleaning session.
That does not mean the method failed.
Thick carbonized residue develops over time, so removing it may also take time.
Start by applying another layer of baking soda paste directly to the stubborn area.
Then, let it sit for several hours.
Afterward, wipe and scrape gently with a plastic tool.
Repeat if necessary.
This Homemade Oven Cleaner Will Have Your Stove Sparkling because repeated softening often works better than one aggressive scrubbing session.
Hard scrubbing can scratch enamel and leave permanent marks.
Meanwhile, repeated soaking gradually loosens the residue.
For greasy rather than heavily carbonized stains, add a little dish soap to the paste.
The soap can help emulsify grease and make it easier to wipe away.
However, rinse thoroughly afterward.
If a blackened patch remains after several cleaning attempts, consider whether it has become permanently stained rather than simply dirty.
Some oven surfaces discolor with age and heat.
In that case, further scrubbing may create more damage than improvement.
Likewise, if your oven uses catalytic or porous self-cleaning panels, homemade pastes may not suit those surfaces.
Never cover heating elements or burner openings with baking soda.
Also, never mix this cleaning method with chlorine bleach, ammonia, commercial oven cleaner, or other household chemicals.
Mixing cleaners can create dangerous reactions.
Use one cleaning approach at a time, rinse thoroughly, and keep the area ventilated.
That simple rule makes household cleaning much safer.
Keep Your Oven Cleaner With Less Work
Prevent Buildup Before It Becomes a Big Job
This Homemade Oven Cleaner Will Have Your Stove Sparkling, but prevention can make every future cleaning session easier.
Start by wiping fresh spills after the oven cools.
A recent food splash often comes off with warm water and mild dish soap. However, once repeated heating burns it onto the surface, removal becomes much harder.
Therefore, quick cleanup saves time.
Use appropriate baking dishes with enough depth to contain bubbling sauces and casseroles.
You can also place a sheet pan on a lower rack beneath certain dishes to catch drips, provided the placement does not interfere with airflow or the oven manufacturer’s instructions.
Avoid placing aluminum foil directly on the oven floor unless your manufacturer specifically allows it.
Foil can trap heat, damage enamel, interfere with heating, or affect airflow in some ovens.
Likewise, oven liners do not suit every appliance.
Always confirm compatibility first.
Another useful habit involves checking the oven once every few weeks rather than waiting until smoke or odors appear.
A five-minute wipe can prevent a future hour-long cleaning session.
This Homemade Oven Cleaner Will Have Your Stove Sparkling more easily when you address small messes before they become thick buildup.
Also, pay attention to sugary spills.
Syrups, pie filling, and melted sugar can harden dramatically under repeated heat.
Once the oven cools, clean these spills as soon as practical.
Greasy meat splatters deserve similar attention.
They can create smoke and unpleasant odors if left inside the oven.
Therefore, routine maintenance supports both appearance and everyday cooking comfort.
Important Safety Tips Before You Start
Before using This Homemade Oven Cleaner Will Have Your Stove Sparkling, make safety part of the process.
First, work only with a cool oven.
Second, keep liquid away from electrical parts, heating elements, fans, sensors, and gas openings unless your manual specifically says those areas can be cleaned with moisture.
Third, ventilate the kitchen.
Baking soda and vinegar do not produce the same harsh fumes as some commercial products, but good airflow still makes cleaning more comfortable.
Fourth, wear gloves if your skin becomes irritated easily.
Even familiar kitchen ingredients can dry or irritate sensitive skin after prolonged contact.
Fifth, do not assume that “natural” means safe to mix with everything.
Never combine vinegar with chlorine bleach.
That combination can release dangerous chlorine gas.
Likewise, do not mix different commercial cleaners together.
Keep your cleaning process simple.
Use the baking soda paste, wipe it away, use a small amount of vinegar for residue if needed, rinse thoroughly, and dry.
If you recently used another strong cleaner in the oven, remove its residue completely before applying a different product.
Finally, follow the oven manufacturer’s instructions whenever they conflict with a homemade cleaning method.
Specialty liners, steam-cleaning systems, self-cleaning coatings, and newer oven materials may require specific care.
Protecting the appliance matters just as much as removing grease.
Frequently Asked Questions
Can I mix baking soda and vinegar together for stronger cleaning?
You can mix them, but the fizzing reaction causes the acid and base to neutralize each other. For oven cleaning, baking soda generally works better as a paste first, while vinegar works well afterward to help remove leftover baking soda residue.
How long should I leave baking soda paste in the oven?
For light grime, a few hours may work. For heavier buildup, you can leave the paste in a cool, unused oven overnight. However, always avoid heating the oven while the paste remains inside.
Can I use this homemade oven cleaner on a self-cleaning oven?
Possibly, but oven coatings vary. Some self-cleaning or catalytic surfaces require special care. Check your appliance manual before applying baking soda, vinegar, or soap to specialty oven liners.
Why does white residue remain after cleaning?
Baking soda often leaves a chalky film if you do not rinse it completely. Wipe the area several times with a clean damp cloth. A small amount of vinegar can also help loosen remaining baking soda before the final water rinse.
Can I clean the heating elements with baking soda paste?
Avoid coating heating elements, gas burner openings, electrical parts, fans, sensors, and other sensitive components unless your oven manufacturer specifically approves that method. Focus on cleanable interior surfaces instead.
Conclusion
This Homemade Oven Cleaner Will Have Your Stove Sparkling with a simple approach built around baking soda, water, patience, and careful rinsing.
You do not need a complicated mixture.
Start with 1/2 cup baking soda and enough water to create a spreadable paste. Add a small amount of mild dish soap when grease creates the biggest challenge.
Then, spread the mixture only onto oven surfaces approved for manual cleaning.
Let the paste sit.
That waiting period gives the mixture time to soften old grime so you can wipe it away with less aggressive scrubbing.
Afterward, remove the paste with a damp cloth.
Use a small amount of vinegar only as a finishing step when baking soda residue remains.
Then, rinse again until the surface feels clean and no chalky film remains.
This Homemade Oven Cleaner Will Have Your Stove Sparkling most successfully when you combine gentle cleaning with realistic expectations.
Old, carbonized residue may require more than one treatment.
Likewise, permanent discoloration may not disappear completely.
The goal involves removing grease and buildup without damaging the oven’s finish.
Therefore, avoid harsh scraping, never mix incompatible cleaners, keep moisture away from sensitive parts, and always follow your appliance manufacturer’s recommendations.
Once the oven looks clean again, maintain it with quick wipe-downs after spills.
Fresh messes come off far more easily than residue that has baked onto the surface dozens of times.
With a little routine care, the next deep clean becomes much easier.
And when greasy buildup returns, this simple baking soda method gives you a practical way to tackle it without filling the kitchen with an overpowering chemical smell.