Looking for a hands-on art project that combines science, creativity, and a whole lot of sparkle? Salt Painting is where it’s at! This colorful, texture-filled craft is perfect for kids of all ages and brings instant “wow” moments as colors bloom and swirl across salt-covered glue designs.
The first time I tried this with my little cousins, they were fascinated — watching the paint spread like magic through the salt lines had them giggling with delight. It’s not just art — it’s a beautiful blend of play and learning.
💌 Want more creative crafts like this delivered to your inbox? Subscribe now and keep the fun coming!
🧂 What Is Salt Painting?
Salt painting is an easy, kid-friendly art activity where glue, salt, and watercolor paints combine to create vibrant, textured masterpieces. It’s part science experiment, part art project — and 100% fun. The salt absorbs the colored liquid, creating mesmerizing effects right before your eyes.
Perfect for:
- Rainy day art projects
- Preschool or elementary classroom crafts
- Art therapy and sensory play
- Playdates and birthday activities
💖 Why Kids (and Parents!) Love Salt Painting
- Easy to set up with basic craft supplies
- Sensory-rich with texture, color, and movement
- Fascinating to watch as the colors spread
- Encourages creativity and experimentation
- Teaches color blending and fine motor skills
What Does It Look Like?
Imagine a drawing made of sparkly frost — the lines raised and glistening — then touched with paint that blooms and flows in every direction. It’s a mix of watercolor softness and glittery texture, all in one unforgettable art piece.
🧰 What You’ll Need for Salt Painting
- White school glue (PVA) – the star of the show
- Table salt (fine grain) – helps spread the color
- Liquid watercolors or food coloring – bright and blendable
- Heavyweight paper or watercolor paper – prevents tearing
- Paintbrushes, droppers, or pipettes – to apply the paint
- Tray or newspaper – catches the excess salt and keeps things tidy
Optional:
- Glitter (for extra sparkle)
- Templates or stencils (for younger kids to trace)
🎨 How to Make Salt Paintings Step by Step
1. Draw with Glue
Let your child (or you!) draw a picture using white glue directly onto the paper. You can go abstract or make flowers, stars, their name, or rainbows. The thicker the lines, the more salt (and magic!) they’ll hold.
2. Sprinkle the Salt
While the glue is still wet, shake a generous amount of salt over the designs. Make sure the glue lines are completely covered! Shake off any excess salt onto a tray or paper so it can be reused.
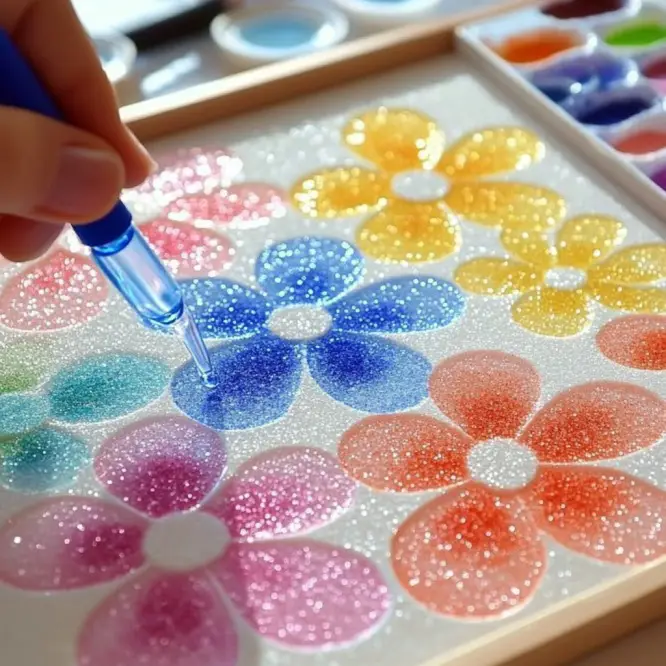
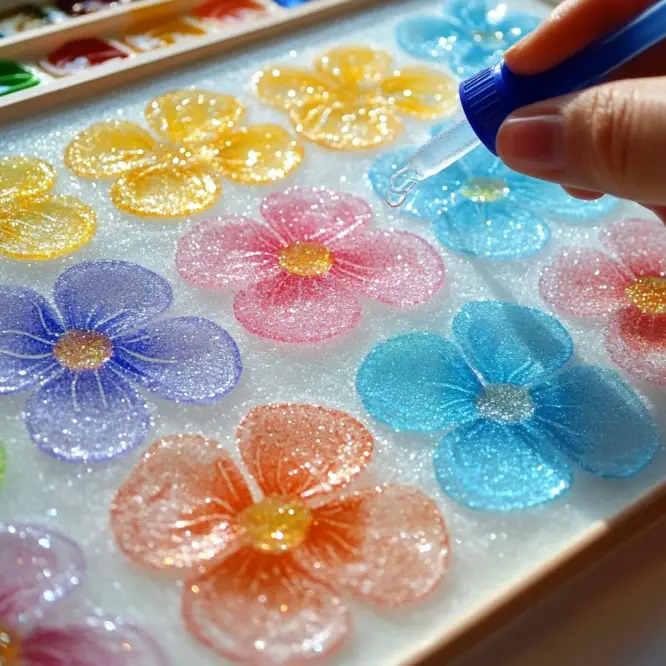
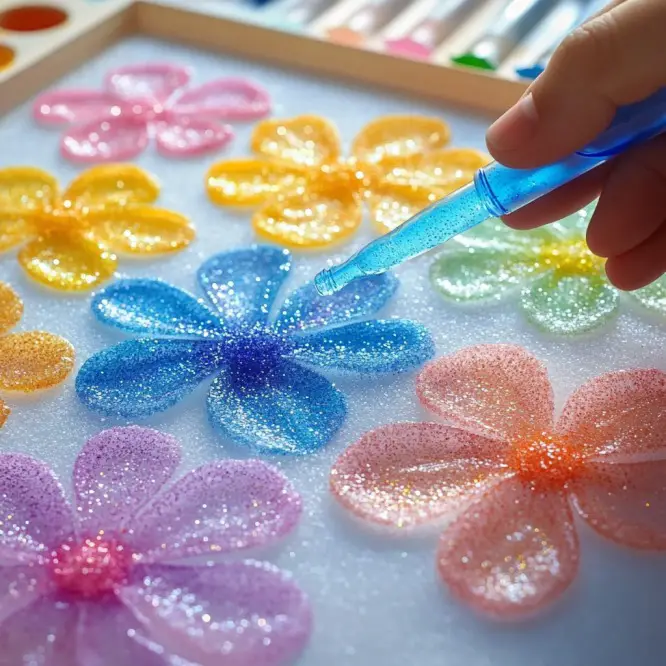
3. Add Color – Watch It Bloom!
Dip a dropper, brush, or pipette into your chosen paint and gently touch the salt lines. The color will travel and spread through the salt like a little colorful river. This is where the magic happens — kids love watching it move!
4. Layer and Blend
Add more colors for beautiful marbled effects. Place colors side by side to see how they blend, but don’t soak the salt — it can dissolve if too wet. Let the color do its thing!
5. Let It Dry & Admire
Once your painting is finished, lay it flat and let it dry for 30–60 minutes. It’ll be sparkly, textured, and absolutely frame-worthy once dry!
🧠 Learning Benefits of Salt Painting
- Fine motor development from squeezing glue and using droppers
- Science concepts like absorption and diffusion
- Color theory through blending and layering
- Sensory exploration with textures and visual movement
- Creative confidence from making something unique and beautiful
🌟 Tips & Variations
- Try different glue designs: zigzags, stars, mandalas, or initials.
- Use templates or stencils for younger kids to trace with glue.
- Mix your own colors: let kids experiment with combining red + yellow to make orange, etc.
- Add glitter for extra sparkle before adding color!
- Theme it: create seasonal salt paintings (snowflakes in winter, flowers in spring, etc.).
❓ Frequently Asked Questions
Can I use regular paper instead of watercolor paper?
You can, but be careful — thin paper may warp or tear. Watercolor paper is sturdier and works best for this wet project.
What if the color doesn’t spread?
Make sure your salt is still dry and fluffy. If it’s clumping or wet, it won’t absorb the color as well. Also, use liquid-based colors (not thick paint).
How long do salt paintings last?
These are best as short-term art displays. Over time, salt can flake off, so take a photo of the finished piece if you want to preserve the memory!
🖼️ In Conclusion
Salt Painting is more than just a craft — it’s a sensory-rich, science-meets-art experience that inspires creativity and curiosity in kids of all ages. It’s beautiful, a little bit messy, and a whole lot of fun.
Whether you’re looking to keep busy on a rainy afternoon, bring some color to your homeschool art class, or just want to witness a little magic on paper — this activity is for you.
📷 Show Us Your Salty Masterpieces!
Made a magical salt painting? We’d love to see it! Share your photos with #SaltyArtMagic on Pinterest or Instagram and inspire others to give it a try. 💬 Drop a comment below with your favorite color combos or designs!
🌈 More Artsy DIYs to Try Next:
Thanks for creating something colorful and joyful — one sprinkle of salt at a time! 🖌️💧✨
Salt Painting
Ingredients
Method
- Draw with glue on the paper using white school glue. You can go abstract or create specific designs.
- While the glue is still wet, shake a generous amount of salt over the designs until they are completely covered.
- Dip a dropper, brush, or pipette into the chosen paint and gently touch the salt lines. Watch the color spread through the salt.
- Add more colors for marbled effects, but don’t soak the salt to avoid dissolving it.
- Once finished, lay the artwork flat to dry for 30-60 minutes before admiring the final piece.


