Before we get into the fizzy, foamy magic of today’s activity—I just want to take a quick moment to thank you. Whether you’re a parent looking to wow your kiddos, a teacher planning a sensory science day, or just a curious soul who loves creative experiments, I’m so glad you’re here. This Rainbow Ice Experiment is one of those truly special “wow” moments that mixes color, chemistry, and so much joy.
💌 Want more hands-on STEAM experiments like this one? Subscribe to get this activity (and more!) sent right to your inbox.
What Is the Rainbow Ice Experiment?
This project turns an ordinary kitchen tray into a kaleidoscope of fizz and fun! By combining baking soda, food coloring, and vinegar, you create colorful frozen cubes that erupt into bubbling rainbows the moment vinegar touches them. It’s a sensory experience that kids (and adults!) can’t get enough of—and it secretly teaches them about acid-base reactions, color theory, and freezing states. 🤯
Why You’ll Love This Rainbow Ice Activity
🌈 Bright and beautiful results
🧪 Teaches simple science in a fun, hands-on way
❄️ Perfect for hot days or indoor STEM fun
🎨 Fully customizable with colors, glitter, and textures
🧼 Low mess, high impact!
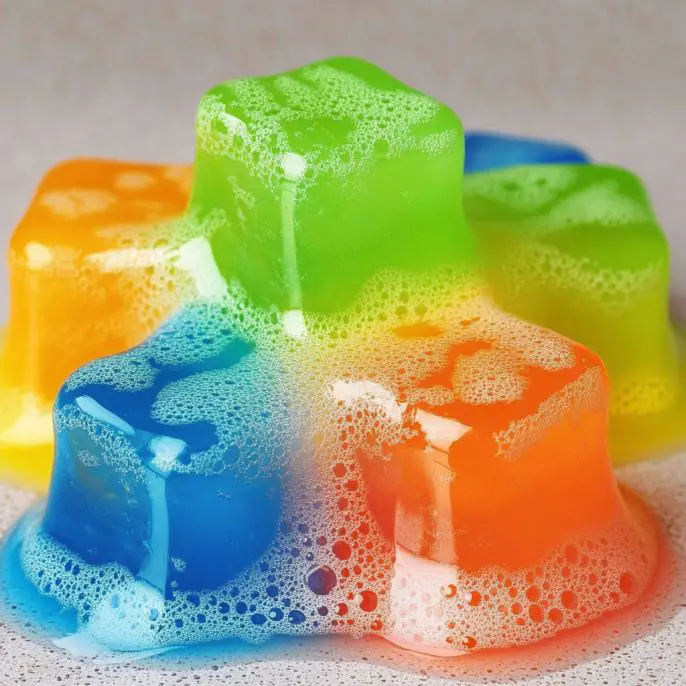
What It Looks & Feels Like
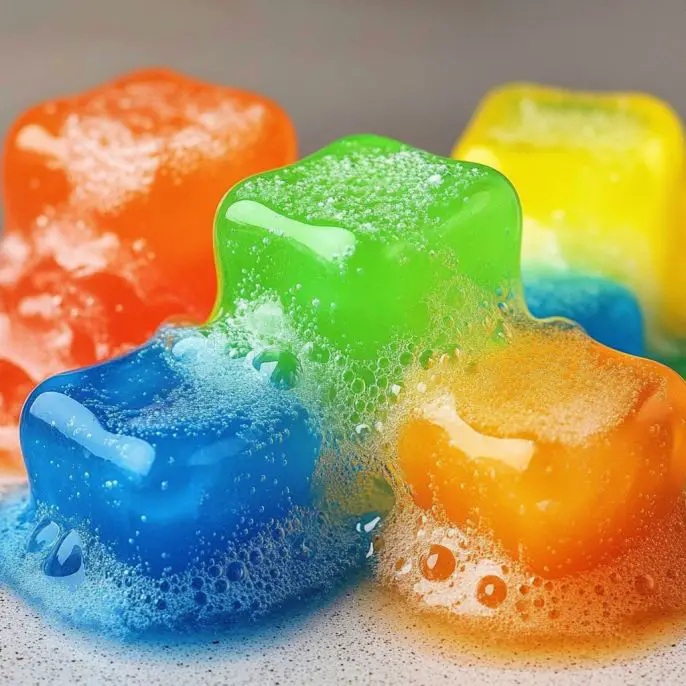
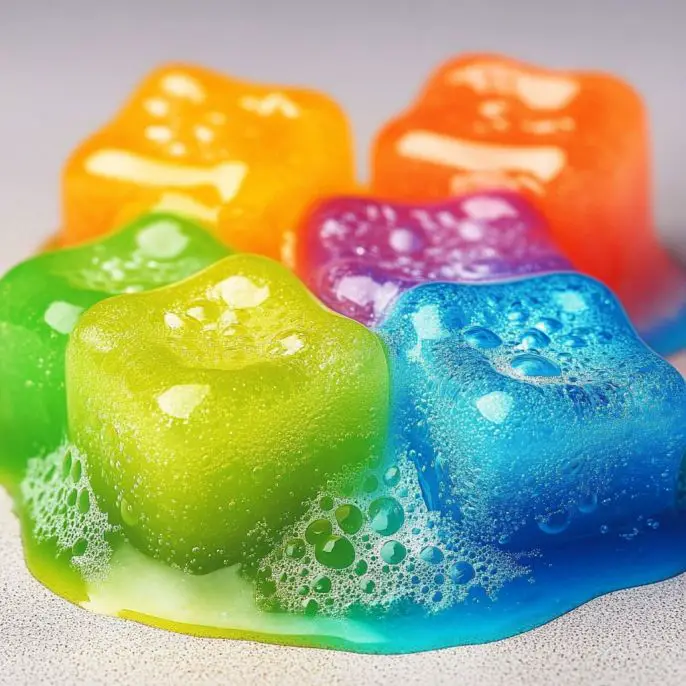
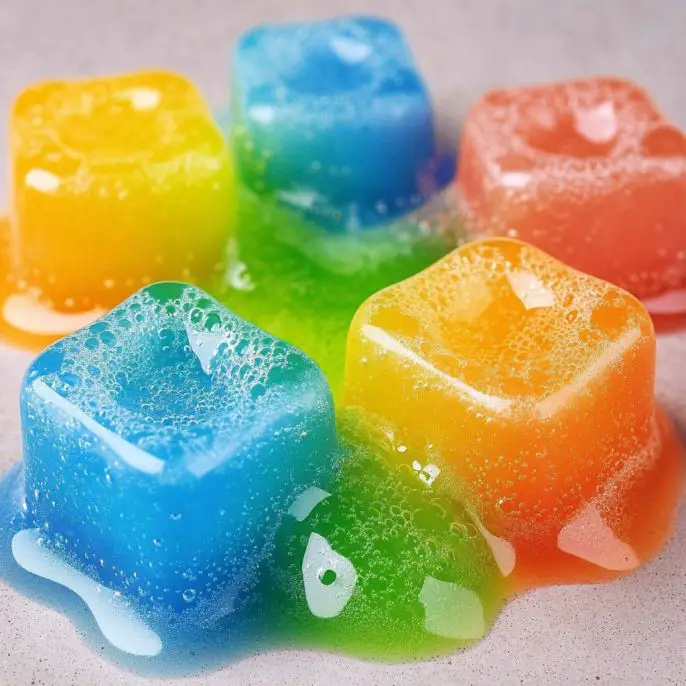
As soon as the vinegar hits the rainbow ice cubes, you’ll see a fizzing, foaming eruption of color. The bubbles shimmer and dance, each cube melting in a mesmerizing swirl of hues. It’s like watching fireworks in slow motion—but right in your kitchen.
The textures are equally cool: cold, smooth cubes turning fizzy, frothy, and soft before your eyes. Kids can explore with spoons, brushes, or just their hands—it’s a full-on sensory explosion.
Educational Benefits of the Rainbow Ice Experiment
Introduces acid-base chemical reactions
Encourages color mixing and visual creativity
Enhances fine motor skills through pouring, squeezing, and scooping
Inspires scientific curiosity and inquiry-based play
Super engaging for all learning styles—visual, tactile, auditory!
🧂 Ingredients & Supplies
1 ice cube tray
2 cups baking soda
1 cup water
Food coloring (variety of colors)
Vinegar (white vinegar works best)
Optional: glitter, small bowls, spoons, spray bottle
Rainbow Ice Experiment
Ingredients
Equipment
Method
- In a mixing bowl, combine the baking soda and water to create a thick, spreadable paste. Mix until smooth with no lumps.
- Divide the paste into small bowls and add a few drops of food coloring to each. Stir until colors are vibrant and even.
- Spoon the colorful mixtures into an ice cube tray. Fill each compartment fully but do not overfill.
- Place the tray in the freezer for at least 4 hours, or until the cubes are fully frozen.
- Pop the frozen cubes out by twisting the tray or running warm water under the bottom for a few seconds.
- Arrange the frozen cubes in a shallow tray or dish, creating a colorful display.
- Spray or pour vinegar over the cubes. Watch the vibrant fizzing reaction as the colors bubble and mix!
Notes
🛠️ Tools You’ll Need
Mixing bowls (for colored pastes)
Spoons for scooping and mixing
Freezer-safe ice cube tray
Spray bottle or small cup (to apply vinegar)
Shallow dish or baking tray (to contain the fizz!)
👩🔬 Step-by-Step Instructions
1. Mix the Base
In a bowl, stir together 2 cups baking soda and 1 cup water until you have a smooth, thick paste. It should feel like frosting—not too runny.
2. Color It Up
Divide the paste into several small bowls. Add a few drops of different food colorings to each and mix thoroughly. You want those colors bold and beautiful!
3. Fill the Tray
Scoop the colorful mixtures into the ice cube tray, filling each compartment to the top. You can do one color per cube or even layer them for a tie-dye effect.
4. Freeze
Place your tray in the freezer for at least 4 hours (overnight is best) until the cubes are completely solid.
5. Pop ‘Em Out
Remove the tray from the freezer and carefully release the cubes. If they stick, run the underside under warm water for a few seconds.
6. Set the Stage
Arrange your rainbow ice cubes in a shallow tray or large plate. Get your vinegar ready in a spray bottle or small pouring cup.
7. Make the Magic
Spray or drizzle vinegar over the cubes and watch them fizz, bubble, and erupt in color! The reaction starts instantly—perfect for curious eyes and little hands.
✨ Tips & Fun Variations
Add glitter to your baking soda paste for a magical sparkle effect!
Try layering colors in one cube—pour a bit of blue, then red, then yellow for rainbow gradients.
Use different vinegars like apple cider or balsamic to explore how the reactions vary.
Encourage predictions: Ask your kids, “What do you think will happen when we add the vinegar?”
Play with tools: Spoons, droppers, or brushes let kids control the reaction.
🧺 Clean-Up & Storage
The reaction is non-toxic and easy to clean up—just rinse everything with warm water!
No need to store leftover cubes—just make a fresh batch when you’re ready to play again.
If you want to prepare ahead, freeze the cubes the night before and store in a zip-top bag until ready to use.
🔬 Science Behind the Fizz
This experiment is all about acid-base chemistry! Baking soda is a base, and vinegar is an acid. When they mix, they create carbon dioxide gas—aka bubbles! The reaction breaks down the frozen cube while releasing fizzy fun. Add the color, and it becomes a visual feast + science lesson in one.
🙋 FAQ
Can I use baking powder instead of baking soda?
Nope! Baking soda reacts more strongly and gives the best fizz.
What age is this for?
This activity is ideal for ages 3+, with supervision. Older kids love it too—it’s science + art + sensory all in one.
Can I reuse the cubes?
Once the vinegar hits them, they’ll start melting fast. It’s a one-time use, but easy to make again!
🧁 Conclusion
This Rainbow Ice Experiment is one of those activities that sticks in your memory—bright, fizzy, and full of “oohs” and “aahs.” It’s the kind of hands-on learning that turns a regular day into something extraordinary. Whether you’re exploring color, practicing fine motor skills, or just making magic on a summer afternoon, this one’s a keeper.
And yes—you’ll want to do it again. (Don’t say I didn’t warn you 😉)
🌈 More Sensory Science Fun
Love this? Try these next:
📷 Show Off Your Rainbow Fizz!
Made your own rainbow ice? I’d LOVE to see it!
Tag me on Pinterest or Instagram with your creations and reactions. Let’s keep spreading that colorful joy.
🍽 Nutritional Info?
Sorry, science only here—definitely not edible! But the brain and heart benefits? Off the charts. ❤️🧠
Thanks so much for stopping by! Until next time—stay curious, stay colorful, and keep experimenting with joy.