Easter Blossom Sugar Cookies: A Sweet Spring Tradition
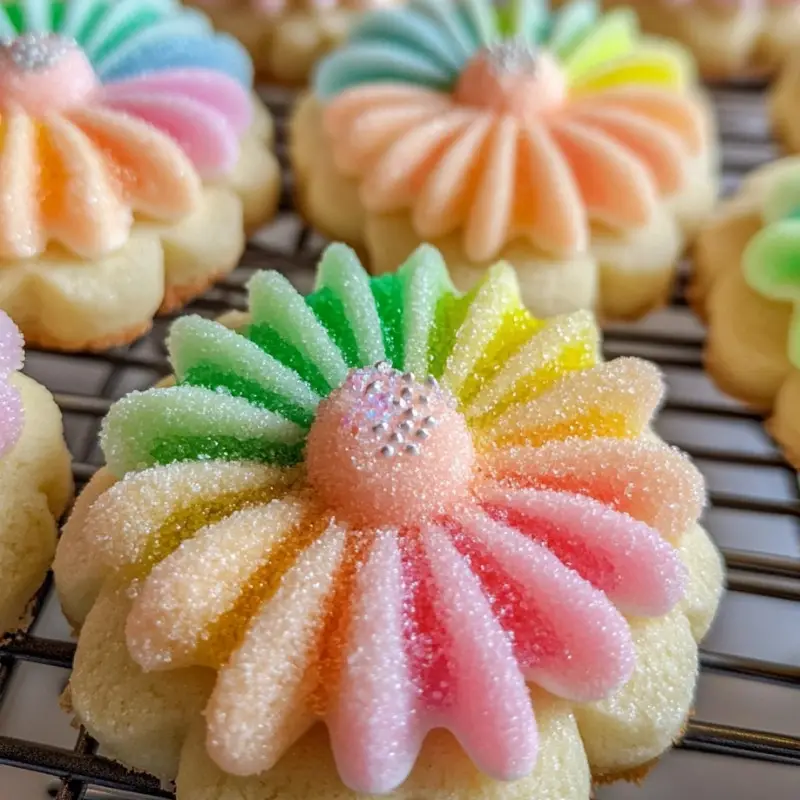
As the flowers bloom and the air fills with the sweet scent of spring, it’s time to celebrate Easter with these delightful Easter Blossom Sugar Cookies! They are not only a treat for the taste buds but also a feast for the eyes with their colorful pastel candies. This recipe embodies the spirit of the season, perfect for family gatherings, Easter brunches, or simply indulging your sweet tooth. I’m so excited to share this recipe with you, and I hope you find as much joy in making them as I do!
If you’d like to receive this delightful cookie recipe directly in your inbox, be sure to subscribe. Let’s dive into why you’ll love these cookies and how to make them!
Why You’ll Love This Recipe
These Easter Blossom Sugar Cookies are a lovely combination of soft, buttery goodness and festive cheer! The moment you pull them from the oven, the enticing aroma will fill your kitchen and have everyone eagerly waiting for their first taste. What’s more? They are extremely easy to prepare, and the blending of colors from the pastel candies will bring a smile to anyone’s face. It’s a wonderful recipe that you can make with kids or friends, making for a fun bonding experience in the kitchen!
Ingredients
– 1 cup unsalted butter, softened
– 1 cup granulated sugar
– 1 large egg
– 1 1/2 teaspoons vanilla extract
– 2 3/4 cups all-purpose flour
– 1 teaspoon baking powder
– 1/2 teaspoon salt
– Pastel-colored candy-coated chocolate pieces (such as M&M’s)
– Sprinkles (optional)
Necessary Tools
– Large mixing bowl
– Whisk
– Baking sheets
– Parchment paper
– Wire rack
– Cookie scoop or tablespoon
Ingredient Swaps and Additions
Feeling adventurous? You can tweak this recipe to suit your taste! Consider using almond extract instead of vanilla for a unique flavor twist. You can also swap out the pastel candies with your favorite chocolate or even seasonal fruity candies. For a fun twist, try adding a hint of lemon zest to the dough for a refreshing citrus kick. The possibilities are endless!
Step-by-Step Instructions
1. Preheat your oven to 350°F (175°C) and prepare your baking sheets with parchment paper—this keeps cleanup easy!
2. In a large mixing bowl, cream together the softened butter and granulated sugar until the mixture is light and fluffy.
3. Beat in the egg and vanilla extract, ensuring everything is well combined.
4. In another bowl, whisk together the flour, baking powder, and salt for a well-blended dry mix.
5. Gradually add the dry ingredients to the wet mixture, mixing until a dough forms. Your kitchen will smell heavenly!
6. Roll the dough into 1-inch balls and arrange them on the prepared baking sheets, making sure to space them about 2 inches apart.
7. Press a pastel candy piece into the center of each ball and feel free to sprinkle some extra joy with some colorful sprinkles!
8. Bake for 10-12 minutes until the edges are just lightly golden—don’t overbake; you want them soft!
9. Once done, allow them to cool on the baking sheet for a few minutes before transferring them to a wire rack to cool completely. The anticipation will be worth it!
Serving Suggestions
These cookies are perfect on their own but can be served alongside a refreshing glass of lemonade or a warm cup of tea. They also make great gifts when packaged in decorative boxes or bags for friends and family.
Pro Tips for Success
– Ensure the butter is softened properly to prevent a dense cookie.
– Don’t forget to let your cookies cool slightly on the baking sheet—this helps them set perfectly!
– Experiment with different candies to create a variety of colorful cookies.
Storing and Reheating
Store your Easter Blossom Sugar Cookies in an airtight container at room temperature for up to a week. If you want to enjoy them fresh later, consider freezing the dough in advance or baked cookies for a delightful treat whenever you need a little sweetness in your day.
FAQ Section
Can I freeze the cookies?
Yes! You can freeze both the dough and the finished cookies. Just ensure they are well-wrapped to avoid freezer burn.
What can I use instead of butter?
You can substitute the butter with a vegan alternative or coconut oil, but it may slightly change the texture.
Conclusion
In just under 30 minutes, you can create these delightful Easter Blossom Sugar Cookies, bursting with sweetness and color. They’re a fantastic way to celebrate the joys of the season and create cherished memories with loved ones. I would love to see your creations—feel free to leave a review, share photos, or tag this recipe on social media!
Nutritional Information
Approximate nutritional information per cookie:
Calories: 120
Fat: 6g
Carbohydrates: 17g
Protein: 1g
Sugar: 6g
Happy baking and Happy Easter!
Easter Blossom Sugar Cookies
Ingredients
Method
- Preheat your oven to 350°F (175°C) and prepare your baking sheets with parchment paper.
- In a large mixing bowl, cream together the softened butter and granulated sugar until the mixture is light and fluffy.
- Beat in the egg and vanilla extract until well combined.
- In another bowl, whisk together the flour, baking powder, and salt.
- Gradually add the dry mixture to the wet ingredients, mixing until a dough forms.
- Roll the dough into 1-inch balls and place them on the baking sheets, spacing them about 2 inches apart.
- Press a pastel candy piece into the center of each ball and optionally sprinkle some colorful sprinkles on top.
- Bake for 10-12 minutes until the edges are just lightly golden.
- Allow the cookies to cool on the baking sheet for a few minutes before transferring them to a wire rack to cool completely.