A Mesmerizing, Hands-On Weather Experiment for Kids (and Kids at Heart!)
First off—thank you so much for being here. Every time you show up to explore another fun, engaging activity with me, it fills my heart with gratitude. Whether you’re a parent, a teacher, or just someone who loves watching science and art collide in the most delightful way—you’re in the right place! 💛
And today, I’m thrilled to share something absolutely magical: the Colorful Rain Cloud in a Jar. Not only is this craft-turned-science-experiment visually stunning (hello swirling rainbow rain!), it’s also educational and incredibly easy to pull off with items you likely already have at home.
If you’d like this dreamy DIY activity (and many more like it!) sent straight to your inbox, don’t forget to subscribe to my weekly newsletter below. You won’t want to miss what’s coming next!
What Is the Colorful Rain Cloud in a Jar?
Think of this as a blend of science class and art studio. We’re using simple household ingredients to demonstrate how rain forms in the atmosphere—but with a vibrant twist. This is more than just a rainy-day activity; it’s a chance to explore cause and effect, talk about weather patterns, and encourage your little ones’ creativity.
And honestly? It’s just as mesmerizing for adults. I could watch those colors fall and swirl for hours. 😍

Why You’ll Love This Activity
- Zero prep stress. You likely have everything you need already!
- Great for all ages. Toddlers to tweens (and beyond!) will be hooked.
- Sensory and educational. See it. Touch it. Learn from it.
- Quick, colorful fun. Perfect for a weekend project or a 15-minute classroom break.
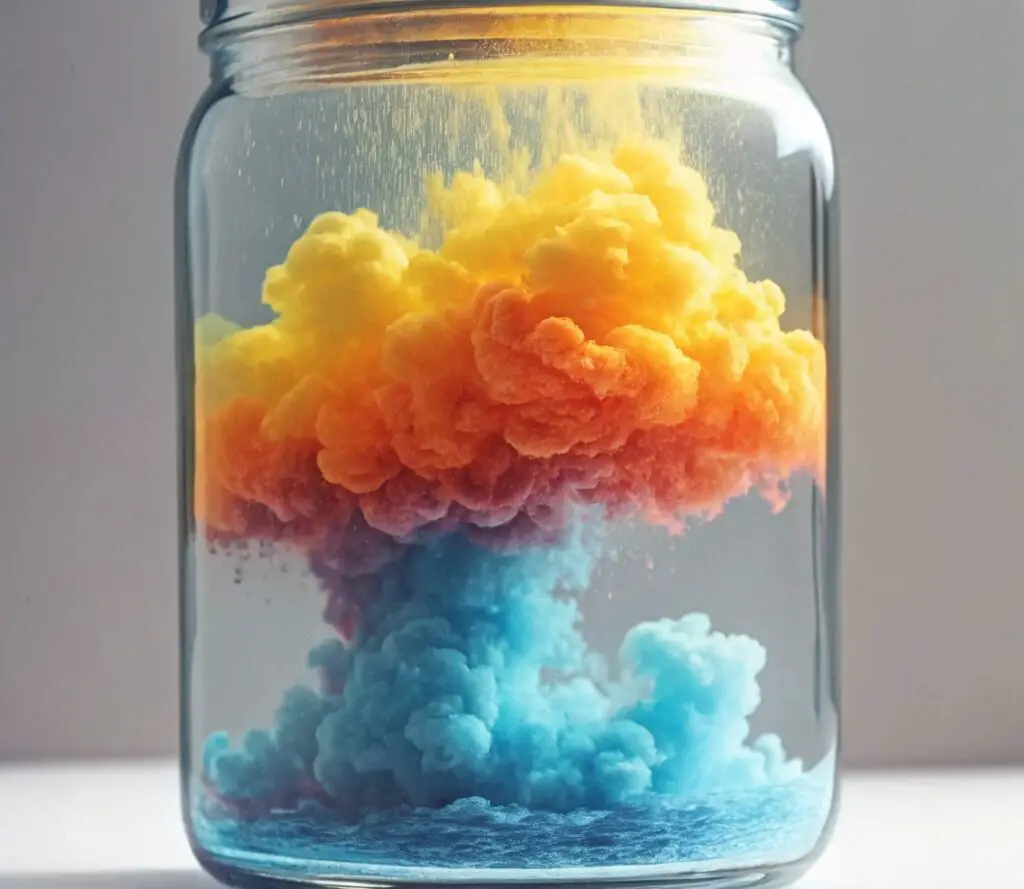
What Does It Look Like?
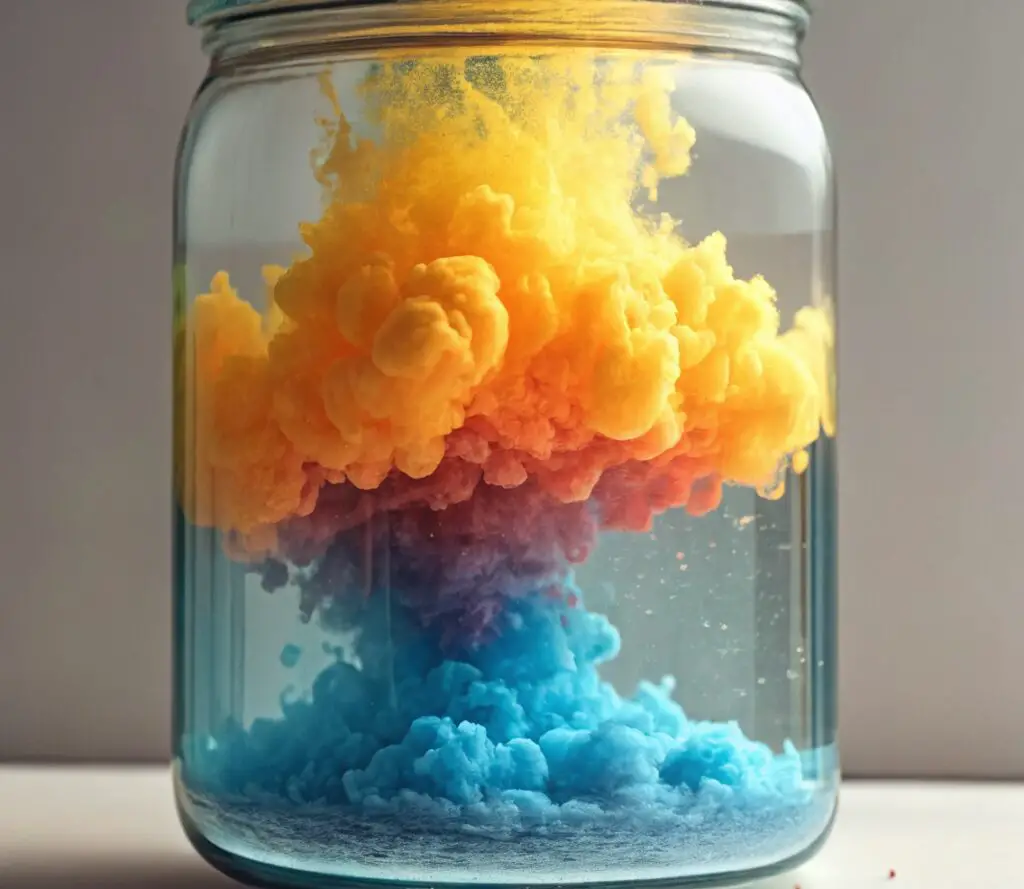
Imagine a fluffy white “cloud” floating over a glass jar—and then vibrant streaks of red, blue, yellow, and green slowly dripping through it, twisting and dancing like real rain. It’s anything but boring!!
Benefits of the Rain Cloud in a Jar
- Helps explain basic weather concepts (like precipitation and density)
- Encourages fine motor skills through pouring and dropping
- Sparks creativity and sensory exploration
- Perfect icebreaker for STEM lessons or weather units
- A fantastic visual activity for visual learners!
Ingredients & Materials
Here’s what you’ll need:
- 🫙 1 clear glass jar or cup (Mason jars work great!)
- 🧴 Shaving cream (foam, not gel!)
- 💧 1/2 cup water per color
- 🎨 Food coloring (multiple colors for full rainbow magic)
- 🍶 Small cups or bowls for color mixing
- 🥄 Droppers or teaspoons
- 🥄 Optional: 1 spoon for stirring
Optional Additions & Substitutions
- No droppers? Use a small spoon or even a plastic straw to drip color.
- Want to extend the lesson? Add a weather worksheet or drawing prompt.
- Add glitter (just a pinch!) to make your “rain” sparkle.
- Skip shaving cream for sensitive skin? Try using whipped cream as an alternative for a short-term display.
How to Make Your Colorful Rain Cloud in a Jar 🌈
Step 1: Fill the Jar
Fill your glass jar about 3/4 full with water. This represents our atmosphere.
Step 2: Make Your Cloud ☁️
Spray a generous amount of shaving cream over the water to create your “cloud.” It should puff up and float right on top.
Step 3: Mix Your Colors 🎨
In separate small bowls, mix 1/2 cup water with a few drops of food coloring in each. The more color, the bolder the rain!
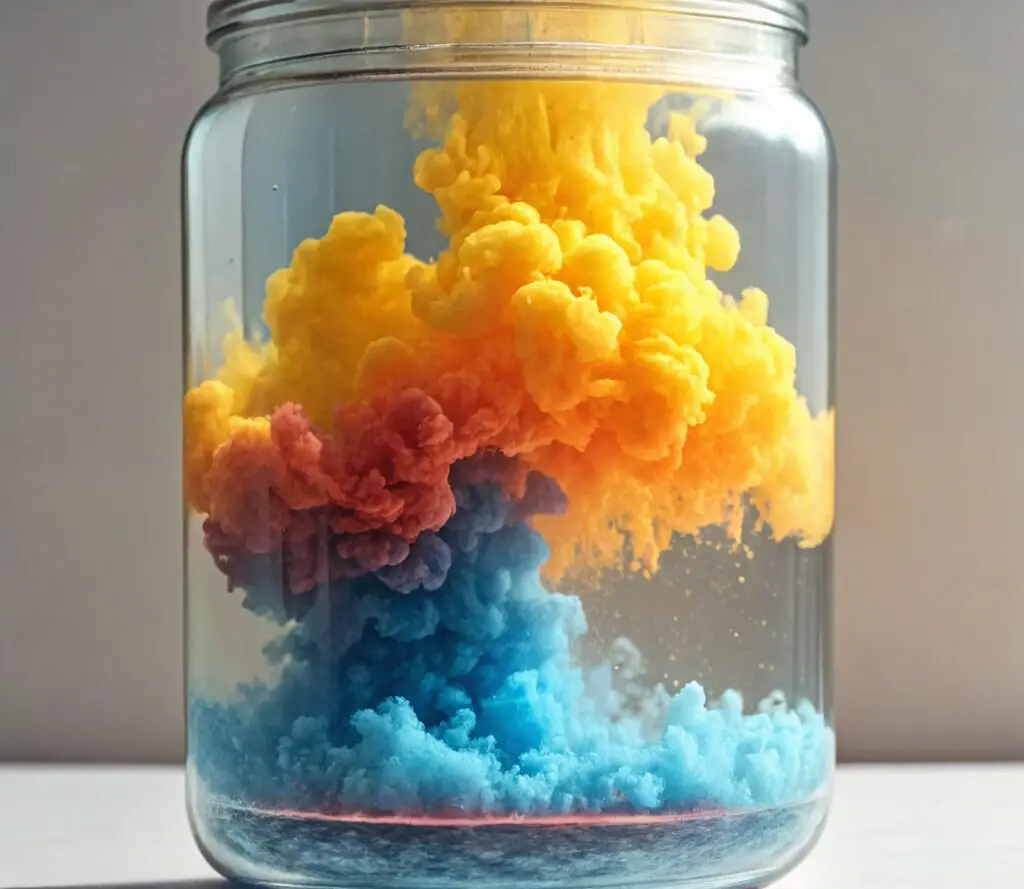
Step 4: Let It Rain! 🌧
Using a dropper or spoon, gently drop your colored water over the shaving cream cloud. Watch as the colors begin to seep through the foam and fall into the clear water below.
Step 5: Enjoy the Show ✨
Keep adding colors, observe, and let curiosity take over. You can even talk about how rain forms when water droplets in clouds become heavy and fall to the earth!
What to Serve With It? 😉
Okay, not food per se—but this pairs perfectly with a cozy hot cocoa, a weather-themed book (like Cloudy with a Chance of Meatballs), or even a YouTube video showing real-life weather footage.
Tips for a Smooth Experience
- Prep in advance by mixing colors before kids arrive or class begins.
- Use bold colors—diluted ones won’t be as visible through the shaving cream.
- Clean up ready? Keep paper towels or a damp cloth nearby for spills.
- Ask open-ended questions: “What do you think will happen with blue and red?” “Why do the colors go down?”
How to Store or Reuse?
This is mostly a one-time experiment, but you can:
- Let the jar sit and observe how colors settle after 15-30 minutes.
- Take a time-lapse video for later replay or classroom sharing.
- Clean and reuse your jar for other DIY science activities.
Frequently Asked Questions (FAQ)
Can I use whipped cream instead of shaving cream?
Yes, whipped cream works for a more edible, short-lived version—but it melts quickly.
Is this safe for toddlers?
Absolutely! Just supervise closely, especially around food coloring and droppers.
What age is this best for?
Ages 3 and up. Younger ones may need help with the dropper, but everyone loves the colorful effect.
Can I do this in a group setting?
Yes! This is a favorite for classrooms and birthday parties. Just prep extra jars and colors in advance.
Conclusion: Why You’ve Gotta Try This 🌈
The Colorful Rain Cloud in a Jar is hands-down one of the most magical, low-fuss ways to introduce weather science in a hands-on, beautiful way. It invites curiosity, teaches real science, and adds a splash of color to your day. Whether you’re exploring it with your kids, students, or just letting your own inner child play—this is a moment worth savoring.
Want more activities like this?
Don’t forget to subscribe below and check out our Peachy Science Series coming soon!
More Colorful DIYs & Weather-Themed Fun:
- Rainbow Walking Water Science Trick
- DIY Tornado in a Bottle
- Peach Fizzy Volcano (with real fruit!)
- Homemade Cloud Dough with Essential Oils
Share Your Colorful Clouds!
Tried this at home? Tag your photos on Pinterest or drop a comment below—I love seeing how your jars turn out! Your creativity is what makes this space so special. 💕
Nutritional Information
(Just kidding—don’t eat this one! 😉)
Instead, how about a sweet peach snack while you craft? Check out my Peachy Parfait Cups for a healthy, fruity treat to go with your cloud magic. 🍑
Let the rain fall—beautifully and colorfully.

Colorful Rain Cloud in a Jar
Ingredients
Method
- Fill your glass jar about 3/4 full with water. This represents our atmosphere.
- Spray a generous amount of shaving cream over the water to create your “cloud.” It should puff up and float right on top.
- In separate small bowls, mix 1/2 cup water with a few drops of food coloring in each. The more color, the bolder the rain!
- Using a dropper or spoon, gently drop your colored water over the shaving cream cloud.
- Watch as the colors begin to seep through the foam and fall into the clear water below.
- Keep adding colors, observe, and let curiosity take over. Discuss how rain forms when water droplets in clouds become heavy and fall to the earth.