Homemade Red Velvet Cake Recipe: A Valentine’s Day Delight for Two
Introduction
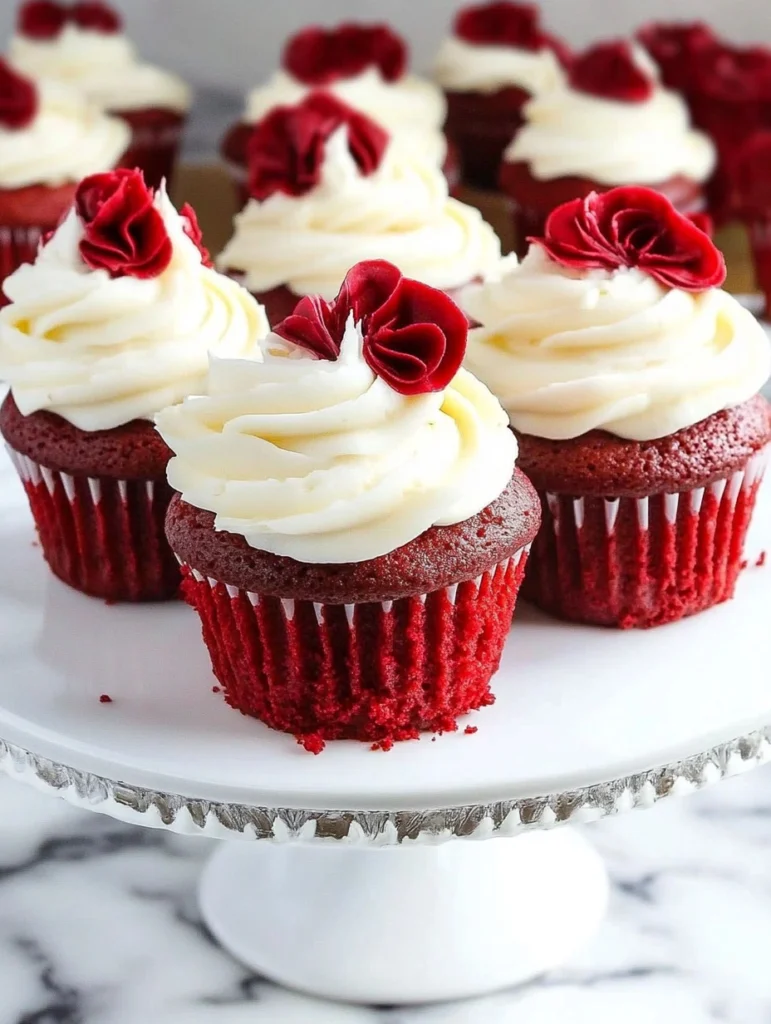
Valentine’s Day calls for something sweet and intimate, and what better way to celebrate than with a Homemade Red Velvet Cake? This charming dessert, baked in a 6-inch pan, is perfect for sharing with your special someone or indulging yourself. With its tender crumb, vibrant color, and creamy frosting, this Homemade Red Velvet Cake is as delightful to eat as it is to make. Whether you’re a seasoned baker or trying your hand at something new, this mini Homemade Red Velvet Cake is sure to impress. Let’s dive into the details to create a dessert that’s perfect for your celebration!
Why You’ll Love Homemade Red Velvet Cake
- Perfectly Sized: Designed for two, this recipe eliminates leftovers and creates a cozy, personal dessert experience.
- Simple Ingredients: Most items are pantry staples, ensuring you don’t need to hunt for specialty products.
- Incredible Flavor: Moreover, the balance of mild cocoa, tangy buttermilk, and sweet cream cheese frosting makes every bite irresistible.
- Customizable: Additionally, decorate it however you like, from fresh flowers to vibrant sprinkles.
- Beginner-Friendly: With clear instructions, even novice bakers can achieve stellar results.
Ingredients 🌿
For the Cake:
- 1/3 cup canola oil
- 1 cup granulated sugar 🍠
- 1/2 cup buttermilk 🥛
- 4 large egg whites 🍳
- 1 teaspoon vanilla extract 🍦
- 1 teaspoon white vinegar 🍓
- 1 teaspoon red gel food coloring 🍇
- 1 1/3 cups + 1/4 cup all-purpose flour 🥞
- 2 tablespoons + 2 teaspoons cocoa powder 🍫
- 1/2 teaspoon baking soda 🥦
- Pinch of salt 🧂
For the Frosting:
- 8 ounces cream cheese, softened 🍑
- 1 stick (4 ounces) unsalted butter, softened 🍼
- 4 cups powdered sugar 🥼
- 1 teaspoon vanilla extract 🍦
- 2 tablespoons heavy cream 🥛
Necessary Tools for Homemade Red Velvet Cake
- Two 6-inch round cake pans (2-inch sides recommended)
- Parchment paper
- Mixing bowls (one large, one medium)
- Electric mixer
- Whisk
- Measuring cups and spoons
- Rubber spatula
- Wire cooling rack
Ingredient Swaps and Additions
- Oil Options: Swap canola oil for sunflower or vegetable oil for similar results.
- Color Variations: Additionally, use natural red food coloring or beetroot powder for a chemical-free option.
- Frosting Add-Ins: Enhance the frosting with a hint of almond extract or citrus zest.
- Decorations: Moreover, fresh roses, edible glitter, or chocolate shavings can add flair.
Moreover, you can find an equally delicious Soft Red Velvet Cake recipe here.
Step-by-Step Instructions
1: Prepare Your Pans
- Line the bottoms of the 6-inch cake pans with parchment paper. Lightly oil the sides to prevent sticking.
2: Make the Cake Batter
- Then, in a large bowl, beat together oil, sugar, buttermilk, egg whites, red food coloring, vanilla extract, and vinegar using an electric mixer until smooth.
- In a separate bowl, whisk together flour, cocoa powder, baking soda, and salt.
- Gradually add the dry ingredients to the wet mixture while mixing on low speed. After that, stop once the batter is fully combined.
3: Bake the Cakes
- Then, divide the batter evenly between the two prepared pans. After that, smooth the tops with a spatula.
- Bake in a preheated oven at 350°F (175°C) for 25–35 minutes, or until a toothpick inserted in the center comes out clean.
- After that, let the cakes cool completely in the pans before transferring to a wire rack.
4: Prepare the Frosting
- In a mixing bowl, beat cream cheese and butter until smooth and creamy.
- After that, gradually add powdered sugar, one cup at a time, beating well after each addition.
- Add vanilla extract and heavy cream. Beat until fluffy. Then, add more cream if needed for a spreadable consistency.
5: Assemble the Cake
- Place one cake layer on a serving plate. Spread a generous layer of frosting on top.
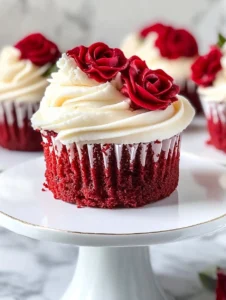
- Then, add the second layer and frost the top and sides. For a “naked” look, scrape off excess frosting for a minimalist effect.
- Decorate as desired.
Pro Tips for Success of Homemade Red Velvet Cake✅
- Room Temperature Ingredients: Ensure eggs, buttermilk, and butter are at room temperature for better mixing.
- Measure Accurately: Precision matters, especially with flour and cocoa.
- Don’t Overmix: Additionally, overmixing can lead to a dense cake. Stop once the batter is combined.
- Test for Doneness: Moreover, use a toothpick to ensure cakes are fully baked.
- Chill Before Frosting: Slightly chilling the cake layers makes frosting easier.
Serving Suggestions 🍽️
- Serve with a glass of cold milk or champagne for a celebratory touch.
- Moreover, pair with fresh strawberries or raspberries for added elegance.
- Additionally, use as a wedding cake topper or for a romantic anniversary dinner.
Storing and Reheating 🏢
- Room Temperature: Wrap tightly and store for up to 1 day.
- Refrigeration: Additionally, keep in an airtight container for up to 5 days. Bring to room temperature before serving.
- Freezing: Moreover, wrap individual slices in plastic wrap and freeze for up to 2 months. Thaw overnight in the fridge.
Nutritional Information of Homemade Red Velvet Cake
- Calories: 420 per serving
- Fat: 22g
- Carbohydrates: 50g
- Protein: 5g
- Sugar: 38g
- Fiber: 1g
FAQs 🤔
Q1: Can I make this cake ahead of time? Yes, bake the layers a day in advance and store them tightly wrapped. Frost just before serving.
Q2: Can I double the recipe? Absolutely! This recipe scales well for larger celebrations.
Q3: What’s the best way to achieve a vibrant red color? Use high-quality gel food coloring for the brightest hue.
Q4: Can I use a substitute for buttermilk? For the best results, use real buttermilk. In a pinch, mix 1/2 cup of milk with 1/2 teaspoon vinegar.
Q5: What’s the ideal storage temperature for cream cheese frosting? Keep frosted cakes refrigerated if storing longer than 1 day.
Conclusion
This mini red velvet cake is the perfect way to celebrate love and create cherished memories. Furthermore, its rich flavors, soft texture, and creamy frosting make it a must-try for Valentine’s Day or any special occasion. Give it a try, and let the magic unfold! In addition, for more delightful recipes, check out the links below.
Additionally, if you’re craving a twist on the classic, check out this Red Velvet Strawberry Cheesecake recipe here.
Homemade Red Velvet Cake Recipe: A Valentine’s Day Delight for Two
Ingredients
Equipment
Method
- Prepare Your Pans:
- Line the bottoms of the 6-inch cake pans with parchment paper. Lightly oil the sides to prevent sticking.
- Make the Cake Batter:
- In a large bowl, beat together oil, sugar, buttermilk, egg whites, red food coloring, vanilla extract, and vinegar using an electric mixer until smooth.
- In a separate bowl, whisk together flour, cocoa powder, baking soda, and salt. Gradually add the dry ingredients to the wet mixture while mixing on low speed. Stop once the batter is fully combined.
- Bake the Cakes:
- Divide the batter evenly between the two prepared pans. Smooth the tops with a spatula.
- Bake in a preheated oven at 350°F (175°C) for 25–35 minutes, or until a toothpick inserted in the center comes out clean.
- Let the cakes cool completely in the pans before transferring to a wire rack.
- Prepare the Frosting:
- In a mixing bowl, beat cream cheese and butter until smooth and creamy.
- Gradually add powdered sugar, one cup at a time, beating well after each addition.
- Add vanilla extract and heavy cream. Beat until fluffy. Add more cream if needed for a spreadable consistency.
- Assemble the Cake:
- Place one cake layer on a serving plate. Spread a generous layer of frosting on top.
- Add the second layer and frost the top and sides. For a “naked” look, scrape off excess frosting for a minimalist effect. Decorate as desired.
Notes
Measure Accurately: Precision matters, especially with flour and cocoa.
Don’t Overmix: Overmixing can lead to a dense cake. Stop once the batter is combined.
Chill Before Frosting: Slightly chilling the cake layers makes frosting easier.

