Before we dive into the colors, swirls, and sparkles, I just want to take a moment to thank you for being here. Whether you’re a longtime crafter or just testing the waters of DIY fun, I’m truly grateful that you’re choosing to spend some of your creative energy with me. There’s something really special about making things with your hands—especially when the end result catches the sunlight and your heart at the same time.
So today, I’m bringing you a project that’s as delightful as it is simple: Easy-Peasy Glue Suncatchers! These vibrant, whimsical decorations are the perfect blend of science, art, and a little magic. They’re ideal for lazy summer afternoons, rainy-day activities, or even holiday crafting. And yes, they’re kid-tested, parent-approved, and 100% boredom-busting.
👉 Want this recipe emailed to you? Pop your email into the subscription box and I’ll send it your way, complete with printable instructions and bonus seasonal ideas!
What Are Glue Suncatchers?
Glue suncatchers are DIY window decorations made from clear glue and colorful swirls of food coloring or watercolor. Once dried, they peel off like jelly stickers and can be taped to a window to capture and reflect sunlight. They’re as much fun to make as they are to display!
Why You’ll Love This Project
So easy! Just pour, swirl, and wait—it really doesn’t get simpler.
No fancy tools needed. You probably already have everything at home.
Versatile: You can theme these for any holiday, season, or party.
Kid-friendly: Safe and engaging for little hands (with supervision).
Beautiful and functional: The final result genuinely brightens up a room.
What Do They Look Like?
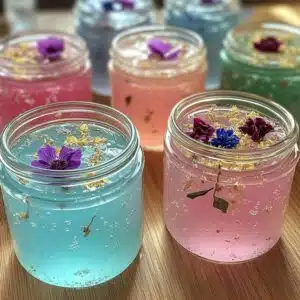
Imagine thin, colorful discs that resemble stained glass—translucent, swirly, and just a little sparkly if you add glitter or sequins. Depending on your color choices, they can feel dreamy and ethereal, bold and festive, or anywhere in between.
Benefits of Making Suncatchers
Encourages creativity and fine motor skills in kids
Teaches patience (hello, 2-day dry time!)
Great for seasonal decor or party favors
Inexpensive and low-mess
Offers a soothing, almost meditative crafting experience

Ingredients & Materials
You’ll Need:
Clear glue (like Elmer’s or any school glue)
Food coloring or liquid watercolor
Clear plastic lid, tray, or sheet (recycled packaging works great!)
Toothpick or skewer
Optional extras: Glitter, sequins, small beads
String and tape (for hanging)
Tools You Might Need
A flat working surface
Paper towels for spills
Cookie cutters (for shaping)
Tweezers (if you’re getting intricate with decorations)
Ingredient Additions & Substitutions
Instead of food coloring: Try natural dyes like beet juice or turmeric (results may vary!).
Want more shimmer? Use holographic glitter or mica powder.
No plastic tray? Try a silicone baking mat or even wax paper (just be careful when peeling).
Step-by-Step Instructions
Step 1: Prep Your Workspace
Choose a flat, protected surface. Cover it with parchment paper or old newspapers.
Step 2: Pour the Glue
Squeeze clear glue into your lid or tray. Aim for about 1/4 inch thick—it needs some body to peel cleanly.
Step 3: Add Color
Drop in your food coloring or watercolor—just a drop or two! Less is more here.
Step 4: Swirl
Grab your toothpick and swirl the colors gently. Think marble, not milkshake—don’t overmix!
Step 5: Add Sparkle (Optional)
Sprinkle glitter or sequins while the glue is still wet.
Step 6: Let It Dry
Leave it flat in a well-ventilated area. Drying takes 1–3 days depending on glue thickness and humidity.
Step 7: Peel and Reveal
Once it’s completely dry and firm, gently peel your masterpiece off the plastic.
Step 8: Hang It Up!
Attach string with tape or poke a tiny hole to thread it through. Stick to a sunny window and watch it shine!

What to Pair It With
These pair beautifully with:
A homemade lemonade stand for summer vibes 🌞
DIY tissue paper flowers
Rainy day movie marathons
Kids’ birthday parties as make-and-take crafts
Holiday tablescapes for a pop of handmade color
Tips for Perfect Suncatchers
Thicker glue layers take longer to dry but peel more easily.
Don’t use hot glue—it’s not transparent and won’t dry flat.
For younger kids, limit to one or two colors to avoid brown mush.
Keep pets away—curious paws will leave dents!
Storage Instructions
If you’re not hanging them right away, store them flat in a dry container between layers of wax paper. Avoid bending or folding, as they may crack once dry.
Frequently Asked Questions
Can I use white glue?
You can, but it won’t be transparent, so the “suncatcher” effect will be lost.
How do I prevent bubbles?
Tap the tray gently after pouring glue to release air bubbles, or pop them with a toothpick.
How long do they last?
Indoors, these can last for months! Sunlight may eventually fade the colors slightly, especially with natural dyes.
Can I make these with Mod Podge?
Mod Podge doesn’t dry quite the same way—it’s best to stick to regular clear glue for this project.
In Summary
Easy-Peasy Glue Suncatchers are a perfect craft for kids, families, and creative souls of all ages. They’re cheap, cheerful, and endlessly customizable—and they just might become your new favorite rainy-day tradition. Whether you’re prepping for a craft fair, a preschool activity, or just indulging in a little color therapy, this one’s a keeper.
More Creative Recipes to Try
Homemade Puffy Paint
Salt Dough Ornaments (Holiday or Everyday!)
DIY Tie-Dye Coffee Filters
Peachy Craft Recipes (Yup, I’ve got edible crafts too—stay tuned!)
Share the Joy!
Tried this craft? I’d love to see it! Snap a photo and tag it on Pinterest using #EasyPeasySuncatchers. Or drop a review below with how yours turned out—especially if you tried a unique twist!
Nutritional Info
😂 None needed—these are all for the eyes, not the belly!
Thanks for crafting with me today! See you in the next DIY adventure 💛

Easy-Peasy Glue Suncatchers
Ingredients
Method
- Choose a flat, protected surface. Cover it with parchment paper or old newspapers.
- Squeeze clear glue into your lid or tray. Aim for about 1/4 inch thick—it needs some body to peel cleanly.
- Drop in your food coloring or watercolor—just a drop or two! Less is more here.
- Grab your toothpick and swirl the colors gently. Think marble, not milkshake—don't overmix!
- Sprinkle glitter or sequins while the glue is still wet.
- Leave it flat in a well-ventilated area. Drying takes 1–3 days depending on glue thickness and humidity.
- Once it’s completely dry and firm, gently peel your masterpiece off the plastic.
- Attach string with tape or poke a tiny hole to thread it through. Stick to a sunny window and watch it shine!


