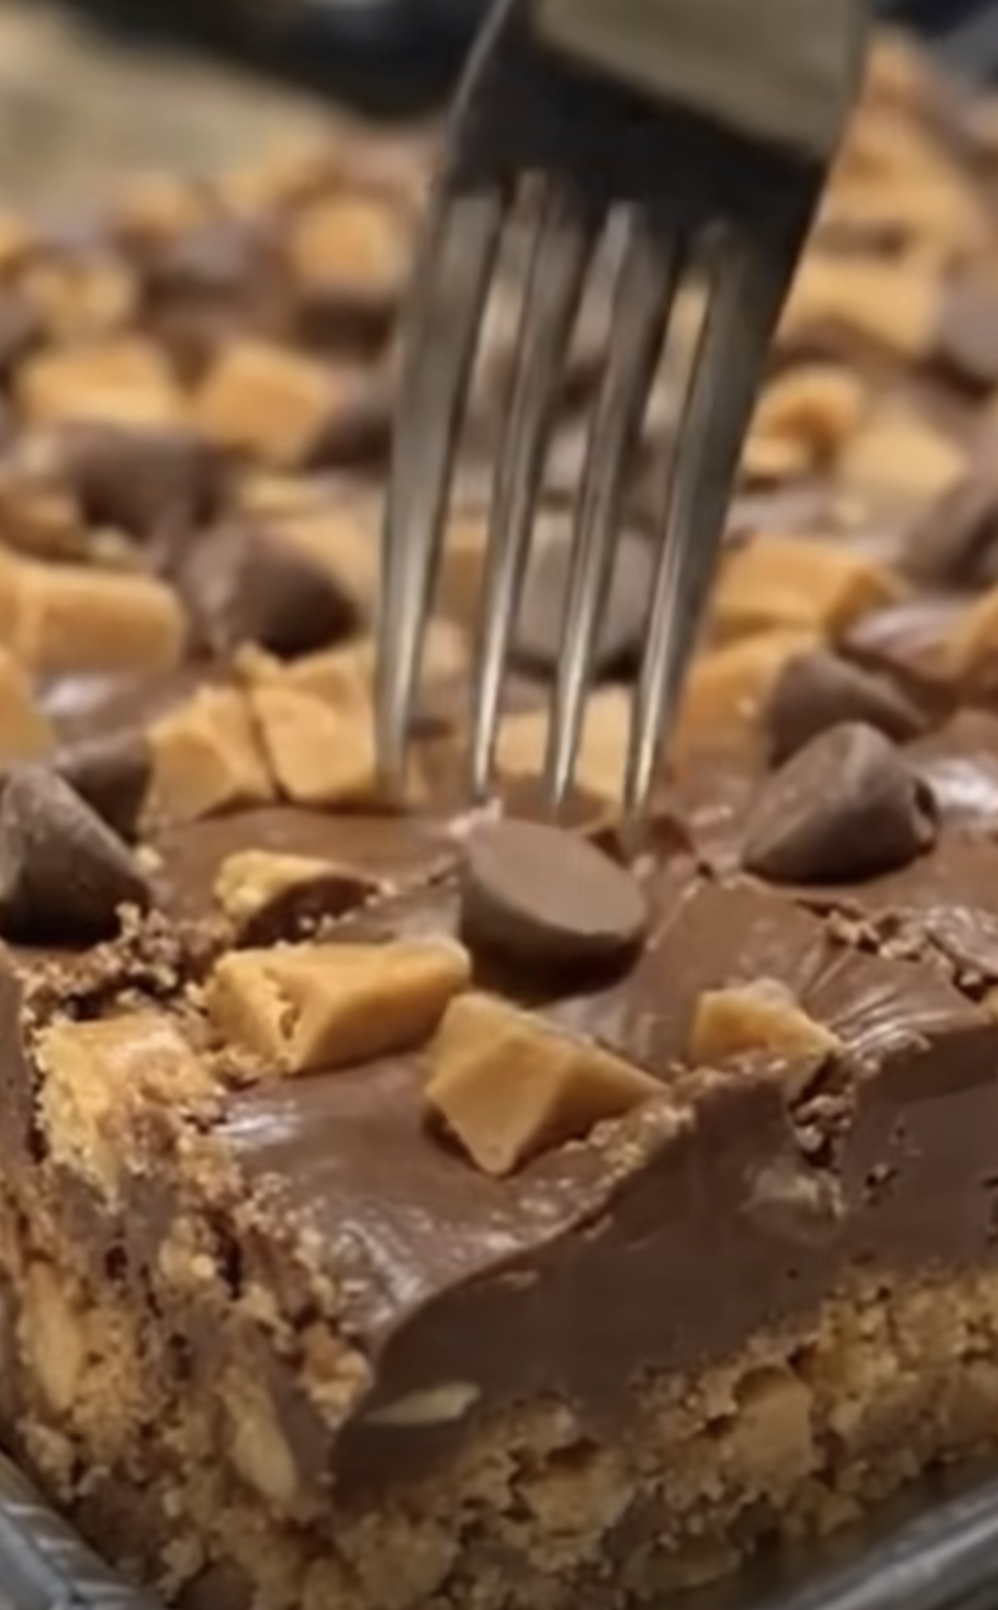
Easy & Creamy No-Bake Peanut Butter Bars combine everything you want in a simple homemade dessert: a rich peanut butter filling, buttery graham cracker crumbs, and a silky chocolate topping. Best of all, you never need to turn on the oven.
These bars come together with basic pantry ingredients and about 15 minutes of hands-on preparation. After that, the refrigerator does the work. The peanut butter base becomes firm yet creamy, while the chocolate-peanut butter layer sets into a smooth topping that slices beautifully.
Whether you need an easy party dessert, a make-ahead treat for a family gathering, or something sweet to keep in the refrigerator, Easy & Creamy No-Bake Peanut Butter Bars make an excellent choice. The classic chocolate and peanut butter combination also makes these bars difficult to resist.
The first time I made these bars, I needed a quick dessert for a casual family get-together and had no interest in heating the kitchen. I already had peanut butter, chocolate chips, and graham crackers in the pantry, so this recipe seemed perfect. I mixed the base, pressed it into the pan, and poured the warm chocolate topping over it. The hardest part was waiting for everything to chill. Once I sliced the first batch, everyone immediately reached for seconds. Since then, I have kept this recipe handy whenever I need an easy dessert that looks polished but requires very little work.
Why Easy & Creamy No-Bake Peanut Butter Bars Work So Well
The layers create the perfect texture
The secret to Easy & Creamy No-Bake Peanut Butter Bars lies in the contrast between their two simple layers. The bottom layer combines melted butter, graham cracker crumbs, powdered sugar, and creamy peanut butter. As a result, it has a soft, dense texture that resembles the center of a peanut butter candy.
Meanwhile, the graham cracker crumbs provide structure. Without them, the base would stay too soft for clean slicing. Powdered sugar also helps firm the mixture while adding sweetness without a grainy texture.
The melted butter binds everything together. Furthermore, it gives the bars a rich flavor and helps the chilled base hold its shape.
The top layer uses only semi-sweet chocolate chips and creamy peanut butter. Adding peanut butter to the chocolate does more than reinforce the flavor. It also keeps the chocolate layer softer after chilling. Therefore, the topping stays smooth and pleasant instead of turning into a hard shell that cracks when you cut it.
For the best results, use standard creamy peanut butter rather than a natural variety that separates heavily. Conventional creamy peanut butter provides predictable consistency, so the base stays firm and the topping remains smooth.
Why this dessert needs no oven
Many dessert bars rely on baking to create structure. However, Easy & Creamy No-Bake Peanut Butter Bars use ingredients that naturally firm as they cool.
The butter and peanut butter become more solid in the refrigerator. At the same time, the chocolate topping sets as its temperature drops. Consequently, two hours of chilling transforms the soft mixture into sturdy, sliceable bars.
This method makes the recipe especially convenient during warm weather. You can prepare an impressive chocolate dessert without heating the entire kitchen.
Additionally, you do not need to worry about overbaking or underbaking. Once you combine the ingredients thoroughly and press the base firmly into the pan, the refrigerator handles the rest.
Because the method is so straightforward, beginners can make these bars confidently. You also need no mixer, food processor, or complicated equipment if you start with prepared graham cracker crumbs.
How to Make Easy & Creamy No-Bake Peanut Butter Bars
Prepare and press the peanut butter layer
Start by lining a 9×13-inch baking pan with parchment paper. Leave enough parchment extending over two opposite sides to create handles. Later, you can use those handles to lift the entire chilled dessert from the pan.
Next, melt 1 cup of unsalted butter. Allow it to cool slightly so it remains warm but not extremely hot.
Add 2 cups graham cracker crumbs, 2 cups powdered sugar, 1 cup creamy peanut butter, and the melted butter to a large mixing bowl.
Stir everything thoroughly. At first, the mixture may appear loose in certain spots. However, continue stirring until no dry powdered sugar or graham cracker crumbs remain.
The finished mixture should feel thick, soft, and slightly sticky.
Transfer it to your prepared baking pan. Then spread it roughly across the surface before pressing it down firmly.
A flat-bottomed measuring cup works particularly well for this job. Press across the entire pan with steady pressure, paying special attention to the corners and edges.
An evenly compressed base creates Easy & Creamy No-Bake Peanut Butter Bars that hold together much better after slicing.
Add the smooth chocolate topping
Place 1 1/2 cups semi-sweet chocolate chips and 1/4 cup creamy peanut butter in a microwave-safe bowl.
Microwave the mixture for 20 to 30 seconds. Then remove the bowl and stir thoroughly.
Continue heating in short intervals and stirring after every interval. Because chocolate retains heat, stirring often helps remaining pieces melt without unnecessary additional microwave time.
Stop heating as soon as the mixture becomes smooth.
Overheated chocolate can become thick or grainy. Therefore, short intervals work much better than heating the chocolate continuously.
Pour the melted chocolate mixture over the prepared peanut butter base. Then use an offset spatula, silicone spatula, or the back of a spoon to spread it evenly from edge to edge.
Place the pan in the refrigerator for approximately 2 hours. The base should feel firm, and the chocolate layer should look completely set before you remove the bars.
Once chilled, use the parchment handles to lift the slab onto a cutting board.
Let it stand at room temperature for about 10 minutes before slicing. This short rest slightly softens the chocolate and makes cutting easier.
Tips for Perfect Easy & Creamy No-Bake Peanut Butter Bars
Get clean slices every time
Easy & Creamy No-Bake Peanut Butter Bars taste delicious regardless of how you cut them. However, a few simple techniques produce especially attractive squares.
First, avoid slicing them immediately after removing them from a very cold refrigerator. When chocolate gets extremely cold, it can crack under pressure.
Instead, leave the chilled slab at room temperature for about 10 minutes.
Next, use a large, sharp knife. Run the blade under warm water, and then wipe it completely dry before making a cut. The slight warmth helps the knife move smoothly through the chocolate.
Clean the blade between cuts. Otherwise, peanut butter filling can collect on the knife and smear across the chocolate surface.
For 16 generous portions, cut the slab into four rows in each direction. Alternatively, make 20 smaller bars when serving them alongside several other desserts.
Because these bars taste rich, smaller portions often work surprisingly well.
Also, avoid pressing the knife slowly through the bars with a sawing motion. Instead, make controlled downward cuts whenever possible.
Avoid these common mistakes
Although Easy & Creamy No-Bake Peanut Butter Bars require very little experience, several small details can improve your results.
Do not reduce the powdered sugar dramatically. Besides providing sweetness, powdered sugar contributes to the structure of the peanut butter base. Therefore, removing too much can create bars that remain excessively soft.
Similarly, measure the graham cracker crumbs accurately. Too few crumbs can make the filling greasy, while too many can produce a dry or crumbly texture.
Also, press the base firmly into the pan. A loosely packed base may break apart when you lift or slice the finished dessert.
When melting the chocolate, avoid overheating it. Short microwave intervals give you more control.
Furthermore, keep water away from the melted chocolate. Even a small amount can cause melted chocolate to seize.
Finally, give the bars enough chilling time. Although the dessert may look ready earlier, a full two hours allows the layers to become much easier to cut.
If your kitchen feels particularly warm, you can chill the bars a little longer.
Serving and Storing Easy & Creamy No-Bake Peanut Butter Bars
Serving ideas and simple variations
Easy & Creamy No-Bake Peanut Butter Bars already deliver plenty of flavor, so they require no garnish. Simply arrange the squares on a serving platter and enjoy them chilled or slightly softened.
However, you can make small adjustments when you want something different.
For example, sprinkle a small amount of flaky sea salt over the melted chocolate before chilling. The salt creates contrast with the sweet peanut butter filling and rich chocolate.
You can also scatter finely chopped roasted peanuts over the topping. They add crunch while reinforcing the peanut flavor.
For a darker chocolate flavor, replace some or all of the semi-sweet chocolate chips with dark chocolate chips. Conversely, milk chocolate creates a sweeter, milder topping.
You could also cut the finished slab into small bite-size squares for parties. Since the bars taste rich, miniature portions work especially well on dessert trays.
Serve them directly from the refrigerator for a firmer texture. Alternatively, allow each serving to rest for several minutes at room temperature for a softer, creamier bite.
Either way, the combination of buttery graham crackers, peanut butter, and chocolate stays satisfying.
Refrigerating and freezing the bars
Store Easy & Creamy No-Bake Peanut Butter Bars in an airtight container in the refrigerator for up to one week.
If you need to stack them, place parchment or wax paper between the layers. This barrier prevents the chocolate surfaces from sticking to neighboring bars.
You can also freeze them.
First, chill and slice the bars completely. Then arrange the pieces in a freezer-safe container with parchment between layers.
Alternatively, wrap individual bars before placing them inside a freezer bag or airtight container. Individual wrapping makes it easy to remove only the portions you need.
For the best texture, thaw frozen bars in the refrigerator before serving. Once thawed, let them stand briefly at room temperature if you prefer a softer peanut butter center.
Because the recipe stores so well, you can prepare it several days before parties, holidays, potlucks, or other gatherings.
That make-ahead convenience ranks among the biggest advantages of Easy & Creamy No-Bake Peanut Butter Bars.
Frequently Asked Questions
Can I use natural peanut butter?
You can, but standard creamy peanut butter produces more consistent results. Natural peanut butter can contain extra oil, which may make the base softer or greasier. If you use natural peanut butter, stir it extremely well before measuring.
Why are my no-bake peanut butter bars too soft?
Incorrect measurements, insufficient chilling, or very oily peanut butter can cause soft bars. Make sure you use the full amount of graham cracker crumbs and powdered sugar. Additionally, refrigerate Easy & Creamy No-Bake Peanut Butter Bars for at least two hours before slicing.
Can I make these bars ahead of time?
Yes. In fact, this recipe works extremely well as a make-ahead dessert. Prepare the bars one or two days before serving, cover them well, and keep them refrigerated until needed.
Can I freeze Easy & Creamy No-Bake Peanut Butter Bars?
Yes. Slice the chilled bars first, and then store them in a freezer-safe container with parchment between layers. Thaw them in the refrigerator before serving for the best consistency.
What chocolate works best for the topping?
Semi-sweet chocolate chips provide a balanced flavor because the peanut butter base already contains plenty of sweetness. However, you can use dark chocolate for a stronger cocoa flavor or milk chocolate for a sweeter result.
Conclusion
Easy & Creamy No-Bake Peanut Butter Bars prove that a memorable homemade dessert does not require complicated techniques or hours in the kitchen.
The graham cracker and peanut butter base tastes rich, buttery, and creamy. Meanwhile, the smooth chocolate-peanut butter topping adds just enough chocolate to balance every bite.
Preparation takes only about 15 minutes, and the refrigerator handles the rest. Therefore, this recipe works beautifully when you need something easy for a party, holiday tray, potluck, or family dessert.
Even better, Easy & Creamy No-Bake Peanut Butter Bars store well and freeze easily. You can prepare them ahead of time and keep a batch ready whenever you want a sweet treat.
Use creamy peanut butter, measure the ingredients carefully, press the base firmly, and melt the chocolate gently. Then give the bars enough time to chill.
With those simple steps, you will get smooth layers, clean slices, and a classic chocolate-peanut butter dessert without turning on the oven.