Looking for a vibrant way to brighten your home, entertain your kids, and unleash your creativity? These DIY melted bead suncatchers are an easy and delightful project that adds color and charm to any sunny window. Whether you’re decorating for spring, crafting with kids, or creating personalized gifts, these radiant suncatchers bring joy and beauty into any space.
Why You’ll Love This Craft
DIY melted bead suncatchers are not only beautiful but also incredibly fun to make. Here’s why this craft will quickly become a favorite:
- Simple and Accessible: All you need are pony beads and a few household items.
- Creative Freedom: Mix and match colors, use different shapes, and design your own patterns.
- Family-Friendly Fun: A great activity to do with kids, teaching color theory and pattern-making.
- Beautiful Results: The way sunlight streams through the melted beads creates dazzling rainbow reflections.
- Personal Touch: Makes lovely, homemade gifts that are both thoughtful and unique.
Whether you’re a seasoned crafter or just beginning, this project offers an easy entry into the world of DIY decor.
Ingredients (Materials You Need)
- Translucent plastic pony beads (assorted colors)
- Metal baking molds, muffin tins, or cookie cutters
These simple materials form the base of your project and are easy to find at any craft or dollar store.
Necessary Tools
- Oven (preheated to 400°F / 200°C)
- Drill or heated skewer (for making holes)
- Pliers (if using metal cookie cutters that need reshaping)
- String, ribbon, or wire (for hanging)
- Baking sheet lined with aluminum foil (to protect oven surface)
- Oven mitts and tongs (for safety when removing molds)
Customizations and Alternatives
You can make this craft truly your own by changing up the shapes, colors, and even materials:
- Shapes: Use heart-shaped cookie cutters for Valentine’s Day or stars for the holidays.
- Colors: Create themes such as ocean blues, sunset gradients, or rainbow bursts.
- Scented Beads: Try using aromatic plastic beads (if available) for a subtle scent.
- Glow-in-the-Dark: Add glow beads for a magical effect at night.
Let your imagination lead the way—each suncatcher is a miniature work of art.
Step-by-Step Instructions
1. Preheat the Oven
Set your oven to 400°F (200°C). Line a baking sheet with aluminum foil to catch any stray melting beads.
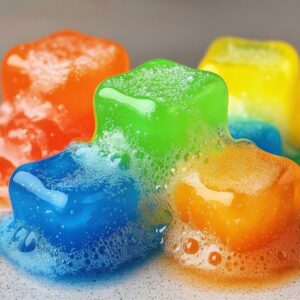
2. Arrange the Beads
Place your baking molds or cookie cutters on the foil-lined tray. Fill each one with a single layer of translucent pony beads. Arrange them in patterns or random assortments for different effects.
3. Bake the Beads
Carefully place the tray in the oven. Bake for 10–15 minutes, or until all beads have melted flat into one smooth surface. Watch them through the oven door to avoid overbaking.
4. Cool and Remove
Once melted, remove the tray from the oven using mitts. Let the molds cool completely before attempting to remove the suncatchers.
5. Create a Hanging Hole
Use a drill or heated skewer to make a hole near the top of the cooled piece. Be gentle to avoid cracking the plastic.
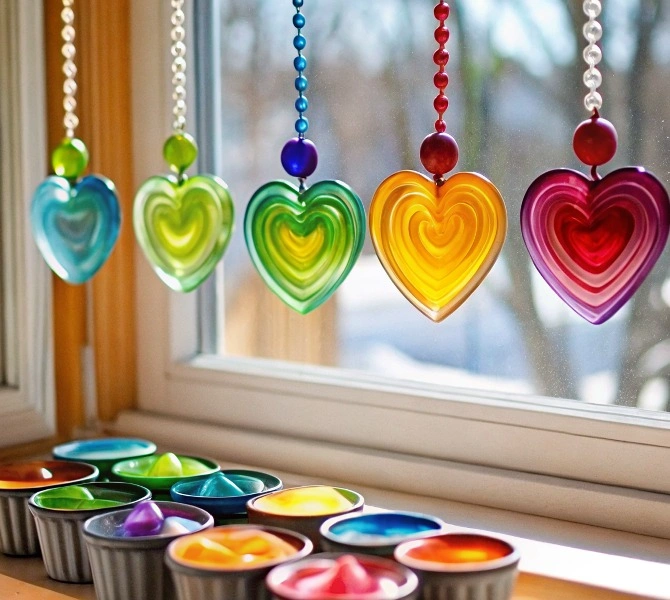
6. Add String and Hang
Thread a string or ribbon through the hole and hang your suncatcher in a sunny window. Watch the colors sparkle in the light!

Pro Tips for Perfect Suncatchers
- Ventilation is Key: Always melt beads in a well-ventilated area, preferably with windows open or a fan running.
- Even Layering: Avoid stacking beads, as uneven melting can create weak spots.
- Use Metal Molds: Plastic molds can melt—metal is safer and produces cleaner shapes.
- Watch Closely: Ovens vary; keep an eye on your suncatchers to prevent burning.
- Easy Release: Spray your molds lightly with nonstick spray to make removal easier.
Display Suggestions
There are endless creative ways to use your suncatchers:
- Hang them in windows to catch the morning sun.
- Attach them to garden stakes for outdoor color.
- Use them as ornaments on a tree or holiday wreath.
- Make a mobile with several suncatchers in different shapes.
- Create custom name tags for parties or gifts.
Storing and Reusing
While suncatchers don’t require reheating, they can be stored safely in a flat, dry container. Keep them out of direct heat sources to avoid warping. You can even re-melt old suncatchers to form new ones!

Nutritional Information
Since this is a non-edible craft, nutritional info isn’t applicable. However, here’s a “fun fact” breakdown:
- Creativity Boost: 100%
- Kid Enjoyment: 95%
- Parent Satisfaction: 90%
- Window Glam Factor: 110%
- Cost Efficiency: High
FAQs
Q1: Can I use regular plastic beads?
Only use translucent pony beads marked safe for melting. Other plastics may release harmful fumes.
Q2: How do I clean the molds afterward?
Soak in warm soapy water. If any residue remains, gently scrape it off.
Q3: Are these suncatchers weather-resistant?
They’re best kept indoors or under covered outdoor spaces.
Q4: Can I involve young children?
Yes! Let them arrange the beads, but adults should handle the oven and drilling steps.
Q5: What if I don’t have cookie cutters?
Use muffin tins or free-form your designs in metal rings.
Conclusion
Melted bead suncatchers are a colorful, joyful craft that brings instant happiness to any space. Easy to make, endlessly customizable, and perfect for all ages, they offer a fun way to decorate and express creativity. Try them with your kids, gift them to friends, or simply enjoy the sunshine they catch in your home.

Melted Bead Suncatchers
Ingredients
Method
- Preheat your oven to 400°F (200°C). Line a baking sheet with aluminum foil.
- Arrange baking molds or cookie cutters on the foil-lined tray. Fill each with a single layer of pony beads.
- Carefully place the tray in the oven and bake for 10–15 minutes until beads melt into a smooth surface.
- Watch closely to prevent overbaking.
- Remove the tray from the oven with mitts and let it cool completely.
- Use a drill or heated skewer to make a hole near the top of the suncatcher.
- Thread a string or ribbon through the hole and hang it in a sunny window.