
Before we dive into the details, thank you for being here! 💛 Whether you’re a crafty parent, a creative soul looking for your next afternoon project, or someone who just loves filling their home with light and color—this little DIY is for you. Glass Bead Suncatchers are a joyful mix of color, shine, and simple creativity. The best part? You don’t need fancy tools or artistic skills to make something beautiful.
Want more fun DIYs and crafts like this delivered right to your inbox? 📬
Subscribe now and never miss a chance to get crafty with me again!
What Is a Glass Bead Suncatcher?
A glass bead suncatcher is a sun-loving decoration made from transparent or colorful glass beads embedded in glue. When hung in a window, it catches sunlight and scatters brilliant patterns across your room. It’s like having a tiny piece of rainbow magic dancing around your space!
This craft is:
- Easy to make
- Budget-friendly
- Kid-safe (with adult supervision)
- A lovely addition to any window, porch, or garden nook
Why You’ll Love Making This
✨ It’s therapeutic! Watching the beads catch light while crafting is a mini escape from everyday stress.
🌈 Creative freedom – you can make it random or create patterns, play with colors, and even tell a story through your designs.
👩👧👦 Great for kids & adults alike – it’s a perfect craft to bond over.
🎁 Makes a beautiful gift – handmade and heartfelt. What’s better?
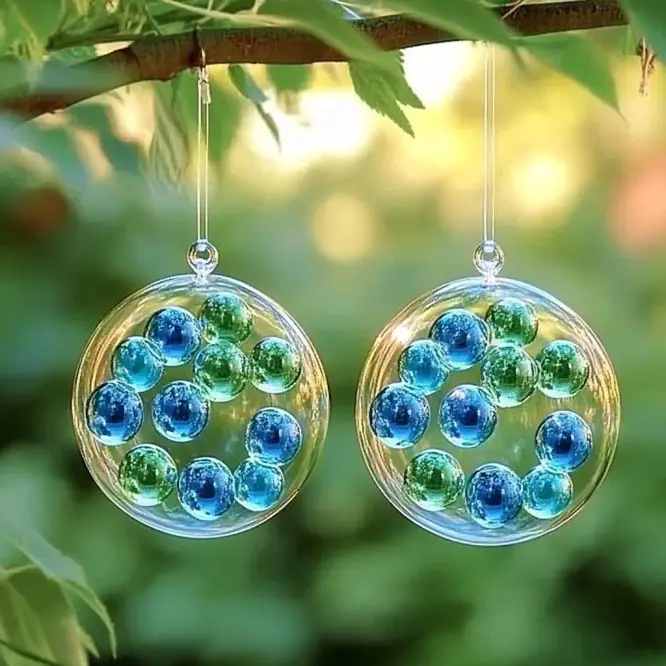
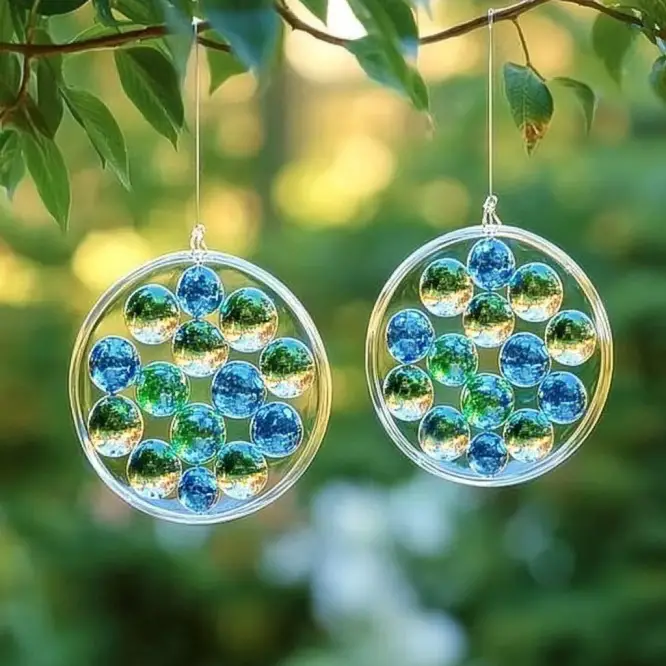
How It Looks & Feels
Picture this: a medallion of vibrant colors twinkling in your window, beads glowing like drops of sun-kissed glass. The clear glue turns slightly translucent, letting the light pass through the beads, casting gentle patterns that dance across your walls.
Honestly? It’s hard not to smile when you walk by one.
Materials You’ll Need
- Glass beads (flat-back, transparent, and colorful work best)
- Clear glue (school glue or craft glue that dries transparent)
- A plastic lid (from a yogurt or margarine container)
- Fishing line (or sturdy thread)
- A suction cup with a hook (for hanging in your window)
- Needle or push pin (to make the hanging hole)
Optional Additions & Variations
- Bead variety: Try faceted or iridescent beads for more sparkle.
- Colorful glue: Mix a drop or two of food coloring into your glue before spreading.
- Layered effect: Add a few glitter flakes for extra shimmer beneath the beads.
- Shapes: Use cookie cutters placed inside the lid as molds for custom shapes!
Step-by-Step Instructions
1. Prepare Your Base
Cover the bottom of a clean plastic lid with a generous layer of clear glue. You want enough to embed the beads fully, but not so much that it spills over the sides.
2. Add the Beads
Press your glass beads into the glue with the flat side down. This ensures the rounded tops will face out once it dries, catching and refracting sunlight beautifully.
Be random, or get fancy with patterns—hearts, spirals, initials… go wild!
3. Let It Dry Completely
Set the lid aside in a safe, undisturbed spot and allow it to dry for 4–5 days. Patience is key here! The glue needs to cure fully so it holds together when removed.
4. Remove from Lid
Once dry and firm, gently peel the suncatcher out of the lid. If it resists, carefully bend the lid slightly to release it.
5. Make a Hole
Use a needle or sharp pin to poke a small hole in a thinner part of the glued area, close to the edge. This will be where you hang it from.
6. Attach Fishing Line
Cut about 11 inches of fishing line, thread it through the hole, and tie a secure knot.
7. Hang It Up!
Attach the other end of the line to your suction cup with a hook, and hang it on a sunny window. Watch as your suncatcher transforms simple sunlight into a radiant display!
Pro Tips for Success
- Thicker glue = stronger suncatcher, but avoid overdoing it or it won’t dry properly.
- If glue seems cloudy, don’t worry—it usually clears up as it dries.
- Keep the drying area dust-free to avoid debris getting trapped in the glue.
Storage & Longevity
These suncatchers are surprisingly durable, but:
- Keep them indoors or under a sheltered patio to avoid weather damage.
- Store flat in a cool place if not in use.
- Clean gently with a soft cloth—no scrubbing needed!
FAQs
Can I use hot glue instead?
Not for this project! Hot glue sets too quickly and doesn’t provide the same clear, glassy finish once dry.
Is this safe for kids?
Yes—with adult supervision for the drying stage and needle-poking. It’s a fantastic craft for school-age kids and up!
What if the glue cracks?
This can happen if it’s peeled out too soon. Let it dry longer or use a slightly thicker glue next time.
Final Thoughts
There’s something truly magical about watching sunlight transform everyday craft supplies into glowing art. This Glass Bead Suncatcher is one of those simple, satisfying projects that brings lasting beauty into your home—and the process is half the joy.
So next time the sun is shining just right, why not catch a bit of it for yourself? 🌞
Show Off Your Shine! ✨
Did you make this? I’d LOVE to see it!
Share your suncatchers on Pinterest or tag me on Instagram. Bonus points if you catch that rainbow light in a photo 📸
Looking for More DIY Window Magic? Try These:
- Pressed Flower Sun Catchers
- Stained Glass Tissue Paper Craft
- CD Mosaic Window Art
Approximate Craft Cost (per suncatcher)
- Glass beads: $3
- Glue: $1
- Fishing line & suction cup: $1
- Total cost: ~$5
(Reusable materials not included in total)
Subscribe for more home & craft inspiration straight to your inbox! 💌
Thanks again for being here—now go chase some light!
Glass Bead Suncatcher
Ingredients
Method
- Cover the bottom of a clean plastic lid with a generous layer of clear glue.
- Press your glass beads into the glue with the flat side down.
- Set the lid aside in a safe, undisturbed spot and allow it to dry for 4–5 days.
- Once dry and firm, gently peel the suncatcher out of the lid.
- Use a needle or sharp pin to poke a small hole in a thinner part of the glued area.
- Cut about 11 inches of fishing line, thread it through the hole, and tie a secure knot.
- Attach the other end of the line to your suction cup with a hook, and hang it on a sunny window.


