Thank you for being here — truly. There’s something so special about choosing to spend time crafting, creating beauty with your hands, and bringing a little color into your world. Whether you’re planning a fun afternoon with the kids, prepping for a summer party, or simply craving a little creative magic, this DIY is going to light up your day — and your windows!
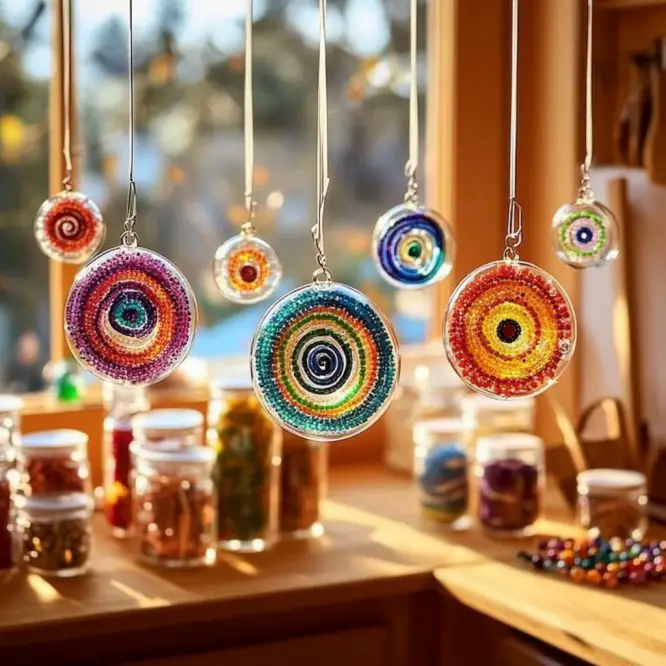
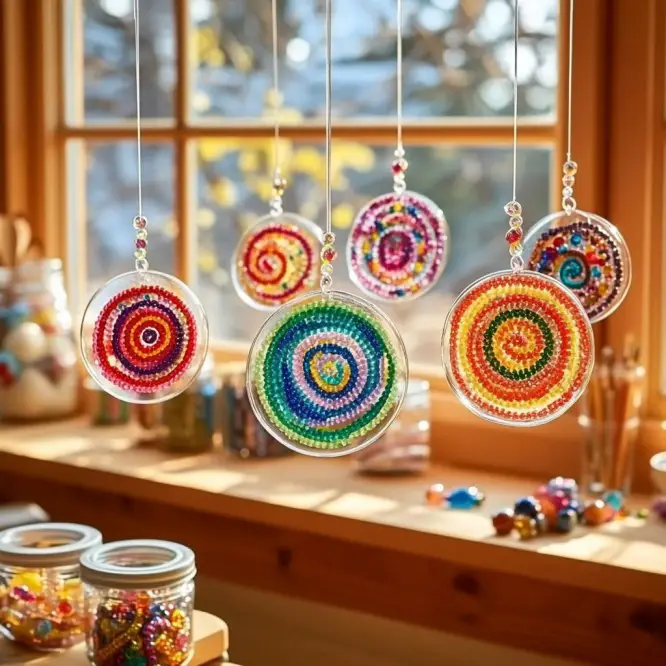
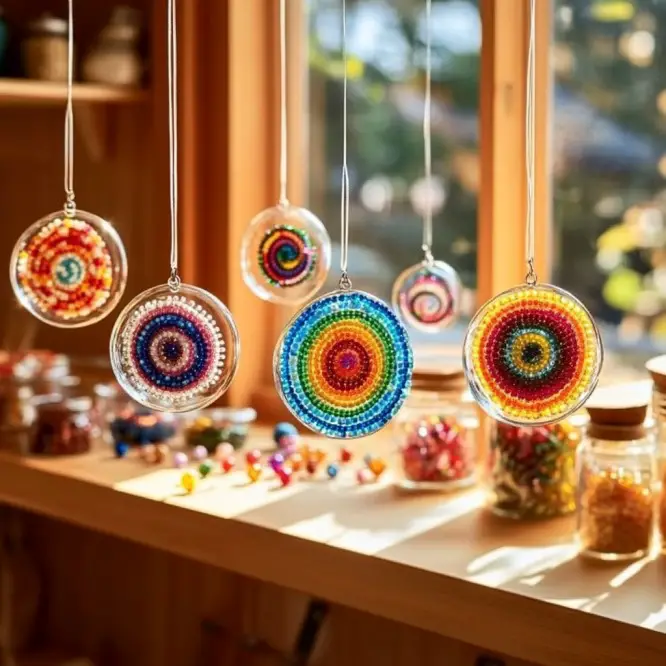
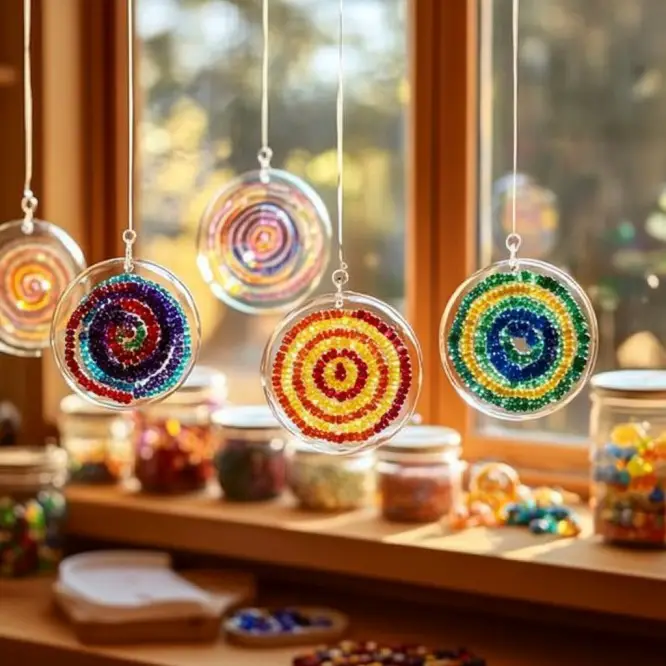
Let me introduce you to the Cool Beads Suncatcher — a vibrant, eye-catching project that transforms humble pony beads into glossy, glass-like art. These suncatchers are a total joy to make and even more fun to display. 🌈✨
💌 Want more DIYs like this delivered straight to your inbox? Be sure to subscribe to get my favorite crafts, recipes, and seasonal projects sent your way!
What Are Cool Beads Suncatchers?
These playful suncatchers are made by melting translucent plastic pony beads in metal molds until they fuse together. Once cooled and popped out, you’re left with colorful, light-catching discs that look like stained glass — only way more fun (and kid-friendly!).
Why You’ll Love This Craft
- Minimal prep, major payoff. A simple setup turns into vibrant window art.
- Perfect for all ages. Kids can safely design the layout, and adults can handle the oven part.
- Customizable. Every suncatcher is unique — from rainbows to galaxy swirls!
- Budget-friendly and mess-free. No glue, no paint, no problem!
What Do They Look Like?
Once cooled, the beads melt into one solid, smooth shape that looks almost like glass or candy. Hold it up to the light and you’ll see all the individual colors shine through like a kaleidoscope. With optional glitter or glow-in-the-dark beads, the effect gets even more magical!
Benefits of This Craft
- Encourages color recognition, pattern-making, and fine motor skills.
- Uses common craft supplies (and it’s a great way to use up extra beads).
- Creates beautiful decorations or gifts.
- Offers a fun way to safely explore melting and cooling science.
Materials You’ll Need
🧵 Supplies:
- Translucent plastic pony beads (assorted colors)
- Metal baking molds (muffin tins, cookie cutters, mason jar lids)
- Foil-lined baking sheet
- Nonstick spray (optional)
- String, fishing line, or ribbon for hanging
✨ Optional Extras:
- Glitter beads
- Glow-in-the-dark pony beads
Tools You’ll Want On Hand
- Oven-safe baking sheet
- Aluminum foil
- Oven mitts (safety first!)
- Drill or heated skewer (to make holes for hanging)
- Pliers or tweezers (for delicate removal, if needed)
Optional Add-Ins & Variations
- Use cookie cutters inside a muffin tin to create fun shapes like stars or hearts.
- Layer beads by color for a gradient or ombré effect.
- Add a message or name with letter beads (just be sure they melt well!).
Step-by-Step Instructions
Step 1: Prep Your Workspace
Line a baking sheet with foil and place your metal molds on top. Lightly spray with nonstick spray if you’d like easier release.
Step 2: Arrange Your Beads
Lay pony beads flat in a single layer inside each mold. Arrange them in patterns or scatter them randomly — just make sure they touch each other so they melt evenly.
Step 3: Preheat and Bake
Preheat your oven to 400°F (200°C). Place the tray in the oven and bake for 15–25 minutes, keeping a close watch. They’re ready when the beads are fully melted and smooth.
Step 4: Cool and Remove
Take the tray out and let the suncatchers cool for 15–20 minutes. Once fully cooled, gently pop them out of the molds.
Step 5: Make a Hanging Hole
Use a drill or heated skewer to carefully create a small hole near the edge. Thread ribbon or string through and get ready to hang!
What to Pair with This Craft
- Sunny windows for the full rainbow effect
- DIY stained glass paper art for younger kids
- A lemonade stand decorated with your new suncatchers!
Tips for Best Results
- Use only translucent beads for light-catching brilliance.
- Watch the oven closely to avoid browning or bubbling.
- Ventilate your kitchen — melting plastic can have a slight odor.
- Let kids design the patterns before baking, then step in for the oven work.
How to Store or Gift
- Wrap in tissue or tuck into a clear bag with ribbon for a handmade gift.
- Store flat in a box between layers of paper to prevent scratches.
- Use them as ornaments, sunlight charms, or even mobile pieces.
FAQs
Are these safe to make with kids?
Yes — kids can do the arranging and decorating! But adults should handle the oven and drilling.
What if I don’t have metal molds?
You can use mason jar lids, small oven-safe cookie cutters, or mini tart pans. Avoid plastic molds — they’ll melt!
Can I use solid-colored beads?
Yes, but only translucent beads give that stained-glass glow.
In a Nutshell
Cool Beads Suncatchers are the perfect blend of fun, color, and creativity. They’re easy to make, delightful to display, and bring instant joy to any sunny space. Whether you’re crafting with kids or just need a weekend project that sparks joy, this one’s an absolute win. ☀️
More Bright & Cheery Crafts You’ll Love:
💬 Share the Sunshine!
Did you make these suncatchers? I’d love to see your creations!
Tag me on Pinterest or Instagram, or leave a comment below with your favorite color combo!
☀️ Nutritional Info (Just for Fun)
Satisfaction: ✨Maximum✨
Sunshine: Unlimited
Thanks for spending time here with me — here’s to more color, more creativity, and more handmade magic in your day!
Cool Beads Suncatcher
Ingredients
Method
- Line a baking sheet with foil and place your metal molds on top. Lightly spray with nonstick spray if you'd like easier release.
- Lay pony beads flat in a single layer inside each mold, arranging them in patterns or randomly while ensuring they touch each other.
- Preheat your oven to 400°F (200°C).
- Place the tray in the oven and bake for 15–25 minutes, monitoring closely until the beads are fully melted and smooth.
- Once baked, remove the tray and let the suncatchers cool for 15–20 minutes before gently popping them out of the molds.
- Use a drill or heated skewer to create a small hole near the edge of each suncatcher, then thread with ribbon or string for hanging.


