Chocolate Chip Celebration Cake: A Sweet Delight for Every Occasion
Introduction
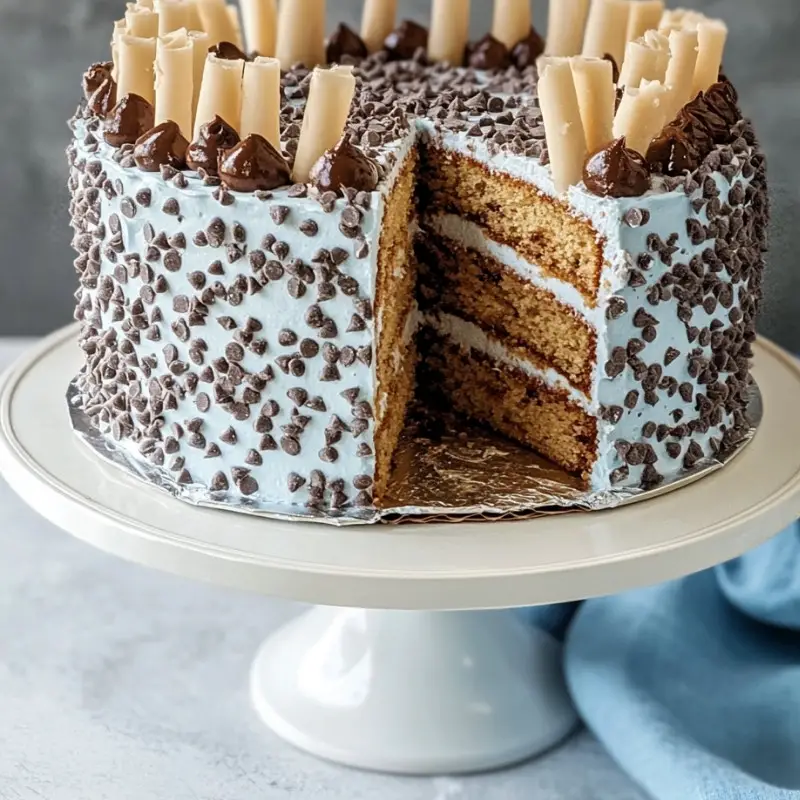
Welcome to a world of chocolatey indulgence with the Chocolate Chip Celebration Cake. This delightful concoction transforms the beloved chocolate chip cookie into a cake that’s perfect for every celebration. Imagine biting into a cake that’s both fluffy and rich with the nostalgia of a classic cookie. Whether it’s a birthday bash, an anniversary, or a simple get-together, this cake is destined to be the star. Don’t forget to subscribe to receive this and many more recipes right in your inbox!
Why You’ll Love This Recipe
This recipe is a dream come true for dessert lovers. The robust flavor of chocolate chips harmonizes perfectly with the moist, buttery cake. Not only is this treat flavorful, but it’s also incredibly easy to make. With simple steps and straightforward ingredients, it’s a family-friendly recipe that even beginners can master. Plus, it’s easy to customize for those looking to put their unique spin on a classic dessert.
Ingredients
– 2 1/4 cups all-purpose flour
– 1 teaspoon baking soda
– 1/2 teaspoon salt
– 1 cup unsalted butter, softened
– 1/2 cup granulated sugar
– 1 cup packed light brown sugar
– 2 large eggs
– 1 tablespoon pure vanilla extract
– 1 cup buttermilk
– 1 1/2 cups semisweet chocolate chips
Necessary Tools
– Two 9-inch round cake pans
– Medium mixing bowl
– Large mixing bowl
– Electric mixer
– Whisk
– Spatula
– Wire rack
Ingredient Swaps and Additions
Want to switch things up? Try substituting white chocolate chips or adding a handful of chopped nuts for a crunchy texture. For those seeking a deeper flavor, consider adding a tablespoon of espresso powder to the batter. You can also experiment with flavored extracts, such as almond or hazelnut, for a personalized touch.
Step-by-Step Instructions
1. Preheat your oven to 350°F (175°C). Grease and flour two 9-inch round cake pans.
2. In a medium bowl, whisk together flour, baking soda, and salt. Set aside.
3. In a large bowl, cream the butter, granulated sugar, and brown sugar with an electric mixer on medium speed until light and fluffy, about 3 minutes.
4. Add eggs one at a time, beating well after each addition. Mix in the vanilla extract.
5. Gradually add the dry ingredients to the butter mixture, alternating with the buttermilk, beginning and ending with the dry ingredients. Mix until just combined.
6. Fold in the chocolate chips.
7. Divide the batter evenly between the prepared cake pans and smooth the top with a spatula.
8. Bake for 25-30 minutes or until a toothpick inserted into the center comes out clean.
9. Let cakes cool in the pans for 10 minutes, then transfer to a wire rack to cool completely.
10. Frost and decorate as desired, and serve to your delighted guests.
Serving Suggestions
This cake pairs wonderfully with a dollop of whipped cream or a scoop of vanilla ice cream. For a festive touch, consider sprinkling some powdered sugar or drizzling chocolate ganache over the top.
Pro Tips for Success
– Make sure all your ingredients are at room temperature for a smoother batter.
– Don’t overmix the batter; this ensures a tender crumb.
– Use high-quality chocolate chips for the best flavor.
Storing and Reheating
Store leftovers in an airtight container at room temperature for up to three days. To enjoy a warm slice, reheat in the microwave for 10-15 seconds. If you wish to freeze the cake, wrap it tightly and store for up to two months.
FAQ Section
– *Can I make this cake in advance?
Yes, you can bake it a day ahead and frost it on the day of serving.
-Can I use dark chocolate chips
Absolutely, dark chocolate provides a more intense flavor.
Conclusion
This Chocolate Chip Celebration Cake is a delightful way to elevate any gathering with its rich flavors and easy preparation. We’d love to see how your cake turned out! Share your photos and tag us on Instagram or Pinterest.
Nutritional Information
Approximate nutrition per serving:
– Calories: 450
– Fat: 20g
– Carbohydrates: 60g
– Protein: 5g
Indulge in this deliciously simple recipe and celebrate every moment with a slice of joy.
Chocolate Chip Celebration Cake
Ingredients
Method
- Preheat your oven to 350°F (175°C). Grease and flour two 9-inch round cake pans.
- In a medium bowl, whisk together flour, baking soda, and salt. Set aside.
- In a large bowl, cream the butter, granulated sugar, and brown sugar with an electric mixer on medium speed until light and fluffy, about 3 minutes.
- Add eggs one at a time, beating well after each addition. Mix in the vanilla extract.
- Gradually add the dry ingredients to the butter mixture, alternating with the buttermilk, beginning and ending with the dry ingredients. Mix until just combined.
- Fold in the chocolate chips.
- Divide the batter evenly between the prepared cake pans and smooth the top with a spatula.
- Bake for 25-30 minutes or until a toothpick inserted into the center comes out clean.
- Let cakes cool in the pans for 10 minutes, then transfer to a wire rack to cool completely.
- Frost and decorate as desired, and serve to your delighted guests.