First of all—thank you so much for being here. If you’re a parent, caregiver, teacher, or just someone who loves sparking creativity in little ones, I’m thrilled to welcome you to today’s colorful DIY adventure: Bubble Painting Art for Kids! 🎨🫧
This project brings together the magic of bubbles and the beauty of paint in the most joyful way. It’s messy (in the best sense!), wildly fun, and results in truly one-of-a-kind artwork. You’ll be amazed by how simple materials can lead to such vibrant, textured masterpieces!
Want the printable version with bonus tips?
📩 Subscribe below to get this project delivered to your inbox, plus exclusive access to more hands-on crafts and recipes!
What Is Bubble Painting?
Bubble painting is an easy and exciting art activity where kids blow colored bubbles and capture their delicate shapes on paper. It’s perfect for toddlers, preschoolers, or elementary-aged children, and you don’t need any fancy tools—just soap, water, food coloring, and straws!
The result? Gorgeous swirls, pops, and textures that look like watercolors kissed by the wind. It’s sensory, it’s educational, and it’s seriously fun.
Why You’ll Love This Activity
- Creative Freedom – Kids can choose and mix their own colors.
- Easy Setup & Cleanup – Done with household items.
- Sensory-Rich Experience – Blowing, pressing, popping—it’s full of movement!
- No Artistic “Mistakes” – Every piece is uniquely beautiful.
- Great Group Activity – Ideal for classrooms, parties, or playdates.
What Does the Art Look Like?
Each print captures the fleeting magic of bubble domes as they burst—leaving behind lacy, organic patterns in soft or bold hues. Layering different colors creates a rainbow collage of abstract textures. Some look like dreamy clouds, others like tie-dye fireworks. There’s no wrong way to do it!
Benefits of Bubble Painting for Kids
- Enhances fine motor skills and oral motor control
- Sparks creativity and self-expression
- Encourages color mixing exploration
- Introduces early concepts of cause and effect
- Boosts confidence through art they can proudly display
Ingredients & Materials List
You’ll need:
- 2–3 tablespoons dish soap or tear-free baby wash (per color)
- ¼ cup water (per color)
- A few drops of liquid watercolors or food coloring (per color)
- Plastic cups or small bowls (one for each color)
- Straws (one per color – reusable or disposable)
- Heavyweight paper (watercolor paper or cardstock works best)
- Optional: Aprons or old T-shirts for mess protection
Tools & Workspace Prep
- Flat surface (covered with newspaper or plastic if needed)
- Drying area for artwork (a flat surface away from foot traffic)
- Paper towels or wipes for quick cleanup
- Trash bin nearby for used straws
Colorful Variations & Add-ins
🎨 Add glitter to the bubble solution for sparkly prints.
🎨 Try metallic or neon food coloring for a futuristic look.
🎨 Use different sizes of straws to vary bubble textures.
🎨 Let kids draw over their dried art to add characters or shapes!
How to Make Bubble Art: Step-by-Step Instructions
Step 1: Set the Scene
Gather all your ingredients. Protect your workspace and your little artist’s clothes with aprons or old shirts.
Step 2: Mix Your Colors
In each cup or bowl, mix:
- 2–3 tbsp dish soap or baby wash
- ¼ cup water
- A few drops of liquid watercolor or food coloring
Stir gently so the solution doesn’t get too foamy.
Step 3: Blow the Bubbles
Place a straw in one color mix. Have your child blow through the straw (not suck!) to create a dome of bubbles that rises above the cup’s rim. This is where the magic starts!
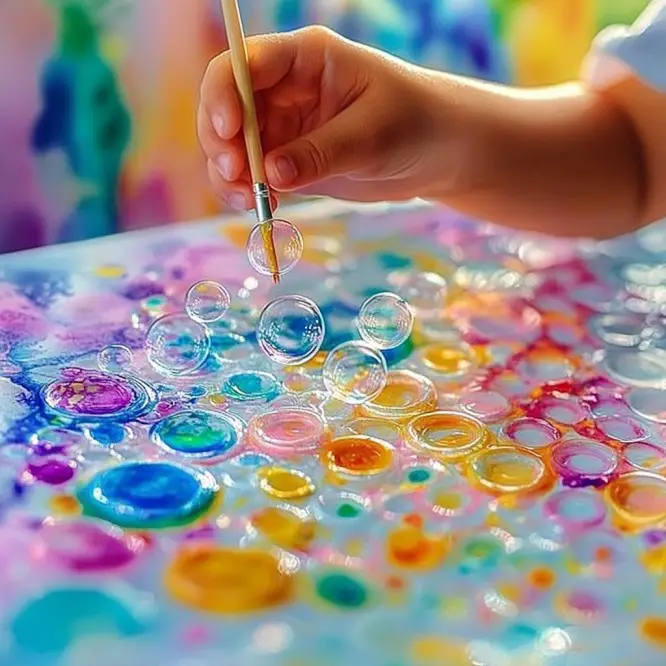
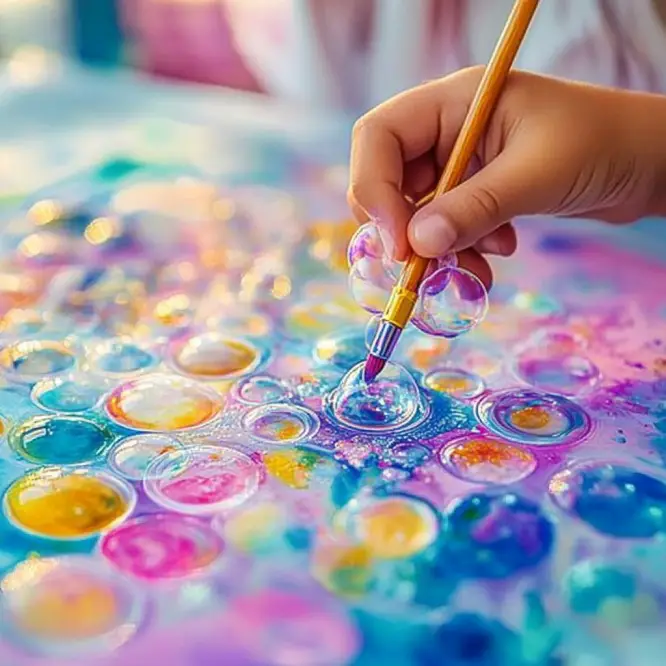
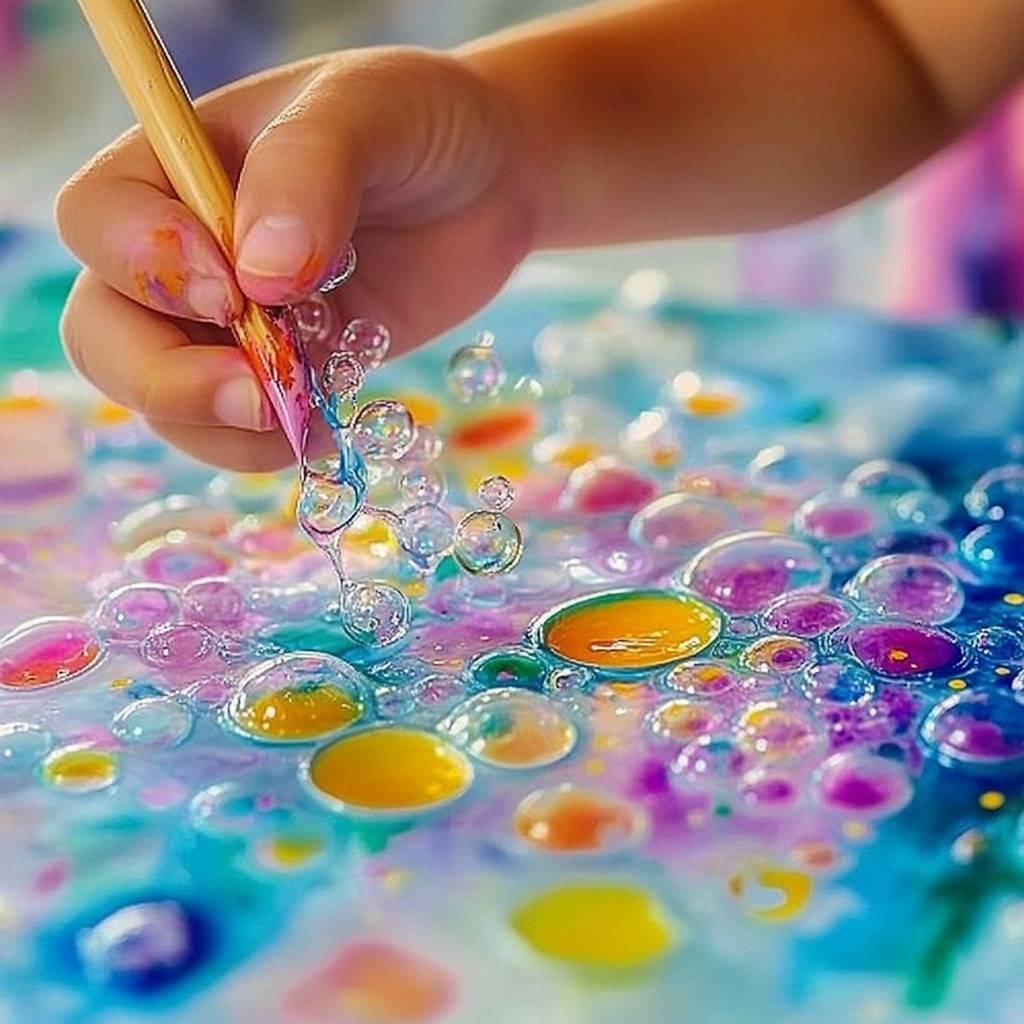
Step 4: Make the Print
Take a piece of heavyweight paper and gently press it down onto the bubbles. Hold for a second, then lift it straight up. You’ll see bubble outlines and color patterns left behind!
Step 5: Repeat & Layer
Use different colors and areas of the paper to layer more bubble prints. The more layers, the more dreamy the effect!
Step 6: Let It Dry
Lay the paper flat and let it dry fully. Try not to stack papers until they’re completely dry to prevent smudging.
What to Do With the Finished Art
- Frame it for your kid’s bedroom wall
- Cut into shapes for greeting cards or bookmarks
- Use as wrapping paper for small gifts
- Turn into a collage or scrapbook page
- Gift to grandparents or teachers!
Tips for Success
- Use heavyweight paper so it won’t curl from moisture.
- Test the color strength—you can always add more coloring if needed.
- Monitor younger kids closely to ensure they blow and not sip the solution.
- Make it a game—who can make the biggest bubble dome?
Storage Instructions
Once dry, the artwork can be:
- Stored flat in a portfolio or folder
- Laminated to preserve the designs
- Hung using clips or washi tape
If you’re saving leftover bubble mixtures, cover and refrigerate. Stir before reusing, but note they may lose bubble power over time.
Frequently Asked Questions (FAQ)
Can you use regular food coloring instead of liquid watercolors?
Absolutely! Food coloring works great—just be aware it may stain clothing or skin.
Is bubble painting safe for toddlers?
Yes, as long as you’re using tear-free baby wash or gentle dish soap and supervising them while they blow.
What kind of paper is best?
Watercolor paper is ideal, but thick cardstock works beautifully too. Avoid printer paper—it gets soggy!
Can I use reusable straws?
You sure can! Just rinse them out between uses and keep one per color to avoid muddy mixtures.
Conclusion: Pop Into a World of Color
There’s something truly magical about this Bubble Painting Art for Kids project—it’s equal parts science, sensory play, and creative expression. Whether it’s your child’s first piece of abstract art or their fiftieth, this activity is bound to bring color, laughter, and maybe even a few proud tears (from you, not them 😉).
So grab those straws and let’s get bubbly! 💜💙💛
Want More Creative Kid Projects?
Subscribe now and I’ll send DIY ideas straight to your inbox—think homemade play dough, fizzy bath bombs, and more rainbow fun!
And don’t forget to 📌 share your bubble masterpieces on Pinterest and tag me. I love seeing your colorful creations!
🧼 Nutritional Information
None! (Unless you count the nourishment of imagination.) 😄
Reminder: Don’t drink the bubble mix, even if it looks like cotton candy!
Other Art Projects You’ll Love:
- [Shaving Cream Marbled Paper DIY]
- [Salt Dough Handprint Keepsakes]
- [DIY Puffy Paint for Kids]
- [Rainbow Spin Art with a Salad Spinner]

Bubble Painting Art
Ingredients
Method
- Gather all your ingredients and supplies.
- Protect your workspace with newspaper or plastic and have aprons ready for the kids.
- In each cup or bowl, mix 2-3 tablespoons of dish soap or baby wash, ¼ cup of water, and a few drops of liquid watercolor or food coloring. Stir gently.
- Place a straw in one color mix and have your child blow through the straw to create a dome of bubbles.
- Gently press a piece of heavyweight paper down onto the bubbles. Hold for a second and then lift it to see the bubble outlines and color patterns.
- Use different colors and areas of paper to layer more bubble prints. The more layers, the more texture you'll have.
- Lay the paper flat to dry fully. Try not to stack until completely dry to avoid smudging.


