Before we dive into the dreamy shimmer of this craft, let me say—thank you for stopping by! Whether you’re looking for a soothing rainy-day project, a fun way to reuse old crayons, or a colorful addition to your windows, this DIY is going to spark so much joy. There’s just something magical about watching light dance through handmade suncatchers, especially when they mimic the beauty of falling rain.
Today, we’re making Blue Crayon Raindrop Suncatchers—a wonderfully creative and mess-friendly activity that uses simple household items to make something truly beautiful. These little drops of color are perfect for window displays, classroom projects, or even spring-themed décor.
💌 Want more seasonal DIYs and calming crafts like this? Subscribe here and get sunshine-filled inspiration delivered straight to your inbox!
What Are Blue Crayon Raindrop Suncatchers?
This charming craft involves melting blue crayon shavings between waxed paper sheets with a warm iron, then cutting out raindrop shapes to hang in your window. The result? Translucent, one-of-a-kind suncatchers that glow with layered color whenever sunlight streams through.
They’re easy enough for kids to help with (with adult supervision for the ironing), and they’re a fantastic way to repurpose crayon bits that might otherwise be tossed out!
Why You’ll Love This Craft
☀️ Captures sunlight beautifully
♻️ Eco-friendly & upcycled (hello, crayon stubs!)
🎨 Totally customizable in shape and color
👨👩👧 Great for family craft time or classroom projects
🌈 Perfect introduction to color blending and texture play
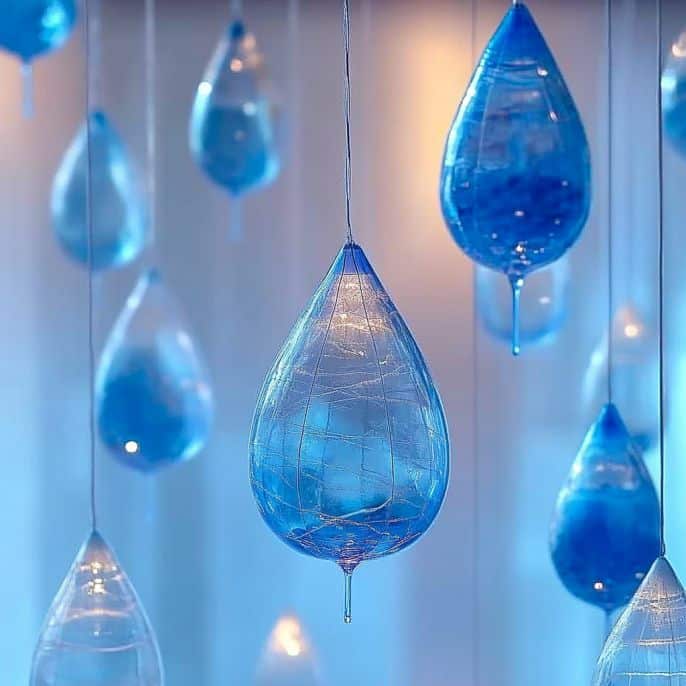
What It Looks Like
Imagine raindrops glowing in your window—swirls of navy, turquoise, and powder blue shimmering like water catching the sun. Each one is a unique blend of color, light, and soft, melted waxy texture. They’re light enough to sway gently in the breeze and strong enough to hang for weeks without fading.
Benefits of This Craft
🧠 Teaches color mixing and texture transformation
🧼 Low-mess, quick-drying, and minimal materials
🌞 Doubles as interactive window art
🎁 Can be made into gifts or classroom decorations
💧 Beautiful for spring, rainy day, or weather-themed units
Ingredients & Supplies
🎨 Materials:
Blue crayons (different shades work best)
Pencil or crayon sharpener
Waxed paper
Iron (for adult use only)
Scissors
Embroidery floss or string
🧰 Optional:
Hole punch
Templates for raindrop shapes
Crayon colors for rainbow or weather-themed versions
Optional Variations & Creative Add-Ons
🌈 Use multiple crayon colors to create rainbow drops
✨ Add a sprinkle of fine glitter before melting for sparkle
🌦 Pair with cotton clouds at the top of your window for a full rainy-day scene
💜 Try different shapes like hearts, stars, or lightning bolts!
How to Make Blue Crayon Raindrop Suncatchers
💧 Step-by-Step Instructions:
Choose & Prepare Crayons
Pick out several blue crayons in various shades. Peel off the wrappers.Make Crayon Shavings
Use a pencil sharpener to shave crayons into small pieces. Aim for a mix of fine and chunky bits for texture. Spread the shavings evenly on a piece of waxed paper.Cover & Prep for Melting
Lay a second piece of waxed paper over the top to sandwich the shavings. Place the paper on a towel or heat-safe surface.Melt the Shavings (ADULT ONLY)
Set the iron to low. Lightly press it on top of the wax paper for 10–20 seconds. Watch closely as the shavings melt and swirl! Avoid overheating.Cool Completely
Remove the iron and let the wax paper cool flat. This takes just a minute or two, but the transformation is worth the wait!Cut Out Raindrops
Use a template or draw freehand raindrop shapes on the cooled sheet. Cut them out with scissors.Add Hanging String
Use a hole punch or scissors to make a small hole at the top of each raindrop. Thread through embroidery floss or string and knot.Display in a Sunny Window
Hang your raindrops individually or in a vertical row. Watch how the light brings them to life!
What to Pair It With
Make it a full rainy day craft session with:
🎵 Rain-themed music or soundscapes in the background
📚 Books like “Raindrop Plop!” or “Come On, Rain!”
🌧 DIY paper clouds or cotton-ball mobiles
🎨 Additional weather-themed crafts like paper plate suns or rainbow wind spinners
Tips for the Best Suncatchers
Use different shades of blue to add depth
Avoid thick wax clumps—they take longer to melt evenly
Always have an adult handle the iron
Let kids help with shaving, arranging, and cutting
Use clear string for a floating effect!
Storage & Longevity
Hang indoors in a dry, sunny window
If stored, place between sheets of parchment or in a folder
These can last weeks or even months with minimal fading
Frequently Asked Questions (FAQ)
Q: Can I use parchment paper instead of wax paper?
A: No—parchment won’t fuse like waxed paper. You need the wax for the melting effect.
Q: Do I need to use multiple crayon shades?
A: Not at all, but using varied blues creates a more dimensional, watery look.
Q: What kind of iron setting should I use?
A: Use the lowest setting, no steam. You want just enough heat to melt the wax without burning the paper.
Q: Can I use this craft in a classroom?
A: Yes! Just do the melting step in batches with a helper, and let kids cut and decorate their own drops.
Final Thoughts – Let the Light Shine Through 🌤💙
There’s something special about watching your own handcrafted art come to life in the sunlight. These Blue Crayon Raindrop Suncatchers are simple, stunning, and packed with creativity. Whether it’s a rainy day outside or just a cozy afternoon inside, this is the perfect project to brighten your windows and your mood.
📸 Tried it? Show me your suncatchers!
Tag me on Pinterest or share your version in the comments—I love seeing how your creativity shines through!
More Crafts to Brighten Your Day
Nutritional Info
💙 Not edible—but fully nourishing for creativity, joy, and imagination.
👉 Want more crafty sunshine in your life?
Join my mailing list here and never miss a creative idea again!
Let’s keep catching the light—one raindrop at a time!

Blue Crayon Raindrop Suncatchers
Equipment
- pencil sharpener
- Waxed paper
- Iron For adult use only.
- scissors
- embroidery floss or string
Materials
- Blue crayons
- Pencil or crayon sharpener
- Waxed paper
- Iron (for adult use only)
- Scissors
- Embroidery floss or string
Instructions
- Choose your crayons: Start by selecting your favorite shades of blue crayons and remove the wrappers.
- Create shavings: Use a pencil sharpener to shave the crayons into small pieces. Spread the shavings out on a sheet of waxed paper.
- Prepare for melting: Take a second sheet of waxed paper and cover the crayon shavings with it.
- Melt the shavings: Set your iron to its lowest setting. Carefully iron the top sheet of waxed paper, watching as the crayon shavings melt together into a colorful sheet. Heat for about 10–20 seconds, or until the crayons fully melt.
- Cool off: Remove the iron and carefully let the melted wax cool completely on a flat surface.
- Cut out raindrops: Once cooled, draw raindrop shapes on the wax and cut them out with scissors.
- Add hanging element: Make a small hole at the top of each raindrop shape using the scissors or a hole punch. Thread a piece of embroidery floss or string through and tie a knot.
- Display your suncatchers: Hang your beautiful raindrop suncatchers in a sunny window to enjoy the vibrant colors shining through.


