Before we get into the glow and gleam of today’s craft, I just want to say—thank you for being here. Whether you’re a fellow DIY devotee, a parent hunting for a weekend activity, or a teacher bringing science to life in your classroom, I’m genuinely so glad you stopped by. This project isn’t just beautiful—it’s eco-conscious, hands-on, and seriously satisfying.
Today, we’re making Bioplastic Suncatchers—an earth-friendly twist on a classic window decoration. They’re colorful, translucent, and best of all, they’re made from natural, compostable ingredients! It’s a craft-meets-science experience that’s perfect for curious minds and sustainable souls alike.
👉 Want this recipe delivered straight to your inbox? Subscribe below to get the printable version plus extra tips for customizing your suncatchers by season!
What Are Bioplastic Suncatchers?
Bioplastic suncatchers are window decorations made from a natural polymer mixture—cornstarch, vinegar, water, and glycerin—that hardens into a firm, flexible sheet as it dries. Once dried, you can cut them into any shape and stick them to windows to let sunlight pour through in brilliant color.
They’re translucent, lightweight, and biodegradable, making them a perfect green craft for all ages.
Why You’ll Fall in Love With This Craft
🌿 Eco-friendly: Made from natural, compostable materials
✨ Customizable: Add color, glitter, or shape them however you want
🧪 STEAM-friendly: A hands-on science experiment and craft in one
🎨 Perfect for all ages: Safe, simple, and fun for kids and adults
🌞 Beautiful and functional: They catch the light so beautifully!
What They Look and Feel Like
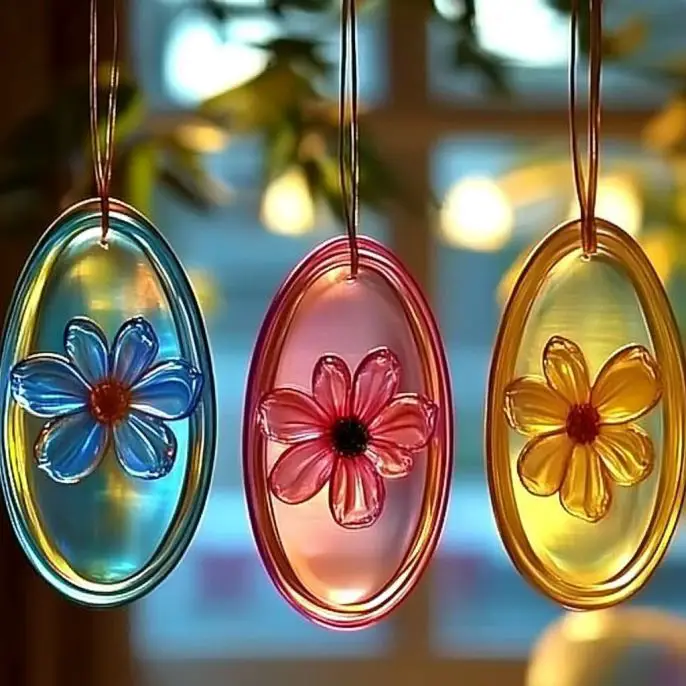
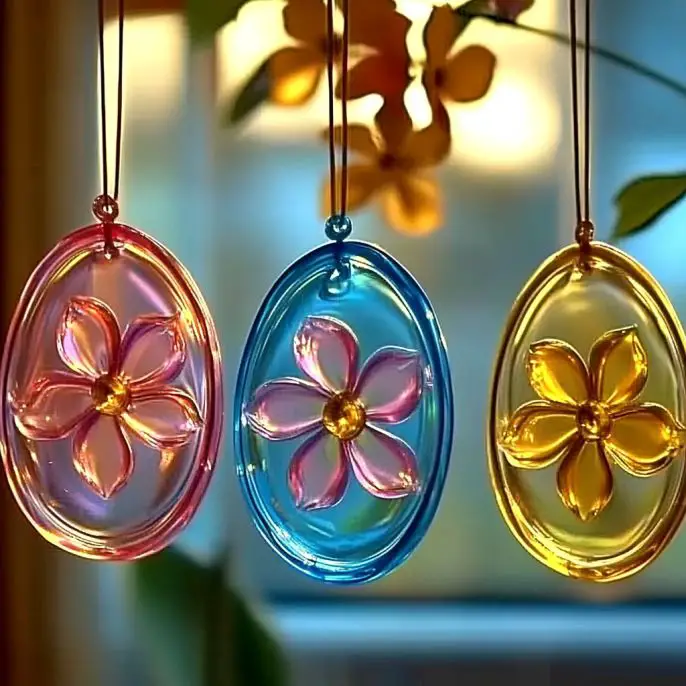
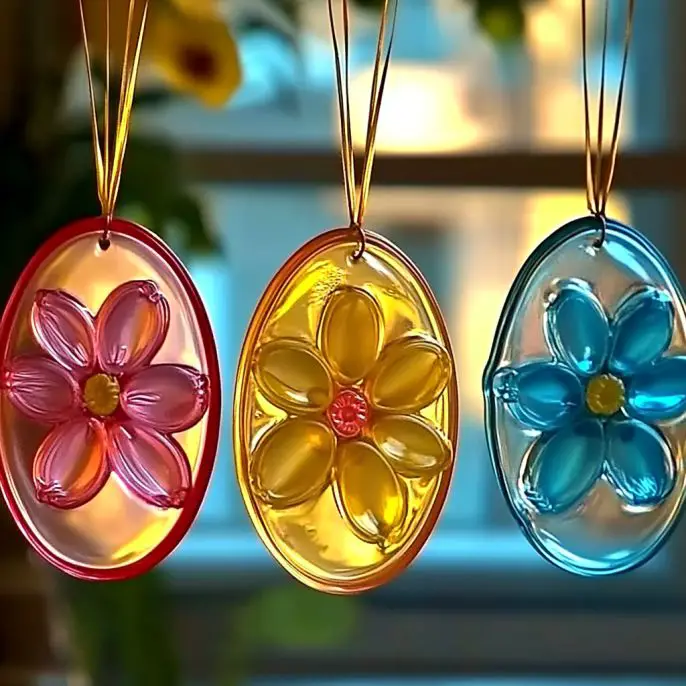
Once dry, these suncatchers resemble thin pieces of stained glass or glossy gelatin. They’re slightly flexible, smooth to the touch, and can be cut into shapes like stars, hearts, flowers—or just left in their abstract, natural form.
Depending on how thick you spread your mixture, they range from semi-transparent to nearly clear, with a glossy finish that really comes alive in the sunlight.
Benefits of Making Bioplastic Suncatchers
Teaches kids about sustainability and biodegradable materials
Encourages creativity and artistic expression
Promotes scientific thinking through observation and experimentation
Offers a mindful activity that blends art and science beautifully
Zero waste—and no plastic guilt!
Bioplastic Suncatchers
Ingredients
Equipment
Method
- In a non-stick saucepan, combine 1/2 cup cornstarch, 1/2 cup water, 1 tbsp vinegar, and 1 tbsp glycerin. Stir until fully blended.
- Place the pan over medium heat. Stir continuously for 5–7 minutes until the mixture thickens into a gel-like paste.
- Remove from heat and stir in food coloring or natural dye. Divide and color separately if using multiple shades.
- Pour or spoon the mixture onto wax paper, silicone mat, or mold. Spread into a thin layer with a spoon or craft stick.
- While wet, decorate with glitter or small embellishments. Swirl in second colors if desired for a marbled effect.
- Let dry for 24–48 hours. When it’s dry, glossy, and no longer sticky, it’s ready.
- Peel from the surface. Cut into shapes with scissors or craft punches as desired.
- Stick to a sunny window with tape or suction hooks. Enjoy your eco-glow!
Notes
Ingredients & Materials
You’ll Need:
1/2 cup cornstarch
1/2 cup water
1 tablespoon white vinegar
1 tablespoon glycerin (vegetable glycerin works great)
Food coloring (optional, for color)
Wax paper or plastic sheet (for molding)
Spoon or craft stick (for stirring and spreading)
Saucepan
Small mold or cookie cutters (optional, for shaping)
Tools You Might Want On Hand
A non-stick saucepan (or one you don’t mind reserving for crafts)
Measuring spoons and cups
Scissors (for cutting shapes after drying)
A light source or sunny window for charging and displaying
Biodegradable glitter (if you’re going glam!)
Optional Add-Ins & Substitutions
Natural dyes (like beet juice or turmeric) instead of food coloring
Essential oils for a subtle scent (lavender and lemon are lovely!)
Biodegradable glitter or pressed flowers for added texture and beauty
Acrylic or silicone molds for extra-precise shapes
How to Make Bioplastic Suncatchers (Step-by-Step)
Step 1: Mix It All Together
In your saucepan, combine:
½ cup cornstarch
½ cup water
1 tablespoon vinegar
1 tablespoon glycerin
Stir until everything is fully blended.
Step 2: Heat It Up
Place your pan over medium heat. Stir continuously—within 5 to 7 minutes, it will thicken into a gel-like paste. Don’t stop stirring or it may clump!
Step 3: Add Color (Optional)
Once thickened, remove from heat. Stir in a few drops of food coloring or natural dye. Divide the mixture if you want to create multiple colors.
Step 4: Mold or Pour
Carefully pour the mixture onto wax paper, a silicone mat, or a plastic sheet. You can also spoon it into molds. For a flat suncatcher, spread it into a thin layer with your spoon or stick.
💡 The thinner it is, the more translucent it will become!
Step 5: Decorate & Customize
While still wet, sprinkle on glitter or press in tiny embellishments. You can also swirl two colors together for a marbled look!
Step 6: Let It Dry
Leave your suncatcher to dry for 24–48 hours. Dry time will vary depending on how thick your layer is. When it’s no longer sticky and feels firm, it’s ready.
Step 7: Peel & Cut
Carefully peel the dried bioplastic off your surface. Use scissors or craft punches to cut shapes if you’d like.
Step 8: Display!
Stick to a sunny window using double-sided tape or suction hooks. Let the light do its magic ✨

What to Pair It With
These suncatchers go great with:
Easy-Peasy Glue Suncatchers for a material comparison activity
Nature Walk Crafts—press leaves or petals into your bioplastic!
DIY Recycled Paper Crafts for an all-natural art session
STEAM Science Journals—kids can record how their suncatchers change over time
Tips for Best Results
Use a nonstick surface—wax paper or silicone mats work best.
If the bioplastic starts setting too quickly, reheat gently with a splash of water.
Avoid overly thick layers, which can crack while drying.
Want a glossy finish? Press with parchment while drying.
To add a hanging hole, poke it in while still soft or use a hole punch after drying.
Storage & Longevity
Store your finished suncatchers in a dry, cool place. Over time, they may become more brittle—especially in humid conditions—but they hold up beautifully for weeks or months in the right environment.
If you want to compost them later, just break them up and toss into your green bin!
Frequently Asked Questions
Are bioplastic suncatchers waterproof?
Not fully—moisture can soften them, so avoid displaying outdoors or near humid windows.
Can I make these without glycerin?
Glycerin helps add flexibility. Without it, the bioplastic may be brittle, but you can still try it! You may need to adjust your dry time and thickness.
Is this safe for kids to make?
Yes! All ingredients are non-toxic, but adult supervision is recommended due to the heating step.
Can I make these in advance?
Absolutely. Make and store them flat in a dry container until you’re ready to use them.
In Conclusion
These Bioplastic Suncatchers are a beautiful reminder that art and science belong together—and they can be sustainable, too. Whether you’re teaching about polymers, celebrating Earth Day, or just craving a weekend project that makes your windows sparkle, this is a craft that gives back in every way.
More Eco-Friendly Crafts You’ll Love
DIY Cloud Dough
Swirl Glowing Bounce Ball
Pressed Flower Bookmarks
Recycled Paper Seed Bombs
Share Your Sunshine!
Tried this project? I’d love to see what you created! Share your photos on Pinterest or Instagram using #BioplasticSuncatcher and inspire others to craft greener. Leave a comment below and tell me how yours turned out!
Nutritional Info
😂 None needed—this beauty is for your windows, not your plate. But hey, it is made from pantry ingredients!
Thanks again for joining me in this bright, biodegradable adventure! Until next time, keep crafting with heart and living light 🌿✨


