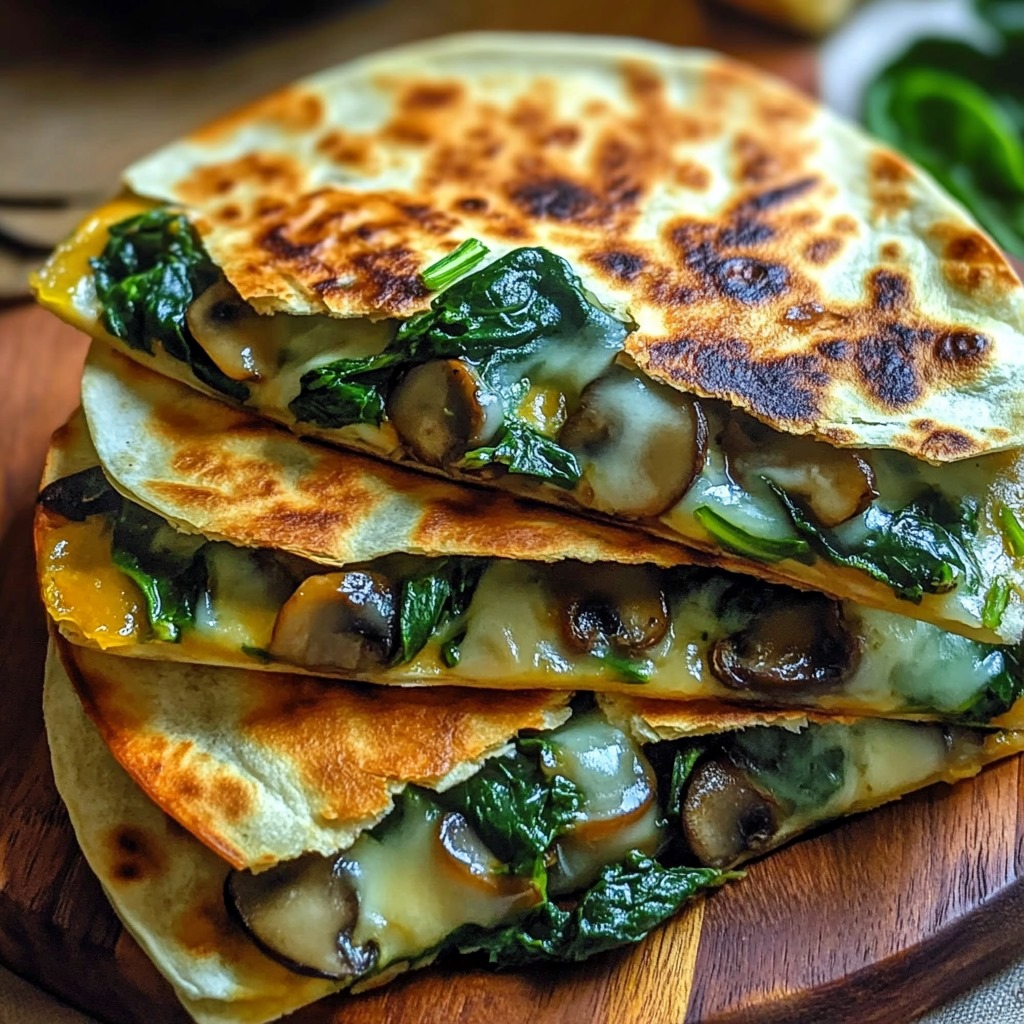
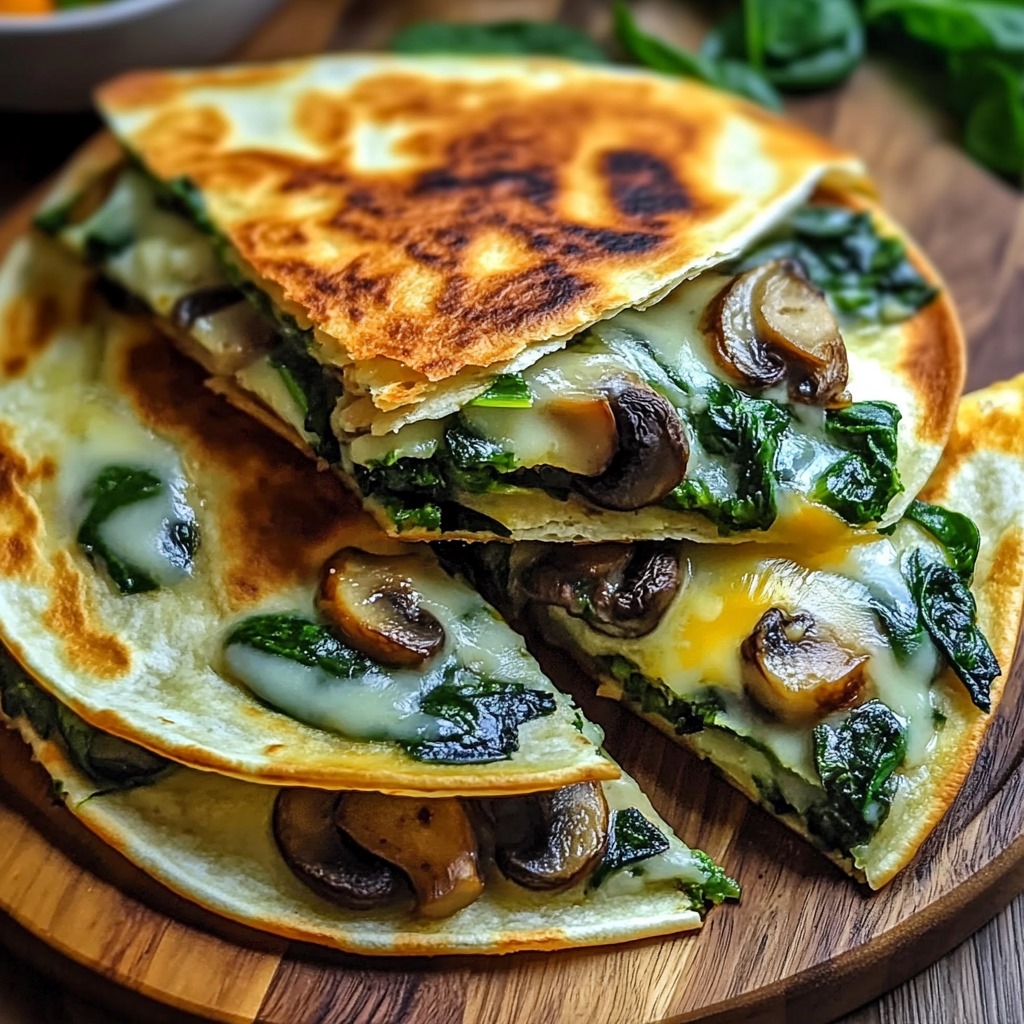
When it comes to quick, satisfying meals, these Baked Spinach Mushroom Quesadillas are an absolute winner. Packed with cheesy goodness, tender mushrooms, and fresh spinach, they strike the perfect balance of comfort food and veggie-forward deliciousness. Bonus? They’re baked to golden perfection, which means no flipping on a stovetop—just pop them in the oven and let the magic happen!
Why You’ll Love This Recipe
- Cheesy heaven: A blend of mozzarella and cheddar makes these irresistibly gooey.
- Easy & oven-friendly: Baking simplifies the process—no need for flipping or babysitting!
- Versatile: Customize with extra veggies, protein, or different cheese varieties.
- Crowd-pleaser: Perfect for family dinners, parties, or even a solo indulgence.
Ingredients for Baked Spinach Mushroom Quesadillas
- 🌮 4 tortillas (8-inch size)
- 🧀 1 cup shredded mozzarella
- 🧀 1 cup shredded cheddar
- 🥬 3 cups roughly chopped spinach
- 🍄 8 ounces sliced mushrooms
- 🛢️ Olive oil (optional, for crispy edges)
Optional Additions
- Sautéed onions or bell peppers
- Grilled chicken, steak strips, or tofu for added protein
- A pinch of red chili flakes for some heat
How to Make Baked Spinach Mushroom Quesadillas
1. Preheat the Oven
Preheat your oven to 400°F (200°C). Line a baking sheet with parchment paper or lightly grease it to prevent sticking.
2. Prep the Mushrooms
Microwave the sliced mushrooms in a microwave-safe bowl for 2 ½ to 3 minutes until softened. Drain any excess liquid to avoid soggy quesadillas.
3. Prepare the Tortillas
Lightly brush one side of each tortilla with olive oil if you like extra crispy edges. Place the tortillas on the prepared baking sheet, oiled side down.
4. Assemble the Quesadillas
- Layer 1: Sprinkle half of the shredded mozzarella and cheddar on one side of each tortilla.
- Layer 2: Add a generous handful of chopped spinach.
- Layer 3: Top with the softened mushrooms.
- Layer 4: Sprinkle the remaining cheeses over the veggies.
- Fold the other half of the tortilla over to form a semicircle.
5. Bake the Quesadillas
- Bake for 6 minutes, then carefully flip each quesadilla.
- Bake for an additional 6-7 minutes, or until the cheese is melted and the tortillas are golden and crispy.
6. Serve & Garnish
Slice the quesadillas into wedges and serve warm. Garnish with extra cooked mushrooms or a sprinkle of shredded cheese for an elegant touch. Pair with your favorite dips like sour cream, guacamole, or salsa.
Tips for Success
- Crispier Tortillas: Olive oil gives the edges a golden, crispy texture. Skip it if you prefer a softer finish.
- Draining Mushrooms: Properly draining the microwaved mushrooms is crucial to avoid soggy quesadillas.
- Customizations: Add sautéed onions, bell peppers, or diced cooked chicken for a heartier meal.
Storage and Reheating
- Storage: Store leftover quesadillas in an airtight container in the refrigerator for up to 3 days.
- Reheating: Reheat in the oven at 375°F (190°C) for a few minutes to restore crispiness. Avoid microwaving, as it can make the tortillas soggy.
What to Serve with These Quesadillas
- Sour Cream: For a cooling contrast.
- Salsa: A tangy, zesty dip.
- Guacamole: Creamy avocado perfection!
- Soup or Salad: Pair with tomato soup or a fresh green salad for a complete meal.
FAQ
Can I use different cheeses?
Absolutely! Monterey Jack, pepper jack, or even gouda would work beautifully.
How do I prevent soggy quesadillas?
Make sure to drain the mushrooms well after microwaving, and avoid overloading with fillings.
Can I freeze these?
Yes! Assemble the quesadillas, freeze them uncooked, and bake directly from frozen at 400°F (200°C) for about 12-15 minutes.
Final Thoughts
These Baked Spinach Mushroom Quesadillas are everything you could want: cheesy, crispy, and bursting with savory veggie goodness. Whether you’re looking for a quick weeknight meal or a party snack, these quesadillas are guaranteed to impress.
Love this recipe? Try my Loaded Veggie Quesadillas or Cheesy Black Bean Enchiladas for more Mexican-inspired favorites. Don’t forget to share your photos and tag me on Pinterest—I love seeing your creations!
Enjoy, and happy baking! 🥳✨